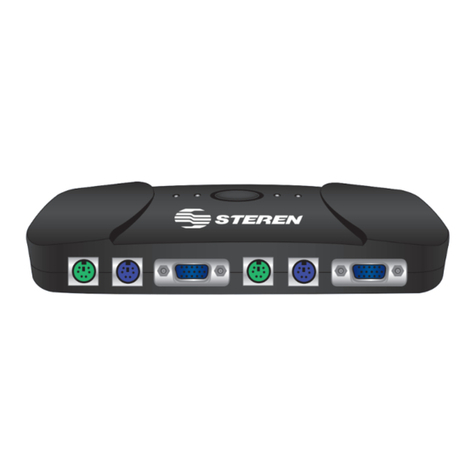
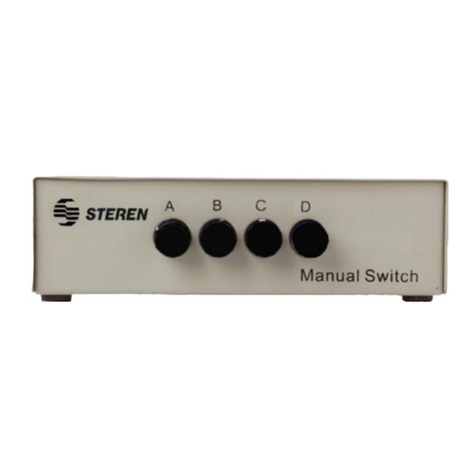
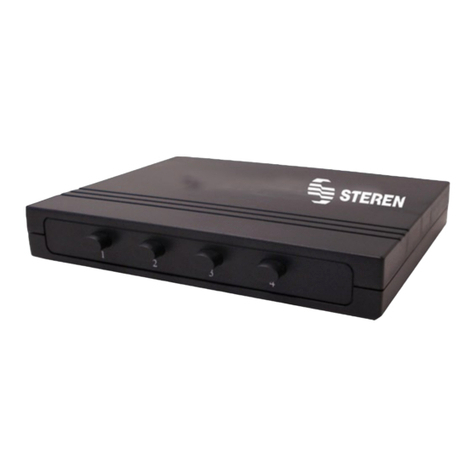
Steren COM-315 User manual


ENGLISH
ENGLISH-02
Before using your new KVM switch, please read this instruction
manual to prevent any damage. Put them away in a safe place for
future references.
IMPORTANT
Clean only with a soft, dry cloth. Do not use solvents.
Make sure all the computers completely boot-up before switching
between them.
Do not move the mouse whilst switching between the PCs.
FEATURES
Compact and size design, easy to handle
Compatible with Microsoft, Logitech mice
Compatible with DOS, Win 3.X, Windows 95, 98, 2000, XP, Vista,
WinNT, Netware, Unix, Linux.
Hot plug, does not require to turn the device off to connect or
disconnect peripherals
High video quality, up to 1920 x 1440. Bandwidth: 200MHz
Drivers are not required
Auto scan mode
Keyboard status restored when switching PCs
LED status display
Buzzer sound for switching port confirmation
•
•
•
•
•
•
•
•
•
•
•
•
•
•
Before usin
g
y
our new KVM switch, please read this instruction
m
anual to prevent an
y
dama
g
e. Put them awa
y
in a safe place for
f
uture references
.

ENGLISH
ENGLISH-03
CONTROLS
1.- Mouse and keyboard connector
Allows you to connect the main mouse and keyboard
2.- AC power adapter input jack
In case you use a notebook and the KVM requires more energy, please
connect an AC power adapter with this specifications: 5V ~ 9V DC,
100mA ~ 1A
3.- Monitor connector
Allows you to connect the main monitor
1
2
5
7
8

ENGLISH
ENGLISH-04
4.- CPU1 connectors
Use a KVM cable (506-220) to connect the switch to CPU1
5.- CPU2 connectors
Use a KVM cable (506-220) to connect the switch to CPU2
6.- CPU3 connectors
Use a KVM cable (506-220) to connect the switch to CPU3
7.- CPU4 connectors
Use a KVM cable (506-220) to connect the switch to CPU4
3
4
6
9

ENGLISH
ENGLISH-05
8. CPU Selector
Press it to choose a CPU
9.- LEDs indicators
A LED will light according to selected CPU
INSTALLATION
Before installing the KVM switch, assure all the external devices
are off.
1.- Connect the keyboard, mouse and monitor to the lateral KVM switch
connectors.
2.- Connect a KVM cable from the switch to the different CPUs (up to 4
CPUs can be connected)
3.- Turn the devices on, wait until the system boot up. Then you can use
the KVM switch.
Make sure to use KVM cable (male-to-male) for each CPU that you
want to use, we recommend to buy the KVM Steren cable: 506-220.
Make sure to connect the mouse, keyboard and monitor to the
KVM switch, otherwise the switch will not work.
Before installin
g
the KVM switch, assure all the external devices
a
re off
.
M
ake sure to use KVM cable
(
male-to-male
)
for each CPU that
y
ou
want to use, we recommend to bu
y
the KVM Steren cable: 506-220
.
M
a
k
e sure to connect t
h
e mouse,
k
e
yb
oar
d
an
d
mon
i
tor to t
h
e
KVM
sw
i
tc
h
, ot
h
erw
i
se t
h
e sw
i
tc
h
w
ill
not wor
k.

ENGLISH
ENGLISH-06
DIAGRAM
From monitor
From keyboard
From mouse
To keyboard connector
To mouse connector
To monitor connector
CPU 1
CPU 2 CPU 4
CPU 3
KVM cable
KVM cable

ENGLISH
ENGLISH-07
INSTRUCTIONS
1.- Turn the CPUs on.
2.- Turn the monitor, keyboard and mouse.
3.- Wait until the CPUs booted up
4.- Once the CPUs booted up, you can press the selector button to
change between different CPUs.
5.- The corresponding indicator LED will light up.
If you switch to an empty port, the corresponding LED will flash.
SHORTCUTS
Using the keyboard, you can use keypad shortcuts to quickly do an
action in KVM switch. Press the Scroll Lock key twice within 2 seconds.
You will hear a beep, then you can press other button as follows:
Previous channel
Next channel
Auto scan
If
y
ou switch to an empt
y
port, the correspondin
g
LED will flash
.
Scroll
Lock Scroll
Lock
Scroll
Lock Scroll
Lock
Scroll
Lock Scroll
Lock S
+
+
+
+
+
+

ENGLISH
ENGLISH-08
Select PC port directly
Beeper on (Factory default: off)
To leave the auto scan mode, press space bar once.
TROUBLESHOOTING
Assure all the cables are well connected. Label the cables to avoids
confusion.
1.- The KVM switch obtain the energy from the keyboard, if you use a
notebook and have not enough energy for the KVM, please use a power
adapter: 5V~9V, 100mA~1A
2.- Do not press any button whilst the select computer boot up,
otherwise, the keyboard may not be recognized.
3.- If the keyboard does not boot up but the computer, try connecting the
keyboard directly to the CPU. If does not work, use a 101, 102 or 104
keyboard.
4.- If the mouse does not boot up but the computer, try connecting the
mouse directly to the CPU. If does not work, use a new mouse or check
if it is a PS/2 mouse.
T
o leave the auto scan mode,
p
ress s
p
ace bar once
.
Scroll
Lock Scroll
Lock B
+
+
+
+
Scroll
Lock Scroll
Lock 1
2 or 3 or 4

ENGLISH
ENGLISH-09
5.- We recommend to connect a notebook before to boot up the system.
In case the system booted up and then you connect the computer to the
KVM switch, press Scroll Lock twice + P.
SPECIFICATIONS
PC ports: 4
Console port: 1
Maximum PC connections: 4
LEDs: 4
PC connectors: PS/2 keyboard 6 pin mini-din
PS/2 mouse 6 pin mini-din
VGA 15-pin HDDB
(female connectors)
Console connectors: PS/2 keyboard 6 pin mini-din
PS/2 mouse 6 pin mini-din
VGA 15-pin HDDB
(Female connectors)
Scan intervals: 8 seconds
Keyboard emulation: PS2
Mouse emulation: PS2
VGA resolution: 1920x1440
Bandwidth: 200MHz
Weight: 140g
Dimensions: 110x74x29mm
Product design and specifications are subject to change without
previous notice
P
roduct desi
g
n and specifications are sub
j
ect to chan
g
e without
p
rev
i
ous not
i
c
e

WARRANTY
This Steren product is warranted under normal usage against defects in workmanship and
materials to the original purchaser for one year from the date of purchase.
CONDITIONS
1.- This warranty card with all the required information, invoice or purchase ticket, product
box or package, and product, must be presented when warranty service is required.
2.- If the product stills on the warranty time, the company will repair it free of charge.
3.- The repairing time will not exceed 30 natural days, from the day the claim was received.
4.- Steren sell parts, components, consumables and accesories to costumer, as well as
warranty service, at any of the addresses mentioned later.
THIS WARRANTY IS VOID IN THE NEXT CASES:
If the product has been damaged by an accident, acts of God, mishandling, leaky batteries,
failure to follow enclosed instructions, improper repair by unauthorized personnel, improper
safe keeping, among others.
a) The consumer can also claim the warranty service in the purchase establishment.
b) If you lose the warranty card, we can reissue it, if you show the invoice or purchase ticket.
Product: 4 port KVM switch
Part number:COM-315
Brand: Steren

RETAILER INFORMATION
Name of the retailer
Address
Product
Brand
Part number
Serial number
Date of delivery
In case your product fails or have questions, please contact your nearest dealer. If
you are in Mexico, please give a call to our Call Center.
Call Center
01 800 500 9000


Antes de utilizar su nuevo Switch KVM lea este instructivo para
evitar cualquier mal funcionamiento. Guárdelo para futuras
referencias.
IMPORTANTE
Siempre utilice un paño suave limpio y seco para limpiar el equipo.
No utilice solventes.
Asegúrese de que los equipos hayan iniciado completamente antes
de realizar un cambio entre ellos.
No mueva el ratón durante el cambio entre las computadoras.
CARACTERÍSTICAS
Diseño compacto y fácil de transportar
Soporta ratones Microsoft, Logitech, entre otros.
Soporta DOS, Win 3.X, Windows 95, 98, 2000, XP, Vista, WinNT,
Netware, Unix, Linux.
Conexión Hot, no requiere de apagar el equipo para conectar o
desconectar equipos.
Alta calidad de vídeo, hasta 1920 x 1440, ancho de banda:
200MHz
No se requiere de software
Modo automático de búsqueda para monitoreo de PCs
Estado de teclado restaurado cuando se monitorean PCs
LEDs indicadores para fácil monitoreo de estado
Confirmación audible para intercambio de puerto
•
•
•
•
•
•
•
•
•
•
•
•
•
ESPAÑOL-02
ESPAÑOL
A
ntes de utilizar su nuevo Switch KVM lea este instructivo para
e
vitar cualquier mal funcionamiento. Guárdelo para futuras
r
eferencias
.

CONTROLES
1.- Conectores de teclado y ratón
Permite conectar un teclado y un ratón principal
2.- Entrada de adaptador de corriente
En caso de que utilice una computadora portátil y se requiera de más
energía, conecte un adaptador de corriente con las siguientes
especificaciones: 5V ~ 9V CD, 100mA ~ 1A
3.- Conector para monitor
Permite conectar el monitor principal
ESPAÑOL-03
ESPAÑOL
1
2
5
7
8

4.- Conector de CPU1
Utilice un cable KVM (506-220) para conectar el switch al CPU1
5.- Conector de CPU2
Utilice un cable KVM (506-220) para conectar el switch al CPU2
6.- Conector de CPU3
Utilice un cable KVM (506-220) para conectar el switch al CPU3
7.- Conector de CPU4
Utilice un cable KVM (506-220) para conectar el switch al CPU4
ESPAÑOL-04
ESPAÑOL
3
4
6
9

8.- Botón de selección
Presione para elegir un CPU
9.- Indicadores LED
Dependiendo del CPU seleccionado, el LED correspondiente se
encenderá.
INSTALACIÓN
Antes de comenzar la instalación, asegúrese de que todos los
dispositivos se encuentran apagados.
1.- Conecte los cables del teclado, el monitor, y el ratón de la
computadora al switch KVM en los conectores laterales.
2.- Conecte cables para ratón, monitor y teclado del switch KVM a
cada uno de los CPU’s que desee utilizar (hasta 4).
3.- Encienda sus equipos y dispositivos externos (teclado, monitor y
ratón), espere a que se inicie el sistema. Después de iniciar, podrá
comenzar a utilizar el switch KVM.
Asegúrese de adquirir cables KVM (macho-macho) para cada
dispositivo de cada una de las computadoras a conectar (Modelo
Steren: 506-220).
Asegúrese de conectar los 3 dispositivos (ratón, teclado y
monitor) al switch KVM, de otra forma el switch NO funcionará.
ESPAÑOL-05
ESPAÑOL
A
se
g
úrese de adquirir cables KVM
(
macho-macho
)
para cada
d
ispositivo de cada una de las computadoras a conectar
(
Modelo
Steren: 506-220
).
A
se
g
úrese de conectar los 3 dispositivos
(
ratón, teclado
y
m
onitor
)
al switch KVM, de otra forma el switch NO funcionará
.
A
ntes de comenzar la instalación, ase
g
úrese de que todos los
d
ispositivos se encuentran apa
g
ados
.

DIAGRAMA DE INSTALACIÓN
ESPAÑOL-06
ESPAÑOL
Del monitor
Del teclado
Del ratón
Al conector del teclado
Al conector del ratón
Al conector del monitor
CPU 1
CPU 2 CPU 4
CPU 3
Cable KVM
Cable KVM

INSTRUCCIONES DE USO
1.- Encienda los CPU’s conectados.
2.- Encienda los dispositivos externos, teclado, monitor y ratón.
3.- Espere a que los CPUs se hayan iniciado.
4.- Una vez que hayan inicializado, podrá realizar los cambios entre
las diferentes computadoras manualmente, presionando el botón de
selección.
5. El LED indicador correspondiente al CPU seleccionado se
encenderá.
Los LEDs de los puertos que no tengan CPUs conectados,
parpadearán, indicando que no existe señal.
COMANDOS ABREVIADOS
Mediante el teclado conectado al KVM podrá utilizar un conjunto de
teclas para abrir secuencias básicas y enviarlas al switch KVM. El
botón de Bloq. Despl. deberá ser presionado dos veces en menos de 2
segundos. Escuchará un beep de confirmación, luego podrá presionar
el siguiente botón como se indica:
Canal previo
Siguiente canal
ESPAÑOL-07
ESPAÑOL
Bloq
Despl Bloq
Despl
Bloq
Despl Bloq
Despl
L
os LEDs de los puertos que no ten
g
an CPUs conectados,
p
ar
p
adearán, indicando
q
ue no existe señal
.
+
+
+
+

Búsqueda automática
Seleccione el puerto de PC
directamente
Sonido activado (desactivado de
fábrica).
Para salir del modo de Búsqueda automática presione la barra
espaciadora
ESPAÑOL-08
ESPAÑOL
Bloq
Despl Bloq
Despl S
Bloq
Despl Bloq
Despl B
P
ara salir del modo de Búsqueda automática presione la barra
e
spac
i
a
d
or
a
+
+
+
+
+
+
Bloq
Despl Bloq
Despl 1
2 ó 3 ó 4

SOLUCIÓN DE PROBLEMAS
Asegúrese de que todos los cables estén bien conectados. Etiquete
todos los cables con el número de la computadora respectiva a fin de
evitar confusiones.
1.- El switch KVM obtiene la energía del puerto del teclado de la
computadora, si utiliza una computadora portátil y no cuenta con
suficiente energía para energizar el switch KVM, por favor utilice un
adaptador de corriente con las siguientes especificaciones: 5V~9V,
100mA~1A
2.- No presione ningún botón del teclado mientras la computadora
seleccionada se inicia, de otra forma, es posible que el teclado no sea
detectado.
3.- Si la computadora se inicia pero el teclado no funciona, asegúrese
primeramente de que el teclado funciona correctamente si lo conecta
a la computadora de forma directa. De no ser así, intente cambiar el
teclado, pero utilice únicamente un teclado con 101, 102 o 104 teclas.
4. Si el ratón no es detectado durante el inicio de sistema, asegúrese
primeramente de que el ratón funciona correctamente si lo conecta a
la computadora de forma directa. Compruebe que es un ratón PS/2.
Intente con un nuevo ratón.
5.- Se recomienda conectar la computadora portátil al switch KVM
antes de iniciar el sistema. En caso de que haya iniciado la
computadora y posteriormente la conecta al switch KVM, presione el
botón de Bloq. despl. 2 veces + P.
ESPAÑOL-09
ESPAÑOL
Other manuals for COM-315
1
Table of contents
Languages:
Other Steren Switch manuals

Steren
Steren SHOME-110 User manual

Steren
Steren SWI-005 User manual

Steren
Steren SWI-024 User manual

Steren
Steren ELE-105 User manual
Steren
Steren EL-101 User manual

Steren
Steren SWI-005 User manual
Steren
Steren COM-320 User manual

Steren
Steren USB-528 User manual

Steren
Steren SWI-50 User manual

Steren
Steren SWI-008 User manual

Steren
Steren USB-520 User manual

Steren
Steren 201-747 User manual

Steren
Steren FASTHOME 550-030 User manual

Steren
Steren SWI-600 User manual

Steren
Steren 201-737 User manual

Steren
Steren ALA-003 User manual

Steren
Steren COM-315 User manual
Steren
Steren USB-527 User manual

Steren
Steren COM-445 User manual

Steren
Steren USB-524 User manual