
horn E extends from the LOWER LEFT side
of the elevator.
78. Open the covering over the holes in the
horizontal stabilizer for the vertical stabilizer
tabs. Mount the vertical stabilizer tabs
through the horizontal stabilizer, and into the
slots in the rear of the fuselage. Ensure
surfaces are square to each other and
perpendicular to the fuselage, and bond with
medium CA.
79. Follow the “Push Rod Detail” on the plan to
connect the control surfaces to the pushrods.
80. Insert the motor in the slots in the cowl, with
the propeller shaft below the motor. Mark the
tabs where they extend beyond the cowling.
81. Remove the motor and sand the tabs down to
your mark. Be careful not to contact the
gearing with the sandpaper. Apply a small
drop of thick CA on each side of the motor
mount plate where the tabs will rest, and re-
install the motor.
82. Assemble Dummy engine from parts M1
through M7 in order as shown on the plan.
Bond with thin CA. M1 and M2 are at the rear
of the motor. The slots in M5 should face left.
Sand the motor smooth, slightly rounding the
edges, and paint desired color.
83. Cut the 3/32 in. aluminum tube into 1/2 in.
lengths. Insert tubes into slots in dummy
motor to create exhaust stacks. Bond with
medium CA glue.
84. Mount the dummy engine by applying thick
CA to the bottom of M1 and inserting engine
in the opening behind the motor. The dummy
engine will extend over the motor. Do not
glue the dummy engine to the motor itself.
This will allow the motor to be removed if
necessary.
85. Fit the radiator frame from parts RA1, RA2
and RA3. Note: Tabs on parts RA1 should
face common side of radiator assembly.
86. Fit the radiator face RA4 to the frame and
bond. Sand radiator smooth, rounding the
corners slightly at the top of the radiator.
87. Tack glue parts RA5 and RA6 to create the
radiator inner frame. Paint radiator parts flat
black.
88. Lay the plastic mesh inside the radiator from
the back.
89. Secure the screen by inserting the radiator
inner frame into the back of the radiator. Seat
the frame all the way into the radiator and
bond with thin CA. Set the radiator aside for
now.
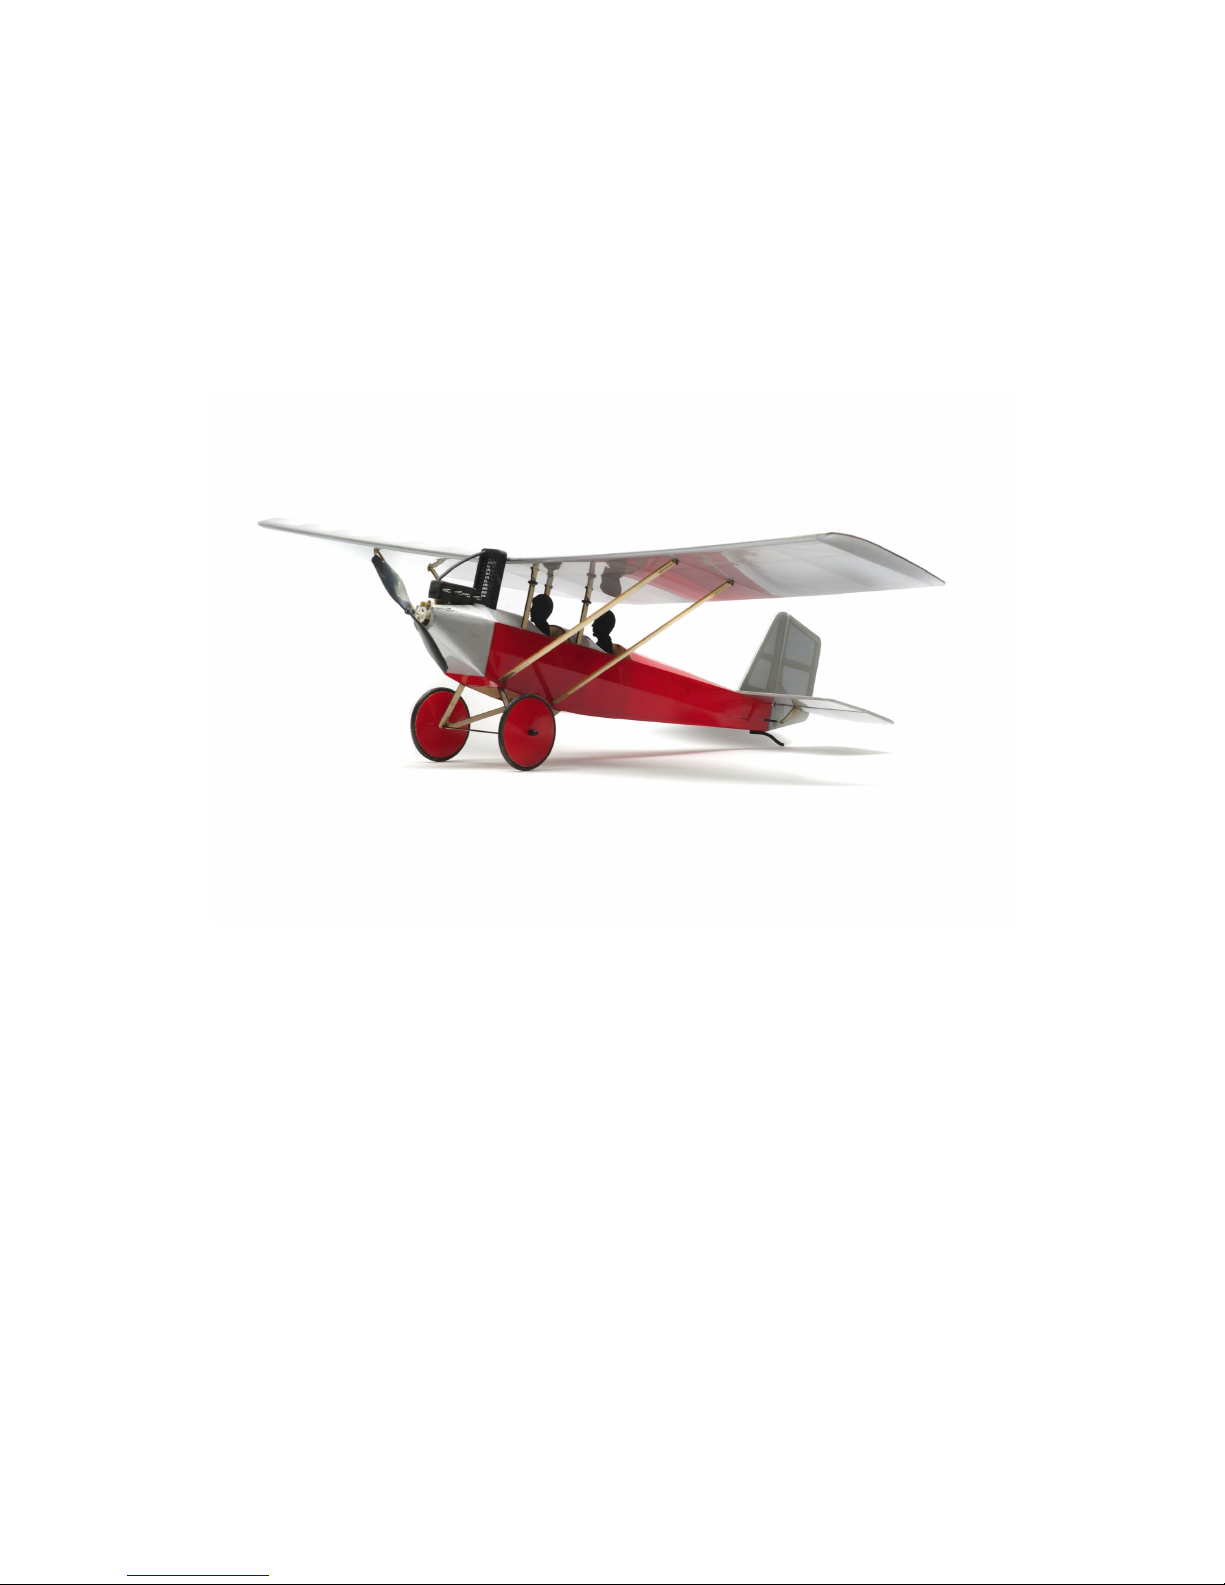
90. Paint the ply cabane struts C1 and C2 to
match your planes color scheme. Open the
covering over the holes in the fuselage deck
and dry fit the struts. C1 goes in the front
holes, C2 in the rear holes. Ensure the
arrows on the struts point forward and
that the struts seat completely within
pockets at fuselage sides. Check the
alignment from the front and sides of the
plane. The four struts should be parallel to
each other and perpendicular to the fuselage.
Bond the struts to the fuselage by wicking thin
CA around the base of the struts.
91. Assemble the pilot profiles from parts Pa and
Pb. Bond with thin CA. Paint profiles flat
black.
92. Install the pilot profiles to the slots in formers
F7 and F8 with thin CA.
93. Install acetate windscreens by positioning
them where indicated on the plan. Mark the
points where the spikes on the lower edge of
the windscreen will contact the fuselage
decking. With a sharp hobby knife, cut two
small slots in the fuselage deck on your
marks. Fit windscreen to slots and bond with
a tiny drop of thin CA or canopy glue.
94. Paint the cabane stubs C3 and C4 to match
the cabane struts C1 and C2. Open the
covering over the holes in the center section
of the wing and install the stubs. Ensure the
arrows on the stubs point toward the leading
edge of the wing. Install C3 in the front holes,
and C4 in the rear holes nesting within
pockets at wing center section. Bond stubs to
the wing with thin CA.
95. Open the covering over the slots in W27 to
receive the ply flying strut attachments SA.
Bond attachments to wing with thin CA.
96. Slide four 1/8 in. I.D. x 1/4 in. O.D. rubber o-
rings over cabane struts. Fit cabane struts to
stubs in wing center section. Slide o-rings
over joint in cabane struts to secure wing to
fuselage.
Build Instructions Revised: 06/22/2011
© 2011 Stevens AeroModel all rights reserved.!Page 9 of 11


 Manual")


