-6-
LH
Fr UP
LH
Fr UP
(1)
(2)(3)
b
b
9
8
7
6
!Advice
If it is difficult to remove the release paper,
slowly pull it out with needle-nose pliers.
Reference tightening torque 1.0N・m
(0.1kgf・m)
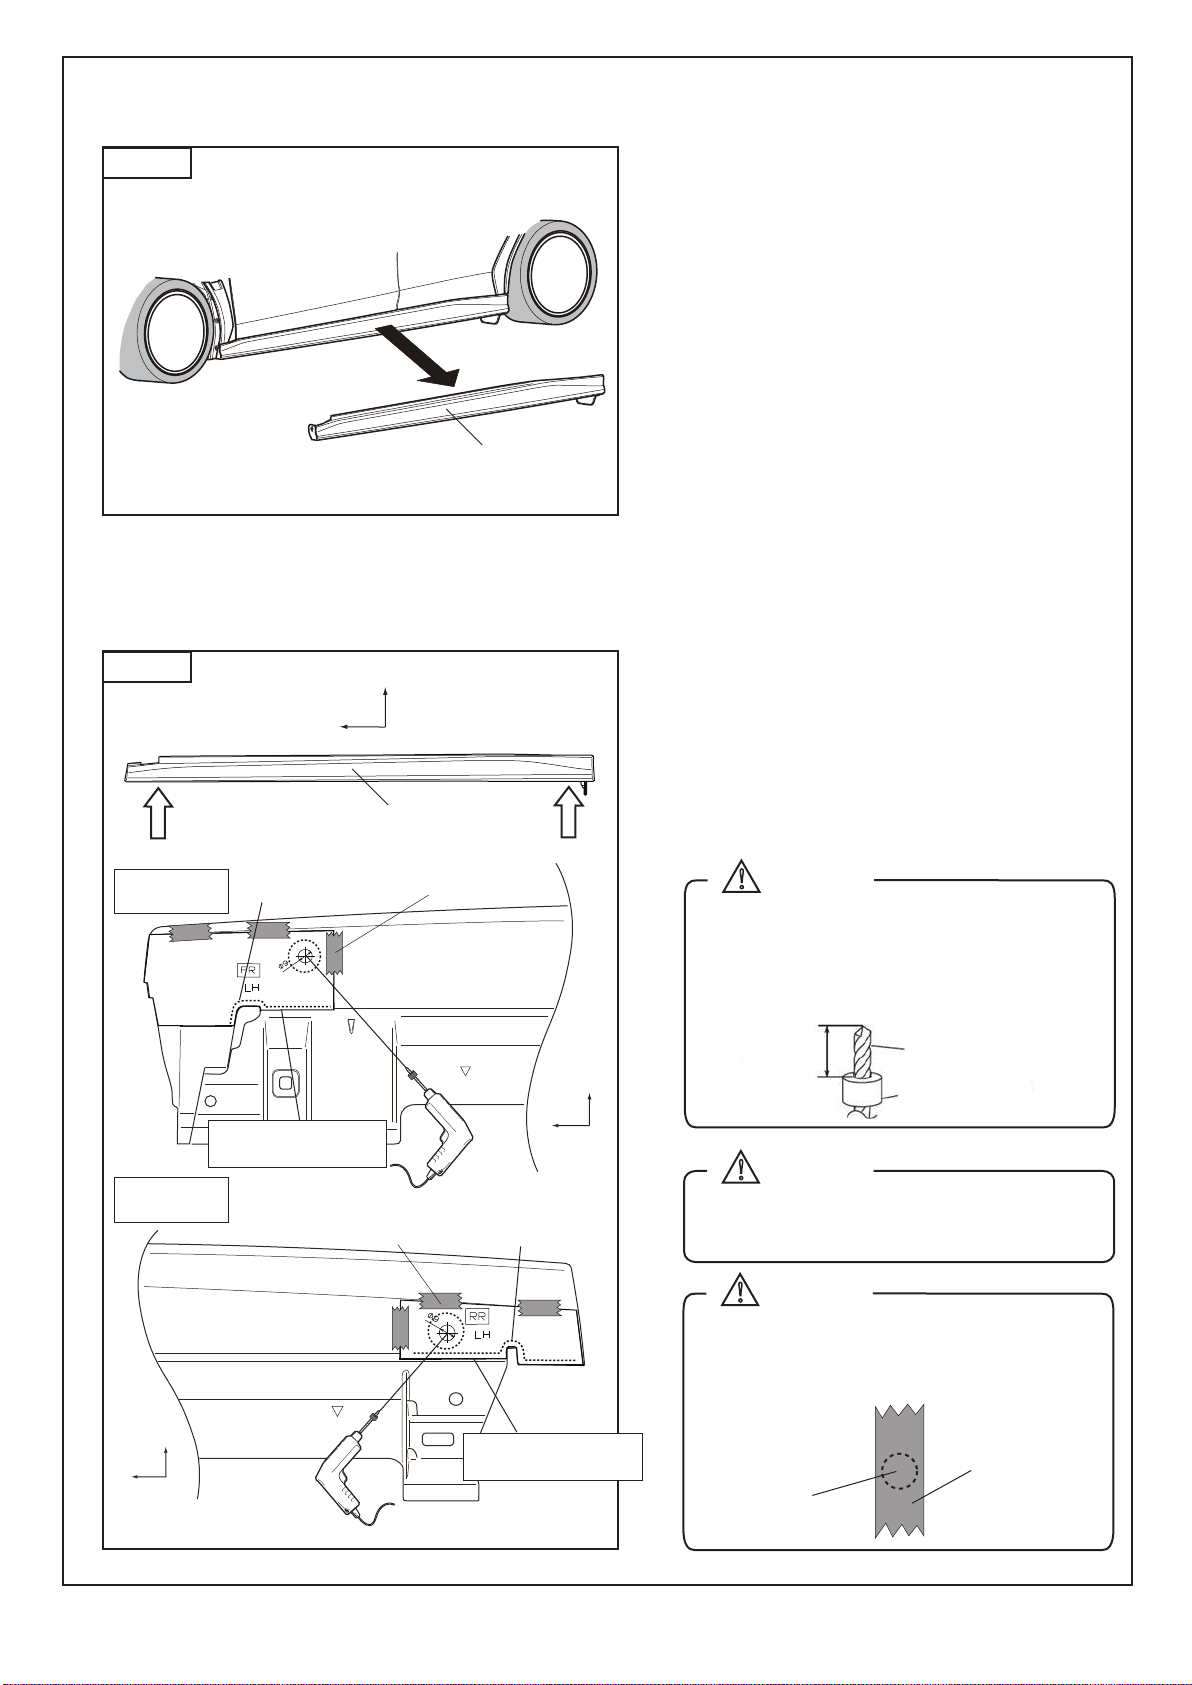
4. Installation of STI Side Under Spoiler. ( The RH side also performs the same work. )
Masking tape
LH side
LH side
LH side
Peel from front to back. Peel from front to back.
Enlarged view
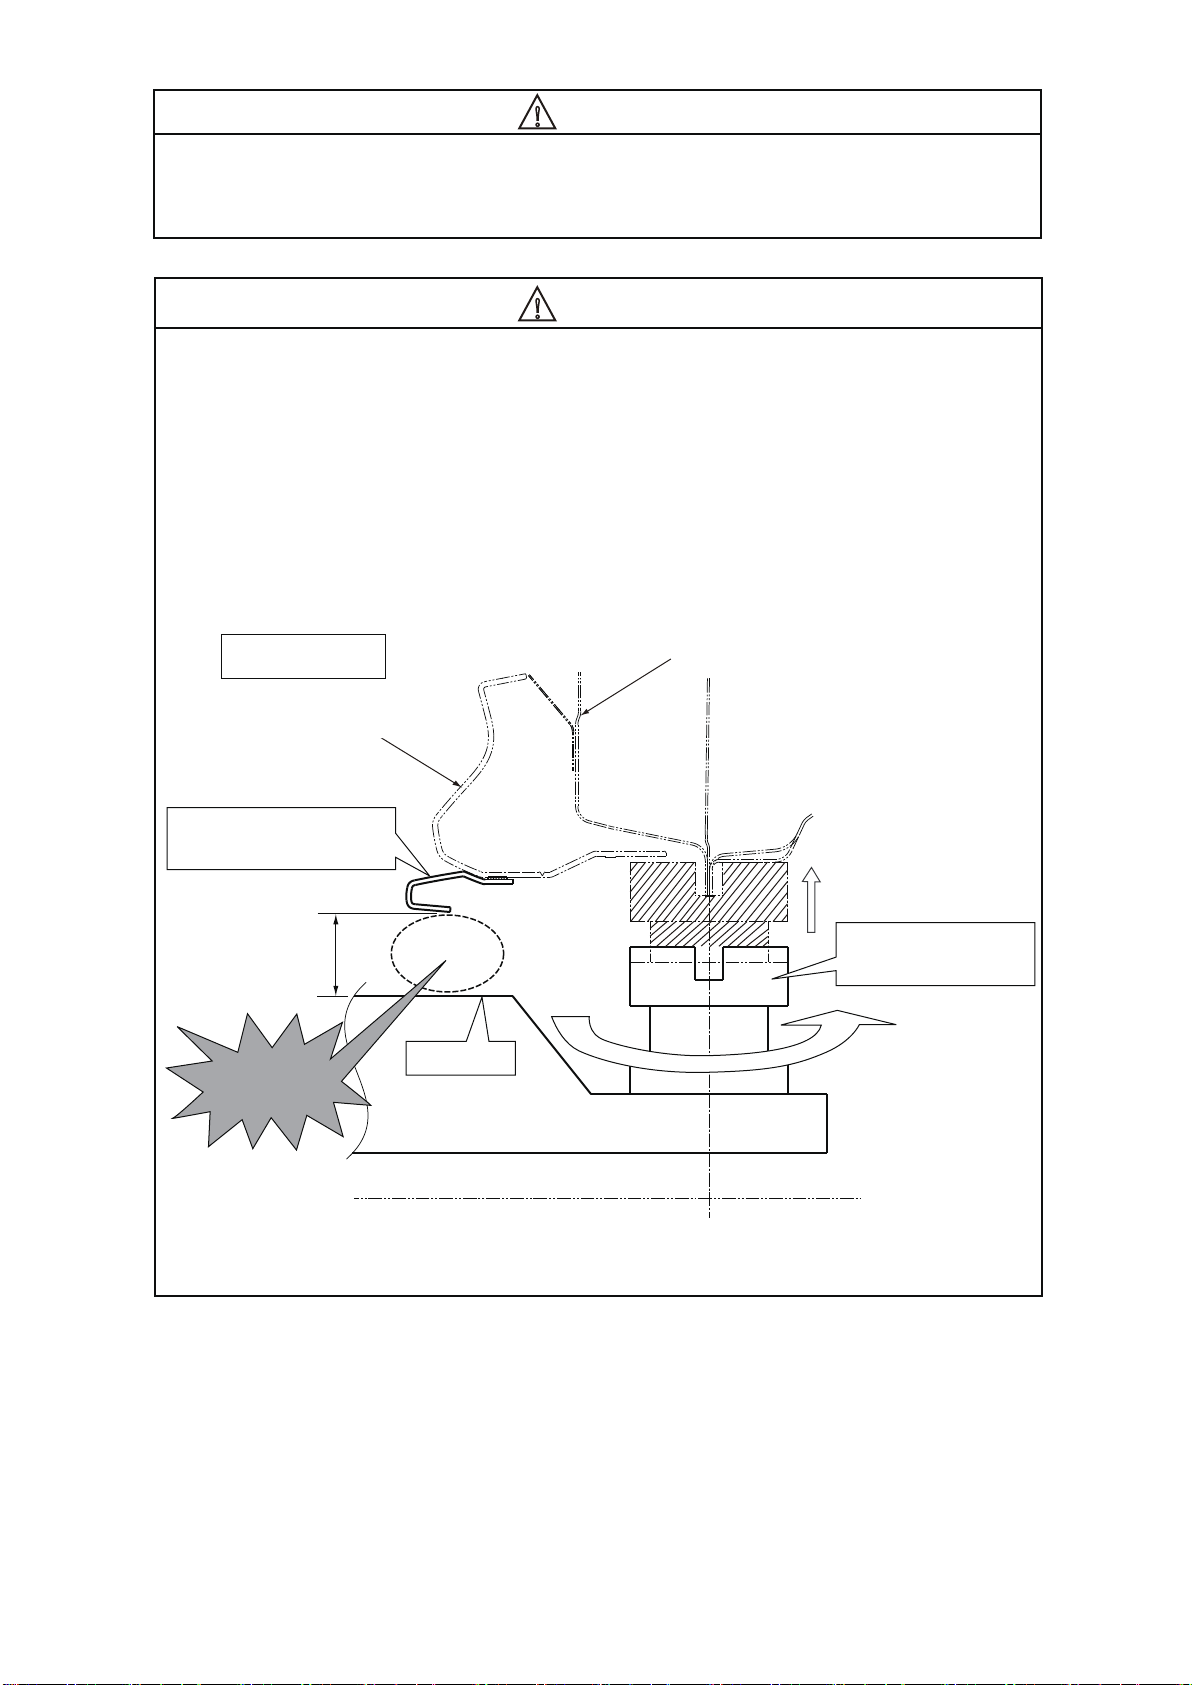
(1) Part of the double-sided tape liners on the
① STI Side Under Spoiler is peeled off and
fixed with masking tape.
!Advice
Do not peel off the double-sided tape
liner more than necessary.
Double-sided tape clings to the Spoiler
assy-side, which hinders positioning.
Spoiler assy-side
(6) The double-sided tape adhesive part is
crimped with enough force to bend the
lower surface of the Spoiler assy-side.
(49N or more)
(4) Refer to the 【 b-b section 】in Fig. 9 and
determine the mounting position so that the
gap is uniform.
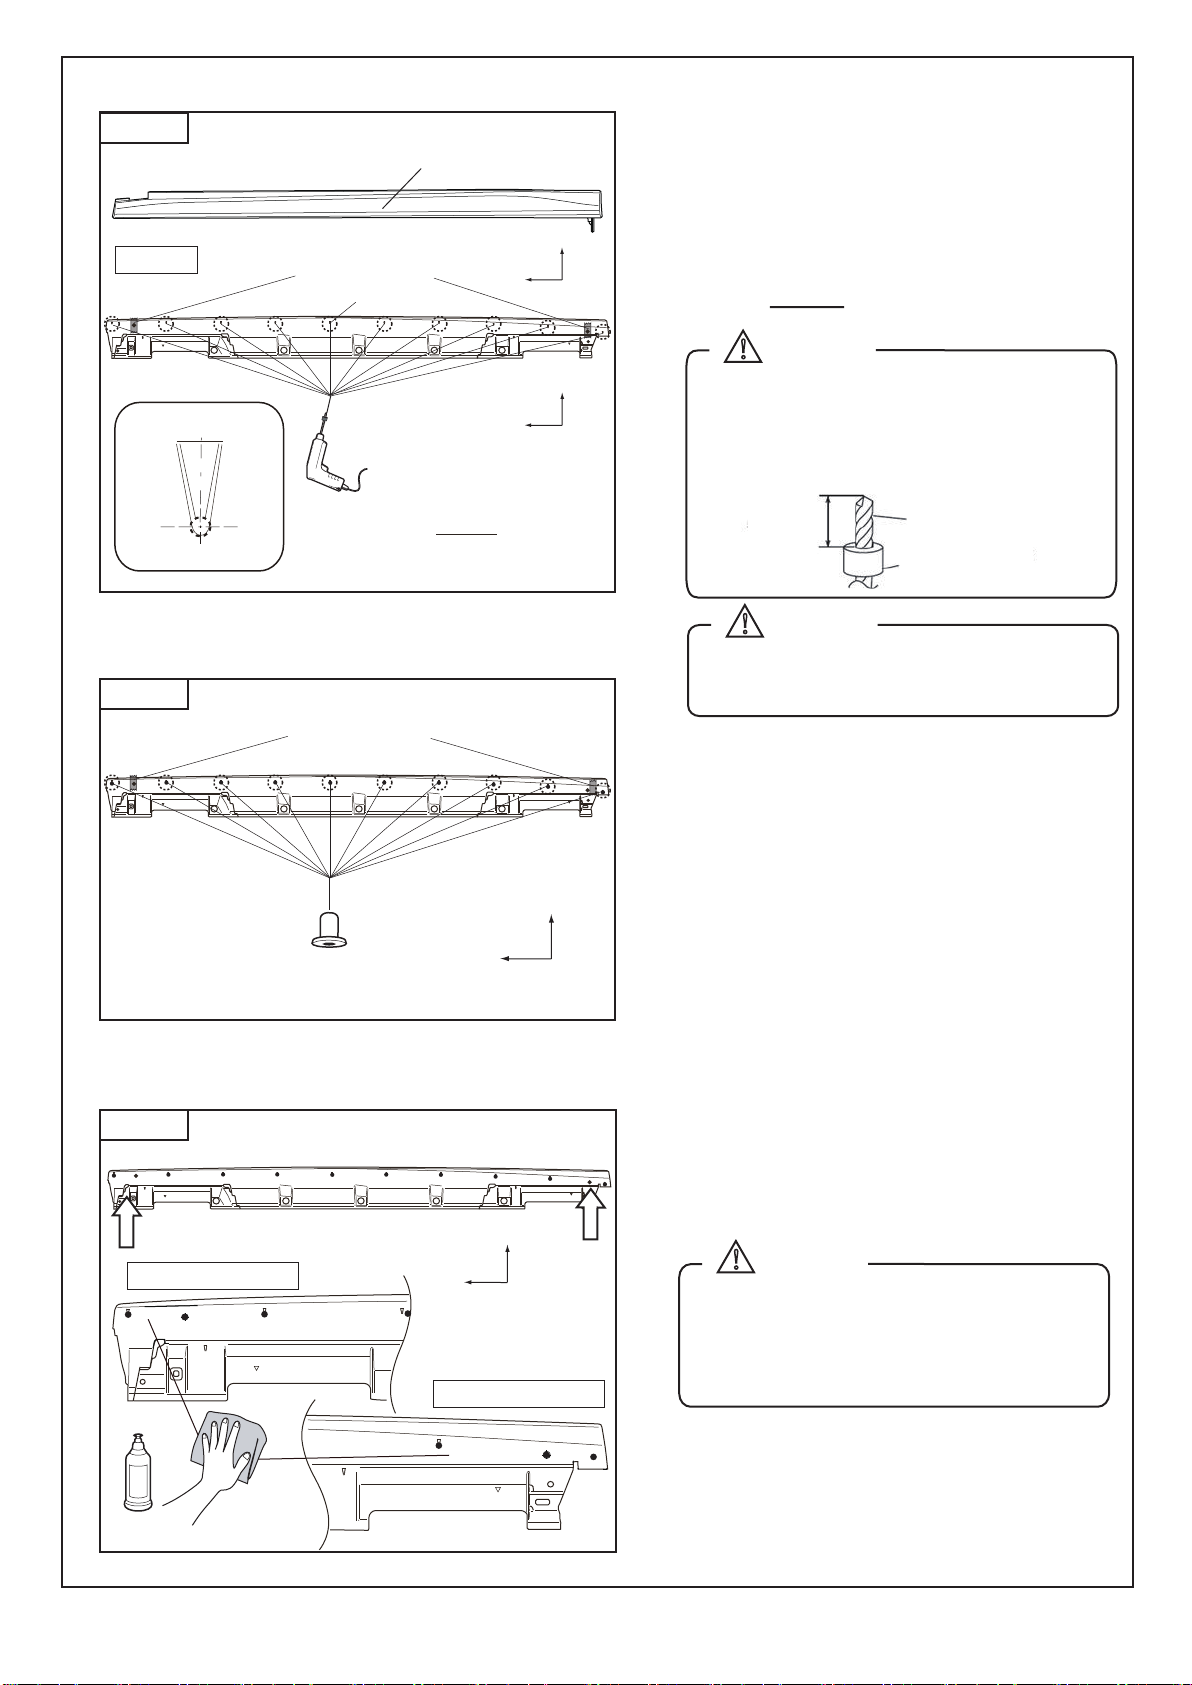
(5) The double-sided tape is crimped while
slowly pulling out the release paper in the
order of (1) to (3).
④ Clip×2
③ Bolt×10
Phillips screwdriver
【 b-b section 】
Uniform gap
all around.
(2) Apply the ① STI Side Under Spoiler to the
Spoiler assy-side and fix it with a ④ clip as
shown in Fig. 7.
① STI Side Under Spoiler LH
① STI Side Under Spoiler LH
(3) Temporarily tighten the ① STI Side Under
Spoiler with ③ bolts as shown in Fig. 8.
(7) Fully tighten the ③ bolts with a 8mm ratchet
wrench.
(8) Finally, check the floating and tilt of the
mounting part, No missing clips or bolts or
forgetting to tighten Please check if it is.