•
Never attempt to modify this product. This may damage the product and may become cause of serious accidents.
· Be sure to stop the engine during work for safety reasons.
· Be sure to tighten bolts and nuts firmly.
· Inspect the nuts and bolts after the first 60 miles (100 km) of driving after attaching them. Re-tighten them if necessary.
·
If abnormal noise or vibration occurs while driving, pull over the car immediately to a safe place, and then inspect and
re-tighten the attaching bolts. If abnormalities persist, perform inspection and make necessary repairs immediately.
If you continue to drive in this condition, damages or accidents may occur.
· Stop using this product immediately
it it has defects such as deterioration and breakage, or receives a strong impact,
as these conditions impair the product's original performance.
· Make sure that no part comes in contact with the battery while working.
Warning
·
This product does not improve the limit performance significantly. Always drive safely.
·
Do not use this product on inapplicable vehicles or for purposes other than it is designed for. Doing so may result in
damages or accidents.
•
Install this product in accordance with the service manual issued by SUBARU CORPORATION for your model. Also
make sure to adhereto the precautions described in this document.
· If bolts and nuts are not tightened with specified torque while installing this product, they may be damaged or become
loose. Make sure to tighten them with the specified torque.
· After installing this product, the fluid should be replenished or changed at a SUBARU dealer.
Caution
·
SUBARU shall not be held liable for any direct or indirect damage due to failures or other malfunction caused by
incorrectinstallation or handling of this product.
·
SUBARU does not honor warranty claims for malfunctions of products or vehicles that occur directly or indirectly due
to theinstallation of this product.
·
Malfunctions of vehicles that could occur due to the installation of this product may not be covered by the
SUBARU vehicle warranty.
·
When replacing parts with this product, be sure to use genuine SUBARU parts for non-reusable parts, consumables,
oil and grease.
·
Product specifications are subject to change without notice.
·
Installation of this product may cause deterioration in ride comfort or significant changes in driving characteristics.
*Advice
Part Number
:
SG990VA010
Production Date : September,2021
△
0
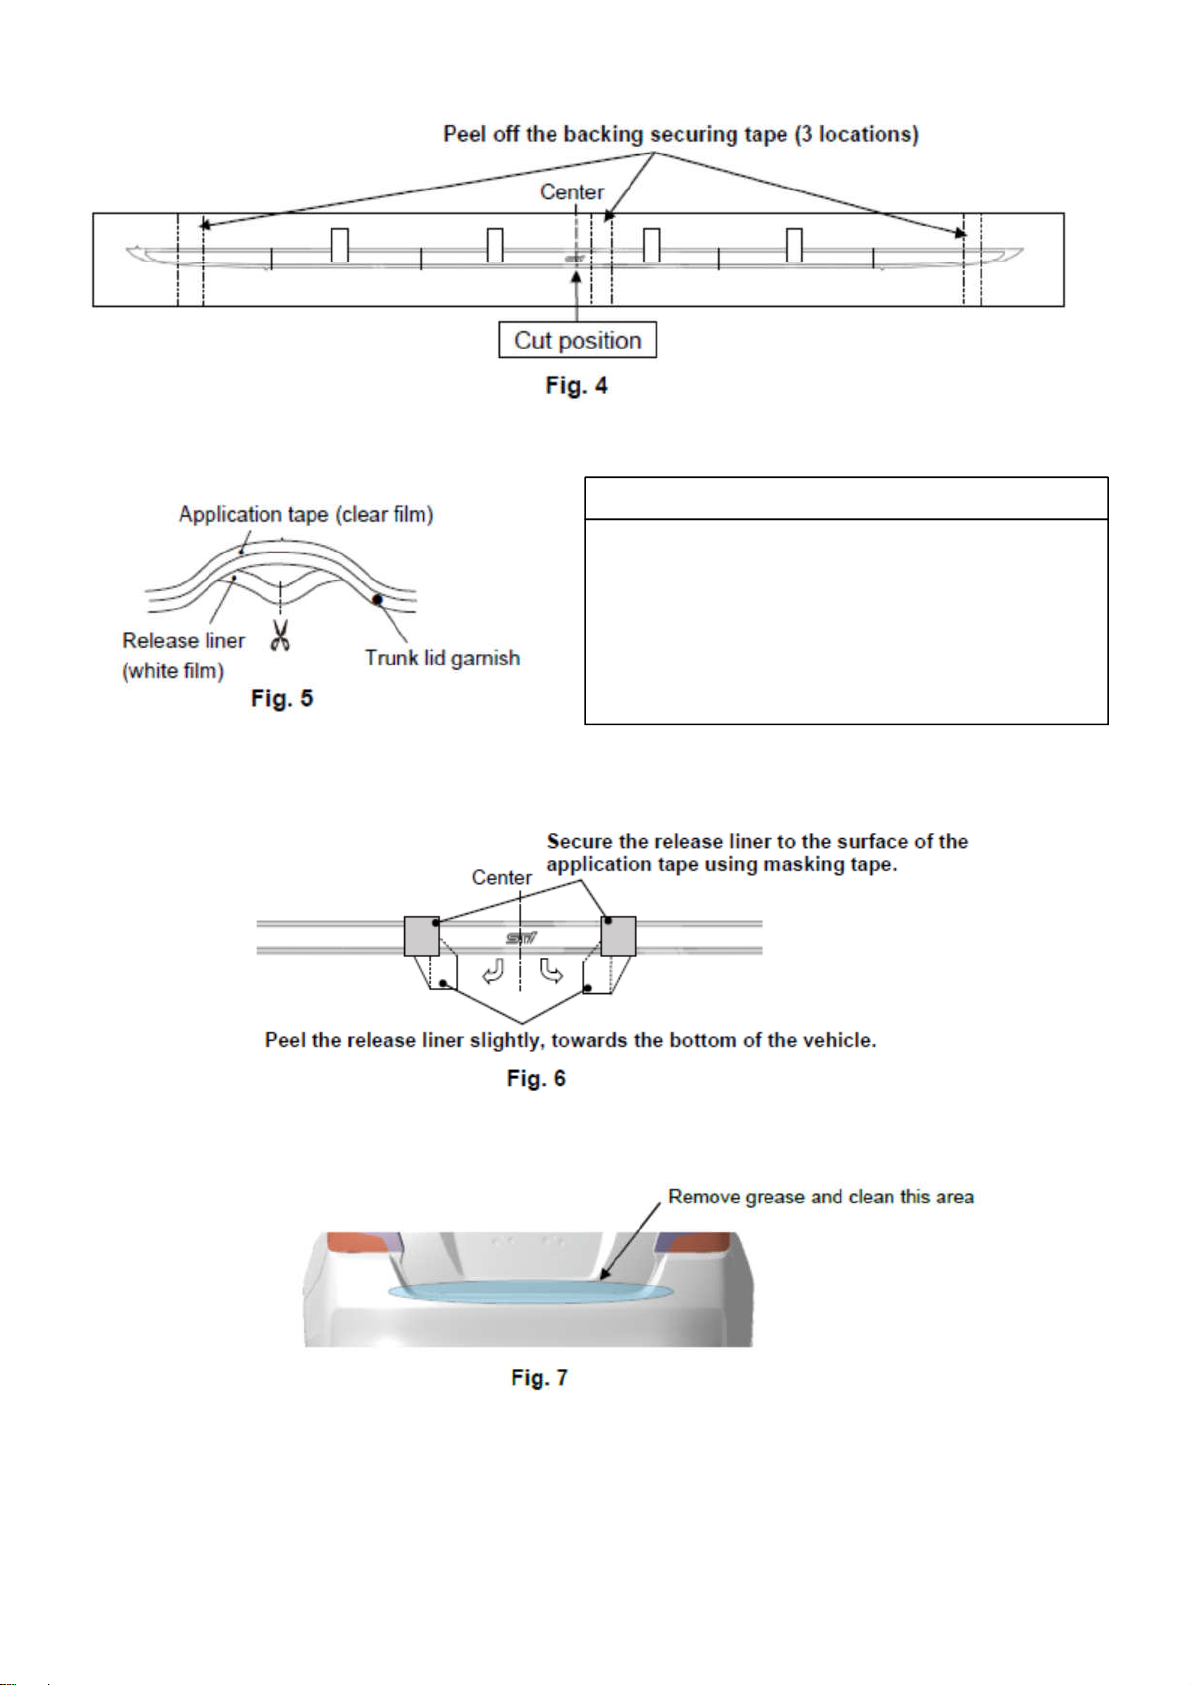
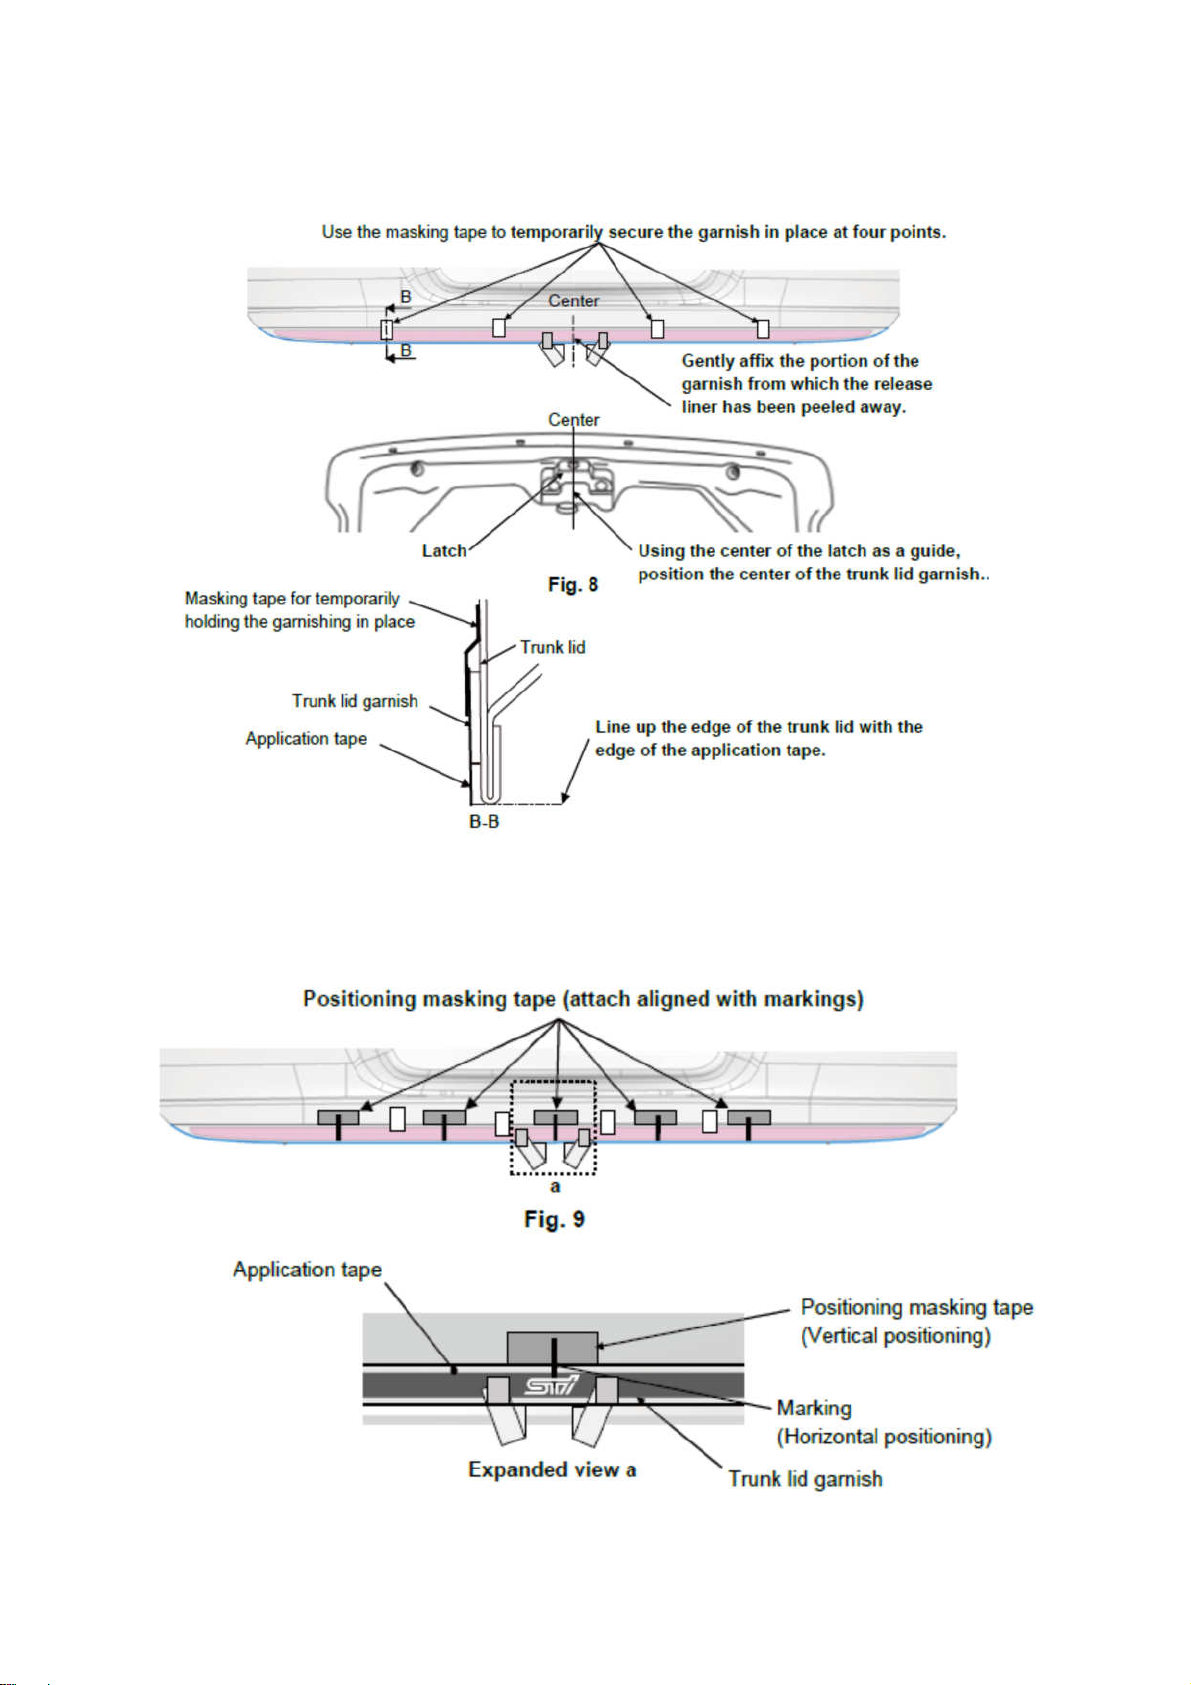
Installation
and Operations instructions
for Trunk Lid Garnish
•
Thank you for purchasing this product.
•
This manual provides installation and handling instructions for this product, and precautions to be observed.
•
Before using this product, be sure to read "Safety Precautions" and use the product properly.
•
Keep this manual in a safe place, such as the glove box, and refer to it whenever necessary.
Important precautions are indicated with the following marks. Be sure to observe those precautions.
Warning
Precautions that you must observe for your safety.
[Failure to observe these precautions may result in death or serious injury.]
Caution
Precautions that you must observe for your safety and for your vehicle.
[Failure to observe these precautions may result in damages or accidents.]
*
Advice
Information that are useful.
- l -
210805