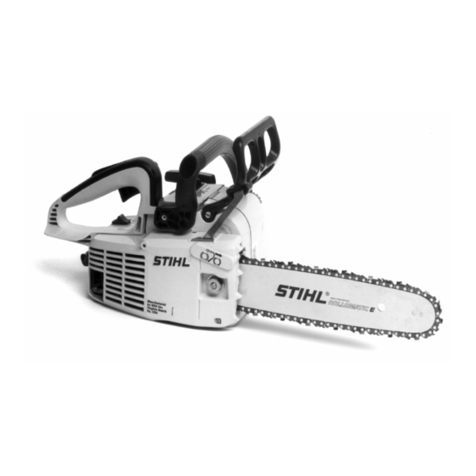
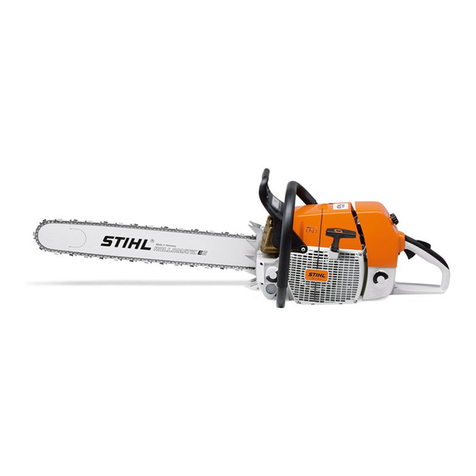
Stihl MS 18 Building instructions

© STIHL Inc., Virginia Beach, VA 2013
Setup and Service Procedures for the
MS 170, MS 180 Chain Saw
© STIHL Inc., Virginia Beach, VA 2013 US/STR
confidential
Introduction
The MS 170, MS 180 chain saw has a 2-cycle engine
STIHL assigns a 4 digit series number to every product
The MS 170, MS 180 is assigned the 1130 series number
The 1130 series of saw was introduced to the market in
1995 as an 017, and then in 1998 the 018 was added
In 2002 the model designation changed from 017 to MS
170, and 018 to MS 180
1

© STIHL Inc., Virginia Beach, VA 2013 US/STR
confidential
Specifications
Engine Displacement 30.1 cc (1.8 cu.in) 31.8 cc(1.9 cu. in.)
Engine Power 1.3 kW (1.7bhp) 1.5kW (2.0 bhp)
Weight 3.9 kg (8.6 lbs) 4.0 kg (8.8 lbs.)
Fuel Capacity 250 cc (8.5 oz.)
Chain Oil Capacity 145 cc (4.9 oz.)
Recommended OILOMATIC® Chain 3/8” PMM3
Guide Bar Lengths Available 12” to 16”
Engine Idle Speed 2800 RPM
Wide Open Throttle 14,000 RPM (with bar and chain installed)
MS 170 MS 180
© STIHL Inc., Virginia Beach, VA 2013 US/STR
confidential
Become Familiar With the Controls
Master Control Lever™
A single lever
operating the choke,
throttle lock and on-off
switch
0 = Off
I = Ignition on
Warm Start
Cold Start
2

© STIHL Inc., Virginia Beach, VA 2013 US/STR
confidential
Starting Features
The MS 170 is equipped with a
standard starter mechanism,
and with 2 bar nuts holding the
bar in place
The MS 180 C-B has the
Toolless Quick Chain Adjuster
(QCA) for fast and easy chain
and bar install and adjustment
The MS 180 C-BE also has the
Easy2Start™ starter
mechanism which allows
starting with less effort at a
lower cranking speed
© STIHL Inc., Virginia Beach, VA 2013 US/STR
confidential
Starting Features
The MS 180 C-B has the standard starter mechanism, which
requires a brisk pull on the rope to it’s full extension to start
the engine
The MS 180 C-BE has the Easy2Start™ starter mechanism,
which allows starting by simply pulling out the rope slow and
easy, winding the auxiliary spring which then spins the motor
over to start it
Notice that the MS
180 C-BE has a
deeper recoil
housing and the
handle extends out
slightly farther for
clearance
3

© STIHL Inc., Virginia Beach, VA 2013 US/STR
confidential
Kickback!!!
Kickback occurs when the
moving saw chain near
the upper quadrant of the
bar nose contacts a solid
object or is pinched
The greater the force of
the kickback reaction, the
more difficult it becomes
for the operator to control
the saw
© STIHL Inc., Virginia Beach, VA 2013 US/STR
confidential
Chain and Bar Color Code Marking
STIHL saw chain will have a green
or yellow tie strap to indicate if the
chain is low-kickback or other than
low-kickback
The bar will have two green or
yellow dots on the powerhead end
of the bar to identify if the bar is a
reduced kickback bar or not
4

© STIHL Inc., Virginia Beach, VA 2013 US/STR
confidential
Install the Bar and Chain
STIHL recommends the use of reduced
kickback bars and low kickback chains on
all STIHL chain saws
Yellow bar and chain combinations are for
trained professionals with extraordinary
cutting needs
Be sure the bar and chain are within the
recommended length for the model of
saw being assembled
Always wear gloves when handling saw
chain to protect your hands from the
sharp cutters
© STIHL Inc., Virginia Beach, VA 2013 US/STR
confidential
Install Bar & Chain: Quick Chain Adjuster
Install the tensioning gear and fasten the screw securely
The bar can be installed with the STIHL logo facing up or
down; periodically the bar should be flipped to spread the
wear over both edges of the bar
5

© STIHL Inc., Virginia Beach, VA 2013 US/STR
confidential
Install Bar & Chain
Make sure the cutters on top of the bar are facing away from
the powerhead!
WRONG
CORRECT
WRONG
© STIHL Inc., Virginia Beach, VA 2013 US/STR
confidential
Quick Chain Adjuster (QCA)
The QCA allows the user to adjust the
chain tension without tools
Loosen the wing nut Rotate the
adjusting wheel Tighten the wing nut
6

© STIHL Inc., Virginia Beach, VA 2013 US/STR
confidential
Install Bar & Chain
If the saw does not have a QCA simply remove the 2 bar nuts,
install the bar and chain, making sure the adjusting pin is in the
hole in the bar
© STIHL Inc., Virginia Beach, VA 2013 US/STR
confidential
Install Bar & Chain
Install the cover and the 2 nuts leaving them just snug against
the cover
7

© STIHL Inc., Virginia Beach, VA 2013 US/STR
confidential
Chain Adjustment
The 1130 saws have a front
chain tensioner
Most STIHL chain saws have a
side chain tensioner that is more
convenient to use
Saws come with a combination
wrench, commonly referred to as
a “Scrench”, to make bar and
chain service easy to do
© STIHL Inc., Virginia Beach, VA 2013 US/STR
confidential
Install Bar & Chain
Adjust the chain tension with the “Scrench” by holding up on
the nose of the bar, tightening the chain tension screw, then
tightening the nuts
8

© STIHL Inc., Virginia Beach, VA 2013 US/STR
confidential
Correct Chain Tension
With the chain brake
disengaged, pull the
chain through from the
top side and it should
rotate freely without any
slack appearing
If the chain goes from
tight to loose the
sprocket and chain may
not be of the same pitch,
or the sprocket and chain
may have excessive
wear and no longer have
the same pitch
© STIHL Inc., Virginia Beach, VA 2013 US/STR
confidential
Correct Chain Tension
Regardless of bar
length, check for
correct chain tension
by pulling up on the
chain at the center of
the bar
The tension is correct
when the bottom of the
drive link will just clear
the bar groove
9

© STIHL Inc., Virginia Beach, VA 2013 US/STR
confidential
Cutterless Chain for Service
For any chain saw, to properly tune the carb or verify running
RPM at idle and wide open throttle a bar and chain should be
installed
Cutterless chains are available to provide a safe way for the
service technician to do this without fear of the chain coming
into contact with anything
© STIHL Inc., Virginia Beach, VA 2013 US/STR
confidential
All Current Models of STIHL Chain Saws are Equipped with
the STIHL Quickstop® Chain Braking System
The chain is stopped and locked when the hand guard is
pushed toward the guide bar nose by the left hand – or when
the brake is activated by enough inertia in certain kickback
situations Brake
Band
Engaged
Brake
Band
Disengaged
Chain Brake
10

© STIHL Inc., Virginia Beach, VA 2013 US/STR
confidential
Starting the 1130 Saw
Fill the tank with 89
octane brand name fuel
with STIHL two-stroke oil
mixed at a 50:1 ratio, or
use STIHL MotoMix
Add bar oil to the oil tank
for chain lubrication
© STIHL Inc., Virginia Beach, VA 2013 US/STR
confidential
Starting the 1130 Saw
Push down on the interlock
on the top of the handle and
then squeeze the throttle all
the way open and hold it
Place the Master Control
Lever™ in the full choke
position, down to the #1
position
11

© STIHL Inc., Virginia Beach, VA 2013 US/STR
confidential
Instruction Manual Directions for Safely
Starting a Chain Saw
(Never Drop Start a Chain Saw!)
© STIHL Inc., Virginia Beach, VA 2013 US/STR
confidential
First Time Start-Up
When the engine starts, commonly referred
to as a “false start”, move the Master
Control Lever™ up to #2, to open the
choke and then pull the rope again
The engine should start and run at fast idle
Quickly “blip” the throttle to release the
engine from the fast idle position
12

© STIHL Inc., Virginia Beach, VA 2013 US/STR
confidential
First Time Start-Up
If a saw is left in the fast idle position with the chain brake
engaged for even a very short period of time it may overheat
the clutch and chain brake components and possibly ruin the
tank housing as well
To stop the engine raise the Master Control Lever™ to the 0
(off) position, #4 in the picture
© STIHL Inc., Virginia Beach, VA 2013 US/STR
confidential
First Time Start-Up: Warm Up
After the engine has started and the chain brake has been
released, slowly squeeze the throttle about half way open and
then slowly release it back to idle
Do this several times, for at least 20 seconds, to completely
purge any remaining air from the carburetor circuits and to
allow the chain lubrication pump time to prime the system with
bar and chain oil
Never allow any chain saw engine to run at full throttle without
a load, regardless if it is new or broken-in, for more than a few
seconds
13

© STIHL Inc., Virginia Beach, VA 2013 US/STR
confidential
Bar & Chain Oiler Check
Carefully hold the
tip of the bar over a
piece of wood or
cardboard
Run the saw at half
throttle and verify
that a line of bar
and chain lubricant
is being slung off
the end of the bar
© STIHL Inc., Virginia Beach, VA 2013 US/STR
confidential
Factory Testing of All STIHL Products
Every engine manufactured by STIHL has been started and
operated in a test cell
The test cell makes carburetor adjustments and verifies
that the engine runs properly at idle, acceleration, and at
full throttle under load
The test cell measures the running performance and
emissions and verifies that they are within acceptable
parameters
All the dealer needs to do is service the unit and verify it is
ready for the customer to operate it
It is extremely rare that a new unit will need any major
adjustments or repair
14

© STIHL Inc., Virginia Beach, VA 2013 US/STR
confidential
Fault Analysis: STIHL Engine Check
When a unit is running poorly or not at all, using a systematic
approach to identify any and all faults present will allow the
Service Technician to quickly and efficiently determine what is
wrong
It is just as
important to
know what
faults are not
present as well
as faults that
do need to be
addressed
© STIHL Inc., Virginia Beach, VA 2013 US/STR
confidential
DG Screws
It is imperative that the Service Technician keep track of which
screw is which and not screw them into the wrong base
material or the threads will be damaged
It is also best practice that when starting a DG screw into the
hole, slowly rotate it backwards until it “clicks” to index the
threads, then turn it clockwise to tighten it
For Plastic For Metal
STIHL uses the DG type of
fastener in manufacturing because
they cut their own threads the first
time they are used
Notice that the ones holding into
plastic have a different pitch and
profile than the ones that hold into
metal
15

© STIHL Inc., Virginia Beach, VA 2013 US/STR
confidential
1. Deflectors, Shrouds, Covers, Fasteners
Visually look the unit over for damage, missing items, loose
fasteners, or anything else that is obvious
Damaged shroud may be a
safety hazard for the operator
Operated without
an air filter or cover
© STIHL Inc., Virginia Beach, VA 2013 US/STR
confidential
2. Warning Labels
Verify that warning labels
are present and readable
On a chain saw the only
label the service technician
should be concerned with
is the one on the chain
brake handle
If this label is damaged or
worn away, a universal
replacement label is
available from STIHL
White Chain Saw Label:
0000 967 3613
16

© STIHL Inc., Virginia Beach, VA 2013 US/STR
confidential
3. Cutting Attachment
Note type and condition
Inspect for wear or damage
Bar, chain, and sprocket
within wear limits
© STIHL Inc., Virginia Beach, VA 2013 US/STR
confidential
3. Cutting Attachment 4. Belt Tension
If the unit is a trimmer or a concrete saw:
Tap head eyelets worn, spool worn, retainer secure
Belt tension correct; belt worn or frayed
17

© STIHL Inc., Virginia Beach, VA 2013 US/STR
confidential
5. Operator Controls
The interlock should
be sticking up out of
the handle, and it
must be depressed
flush with the handle
before the throttle
trigger will move
Be sure the throttle
moves freely
© STIHL Inc., Virginia Beach, VA 2013 US/STR
confidential
5. Operator Controls
The throttle must be squeezed all the way open before the
Master Control Lever™ can be actuated to the full choke
position, then release the throttle and the Master Control
Lever™ should stay in the choke position
18

© STIHL Inc., Virginia Beach, VA 2013 US/STR
confidential
5. Operator Controls
Now raise the Master
Control Lever™ up one
notch with your thumb, and
it should stay in the warm
start, half choke position
Now squeeze the trigger
and it should snap up to the
Iposition automatically
© STIHL Inc., Virginia Beach, VA 2013 US/STR
confidential
5. Operator Controls
Finally the Master
Control Lever™
should easily slide up
to the O position
Any problem with the
Master Control
Lever™ should be
noted for repair
19

© STIHL Inc., Virginia Beach, VA 2013 US/STR
confidential
5. Operator Controls
When the chain
brake handle is
actuated back
and forth, there
should be an
audible “click”
In the forward
position the
sprocket must
not turn
In the back
position the
sprocket must
spin easily
© STIHL Inc., Virginia Beach, VA 2013 US/STR
confidential
6. Verify Anti-vibration Components
Most STIHL chain saws and line
trimmers have an anti-vibration
system that should be inspected for
wear and damage
Some models do not have any anti-
vibration components so this step
would not apply
20
This manual suits for next models
1
Table of contents
Other Stihl Saw manuals

Stihl
Stihl TS 410 User manual

Stihl
Stihl MDG 1 User manual

Stihl
Stihl Cutquik TS 410 User manual

Stihl
Stihl MSA 160.0 C User manual

Stihl
Stihl TS 440 User manual

Stihl
Stihl MSA 220 T User manual

Stihl
Stihl TS 480i User manual

Stihl
Stihl TS 700 User manual

Stihl
Stihl TS 350 User manual

Stihl
Stihl 9 User manual

Stihl
Stihl TS 400 Cutquick User manual

Stihl
Stihl MS 241 C-M User manual

Stihl
Stihl HTA 65 User manual

Stihl
Stihl HLA 65 User manual

Stihl
Stihl TSA 230 User manual

Stihl
Stihl TS 480i User manual

Stihl
Stihl MS 241 C-M User manual

Stihl
Stihl TS 410 User manual

Stihl
Stihl TS 440 User manual

Stihl
Stihl TS 480i User manual