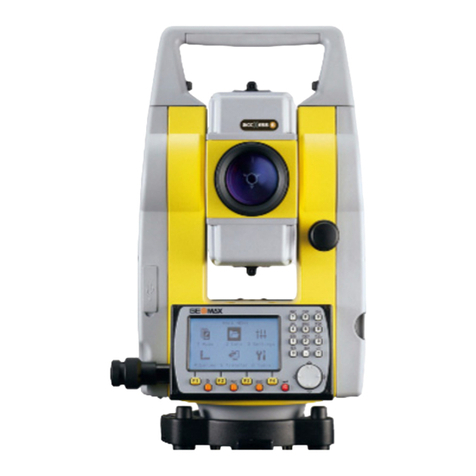
STONEX R2 User manual

STONEX R2
1
CONTENT
FOREWORDS...............................................................................................................1
1. NOMENCLATURE AND FUNCTIONS ...............................................................4
1.1 NOMENCLATURE (take R2 as example in the full text)........................4
1.2 DISPLAY ..................................................................................................6
1.4 FIXED KEYS............................................................................................7
1.5 TRIGGER KEY ........................................................................................7
1.6 SOFT KEYS(FUNCTIONAL KEYS).................................................7
1.7 SYMBOLS................................................................................................8
1.8 ICONS.......................................................................................................8
1.9 MENU TREE............................................................................................9
1.10AUTO POWER OFF.............................................................................10
2. PREPARATION FOR MEASUREMENT............................................................11
2.1 UNPACKING AND STORE OF INSTRUMENT.................................. 11
2.2 INSTRUMENT SETUP.......................................................................... 11
2.3 BATTERY POWER REMAINING DISPLAY .......................................13
2.4 REFLECTOR PRISMS...........................................................................14
2.5 MOUNTING AND DISMOUNTING INSTRUMENT FROM TRIBRACH..........15
2.6 EYEPIECE ADJUSTMENTAND COLLIMATING OBJECT..............15
2.7 INPUTTING MODE...............................................................................16
2.7.1 Inputting Character...................................................................................17
2.7.2 Editing Character......................................................................................18
2.7.3 Deleting Character....................................................................................18
2.7.4 Inserting Character...................................................................................19
2.8 POINT SEARCH ....................................................................................20
2.9 WILDCARD SEARCH...........................................................................22
3. ROUTINE MEASUREMENT..............................................................................23
3.1 DISTANCE SURVEY CAUTIONS........................................................23
3.2 EDM SETTINGS....................................................................................24
3.2.1 Setting EDM Mode ..................................................................................24
3.2.2 Setting Distance Measurement Type........................................................25
3.2.3 Setting the Prism Constant.......................................................................26
3.2.4 Setting Atmosphere Data..........................................................................27
3.2.5 Grid Factor ...............................................................................................30
3.2.6 Viewing Signal of Distance Measurement ...............................................31
3.2.7 Setting Multiplication Constant................................................................32
3.3 START SURVEY....................................................................................33
3.3.1 Setting Horizontal Circle..........................................................................33

STONEX R2
2
3.3.2 Setting the Instrument Height and Prism Height......................................35
3.3.3 Measurement............................................................................................36
3.3.4 Coding......................................................................................................37
3.3.5 Quick Code...............................................................................................41
4. FUNCTIONS........................................................................................................43
4.1 LEVELING.............................................................................................44
4.2 TARGET OFFSET..................................................................................45
4.3 DELETING LAST RECORD.................................................................47
4.4 MAIN SETTINGS ..................................................................................48
4.5 HEIGHT TRANSFER.............................................................................52
4.6 HIDDEN POINT MEASUREMENT......................................................56
4.7 CHECKING TIE.....................................................................................58
4.8 TRACKING ............................................................................................60
5. PROGRAMS.........................................................................................................60
5.1 SETTING JOB........................................................................................61
5.1.1 Setting a New Job.....................................................................................61
5.1.2 Calling up a Job from Internal Memory...................................................62
5.2 SETTING STATION...............................................................................63
5.2.1 Calling up a Job from Internal Memory-[SEARCH] ...............................64
5.2.2 Calling up Known Point in Internal Memory-[LIST]...............................65
5.2.3 Inputting Coordinate Manually ................................................................67
5.3 SETTING ORIENTATION.....................................................................67
5.3.1 Manually Inputting...................................................................................68
5.3.2 with Coordinates.......................................................................................69
5.3.3 Displaying Residuals................................................................................74
5.4 APPLICATIONS.....................................................................................75
5.5 SURVEYING..........................................................................................76
5.5.1 Individual Point........................................................................................77
5.5.2 Coding......................................................................................................79
5.6 STAKING OUT ......................................................................................79
5.6.1 Setting Stake-Out Point............................................................................79
5.6.1.1 Calling up Coordinates from job...........................................................79
5.6.1.2 Inputting Coordinate Manually .............................................................81
5.6.2 Polar Stake Out.........................................................................................83
5.6.3 Orthogonal Stake Out...............................................................................85
5.6.4 Coordinate Offset Stake Out.....................................................................87
5.6.5 B & D .......................................................................................................89
5.7 FREE STATION......................................................................................91
5.8 COGO......................................................................................................95

STONEX R2
3
5.8.1 Inverse & Traverse ...................................................................................96
5.8.1.2 Inverse.................................................................................................100
5.8.2 Intersections ...........................................................................................101
5.8.2.1 Bearing-Bearing ..................................................................................101
5.8.2.2 Bearing-Distance Intersection.............................................................103
5.8.2.3 Distance-Distance Intersection............................................................105
5.8.2.4 By Points.............................................................................................106
5.8.3 Offset......................................................................................................108
5.8.3.1 Distance-Offset....................................................................................108
5.8.3.2 Point-Offset......................................................................................... 110
5.8.4 Extension................................................................................................ 111
5.9 TIE DISTANCE ....................................................................................113
5.9.1 Polygonal (A-B, B-C)............................................................................. 113
5.9.2 Radial (A-B,A-C) .................................................................................. 116
5.10 AREA MEASUREMENT (PLANE)................................................... 118
5.11 REMOTE HEIGHT MEASUREMENT (REM) .................................121
5.12 ROAD..................................................................................................124
5.12.1 Define HZ Alignment...........................................................................124
5.12.2 Editing Horizontal Alignment Data...................................................... 130
5.12.3 Deleting HorizontalAlignment Data....................................................132
5.12.4 Defining Vertical Alignment.................................................................133
5.12.5 Editing Vertical Alignment Data...........................................................134
5.12.6 Deleting Vertical Alignment Data......................................................... 135
5.12.7 Road Stake-Out ....................................................................................136
5.12.8 Slope Stake-Out....................................................................................142
5.13 CONSTRUCTION SITE STAKE OUT..............................................144
5.13.1 Defining New Construction Site ..........................................................144
5.13.2 Shifting Line.........................................................................................147
5.13.3As Build Check.....................................................................................148
5.13.4 Stake Out..............................................................................................149
6. FILE MANAGEMENT......................................................................................151
6.1 JOB........................................................................................................151
6.1.1 Selecting Job ..........................................................................................151
6.1.2 Establishing New Job.............................................................................152
6.1.3 Deleting Selected Job.............................................................................154
6.2 KNOWN POINT...................................................................................154
6.2.1 Searching Known Points........................................................................155
6.2.2Adding Known Point..............................................................................155
6.2.3 Editing the Known Points.......................................................................157

STONEX R2
4
6.2.4 Deleting Known Points ..........................................................................158
6.3 MEASUREMENT DATA .....................................................................158
6.3.1 Viewing Measurement Data ................................................................... 158
6.3.2 Deleting Measurement Data...................................................................162
6.4 CODING ...............................................................................................162
6.4.1 Manual Code Input.................................................................................163
6.4.2 Viewing Code.........................................................................................164
6.4.3 Deleting Code.........................................................................................165
6.5 INTIALIZING INTERNAL MEMORY ...............................................166
6.6 MEMORY STATISTIC.........................................................................167
7. COMMUNICATION SETTING.........................................................................168
8. DATATRANSFER.............................................................................................170
9. SYSTEM INFORMATION ................................................................................171
10.EXPORT/IMPORT DATA.................................................................................172
11. SEND/RECEIVE DATA BY USB....................................................................174
12.U DISK MODE(MEMORY MODE).................................................................177
13. CHECKAND ADJUSTMENT.........................................................................179
13.1 PLATE VIAL ......................................................................................179
13.2 CIRCULAR VIAL ..............................................................................179
13.3 INCLINATION OF RETICLE............................................................180
13.4 PERPENDICULARITY BETWEEN LINE OF SIGHT AND
HORIZONTALAXIS (2C).....................................................................................181
13.5 VERTICAL INDEX DIFFERENCE COMPENSATION ...................182
13.6 ADJUSTMENT OF VERTICAL INDEX DIFFERENCE (I ANGLE)
AND SETTING VERTICAL INDEX O.................................................................183
13.7 TRANSVERSE AXIS ERROR COMPENSATION ADJUSTMENT 184
13.8 PLUMMET .........................................................................................186
13.9 INSTRUMENT CONSTANT (K).......................................................188
13.10 PARALLEL BETWEEN LINE OF SIGHT AND EMITTING
PHOTOELECTRIC AXIS ...................................................................................... 190
13.11 REFLECTORLESS EDM.................................................................190
13.12 TRIBRACH LEVELING SCREW ...................................................191
13.13 RELATED PARTS FOR REFLECTOR............................................191
14.SPECIFICATION............................................................................................192
15. ACCESSORIES................................................................................................195
【APPENDIX-A】DATA COMMUNICATION ...................................................196
【APPENDIX-B】CALCULATE ROAD ALIGNMENT...................................211

STONEX R2
1
FOREWORDS
Congratulations on the purchase of STONEX Total Station R Series.
This manual is for the application of STONEX Total Station R Series.
STONEX R2 Total Station is equipped with infrared laser optic-electronic distance
meter.
STONEX R2 Total Station is equipped with visible infrared laser distance meter
which is operated without sighting a reflector.
In this manual, the parts which are marked “ ” are only applicable to STONEX
R2. Before operating the instrument, please read this manual carefully.
FEATURES:
1. Powerful Software Functions
The internal software installed in STONEX R SeriesTotal Station is precisely designed. It
boasts of compact menu structure and complete and practical application programs, which
proves efficient and helpful in the process of project measurement and stake-out.
2. Simplified Operation
STONEX R Series Total Station has various functional keys, coupled with an input mode
combining characters and numbers perfectly. It‟s simple, practical, and convenient in use,
which enables the engineers who don‟t even have too much surveying experience to
master the operation quickly.
3. Absolute Encoding Circle
The pre-assembled Absolute Encoding Circle enables the user to start measurement
directly after switching on the instrument. Even if the user replaces the battery during
operation, the azimuth data will not be deleted.
4. Reflectorless EDM
The reflectorless laser EDM function equipped in Total Station R Series can be operated
the measurement on various materials of different colors (such as the wall surface of
constructions, telegraph pole, wire, cliff, hill and mountain, earth and soil, stump) from
long distance with high precision. It brings great convenience to surveyors when
measuring a target that is hard or even impossible to reach.
5. High Precision and Long Measuring Range
The measuring range of STONEX R Series Total Station is 2.4 km with single prism.
6. Reliable Water and Dust Proof Function
R Series Total Station boasts water and dust proof function, which realizes a breakthrough
in terms of the hardware performance of total station.

STONEX R2
2
PRECAUTIONS
1. Do not collimate the objective lens direct to sunlight without a filter.
2. Do not store the instrument in high and low temperature to avoid the sudden or great
change of temperature.
3. When the instrument is not in use, place it in the case and avoid shock, dust and
humidity.
4. If there is great difference between the temperature in work site and that in store place,
you should leave the instrument in the case till it adapts to the temperature of
environment.
5. If the instrument has not been used for a long time, you should remove the battery for
separate storage. The battery should be charged once a month.
6. When transporting the instrument should be placed in its carrying case, it is
recommended that cushioned material should be used around the case for support.
7. For less vibration and better accuracy, the instrument should be set up on a wooden
tripod rather than an aluminum tripod.
8. Clean exposed optical parts with degreased cotton or lens tissue only!
9. Clean the instrument surface with a woolen cloth after use. If it gets wet, dry it
immediately.
10. Before working, inspect the power, functions and indications of the instrument as well
as its initial settings and correction parameters.
11. Unless the user is a maintenance specialist, do not attempt to disassemble the
instrument by yourself even if you find the instrument abnormal.
12. Since Reflectorless Total Station R2 emits visible laser, do not sight the eyes in
use.
SAFETY GUIDE
Internal EDM (Visible Laser)
Warning:
The total station is equipped with an EDM of a laser grade of 3R/Ⅲa. It is verified by the
following labels.
On the vertical tangent screw sticks an indication label “CLASS III LASER PRODUCT”.
A similar label is sticked on the opposite side.
This product is classified as Class 3R laser product, which accords to the following
standards.
IEC60825-1:2001 “SAFETY OF LASER PRODUCTS”.
Class 3R/Ⅲa laser product: It is harmful to observe laser beam continuously. User
should avoid sighting the laser at the eyes. It can reach 5 times the emitting limit of
Class2/II with a wavelength of 400mm-700mm.
Warning:

STONEX R2
3
Continuously looking straight at the laser beam is harmful.
Prevention:
Do not stare at the laser beam, or point the laser beam to others‟ eyes. Reflected laser
beam is a valid measurement to the instrument.
Warning:
When the laser beam emits on prism, mirror, metal surface, window, etc., it is dangerous
to look straight at the reflex.
Prevention:
Do not stare at the object which reflects the laser beam. When the laser is switched
on (under EDM mode), do not look at it on the optical path or near the prism. It is only
allowed to observe the prism with the telescope of total station.
Warning:
Improper operation on laser instrument of Class 3R will bring dangers.
Prevention:
To avoid to be harmed, each user is required to take safety precautions, and take
everything under control within the distance that would incur dangers (according to
IEC60825-1:2001).
The following shows the explanation related to the key sections of the Standard.
Laser instrument of Class 3R is applicable outdoors and in construction field
(measurement, defining lines, leveling).
a) Only those persons who are trained with related course and authenticated are allowed
to install, adjust, and operate this kind of laser instrument.
b) Stand related warning symbols in the scale of use.
c) Prevent any person to look straight at or use optical instrument to observe the laser
beam.
d) To prevent the harm caused by laser, block the laser beam at the end of the working
route. When the laser beam exceeds the limit area (harmful distance*) and when there are
motivating persons, stopping the laser beam is a must.
e) The optical path of the laser should be set higher or lower than the line of sight.
f) When the laser instrument is not in use, take care of it properly. The person who is not
authenticated is not allowed to use.
g) Prevent the laser beam from irradiating plane mirror, metal surface, window, etc.
especially beware of the surface of plane mirror and concave mirror.
* Harmful distance means the maximum distance between the start point and the point
which the laser is weakened to a degree that doesn‟t harm people.
The internal EDM instrument equipped with a Class 3R/III a Laser has a harmful distance
of 1000m (3300ft). Beyond this distance, the laser intensity is weakened to Class I
(Looking straight at the laser beam causes no harm to the eyes.)

STONEX R2
4
1. NOMENCLATURE AND FUNCTIONS
1.1 NOMENCLATURE (take R2 as example in the full text)
Collimator
Objective
Lens
Display
Leveling Screw
Battery
Battery Locking Lever
Horizontal Clamp
Screw
Horizontal
Tangent
Screw

STONEX R2
5
Telescope
Focusing Knob
Instrument
Center Mark
Telescope
Focusing
Knob
Eyepiece
Base
USB port and
SD Port
Telescope Grip
Tribrach Lock
VerticalClamp
Screw
Vertical Tangent
Plate Vial

STONEX R2
6
1.2 DISPLAY
Main Menu
Confirm the battery enough shown on the display. Replace it with another charged battery
or charge it when battery level is low. Refer to section 2.3 “Battery Power Remaining
Display”.
The chart above is the display screen. It is possible that local software versions are
different from the basic version.
1.3KEYPAD
It takes R2 for example here.
Power Switch Key ON
Model :R2
Number :RS4502
Version:11.06.29
【Measure】1/4
PtID:A1
R.HT:1.500 m
HR:0°00′00″
V :90°00′00″
:---.--- m Ⅰ
:---.--- m
All DIST RECORD ↓

STONEX R2
7
1) Focus (Actively measured field)
2) Icons
3) Fixed keys (Keys with firmly assigned functions)
4)Alphanumeric keys
5) Navigation keys (Control of input bar in edit and input mode or control of focus bar.)
6) Soft keys (Are assigned the variable functions displayed at the bottom of the screen.)
7) Soft bar (Displays functions that can be called up with the Soft keys. It can use to start
up figure and character input function in R Series.)
8) Trigger key (important key)
9) Power key
1.4 FIXED KEYS
[User]: User key can be defined. Programmable with function from the “Function”menu.
[FNC]: Measurement key in common use. Several functions could be called up, the
instructions are as follows:
²function could be started up directly in different application.
²every function in menu could be appointed to user key (see“4.4 MAIN SETTINGS”)
[Menu]: Menu key. Accesses to programs, settings, data manager, communication
parameters, instrument adjustments, system information and data transfer, etc.
In menus with multiple entries a shortcut number is shown on the right of each entry.
Using this number allows a direct start without turning page.
[PAGE]: Page key. Turn to next page when a dialogue consists of several pages.
[ESC]: Quit a dialog or the edit mode with activation of the “previous”value. Return to a
higher level.
[ENT]: Confirm an input, continue to the next field.
1.5 TRIGGER KEY
The measurement trigger (important key) has three settings (ALL, DIST, OFF). The key
can be activated in Settings or Main Settings menu.
1.6 SOFT KEYS
(
FUNCTIONAL KEYS
)
The measurement data is displayed in the
several upper lines of the display, while a
selection of commands and
functions is at the bottom of the screen,
which can be activated with
corresponding functional keys. The
【Measure】1/4
PtID :A1
R.HT:1.500m
HR:0°00′00″
V:90°00′00″
:---.--- m Ⅰ
:---.--- m
ALL DIST RECORD ↓
SetStn EDM ↓
Set Hz TILT BEEP ∣←

STONEX R2
8
meaning of each soft key depends on the applications/functions currently active.
Soft Keys:
Key
Function
[All]
Starts angle and distance measurements, and saves
measured values.
[DIST]
Starts angle and distance measurements without saving
measured values.
[REC]
Saves displayed values.
[ENH]
Opens the coordinate input mode
[List]
Displays the list of available points
[Search]
Starts the search for the input points
[EDM]
Displays EDM settings
[Esc]
Returns to the previous mode or display.
[Con]
Continues to next mode or display.
[ ]
Returns to highest soft key level.
[ ↓]
To next soft key level.
[ENT]
Sets displayed message or dialog and quits the dialog.
1.7 SYMBOLS
Symbol indicates a particular operating status depending on different software versions.
Key
Content
A double arrow indicates choice fields.
Using the navigation keys the desired parameter can be
selected.
Quits a selection with the navigation keys or Enter key.
, ,
Indicates that several pages are available which can be
selected with [PAGE].
Ⅰ,Ⅱ
Telescope (alidade) is at FaceⅠor FaceⅡ.
( )
Hz is set to “left angle measurement”(or right angle
measurement), which is to circumrotate anticlockwise
(clockwise)
1.8 ICONS
Measurement mode icons:
Infrared EDM (invisible) for measuring prisms and reflective targets.
Reflectorless EDM (visible) for measuring all targets.
Use reflective foils as reflective targets.
Battery capacity status icon:

STONEX R2
9
The battery symbol indicates the level of the remaining battery capacity (80% full
shown in the example).
Compensator status icons:
Compensator is ON
Compensator is OFF
Character/Number inputting mode icons:
01 Numeric Mode
AB Alphanumeric Mode
1.9 MENU TREE
[Menu]>F1-F4 is to confirm the selected menu. Press [PAGE] to view the next page.
Menu tree may be different in the order of display.
MENU (P1)
Programs -----------Surveying
----Stake Out
----Free Station
----COGO
----Tie Distance
----Area (plan)
----Remote Height
----Reference Line/Arc
----Roads
----Construction by axes method
Settings -----------Contrast, Trigger Key, User Key, V- Setting,
Tilt Crn, Coll. Crn.
----SectorBeep, Beep,Hz<=>, Face l Def., Data Output, Auto-Off
---- MinReading, Angle Unit, Dist.Unit, Temp.Unit, Press Unit,
Code Rec.
----GSI 8/16, Mask 1/2
EDM Settings ----------EDM Mode
----Prism
----Atmospheric Data
----Grid Factors
----Signal
----Multiply Constant
File Management --------Job

STONEX R2
10
----Known points
----Measurements
----Codes
----Initialize Memory
----Memory Statistic
MENU (P2)
Adjustment ----------------V- index
----Hz-collimation
----Horizontal Axis
----VO/Axis (Cons, list)
----lnst.Constant
----Tilt Parameter
----State
Comm Parameters ------Baudrate
----DataBits
----Parity
----End Mark
----Stop Bit
Data Transfer ------------Data Send ---- Job
---- Data
---- Format
System Information ------------Battery
----Date
----Time
----Version
----Type
----Number
1.10 AUTO POWER OFF
If no key operation is done for the setting time (30 minutes), the power turns off
automatically.

STONEX R2
11
2. PREPARATION FOR MEASUREMENT
2.1 UNPACKINGAND STORE OF INSTRUMENT
²Unpacking of instrument
Place the case lightly with the cover upward, and unlock the case, take out the instrument.
²Store of instrument
Cover the telescope cap, place the instrument into the case with the vertical clamp screw
and circular level vial upwards (Objective lens towards tribrach), and slightly tighten the
vertical clamp screw and lock the case.
2.2 INSTRUMENT SETUP
Mount the instrument to the tripod. Level and center the instrument precisely to ensure
the best performance.
Operation Reference:
1 Leveling and Centering the Instrument by plumb bob
1) Setting up the tripod
①First, extend the extension legs to suitable length, make the tripod head parallel to the
ground and tighten the screws.
②Make the centre of the tripod and the occupied point approximately on the same
plumb line.
③Step on the tripod to make sure if it is well stationed on the ground.
2) Attaching the instrument on the tripod
Place the instrument carefully on the tripod head and slide the instrument by loosening the
tripod screw. If the plumb bob is positioned right over the center of the point, slightly
tighten the tripod.
3) Roughly leveling the instrument by using the circular vial
①Turn the leveling screw A and B to move the bubble in the circular vial, in which case
the bubble is located on a line perpendicular to a line running through the centers of the
two leveling screw being adjusted .

STONEX R2
12
②Turn the leveling screw C to move the bubble to the center of the circular vial.
4) Precisely leveling by using the plate vial
①Rotate the instrument horizontally by loosening the Horizontal Clamp Screw and
place the plate vial parallel to the line connecting leveling screw A and B, and then bring
the bubble to the center of the plate vial by turning the leveling screwsA and B.
②Rotate the instrument 90º(100g) around its vertical axis and turn the remaining
leveling screw or leveling C to center the bubble once more.
③Repeat the steps ①② for each 90º(100g) rotation of the instrument and check whether
the bubble is correctly centered in all directions.
2 Centering by using the optical plummet
1) Set tripod
Lift tripod to suitable height, ensure equal length of three legs, spread and make tripod
head parallel to the ground, and place it right above the measurement station point. Prop
up tripod on the ground and fix one leg.
2) Install instrument and collimate the point
Set instrument carefully on tripod, tighten the central connecting screw and adjust

STONEX R2
13
optical plummet to make the reticle distinctly. Hold the other two unfixed legs with both
hands and adjust position of these two legs through observation of optical plummet. As it
approximately aims at the station point, make all three legs fixed on the ground. Adjust
three leg screws of the instrument to make optical plummet collimate precisely to the
station point.
3) Use circular vial to roughly level the instrument.
Adjust length of three legs of tripod, and make the circular vial bubble of the
instrument in the middle.
4) Use plate vial to level the instrument accurately.
①Rotate the instrument horizontally by loosening the Horizontal Clamp Screw and place
the plate vial parallel to the line connecting leveling screw A and B, and then bring the
bubble to the center of the plate vial by turning the leveling screws A and B.
②Rotate the instrument 90‵, make it perpendicular to the connecting line of level
screwsA and B. Turn level screw C to make the bubble of the plate vial in the middle.
5) Precisely centering and leveling
Through observation of optical plummet, slightly loosen the central connecting screw
and move the instrument evenly (Don‟t rotate the instrument), making the instrument
precisely collimating to the station point. Then tighten the central connecting screw and
level the instrument precisely again.
Repeat this operation till the instrument collimate precisely to the measurement
station point.
2.3 BATTERY POWER REMAINING DISPLAY
Battery power remaining display indicates the power condition.
Note :
①The battery operating time will vary depending on the environmental conditions such
as ambient temperature, charging time, the number of times of charging and discharging
etc. It is recommended for safety to charge the battery beforehand or to prepare spare full
charged batteries.
②The battery power remaining display shows the power level regarding the current
measurement mode. The distance measurement mode consumes more power than angle
measurement mode, so the power enough for the latter is not sure applicable for the
【Measure 】1/4
Pt ID :A1
RHT :1.500 m
HZ:0°00′00″
V:90°00′00″
:---.--- m Ⅰ
:---.--- m
ALL DIST RECORD ↓
Power remaining display

STONEX R2
14
previous one. Pay particular attention to this when switching angle measurement mode to
distance measurement mode, because insufficient battery power might lead to interrupted
operation.
●Before outdoor operation, battery power status should be well checked.
③When the measurement mode is changed, the battery power would not immediately
show the decrease or increase. The battery power indicating system shows the general
status but not the instantaneous change of battery power.
²Battery Recharging Cautions:
☆Battery should be recharged only with the charger SC-21 going with the instrument.
☆Remove the on-board battery from instrument and connect it to battery charger. When
the indicator lamp on the battery charger is orange, the recharging process has begun.
When charging is complete (indicator lamp turns green), disconnect the charger from
its power source.
²Battery Removal Cautions:
Before removing the battery from the instrument, make sure that the power is turned off.
Otherwise, the instrument may be damaged.
²Battery Recharging Cautions:
☆The charger has built-in circuitry for protection from overcharging. However,
do not leave the charger plugged into the power outlet after recharging is
completed.
☆Be sure to recharge the battery at a temperature of 0°~±45°C, recharging may
be abnormal beyond the specified temperature range .
☆When the indicator lamp does not light after connecting the battery and charger,
either the battery or the charger may be damaged. Please connect professionals
for repairing.
²Battery Charging Cautions:
☆Rechargeable battery can be repeatedly recharged 300 to 500 times. Complete
discharge of the battery may shorten its service life.
☆In order to get the maximum service life, be sure to recharge it at least once a
month.
2.4 REFLECTOR PRISMS
When measuring distance, a reflector prism needs to be placed at the target place.
Reflector systems come with single prism and triple prisms, which can be mounted with
tribrach onto a tripod or mounted onto a prism pole. Reflector systems can be
self-configured by users according to job.
Illustrated are some prism systems that match:

STONEX R2
15
2.5 MOUNTINGAND DISMOUNTING INSTRUMENT FROM TRIBRACH
²Dismounting
If necessary, the instrument (including reflector prisms with the same tribrach) can
be dismounted from tribrach. Loosen the tribrach locking screw in the locking knob with
a screwdriver. Turn the locking knob about 180°counter-clockwise to disengage anchor
jaws, and take off the instrument from tribrach.
²Mounting
Insert three anchor jaws into holes in tribrach and line up the directing stub with the
directing slot. Turn the locking knob about 180°clockwise and tighten the locking screw
with a screwdriver.
2.6 EYEPIECE ADJUSTMENTAND COLLIMATING OBJECT
Method of Collimating Object(for reference)
①Sight the Telescope to bright place and rotate the eyepiece tube to make the reticle
clear.

STONEX R2
16
②Collimate the target point with top of the triangle mark in the coarse collimator.
(Keep a certain distance between eye and the coarse collimator).
③Make the target image clear with the telescope focusing screw.
☆If there is parallax when your eye moves up, down or left, right, it means the diopter
of eyepiece lens or focus is not well adjusted and accuracy will be influenced, so you
should adjust the eyepiece tube carefully to eliminate the parallax.
2.7 INPUTTING MODE
STONEX R2 Total Station has alphanumeric keypad; Users therefore can input number
and character directly. R2 total station instrument will be introduced particularly as
follows.
²R2:
Each key of R2 Total Station Instrument is defined with three characters and one fig.
Numeric fields:
User can only enter numerical values. By pressing a button of the numeric keypad the
number will be displayed.
Alphanumeric fields:
User can enter numbers and letters. By pressing a button of the alphanumeric keypad the
input opens. By pressing several times you can toggle through the characters. For
example: A->B->C->7„„
If the sign is [AB] at the lower-right corner of screen, you can input number/letter on the
alphanumeric keypad;If it is 01, you can only input numbers. For any requirement for
manually inputting, press [F4] to switch between number and letter inputting mode.
²Sign
The characters which can be input in R2 Total Station Instrument are:A~Z . / $ % _ @ &
* ?! + -etc.
+/-:In number/letter inputting mode, "+" and "-" are treated as normal alphanumeric
characters with no mathematical function. In numeric inputting mode, it can only be used
in front of the input numbers.
²Special characters
* In wildcard searching, it is required to use the sign “*”. In character inputting mode of
R2 instrument, press +/- key once.
In the edit mode, the position of the decimal place can not be changed. The decimal
place is skipped.
This manual suits for next models
4
Table of contents
Other STONEX Measuring Instrument manuals
STONEX
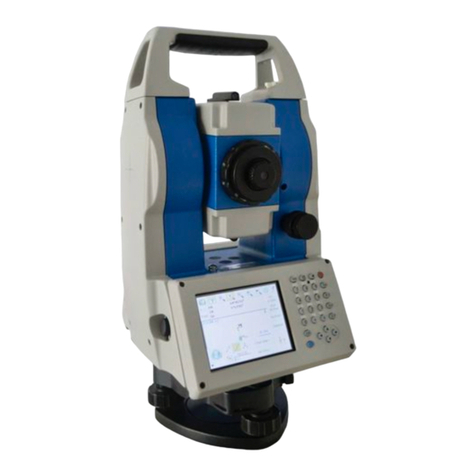
STONEX R2W PLUS 500 User manual
STONEX
STONEX R20 User manual
STONEX
STONEX SPL1 User manual
STONEX
STONEX R2 PLUS User manual

STONEX
STONEX R180 User manual
STONEX
STONEX R80 User manual
STONEX
STONEX R1 PLUS User manual

STONEX
STONEX R80 User manual
STONEX
STONEX R25LR User manual
STONEX
STONEX R60 User manual
Popular Measuring Instrument manuals by other brands
Radiodetection
Radiodetection C.A.T user manual
PCE Instruments
PCE Instruments DFG N Series user manual

Axis Industries
Axis Industries QALCOSONIC HEAT 2 Technical description, installation and user instructions
Bosch
Bosch GTL 3 Professional Original instructions

DSM
DSM Delvotest Fast Go Max user manual
eXact
eXact idip Smart guide
