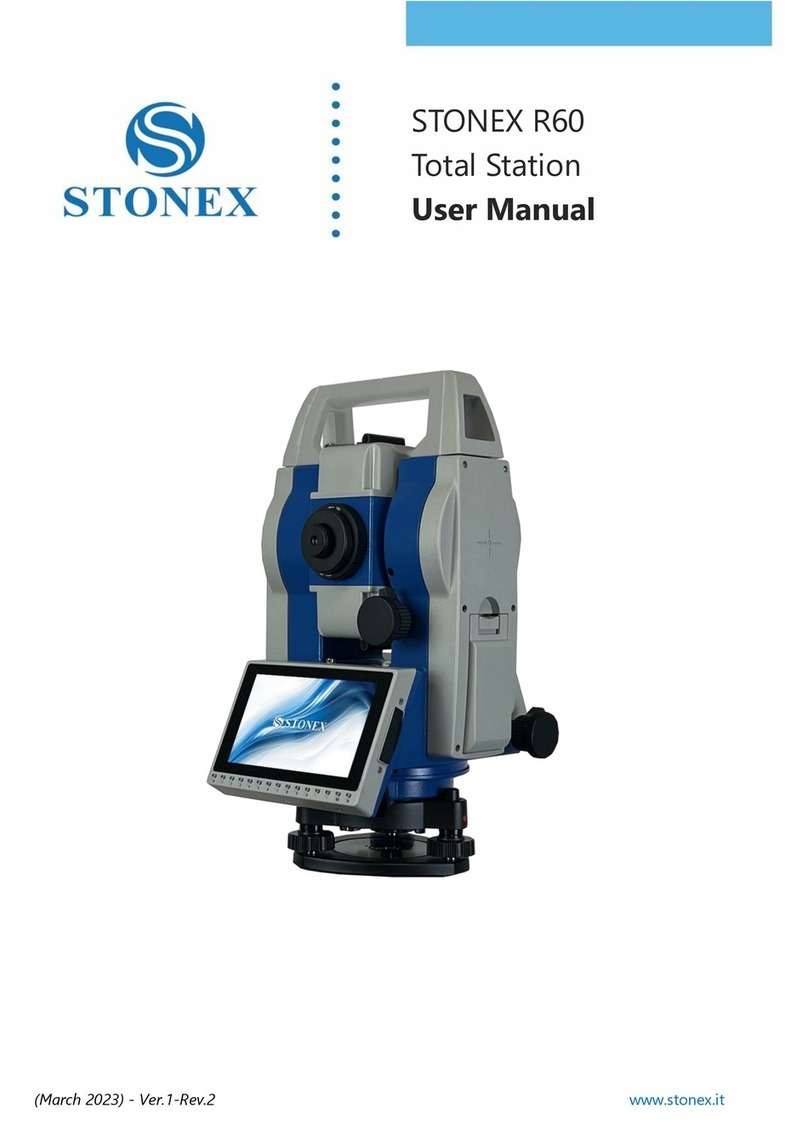
STONEX R6 Series User manual

Stonex
®R6Series
User Manual
Version1.0
English

R6,Table of Contents
2
TableofContents
Inthismanual
Chapter Page
1DescriptionoftheSystem 6
1.1 SystemComponents 6
1.2 ContainerContents 7
1.3 InstrumentComponents 8
2UserInterface 9
2.1 Keyboard 9
2.2 Screen 9
2.3 StatusIcons 10
2.4 Softkeys 11
2.5 OperatingPrinciples 11
2.6 Pointsearch 12
3 Operation 14
3.1 InstrumentSetup 14
3.2 WorkingwiththeBattery 16
3.3 DataStorage 17
3.4 MainMenu 18
3.5 SurveyApplication 18
3.6 DistanceMeasurements‐GuidelinesforCorrectResults 19
4 Settings 21
4.1 GeneralSettings 21
4.2 EDMSettings 25
4.3 CommunicationSettings 27
5Tools 29
5.1 Calibration 29
5.2 AutoStartRoutine 29
5.3 SystemInformation 30
5.4 LoadingSoftware 31
6Functions 32
6.1 Overview 32
6.2 DistanceOffset 33

R6,Table of Contents
3
6.3 Z‐Coordinate 34
6.4 2Dist.Offset 34
6.5 ControlDistance 36
6.6 EDMContinuous 37
7Coding 38
8 ApplicationsGettingStarted 40
8.1 Overview 40
8.2 StartinganApplication 40
8.3 SelectingtheJob 41
8.4 SelectingtheStation 42
8.5 SelectingtheOrientation 42
8.5.1 Overview 42
8.5.2 ManualOrientation 43
8.5.3 OrientationwithCoordinates 43
9 Applications 46
9.1 CommonFields 46
9.2 Survey 46
9.3 ReferenceElement‐ReferenceLine 47
9.3.1 Overview 47
9.3.2 DefiningtheBaseLine 48
9.3.3 DefiningtheReferenceLine 48
9.3.4 SubapplicationMeasureLine&Offset 49
9.3.5 SubapplicationSetout 50
9.4 ReferenceElement‐ReferenceArc 52
9.4.1 Overview 52
9.4.2 DefiningtheReferenceArc 53
9.4.3 SubapplicationMeasureLine&Offset 54
9.4.4 SubapplicationSetout 54
9.5 COGO 57
9.5.1 StartingCOGO 57
9.5.2 InverseandTraverse 57
9.5.3 Intersections 58
9.5.4 Offsets 59
9.5.5 Extension 60
9.6 MissingLineMeasurement 61
9.7 Resection 62
9.7.1 StartingResection 62
9.7.2 MeasuringInformation 63

R6,Table of Contents
4
9.7.3 ComputationProcedure 64
9.7.4 ResectionResults 64
9.8 SetOut 66
9.9 Area&Volume 68
9.10 RemoteElevation 69
9.11 Construction 70
9.11.1 StartingConstruction 70
9.11.2 Layout 71
9.11.3 AsBuiltCheck 72
10 DataManagement 74
10.1 DataManagement 74
10.2 ExportingData 75
10.3 ImportingData 76
10.4 WorkingwithaUSBMemoryStick 78
10.5 WorkingwithBluetooth 78
10.6 WorkingwithGeoMaxGeoOfficeandGGOTools 79
11 Calibration 80
11.1 Overview 80
11.2 Preparation 80
11.3 CalibratingLine‐of‐SightandVerticalIndexError 81
11.4 CalibratingtheCircularLeveloftheInstrumentandTribrach 83
11.5 InspectingtheLaserPlummetoftheInstrument 84
11.6 ServicingtheTripod 85
12 CareandTransport 86
12.1 Transport 86
12.2 Storage 86
12.3 CleaningandDrying 87
13 SafetyDirections 88
13.1 General 88
13.2 IntendedUse 88
13.3 LimitsofUse 89
13.4 Responsibilities 89
13.5 HazardsofUse 90
13.6 LaserClassification 93
13.6.1 General 93
13.6.2 Distancer,MeasurementswithReflectors 93

R6,Table of Contents
5
13.6.3 Distancer,MeasurementswithoutReflectors(Reflectorless
mode) 94
13.6.4 LaserPlummet 96
13.7 ElectromagneticCompatibilityEMC 97
13.8 FCCStatement,ApplicableinU.S. 99
14 TechnicalData 101
14.1 AngleMeasurement 101
14.2 DistanceMeasurementwithReflectors 101
14.3 Distancer,MeasurementswithoutReflectors(Reflectorlessmode) 102
14.4 DistanceMeasurementReflector(LongRange) 104
14.5 ConformitytoNationalRegulations 104
14.5.1 Zoom20 104
14.5.2 Zoom30 105
14.6 GeneralTechnicalDataoftheInstrument 105
14.7 ScaleCorrection 108
14.8 ReductionFormulas 110
15 StandardLimitedWarranty 111
16 Glossary 114
AppendixAMenuTree 116
AppendixBDirectoryStructure 118
Index 119

R6,Description of the System
6
1DescriptionoftheSystem
1.1 SystemComponents
MainComponents
a) R6instrument
b) ComputerwithGGOorGGO
Toolssoftware
c) Datatransfer
Component Description
R6instrument Aninstrumentformeasuring,calculatingandcapturingdata.Ideallysuited
fortasksfromsimplesurveystocomplexapplications.
Thevariouslineshavearangeofaccuracyclassesandsupportdifferent
features.AlllinescanbeconnectedwithGGOorGGOToolstoview,
exchangeandmanagedata.
Firmware Thefirmwarepackageinstalledontheinstrument.Consistsofastandard
baseoperatingsystemwithoptionaladditionalfeatures.
GGOorGGO
Toolssoftware
Anofficesoftwareconsistingofasuiteofstandardandextendedprograms
fortheviewing,exchanging,managingandpostprocessingofdata.
Datatransfer DatacanbealwaystransferredbetweenaR6instrumentandacomputervia
adatatransfercable.
ForZoom30instrumentsdatacanalsobetransferredviaUSBmemorystick
orBluetooth.
Zoom_001 a
c
b
GGO

R6,Description of the System
7
1.2 ContainerContents
Containercontentspart1of2
Containercontentspart2of2
a) Instrumentwithsuppliedtribrach
b) ZDC100datacable(USB‐RS232)*
c) Protectivecover
*Optional
a) Adjustmenttools
b) ZBA200batterycharger*
c) USBmemorystick‐forZoom30instruments*
d) ZBA400battery*
e) Tipforminiprismpole*
f) Usermanual
g) GLS115miniprismpole*
*Optional
Zoom_022a
ba c
Zoom_022
a
bcde f g

R6,Description of the System
8
1.3 InstrumentComponents
Instrumentcomponentspart1of2
Instrumentcomponentspart2of2
a) Detachablecarryinghandlewithmountingscrew
b) Opticalsight
c) ObjectivewithintegratedElectronicDistanceMeas‐
urement(EDM).ExitforEDMlaserbeam
d) Verticaldrive
e) SerialinterfaceRS232/USB
f) USBhostport
g) Horizontaldrive
h) Secondkeyboard*
*Optional
i) Focusingtelescopeimage
j) Eyepiece;focusinggraticule
k) Batterycover
l) Footscrew
m)Circularlevel
n) Display
o) Keyboard
b c da
e f g h
Zoom_002
ij
k l nm o
Zoom_003

R6,User Interface
9
2UserInterface
2.1 Keyboard
Alphanumerickeyboard
Keys
2.2 Screen
Screen
a) Alphanumerickeypad
b) Navigationkey
c) ENTERkey
d) FunctionkeysF1 to F4
e) ESCkey
f) FNCkey
g) PAGEkey
Key Description
Pagekey.Displaysthenextscreenwhenseveralscreensareavailable.
FNCkey.Quick‐accesstomeasurementsupportingfunctions.
Navigationkey.Controlsthefocusbarwithinthescreenandtheentrybarwithina
field.
ENTERkey.Confirmsanentryandcontinuestothenextfield.
ESCkey.Quitsascreenoreditmodewithoutsavingchanges.Returnstonexthigher
level.
Functionkeysthatareassignedthevariablefunctionsdisplayedatthebottomofthe
screen.
Alphanumerickeypadforentryoftextandnumericalvalues.
a) Titleofscreen
b) Focusinscreen.Activefield
c) Statusicons
d) Fields
e) Softkeys
Zoom_009
a
b
c
d
e
f
g
a
b
c
d
e
Zoom_032

R6,User Interface
10
2.3 StatusIcons
Description
Theiconsprovidestatusinformationrelatedtobasicinstrumentfunctions.Dependingonthe
firmwareversion,differenticonsaredisplayed.
Icons
)Allshownscreensareexamples.Itispossiblethatlocalfirmwareversionsare
differenttothebasicversion.
Icon Description
Thebatterysymbolindicatestheleveloftheremainingbatterycapacity,75%full
shownintheexample.
Compensatorison.
Compensatorisoff.
IREDMmodeformeasuringtoprismsandreflectivetargets.
RLEDMmodeformeasuringtoalltargets.
!Offsetisactive.
Keypadissettonumericmode.
Keypadissettoalphanumericmode.
Indicatesthathorizontalangleissettoleftsideanglemeasurement(anticlock‐
wise).
Adoublearrowindicatesafieldhasaselectablelist.
Upanddownarrowsindicatethatseveralscreensareavailable,whichare
accessedusing .
IndicatestelescopepositionisfaceI.
IndicatestelescopepositionisfaceII.
Bluetoothisconnected.Ifthereisacrossbesidetheicon,theBluetoothcommu‐
nicationportisselected,butthestatusisinactive.
USBcommunicationportisselected.

R6,User Interface
11
2.4 Softkeys
Description
SoftkeysareselectedusingtherelevantF1toF4functionkey.Thischapterdescribesthefunc‐
tionalityofthecommonsoftkeysusedbythesystem.Themorespecialisedsoftkeysare
describedwheretheyappearintheapplicationchapters.
Commonsoftkeyfunctions
2.5 OperatingPrinciples
Turninstrumenton/off
UsetheOn/Offkey.
Key Description
ALPHA Tochangethekeypadoperationtoalphanumerical.
NUM Tochangethekeypadoperationtonumerical.
ALL Tostartdistanceandanglemeasurementsandsavethemeasuredvalues.
BACK Toreturntothelastactivescreen.
COORD Toopenthemanualcoordinateentryscreen.
EDM ToviewandchangeEDMsettings.Referto"4.2EDMSettings".
EXIT Toexitthescreenorapplication.
MEAS Tostartdistanceandanglemeasurementswithoutsavingthemeasuredvalues.
OK Ifentryscreen:Confirmsmeasuredorenteredvaluesandcontinuesthe
process.
Ifmessagescreen:Confirmsmessageandcontinueswithselectedactionor
returnstothepreviousscreentoreselectanoption.
IR/RL TotogglebetweenIRandRLEDMmodes.
DISPL. Todisplaythelistofavailablepoints.
REC Tosavethedisplayedvalues.
DEFLT Toresetalleditablefieldstotheirdefaultvalues.
SEARCH Tosearchforanenteredpoint.
VIEW Todisplaythecoordinateandjobdetailsoftheselectedpoint.
Todisplaythenextsoftkeylevel.

R6,User Interface
12
Alphanumerickeypad
Thealphanumericalkeypadisusedtoentercharactersdirectlyintoeditablefields.
•Numeric fields:Canonlycontainnumericalvalues.Bypressingakeyofthekeypadthe
numberwillbedisplayed.
•Alphanumeric fields:Cancontainnumbersandletters.Bypressingakeyofthekeypad
thefirstcharacterwrittenabovethatkeywillbedisplayed.Bypressingseveraltimesyou
cantogglethroughthecharacters.Forexample:1‐>S‐>T‐>U‐>1‐>S....
Editfields
)
Ineditmodethepositionofthedecimalplacecannotbechanged.Thedecimalplaceisskipped.
Specialcharacters
2.6 Pointsearch
Description
Pointsearchisafunctionusedbyapplicationstofindmeasuredorfixedpointsinthememory
storage.
Itispossibletolimitthepointsearchtoaparticularjobortosearchthewholestorage.The
searchprocedurealwaysfindsfixedpointsbeforemeasuredpointsthatfulfillthesamesearch
)ESCDeletesanychangeandrestoresthepreviousvalue.
Movesthecursortotheleft
Movesthecursortotheright.
Insertsacharacteratthecursorposition.
Deletesthecharacteratthecursorposition.
Character Description
* Usedaswildcardsinsearchfieldsforpointnumbersorcodes.Referto"2.6
Pointsearch".
+/‐ Inthealphanumericcharacterset"+"and"‐"aretreatedasnormalalphanu‐
mericcharacterswithnomathematicalfunction.
)"+"/"‐"onlyappearinfrontofanentry.
Inthisexampleselecting2onanalphanumeric
keyboardwouldstarttheSetOutapplication.

R6,User Interface
13
criteria.Ifseveralpointsmeetthesearchcriteria,thentheresultsareorderedaccordingtothe
entrydate.Theinstrumentfindsthemostrecentfixedpointfirst.
Directsearch
Byenteringanactualpointnumber,forexample402,andpressingSEARCH,allpointswithin
theselectedjobandwiththecorrespondingpointnumberarefound.
Wildcardsearch
Thewildcardsearchisindicatedbya"*".Theasteriskisaplaceholderforanyfollowing
sequenceofcharacters.Wildcardsshouldbeusedifthepointnumberisnotfullyknown,orto
searchforabatchofpoints.
Examplesofpointsearches
* Allpointsarefound.
A Allpointswithexactlythepointnumber"A"arefound.
A* Allpointsstartingwith"A"arefound,forexample,A9,A15,ABCD,A2A.
*1 Allpointscontainingonlyone"1"arefound,forexample,1,A1,AB1.
A*1Allpointsstartingwith"A"andcontainingonlyone"1"arefound,forexample,A1,AB1,
A51.
SEARCH
Tosearchformatchingpointswithinthe
selectedjob.

R6,Operation
14
3Operation
3.1 InstrumentSetup
Description
Thistopicdescribesaninstrumentsetupoveramarkedgroundpointusingthelaserplummet.
Itisalwayspossibletosetuptheinstrumentwithouttheneedforamarkedgroundpoint.
)
Importantfeatures
• Itisalwaysrecommendedtoshieldtheinstrumentfromdirectsunlightandavoiduneven
temperaturesaroundtheinstrument.
• Thelaserplummetdescribedinthistopicisbuiltintotheverticalaxisoftheinstrument.
Itprojectsaredspotontotheground,makingitappreciablyeasiertocentretheinstru‐
ment.
• Thelaserplummetcannotbeusedwithatribrachequippedwithanopticalplummet.
Tripod
)Whensettingupthetripodpayattentionto
ensuringahorizontalpositionofthetripodplate.
Slightcorrectionsofinclinationcanbemadewith
thefootscrewsofthetribrach.Largercorrections
mustbedonewiththetripodlegs.
Loosentheclampingscrewsonthetripodlegs,pullouttothe
requiredlengthandtightentheclamps.
a) Inordertoguaranteeafirmfootholdsufficientlypressthe
tripodlegsintotheground.
b) Whenpressingthelegsintothegroundnotethattheforce
mustbeappliedalongthelegs.
Carefulhandlingoftripod.
• Checkallscrewsandboltsforcorrectfit.
• Duringtransportalwaysusethecoversupplied.
• Usethetripodonlyforsurveyingtasks.
a
b

R6,Operation
15
Setupstepbystep
1 Extendthetripodlegstoallowforacomfortableworkingposture.Positionthetripodover
themarkedgroundpoint,centringitasbestaspossible.
2 Fastenthetribrachandinstrumentontothetripod.
3 Turnontheinstrument,and,iftiltcorrectionissetto1‐or2‐axis,thelaserplummetwillbe
activatedautomatically,andtheLevel & Plummet screenappears.Otherwise,pressFNC
fromwithinanyapplicationandselectLevel & Plummet.
4 Movethetripodlegs(1)andusethetribrachfootscrews(6)tocentertheplummet(4)over
thegroundpoint.
5 Adjustthetripodlegs(5)tolevelthecircularlevel(7).
6 Byusingtheelectroniclevel,turnthetribrachfootscrews(6)topreciselyleveltheinstru‐
ment.Referto"Levelupwiththeelectroniclevelstep‐by‐step".
7 Centertheinstrumentpreciselyoverthegroundpointbyshiftingthetribrachonthetripod
plate(2).
8 Repeatsteps6and7untiltherequiredaccuracyisachieved.
Levelupwiththeelectroniclevelstepbystep
Theelectroniclevelcanbeusedtopreciselyleveluptheinstrumentusingthefootscrewsofthe
tribrach.
1) Turntheinstrumentuntilitisparalleltotwofootscrews.
2) Centerthecircularlevelapproximatelybyturningthefootscrewsofthetribrach.
3) Turnontheinstrument,and,iftiltcorrectionissetto1‐or2‐axis,thelaserplummetwill
beactivatedautomatically,andtheLevel & Plummetscreenappears.Otherwise,press
FNCfromwithinanyapplicationandselectLevel & Plummet.
)Thebubbleoftheelectroniclevelandthearrowsfortherotatingdirectionof
thefootscrewsonlyappeariftheinstrumenttiltisinsideacertainlevelling
range.
4 Centertheelectroniclevelofthefirstaxisbyturningthetwo
footscrews.Arrowsshowthedirectionofrotationrequired.
Whentheelectronicleveliscenteredthearrowsarereplaced
bycheckmarks.
5 Centertheelectroniclevelforthesecondaxisbyturningthe
lastfootscrew.Anarrowshowsthedirectionofrotation
required.Whentheelectronicleveliscenteredthearrowis
replacedbyacheckmark.
2
6
7
54
5
5
1
3
1
1
Zoom_004

R6,Operation
16
6 AcceptwithOK.
Changetheintensityofthelaserplummet
Externalinfluencesandthesurfaceconditionsmayrequiretheadjustmentoftheintensityof
thelaserplummet.
Positionoverpipesorholes
3.2 WorkingwiththeBattery
)
Charging/firsttimeuse
• Thebatterymustbechargedpriortousingitforthefirsttimebecauseitisdeliveredwith
anenergycontentaslowaspossible.
• Fornewbatteriesorbatteriesthathavebeenstoredforalongtime(>threemonths),itis
effectualtomakeonlyonecharge/dischargecycle.
• Thepermissibletemperaturerangeforchargingisbetween0°Cto+40°C/+32°Fto
+104°F.Foroptimalchargingwerecommendchargingthebatteriesatalowambient
temperatureof+10°Cto+20°C/+50°Fto+68°Fifpossible.
• Itisnormalforthebatterytobecomewarmduringcharging.Usingthechargersrecom‐
mendedbyStonex®,itisnotpossibletochargethebatteryifthetemperatureistoohigh.
)Whentheelectronicleveliscenteredandthree
checkmarksareshown,theinstrumenthasbeen
perfectlylevelledup.
IntheLevel & Plummetscreen,adjustthe
intensityofthelaserplummetusingthenaviga‐
tionkey.
Thelasercanbeadjustedin25%stepsas
required.
Undersomecircumstancesthelaserdotisnot
visible,forexampleoverpipes.Inthiscase,
usingatransparentplateenablesthelaserdotto
beseenandtheneasilyalignedtothecenterof
thepipe.
Zoom_005

R6,Operation
17
Operation/discharging
• Thebatteriescanbeoperatedfrom‐20°Cto+50°C/‐4°Fto+122°F.
• Lowoperatingtemperaturesreducethecapacitythatcanbedrawn;veryhighoperating
temperaturesreducetheservicelifeofthebattery.
• ForLi‐Ionbatteries,asingledischargingandchargingcycleissufficient.Werecommend
carryingouttheprocesswhenthebatterycapacityindicatedonthechargerorona
Stonex®productdeviatessignificantlyformtheactualbatterycapacityavailable.
Changethebatterystepbystep
)
Thepolarityofthebatteryisdisplayedinsidethebatteryhousing.
Warning
Ifchargedordischarged,batteriesnotrecommendedbyStonex®maybedamaged.Theymay
burnandexplode.
Precautions:
OnlychargeanddischargebatteriesrecommendedbyStonex®.
3.3 DataStorage
Description
Aninternalmemoryisincludedinallinstruments.Thefirmwarestoresalldatainjobsinadata‐
baseintheinternalmemory.Datacanthenbetransferredtoacomputerorotherdevicefor
postprocessingviaacableconnectedtotheserialinterfaceRS232port.
ForZoom30instruments,datacanalsobetransferredfromtheinternalmemorytoacomputer
orotherdevicevia:
• aUSBmemorystickinsertedintotheUSBhostport,or
• viaaBluetoothconnection.
Openthebatterycompartment(1)andremovethe
batteryholder.
Removethebatteryfromthebatteryholder(2).
Insertthenewbatteryintothebatteryholder(3),
ensuringthatthecontactsarefacingoutward.The
batteryshouldclickintoposition.
Insertthebatteryholderbackintothebatterycompart‐
ment(4).
Zoom_006
1
2
3
4
Zoom_007

R6,Operation
18
Referto"10DataManagement"forfurtherinformationondatamanagementanddatatransfer.
3.4 MainMenu
Description
TheMAIN MENUisthestartingplaceforaccessingallfunctionalityoftheinstrument.Itis
usuallydisplayedimmediatelyaftertheLevel & Plummetscreen,afterswitchingonthe
instrument.
MAINMENU
DescriptionoftheMAINMENUfunctions
)
Ifdesired,theinstrumentcanbeconfiguredtostartinauserdefinedplaceaftertheLevel &
Plummetscreen,insteadoftheMAIN MENU.Referto"5.2AutoStartRoutine".
3.5 SurveyApplication
Description
Afterswitchingonandsettingupcorrectly,theinstrumentisimmediatelyreadyformeasuring.
Function Description
Apps Toselectandstartapplications.Referto"9Applications".
Data Tomanagejobs,data,codelists,formats,systemmemoryandUSBmemory
stickfiles.Referto"10DataManagement".
Settings TochangeEDMconfigurations,comm.‐setupandgeneralinstrumentsettings.
Referto"4Settings".
Survey Surveyprogramtobeginmeasuringimmediately.Referto"3.5SurveyAppli‐
cation".
Transfer Toexportandimportdata.Referto"10.2ExportingData".
Tools Toaccessinstrumentrelatedtoolssuchascalibrations,personalstartup
settings,licencekeysandsysteminformation.Referto"5Tools".

R6,Operation
19
Access
SelectSurveyfromtheMAIN MENU.
SURVEY
TheprocedureforthequickstartSurveyisidenticaltotheprocedurefortheapplication
SurveyavailableundertheAppsmenu.Thereforethisprocedureisonlydescribedonce
withintheapplicationchapter.Referto"9.2Survey".
3.6 DistanceMeasurementsGuidelinesforCorrectResults
Description
Alaserdistancer(EDM)isincorporatedintotheR6instruments.Inallversions,thedistancecan
bedeterminedbyusingavisibleredlaserbeamwhichemergescoaxiallyfromthetelescope
objective.TherearetwoEDMmodes:
RLmeasurements
• Whenadistancemeasurementistriggered,theEDMmeasurestotheobjectwhichisinthe
beampathatthatmoment.Ifatemporaryobstruction,forexampleapassingvehicle,
heavyrain,fogorsnowisbetweentheinstrumentandthepointtobemeasured,theEDM
maymeasuretotheobstruction.
• Besurethatthelaserbeamisnotreflectedbyanythingclosetothelineofsight,for
examplehighlyreflectiveobjects.
CODING
Tofind/entercodes.Referto"7Coding".
STN
Toenterstationdataandsetthestation.
Set HA
Tosetthehorizontaldirectionorientation.
HA / HA
Tosetthehorizontalanglereadingtotheleft(anti‐
clockwise)ortotheright(clockwise).
• Prismmeasurements(IR) • Reflectorlessmeasurements(RL)

R6,Operation
20
• Avoidinterruptingthemeasuringbeamwhiletakingreflectorlessmeasurementsor
measurementsusingreflectivefoils.
• Donotmeasurewithtwoinstrumentstothesametargetsimultaneously.
IRmeasurements
• AccuratemeasurementstoprismsshouldbemadeinIR‐Defaultmode.
• MeasurementstostronglyreflectingtargetssuchastrafficlightsinPrismmodewithouta
prismshouldbeavoided.Themeasureddistancesmaybewrongorinaccurate.
• Whenadistancemeasurementistriggered,theEDMmeasurestotheobjectwhichisinthe
beampathatthatmoment.Ifforexamplepeople,cars,animals,orswayingbranchescross
thelaserbeamwhileameasurementisbeingtaken,afractionofthelaserbeamis
reflectedfromtheseobjectsandmayleadtoincorrectdistancevalues.
• Measurementstoprismsareonlycriticalifanobjectcrossesthemeasuringbeamata
distanceof0to30 mandthedistancetobemeasuredismorethan300 m.
• Inpractice,becausethemeasuringtimeisveryshort,theusercanalwaysfindawayof
avoidingunwantedobjectsfrominterferringinthebeampath.
Redlasertoprism
• RL‐LongRangemodeenablesdistancemeasurementsofover3.5 kmtostandardprisms
usingthevisibleredlaserbeam.
Redlasertoreflectorfoil
• Thevisibleredlaserbeamcanalsobeusedtomeasuretoreflectivefoils.Toguaranteethe
accuracytheredlaserbeammustbeperpendiculartothereflectorfoilanditmustbewell
adjusted.
• Makesuretheadditiveconstantbelongstotheselectedtarget(reflector).
Warning
Duetolasersafetyregulationsandmeasuringaccuracy,usingtheLongRangeReflectorless
EDMisonlyallowedtoprismsthataremorethan1000 m(3300 ft)away.
Table of contents
Other STONEX Measuring Instrument manuals
