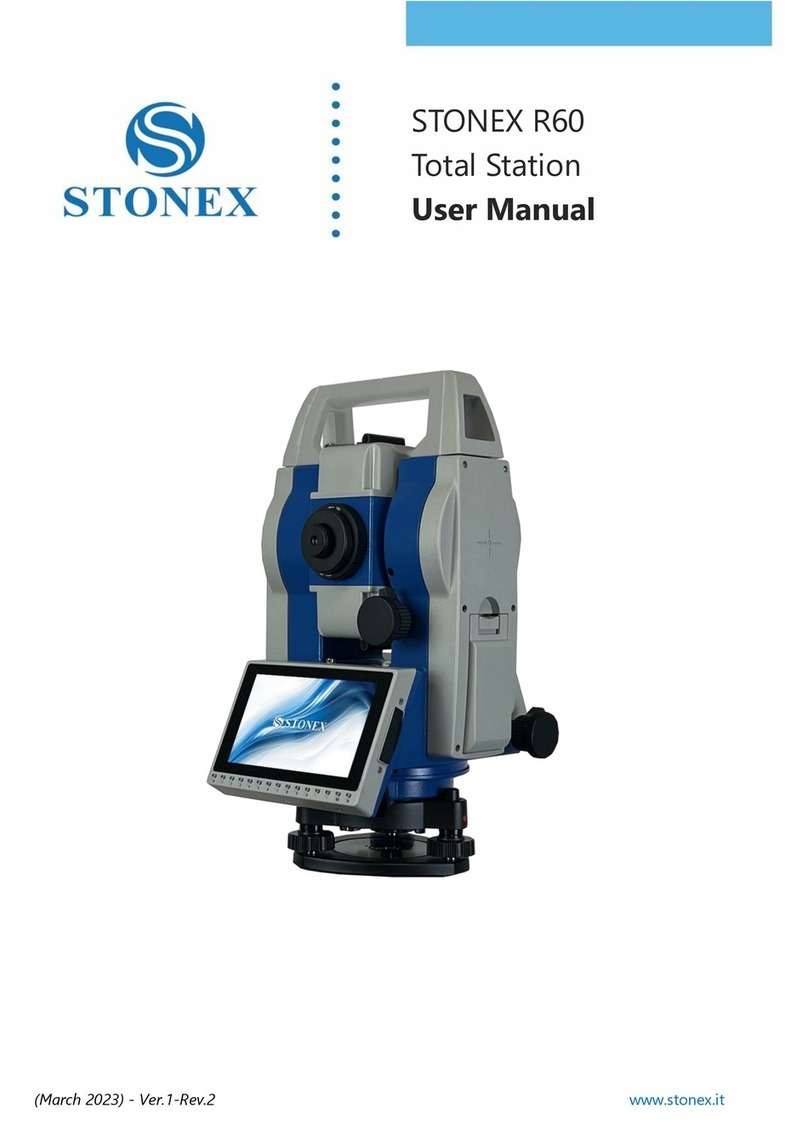
STONEX R1 PLUS User manual

EPG
Las más asequibles estaciones totales de alta precisión.
Page 1 Página 1
R1 PLUS R1 PLUS
1

Page 2 Página 2
R1 PLUS R1 PLUS
2 2
Dear Customer: Estimado cliente:
Congratulations! Felicitaciones! We, STONEX are proud to present you with these series instrument.
Nosotros, STONEX orgullosos de presentarles estos instrumento de la serie.
Your total station is a rugged and reliable instrument whose performance and design are Su estación
total es un instrumento robusto y fiable, cuyo rendimiento y el diseño son
not surpassed. no superado.
To fully appreciate and protect your investment, we suggest that you take the necessary Para apreciar
y pr
oteger su inversión, le sugerimos que tome las medidas necesarias
time to read and fully understand this manual. tiempo para leer y comprender este manual en su
totalidad. We have a dedicated service organization. Tenemos una organización de servicio dedicada.
If the need arises, please don't hesitate to contact us. Si surge la necesidad, por favor no dude en
contactar con nosotros.
Thank you for your trust and confidence. Gracias por su confianza y la confianza que usted.
Page 3 Página 3
R1 PLUS R1 PLUS
1 1
Contents Contenido
1. Precauciones de seguridad ............................................. .................................. 1
1.1 Note..............................................................................................................1
1.2 Definición de la Indicación .............................................. ................................ 2
1.3 Normas de seguridad para el l ser (serie R1) ......................................... ............ 4
1.4 Sobre el Usuario ............................................... .................................................. 0.5
1.5 Excepciones de Responsabilidad .............................................. ................... 5
2. Preparación antes Medición ............................................. ............... 6
2.1 Acerca de Battery..............................................................................................6
2.1.1 Símbolo de alimentación Batería ............................................ ................................ 6
2.1.2 Vuelva a colocar la batería ............................................ ..................................... 7
2.1.3 Recarga la batería ............................................ .................................. 7
2.2 Configuración del Instrumento ............................................. ............................. 8
2.3 Centrado y nivelación-Up ............................................ .......................... 8
2.4 Nivelación precisa-Up con nivel electrónico en pantalla ....................... 10
3. B sica Functions...........................................................................................11
3.1 Nomenclature............................................................................................11
3.2 Tecla de funcionamiento b sico .............................................. .................................. 13
3.3 Display.......................................................................................................14
3.4 Modo Diagrama ............................................... ........................................... 15

3.5 Encendido / Apagado ............................................. ............................................... 17
3.6 Registro y modo demo ............................................. ........................ 18
3.7 Cómo Número de entrada y Alphabet ........................................... ........... 19
3.8 Cómo configurar .............................................. ....................................... 20
3.9 Cómo establecer par metros ............................................. ............................... 22
3.9.1 Medida Condición Ajuste ............................................ ....................... 22
3.9.2 Instrumento b sico Ajuste ............................................ .......................... 24
3.9.3 Puerto de comunicación Ajuste ............................................ .................... 25
3.9.4 Configuración de unidad ............................................. ............................................... 26
3.9.5 Fecha & Hora ........................................... ................................... 27
3.9.6 Tecla Función Ajuste ............................................ 27 .................................
3.9.7 Configuración EDM ............................................. .............................................. 29
4. Medición de ngulos .............................................. ...................................... 31
4.1 Medición de un ngulo horizontal de dos puntos .......................................... .. 31
4.2 Establecer el ngulo horizontal a un valor requerido ....................................... 32
5. Medición Distancia .............................................. .............................. 33
Page 4 Página 4
R1 PLUS R1 PLUS
2 2
6. Coordinar Medición .............................................. ......................... 35
6.1 Introducir los datos del punto ocupado ............................................ ................... 35
6.2 Azimutes ............................................... ......................................... 37
6.3 de coordenadas 3D de medición .............................................. .................... 38
7. Replanteo Medición ............................................. ............................. 40
7. 1 Distancia Replanteo ............................................ ....................................... 40
7.2 Coordenadas Replanteo Medición ............................................. ........ 42
7.3 REM Replanteo Medición ............................................. .................... 44
8. Área ..........................................................................................................45
8.1 C lculo del rea de datos Medido ............................................ .......... 45
8.2 C lculo del rea de lectura Existed Coordenadas ............................... 46
9. Offset Medición .............................................. .................................. 48
9.1 Solo-Distancia de medición Offset ............................................ .......... 48
9.2 Ángulo Offset Medida .............................................. ........................ 50
9.3 Dual-Medición de distancia Offset ............................................ ............ 51
10. MLM.......................................................................................................53
10.1 Medición de distancia entre dos o m s puntos .............................. 53
10.2 Cambiar el Punto de Partida ............................................. ........................ 54
11. REM........................................................................................................55
12. Resección ............................................... ................................................. 56
12.2 Elevación Resección ............................................... ................................. 58
12.3 Resección C lculo Proceso .............................................. ................. 60
12.4 Precauciones al Resección Performing ............................................ 61
Proyección del punto 13. .............................................. ....................................... 62
13.1 Definir Línea Base ............................................... ......................................... 62
13.2 Proyección de puntos ............................................... ....................................... 64
14. Replantear línea ............................................. ........................................... 65

14. 1 Definir Línea Base ............................................. .......................................... 65
14. 2 Replantear línea-Point .......................................... .................................. 66
14.3 Replanteo de Línea / Línea ............................................ .................................... 67
15. Traverse Topografía .............................................. ................................. 69
15.1 Guardar Coordinar ............................................... ....................................... 69
15.2 Leer Coordinar ............................................... ...................................... 70
16. Inverse....................................................................................................71
17. Coordenadas polares C lculo ............................................. ................ 72
18. Medición de ngulos Repetición ............................................. .................. 73
19. Arco replanteo Medición ............................................ ................... 75
Page 5 Página 5
R1 PLUS R1 PLUS
3 3
19.1 Occ. Orientación ................................................. .................................... 75
19.2 2pt + Radio Arco replanteo ........................................... ...................... 76
19.3 Tres Punto Arco replanteo ............................................ ..................... 82
20. Carretera Replanteo Medición ............................................ ................. 84
20.1 Entrada de la estación de inicio ............................................. .............................. 85
20.2 Entrada Camino Horizontal Elementos ............................................. ............. 85
20.2.1 Entrada de Línea Elemento ............................................ ................................. 85
Elemento Círculo 20.2.2 Entrada ............................................ ............................... 86
20.2.3 Entrada de espiral Elemento ............................................ ............................... 87
20.2.4 Camino Horizontal Element Edición ........................................... .......... 87
20.3 Elementos de entrada Camino Vertical ............................................. .................. 89
20.3.1 entrada Vertical carretera Element ........................................... ................... 89
20.3.2 Editar Vertical Ruta Elemento ........................................... ..................... 90
20.4 C lculo carretera ............................................... ..................................... 92
20.4.1 Introducir el elemento ancho de la carretera .......................................... ................... 92
20.4.2 Estación adicional Ajuste ............................................ ....................... 93
20.4.3 C lculo carretera ............................................. .................................... 94
20.5 Carretera Replanteo de la vista de datos ............................................ .................... 95
20.6 Stake Out carretera .............................................. ......................................... 96
20.7 Gestión de Carreteras del archivo .............................................. ............................ 97
20.7.1 Seleccionar un Archivo Camino ........................................... ..................................... 97
20.7.2 Cambiar el nombre de un archivo de
Carretera ........................................... ................................. 98
20.7.3 Eliminar un archivo Camino ........................................... ..................................... 99
20.7.4 Eliminar todos los archivos Carretera ........................................... ............................... 100
21. Registro ..................................................................................................101
21.1 Registro de datos Ocupado .............................................. ........................... 101
21.2 Recopilar datos de ngulo .............................................. .................................. 102
21.3 Puntos Recopilar ............................................... ......................................... 103
21.4 Registro Nota ............................................... ........................................... 104
21.5 Vista Data..............................................................................................105
21.6 Selección trabajo ............................................... ................................................ 106
22. Gestión JOB .............................................. .................................. 107

22.1 Medios de Almacenamiento Seleccionar .............................................. .............................. 107
22.2 Seleccione un trabajo .............................................. ............................................ 108
22.3 Cambio del nombre de un TRABAJO .............................................. ........................................
109
22.5 Salida de trabajo de datos .............................................. ................................... 111
22.6 Copia de archivos ............................................... ................................................ 112
Page 6 Página 6
R1 PLUS R1 PLUS
4 4
22.7 Conectar la PC a través del puerto USB ............................................ ........................ 113
23. Conocido Data Management ............................................. ........................ 114
23.1 Entrada conocido Punto de coordenadas mediante Keys ........................................... 0.114
23.2 Entrada de Punto conocido de coordenadas a través de RS-232C .................................... 115
23.3 Eliminar punto de coordenadas conocidas ............................................. ............... 116
23.4 Ver conocido señala datos ............................................. .......................... 117
23.5 Borrar points'data conocidos ........................................... ..................... 118
24. Gestión Código .............................................. ................................. 119
24.1 Lista de códigos Editar .............................................. ........................................... 119
24.2 Borrar Códigos .............................................. ........................................ 120
25. Advertencia y error ............................................ ................ 121
26. Revise y ajuste ............................................. ........................... 122
26.1 La constante del instrumento .............................................. ...................... 122
26.2 Nivel tubular ............................................... ......................................... 123
26.3 Circular Nivel ............................................... ........................................ 123
26.4 La mira óptica .............................................. .................................... 124
26.5 Plomada óptica (opcional) ............................................ .................. 124
26.6 Plomada l ser ............................................... ....................................... 125
26.7 Vertical Cross-pelo en el Telescopio ........................................... .............. 125
26.8 Horizontal colimación Error C ............................................. ............ 126
26.9 Sensor de inclinación ............................................... .............................................. 127
26.10 Error de índice vertical .............................................. ............................. 128
26.11 EDM eje óptico y el Telescopio Avistamiento Axis Error ............. 130
27. Datos técnicos .............................................. .......................................... 132
28. Accesorios ............................................... ............................................ 136
Apéndice I: fórmula de corrección atmosférica y el gr fico (Sólo para
reference).......................................................................................................137
Apéndice II: Corrección de la refracción y curvatura terrestre ................. 139
Apéndice III: garantía limitada est ndar .............................. 141
Apéndice IV: el reciclaje ambiental ............................................. ....... 145

Page 7 Página 7
R1 PLUS R1 PLUS
1 1
1. Precautions for Safety 1. Precauciones de Seguridad
1.1 Note 1.1 Nota
◆ Don't collimate the sun directly ◆ No colimar el sol directamente
Avoid insolating the instrument, and don't collimate the sun directly for protecting eyes Evite aislando
el instrumento, y no colimar el sol directamente para proteger los ojos
and instrument. y el instrumento.
◆ Avoid the librations on the instrument ◆ Evite las libraciones sobre el instrumento
When transporting, keep the instrument in the case and try your best to lighten librations. Durante el
transporte, mantener el instrumento en el caso y haz todo lo posible para aligerar libraciones.
◆ Carry the instrument ◆ Lleve el instrumento
When carrying, the instrument handle must be hold tight. Durante el transporte, el mango del
instrumento se debe mantener apretado.
◆ Check the battery power ◆ Compruebe la alimentación de la batería
Before using it, you should check the power whether it is enough. Antes de usarlo, usted debe
comprobar el poder si es suficiente.
◆ Battery maintenance ◆ Mantenimiento de la batería
If the instrument is not used for a long time, the battery should be taken out from the Si el instrumento
no se utiliza durante mucho tiempo, la batería debe ser sacado de la
instrument and stored in separate place. instrumento y almacenado en lugar separado. Meantime, the
battery should be charged every Mientras tanto, la batería se debe cargar cada
month. meses.
◆ Take out the battery ◆ Saque la batería
It is not suggested to take out the battery when the instrument is on, otherwise, the stored No se
sugiere que sacar la batería cuando el instrumento está encendido, de lo contrario, el almacenado
data may be lost, so it is better to replace the battery after power off the instrument. los datos se
pueden perder, por lo que es mejor reemplazar la batería después de apagar el instrumento.
◆ Set up the instrument on the tripod ◆ Coloque el instrumento sobre el trípode
When using it please insure the connection between tripod and instrument is firm. Cuando lo utilice
por favor asegurar la conexión entre el trípode y el instrumento es firme. It is Es
better to work with wooden tripod for the measurement accuracy. mejor trabajar con trípode de
madera de la exactitud de medición.
◆ Assemble the tribrach on the instrument ◆ Ensamble la base nivelante sobre el instrumento
The setting of tribrach would influence the accuracy. El ajuste de la base nivelante influiría en la
precisión. The tribrach should be check La base nivelante debe ser cheque
frequently, the screw which connects the tribrach and alidade must be locked tightly. con frecuencia,
el tornillo que conecta la base nivelante y alidada debe bloquearse con fuerza. And Y
the central fixing screw should be tight. el tornillo de fijación central debe ser firme.
◆ High temperature condition ◆ condiciones de alta temperatura
Don't put the instrument in high temperature condition for a long time, it is bad for the No ponga el
instrumento en condiciones de alta temperatura por un largo tiempo, es malo para el
instrument performance. el rendimiento del instrumento.
◆ Temperature changing sharply ◆ Temperatura cambiando dr sticamente
The sharp temperature changing on the instrument or prism will shorten the distance La temperatura
brusco cambio en el instrumento o prisma acortará la distancia

measurement range, for example, after taking the instrument out from a warm car to a rango de
medición, por ejemplo, después de tomar el instrumento sale de un coche caliente a una
cold condition, wait for some time, it can be used when it adapts the surrounding estado frío, esperar
algún tiempo, se puede utilizar cuando se adapta la rodea
condition. condiciones.
◆ The noise from the instrument ◆ El ruido del instrumento
When the instrument working, it is normal if you hear the noise from instrument motor, it Al trabajar
el instrumento, es normal que si se escucha el ruido del motor de instrumento,
will not affect the instrument work. no afectará el trabajo del instrumento.
Page 8 Página 8
R1 PLUS R1 PLUS
2 2
◆ Stored data responsibility ◆ responsabilidad Los datos almacenados
STONEX should not be held liable for the lost data because of wrong operation. STONEX no debe
ser considerado responsable de los datos perdidos debido a la operación incorrecta.
1.2 Definition of Indication 1.2 Definición de la Indicación
For the safe of your product and prevention of injury to operators and other persons as Para la
seguridad de su producto y la prevención de lesiones a los operadores y demás personas que
well as prevention of property damage, items which should be observed are indicated by así como la
prevención de daños a la propiedad, los elementos que deben observarse son indicados por
an exclamation point within a triangle used with WARNING and CAUTION statements un signo de
exclamación dentro de un triángulo se utiliza con las advertencias y precauciones
in this manual. en este manual.
The definitions of the indication are listed below. Las definiciones de la indicación se enumeran a
continuación. Be sure you understand them before Asegúrese de entender su contenido antes de
reading the manual's main text. la lectura del texto principal del manual.
● Do not perform disassembly or rebuilding. ● No realice el desmontaje o la reconstrucción. Fire,
electric shock or burns could result. Fuego, descargas eléctricas o quemaduras podrían resultar.
Only STONEX authorized distributors can disassemble or rebuilt. Distribuidores Sólo STONEX
autorizados pueden desmontar o reconstruido.
● Do not collimate the sun directly. ● No colimar el sol directamente. The eye injury or blind could
result. Podrían dar lugar a la lesión en el ojo o ciego.
● Do not cover the charger. ● No cubra el cargador. Fire could be result. Fuego podría ser resultado.
● Do not use defection power cable, socket or plug. ● No utilice el cable de alimentación deserción,
toma o el enchufe. Fire, electronic shock could result. Fuego, podría producir una descarga
electrónica.
● Do not use wet battery or charger. ● No utilice la batería mojada o en el cargador. Fire, electronic
shock could result. Fuego, podría producir una descarga electrónica.
● Do not close the instrument to burning gas or liquid, and do not use the instrument in ● No cierre el
instrumento a gas o líquido en llamas, y no utilice el instrumento en
coal mine. mina de carbón. Blast could be result. Explosiva podría ser resultado.
● Do not put the battery in the fire or high temperature condition. ● No ponga la batería en la
condición de fuego o altas temperaturas. Explosion, damage Explosión, daños

could result. podría resultar.
● Do not use the battery which is not specified by STONEX. ● No utilice la batería que no está
especificado por STONEX. Fire, electric shock or burn Fuego, descargas eléctricas o quemaduras
could result. podría resultar.
● Do not use the power cable which is not specified by STONEX. ● No utilice el cable de
alimentación no especificado por STONEX. Fire could result. Podría producirse un incendio.
● Do not short circuit of the battery. ● No haga cortocircuito de la batería. Fire could result. Podría
producirse un incendio.
● When this product encounters disturbance of severe Electrostatic Discharge, perhaps it ● Cuando
este producto se encuentra con alteración de la descarga electrostática severa, tal vez
will have some degradation of performance like switching on/off automatically and so tendrá cierta
degradación del rendimiento como de conmutación de encendido / apagado de forma automática y de
manera
Page 9 Página 9
R1 PLUS R1 PLUS
CAUTION PRECAUCIÓN
on.
● Do not touch the instrument with wet hand. ● No toque el equipo con las manos mojadas. Electric
shock could result. Podría causar una sacudida eléctrica.
● Do not stand or seat on the carrying case, and do not turn over the carrying case ● No se suba ni
asiento en la caja de transporte, y no entregar a la caja de transporte
arbitrarily, the instrument could be damaged. arbitrariamente, el instrumento podría resultar dañado.
● Be careful of the tripod tiptoe when setup or move it. ● Tenga cuidado de la punta de los pies del
trípode cuando la instalación o moverlo.
● Do not drop the instrument or the carrying case, and do not use defective belt, agraffe or ● No deje
caer el instrumento o el estuche de transporte, y no utilizar el cinturón defectuoso, agraffe o
hinge. bisagra. Instrument damage could result. Podría dar lugar a daños al instrumento.
● Do not touch liquid leaking from the instrument or battery. ● No toque el líquido de instrumento o
de la batería. Harmful chemicals could Los químicos peligrosos podría
cause burn or blisters. causa quemaduras o ampollas.
● Please assemble the tribrach carefully, if the tribrach is not stable, series damage could ● Por favor,
montar la base nivelante con cuidado, si la base nivelante no es estable, el daño podría serie
result. resultado.
● Do not drop the instrument or tripod, series damage could result. ● No deje caer el instrumento o
trípode, daños serie podría deteriorarse. Before use it, check Antes de usarlo, cheque
the central screw is tight. el tornillo central es escaso.

!
Page 10 Página 10
R1 PLUS R1 PLUS
4 4
1.3 Safety Standards for Laser (R1 series) 1.3 Normas de seguridad para el l ser (serie R1)
R1 series adopt the class of Laser Product according to IEC Standard Publication Serie R1 adoptar la
clase de producto láser de acuerdo con la publicación estándar IEC
60825-1 Amd. 60825-1 Amd. 2:2001. 2:2001. According this standard, EDM device is classified as
Según esta norma, el dispositivo de EDM se clasifica como
Class 3R Laser Product when reflectless measurement is selected, when the Láser de clase 3R del
producto cuando se selecciona la medición reflectless, cuando el
prism and reflective sheet is selected as target, the output is equivalent to the prisma y lámina
reflectante se selecciona como objetivo, la salida es equivalente a la
safer class 1. Follow the safety instructions on the labels to ensure safe use. más segura la clase 1.
Siga las instrucciones de seguridad en las etiquetas para garantizar un uso seguro.
CAUTION: CLASS 3R LASER RADIATION WHEN OPEN PRECAUCIÓN: CLASE 3R
RADIACIÓN LÁSER AL ABRIR
AVOID DIRECT EYE EXPOSURE. EVITE LA EXPOSICIÓN DIRECTA DE LOS OJOS.

Precaución
CAUTION: CLASS 2 LASER RADIATION WHEN OPEN PRECAUCIÓN: RADIACIÓN LÁSER
CLASE 2 AL ABRIR
DO NOT STARE INTO THE BEAM NO MIRE AL RAYO
Note for Safety
Nota para la Seguridad
● Never point the laser beam at other's eyes, it could cause serious injury. ● Nunca apunte el rayo
láser a los ojos de otros, podría causar lesiones graves.
● Never look directly into the laser beam source, it could cause permanent eye ● Nunca mire
directamente a la fuente de rayos láser, podría causar ocular permanente
damage. daños.
● Never stare at the laser beam, it could cause permanent eye damage. ● No mirar al rayo láser,
podría causar daños permanentes en los ojos.
● Never look at the laser beam through a telescope or other optical devices, it ● No mire al rayo láser
a través de un telescopio o en otros dispositivos ópticos, que
could cause permanent eye damage. podría causar daños permanentes en los ojos.
Page 11 Página 11
R1 PLUS R1 PLUS
5 5
1.4 About User 1.4 Sobre el Usuario
1) This product is for professional use only! 1) Este producto es sólo para uso profesional!
The user is required to be a qualified surveyor or have a good knowledge of El usuario está obligado a
ser un inspector calificado o tener un buen conocimiento de
surveying, in order to understand the user manual and safety instructions, before topografía, con el fin
de entender las instrucciones del manual de usuario y de seguridad, antes de
operating, inspecting or adjusting. operar, inspeccionar o ajustar.

2) Wear required protectors (safety shoes, helmet, etc.) when operating. 2) Utilice protectores
requeridos (zapatos de seguridad, casco, etc) cuando se opera.
1.5 Exceptions from Responsibility 1.5 Excepciones de Responsabilidad
1) The user of this products is expected to follow all operating instructions and 1) Se espera que el
usuario de estos productos se siguen todas las instrucciones de funcionamiento y
make periodic checks of the product's performance. realizar controles periódicos de las prestaciones
del producto.
2) The manufacturer, assumes no responsibility for results of a faulty or 2) El fabricante no asume
ninguna responsabilidad por los resultados de un defectuoso o
intentional usage or misuse including any direct, indirect, consequential damage, el uso intencional o
uso incorrecto, incluido cualquier daño directo, indirecto, consecuencial,
and loss of profits. y la pérdida de ganancias.
3) The manufacturer, assumes no responsibility for consequential damage, and 3) El fabricante no
asume ninguna responsabilidad por daños indirectos, y
loss of profits by any disaster, (an earthquake, storms, floods etc.). pérdida de beneficios por cualquier
desastre, (un terremoto, tormentas, inundaciones, etc.)
4) The manufacturer, assumes no responsibility for any damage, and loss of 4) El fabricante no asume
ninguna responsabilidad por los daños y la pérdida de
profits due to a change of data, loss of data, an interruption of business etc., beneficios debido a un
cambio de datos, pérdida de datos, una interrupción de negocios, etc,
caused by using the product or an unusable product. causado por el uso del producto o de un producto
inservible.
5) The manufacturer, assumes no responsibility for any damage, and loss of 5) El fabricante no asume
ninguna responsabilidad por los daños y la pérdida de
profits caused by usage except for explained in the user manual. beneficios causados por el uso a
excepción de se explica en el manual de usuario.
6) The manufacturer, assumes no responsibility for damage caused by wrong 6) El fabricante no
asume ninguna responsabilidad por daños causados por mal
transport, or action due to connecting with other products. transporte, o la acción, debido a la
conexión con otros productos.

Page 12 Página 12
R1 PLUS R1 PLUS
6 6
2. Preparation before Measurement 2. Preparación antes de Medición
2.1 About Battery 2.1 Acerca de la batería
2.1.1 Battery Power Symbol 2.1.1 Símbolo de energía de la batería
NOTE:
NOTA:
◆The working time of battery will be effected by many factors, such as ambient ◆ El tiempo de
trabajo de la batería se realiza por muchos factores, como el ambiente
temperature, recharging time, recharging and discharging times. temperatura, tiempo de recarga,
recarga y los tiempos de descarga. On the data safe En la caja de seguridad de datos
side, we suggest the users recharge the battery full or prepare several full lado, se sugiere a los
usuarios recargar la batería completa o preparan varios plena
batteries before operation. baterías antes de la operación.
◆The battery symbol only indicates power capability for current measurement ◆ El símbolo de la
batería sólo se indica la capacidad de potencia para la medición de corriente
mode. modo. The power consumption in distance measurement mode is more than in El consumo de
energía en el modo de medición de distancia es más que en
angle mode, if the instrument enters into distance measurement mode from angle el modo de ángulo,
si el instrumento pasa al modo de medición de la distancia desde el ángulo
mode, the power maybe auto-off because of lower battery. modo, el poder tal vez auto-apagado
debido a la batería baja.
◆The symbol only indicates the supply power but not the instantaneous power ◆ El símbolo sólo
indica la fuente de alimentación, pero no la potencia instantánea

change. cambiar. And if the measurement mode changes, the symbol will not show the Y si cambia el
modo de medición, el símbolo no se mostrará el
power's decrease or increase immediately. disminución o aumento de energía inmediatamente.
◆It is suggested to check every battery power before field work. ◆ Se sugiere revisar cada carga de
la batería antes del trabajo de campo.
Page 13 Página 13
R1 PLUS R1 PLUS
7
2.1.2 Replace the Battery 2.1.2 Vuelva a colocar la batería
1) Remove the battery 1) Retire la batería
①Press the button downward as shown left ① Pulse el botón hacia abajo
como se muestra a la izquierda
②Remove the battery by pulling it toward you ② Retire la batería tirando de
ella hacia usted
2) Mount the battery 2) Montar la batería
①Insert the battery to the instrument ① Inserte la batería en el instrumento
②Press the top of the battery until you hear a ② Pulse la parte superior de la
batería hasta que oiga un
Click. Haga clic en.
2.1.3 Recharge the Battery 2.1.3 Recarga de la batería
As above figures show, connect the charger and the battery, Dado que las cifras
anteriores muestran, conectar el cargador y la batería,
then plug the charger into the outlet of 100V-240V AC a continuación, conecte el
cargador a la toma de corriente de 100V-240V AC

power supply, recharging will begin. fuente de alimentación, la recarga comenzará.
NOTE:
NOTA:
◆For a new (or long time no use) battery, in order to fully extend its capacity, it ◆ Para un nuevo (o
hace tiempo que no uso) de la batería, con el fin de extender plenamente su capacidad,
is absolutely necessary to carry out 3 to 5 complete charging/discharging cycles, es absolutamente
necesario llevar a cabo del 3 al 5 de carga completa / descarga ciclos,
and the charging time must be 10 hours at least each time. y el tiempo de carga debe ser de 10 horas
por lo menos cada vez.
◆The indicator light on the charger will illuminate three separate colors for ◆ El indicador luminoso
del cargador se iluminará tres colores distintos para
varies mode conditions: varía las condiciones de modo:
Solid Red Light—indicates that the charger is working; Solid Red Light-indica que el cargador está
funcionando;
Solid Green Light— indicates that the charge has finished; Solid Green Light-indica que la carga ha
terminado;
Flashing Red Light—indicates no battery on charging, poor connection or some Flashing Red Light-
indica que no hay batería en carga, mala conexión o alguna
problems exist. existen problemas.
◆It is recommended to continue charging for 1 or 2 hours after the light turn ◆ Se recomienda
continuar con la carga para 1 o 2 horas después de la vuelta la luz
green. verde.
◆Once the red light flashes constantly after the charger is plugged into the ◆ Una vez que la luz roja
parpadea constantemente después el cargador está enchufado en el
outlet of 100V-240V AC power supply, please remove the battery and salida de 100V-240V fuente de
alimentación CA, por favor, retire la batería y
reconnected it after 3 or 5 min. reconectados después de 3 o 5 minutos.
Page 14 Página 14
R1 PLUS R1 PLUS
8 8
2.2 Setting up the Instrument 2.2 Configuración del Instrumento
Mount the battery in the instrument before performing this operation because the Montar la batería en
el instrumento antes de realizar esta operación porque el
instrument will tilt slightly if the battery is mounted after leveling. instrumento se inclinará
ligeramente si la batería está montada después de la nivelación.
I. Set up the tripod first: extend the extension legs to suitable lengths and tighten I. Establecer el
trípode primera: extender las patas de extensión a las longitudes adecuadas y apriete
the screws on the midsections. los tornillos en las partes centrales del cuerpo. Make sure the legs are
spaced at equal intervals Asegúrese de que las piernas están espaciados a intervalos iguales
and the head is approximately level. y la cabeza es aproximadamente el nivel. Set the tripod so that
the head is positioned Ajuste el trípode para que la cabeza está posicionada

over the surveying point. sobre el punto topográfico. Make sure the tripod shoes are firmly fixed in
the Asegúrese de que las patas del trípode se fijan firmemente en el
ground. suelo.
II. II. Mount the instrument on the tripod head. Monte el instrumento en la cabeza del trípode.
Supporting it with one hand, tighten Apoyar con una mano, apriete
the centering screw on the bottom of the unit to make sure it is secured to the el tornillo de centrado
en la parte inferior de la unidad para asegurarse de que está asegurado a la
tripod. trípode.
2.3 Centering and Levelling-Up 2.3 Centrado y nivelación-Up
1. Position tripod legs so that the plummet is aimed to the ground mark point. 1 para que la plomada
se dirige al punto de marca en el suelo. Colocar las patas del trípode.
Turn the focusing ring of the optical plummet to focus. Gire el anillo de enfoque de la plomada óptica
para enfocar.
2. Turn three footscrews of the tribrach till the center of reticle exactly coincides 2. Gire tres tornillos
de la base nivelante hasta que el centro del retículo coincide exactamente
with the surveying point in any position. con el punto topográfico en cualquier posición.
3. Move the tripod legs to center the circular level. 3. Mover las patas del trípode para centrar el nivel
circular. The instrument is now El instrumento está ahora
roughly leveled-up. más o menos nivelado-up.
4. Center the bubble in the circular level 4. Centre la burbuja del nivel circular
Loosen the horizontal motion clamp, and Afloje el freno de
movimiento horizontal, y
turn the instrument till the plate level is girar el instrumento hasta
que el nivel de la placa es
parallel to a line shaped with screws A paralelo a una forma de
tornillos Una línea
and B. Adjust the screws A and B to make y B. Ajuste los tornillos
A y B para hacer
the bubble in the center of the level. la burbuja en el centro del nivel.
Page 15 Página 15

R1 PLUS R1 PLUS
Turn the instrument approximately 90°.
Encienda el instrumento aproximadamente 90 °.
Adjust screw C, till the bubble in the center Ajuste el tornillo
C, hasta que la burbuja en el centro
of the level. del nivel.
Repeat above steps until the bubble remains in the center of the plate level while Repita los pasos
anteriores hasta que la burbuja permanece en el centro de la placa, mientras que el nivel
the instrument is rotated to any position. el instrumento se gira en cualquier posición.
5. Center the surveying point again 5. Centre el punto topográfico más
Loosen the centering screw slightly. Afloje el tornillo de centrado ligeramente. Looking through the
optical plummet Mirando a través de la plomada óptica
eyepiece, slide the instrument over the tripod head until the surveying point is ocular, deslice el
instrumento sobre la cabeza del trípode hasta que el punto topográfico es
exactly centered in the reticle. exactamente centrada en el punto de mira. Re-tighten the centering
screw securely. Vuelva a apretar el tornillo de centrado.
6. Check again to make sure the bubble in the plate level is centered. 6. Compruebe de nuevo para
asegurarse de que la burbuja en el nivel tubular esté centrada.
If not, repeat procedure 4. Si no es así, repita el procedimiento 4.

Screw A
Page 16 Página 16
R1 PLUS R1 PLUS
10 10
2.4 Accurate Levelling-Up with Electronic Level on screen 2.4 Nivelación precisa-Up con nivel
electrónico en pantalla
It is convenient for R1 series to level-up with electronic level, especially when it Es conveniente para
la serie R1 para subir de nivel a nivel electrónico, sobre todo cuando se
is difficult to observe the circular level and plate level. es difícil observar el nivel esférico y el nivel
de la placa.
1. Power on the instrument and press key { 1. Encienda el instrumento y
pulse la tecla { BS BS } }
directly, and the electric level displays on screen. directamente, y los
indicadores de niveles de electricidad en la pantalla.
2. Level it by turning three foot screws, see above
2. Nivel girando los tres tornillos del pie, ver más arriba
operation “3. operación "3. Center the bubble in the plate Centre la
burbuja en la placa level”. nivel ".
Note:
Nota:
1. On this menu you can turn on/off the X/Y compensator by pressing ▲or ▼ 1. En este menú puede
activar / desactivar el compensador X / Y pulsando ▲ o ▼ key.clave.
2. If the instrument is equipped with laser plummet, after opening this menu, the 2. Si el instrumento
está equipado con plomada láser, después de abrir este menú, el
laser plummet adjusting bar will display. plomada láser de ajuste bar mostrarán. With pressing Con
pulsar oro key the laserintroducir el láser
lightness can be adjusted. ligereza se puede ajustar.

Tilt Value
Page 17 Página 17
R1 PLUS R1 PLUS
11 11
3. Basic Functions 3. Funciones b sicas
3.1 Nomenclature 3.1 Nomenclatura
Handle

Page 18 Página 18
R1 PLUS R1 PLUS
12
l
3.2 Basic Key Operation 3.2 Tecla de funcionamiento b sico
Keys

Page 18 Página 19
R1 PLUS R1 PLUS
CLAVES DESCRIPCIÓN
F1-F4 Seleccione las funciones que coinciden con las teclas de función
0-9 1. Número de entrada cuando la entrada numérica
2. Introduzca caracteres cuando la entrada alfabética
●Introduzca un punto decimal
± ± Señal de entrada más / menos
Power Power on/off Encendido / apagado
★Entra en el modo de ajuste directamente
ESC Escape al menú anterior o el modo
SFT 1. Shift between number and alphabetic when inputting 1. Cambie
entre número y alfabético cuando se introducen
2.Shift targets model when measuring 2.Shift está dirigido a modelo
en la medición
BS 1. Borrar el carácter a la izquierda del cursor cuando se introducen
2. Open electronic level menu 2. Abrir el menú de nivel electrónico
Espacio 1. Input a black space when inputting 1. Entrada a un espacio negro
al introducir 2. El objetivo o instrumento de entrada de altura
Func Gire la página
ENT 1. Select/Accept input data 1. Seleccionar / Aceptar datos de entrada
2. Accept the option when selecting 2. Acepte la opción al
seleccionar
Table of contents
Languages:
Other STONEX Measuring Instrument manuals
STONEX
STONEX R25LR User manual
STONEX
STONEX SPL1 User manual

STONEX
STONEX R80 User manual

STONEX
STONEX R180 User manual
STONEX
STONEX R2W PLUS 500 User manual
STONEX
STONEX R80 User manual

STONEX
STONEX R2 User manual
STONEX
STONEX R2 PLUS User manual
STONEX
STONEX R20 User manual
STONEX
STONEX R6 Series User manual
Popular Measuring Instrument manuals by other brands

Diy Kyoto
Diy Kyoto Wattson manual
Eilon Engineering
Eilon Engineering RON 2501 User guide and instruction manual
Dwyer Instruments
Dwyer Instruments DPGA Series Installation and operating instructions
Anritsu
Anritsu 56100A Operation and programming manual
Macnaught
Macnaught DM100-01 instruction manual
Simpson
Simpson 215 Operator's manual
