STONEX R25LR User manual

R25/R25LR
Total Station
User Manual
www.stonex.it
(August 2018)-Ver.1-Rev.1 –Firmware Version: 1.1.8.9G (20180615)

Dear Customer,
Congratulations! We, STONEX, are proud to present you with these series instrument.
Your total station is a rugged and reliable instrument whose performance and design are not surpassed.
To fully appreciate and protect your investment, we suggest that you take the necessary time to read and fully
understand this manual. We have a dedicated service organization. If the need arises, please don’t hesitate to contact
us.
Thank you for your trust and confidence.

Stonex R25/R25LR Total Station - User Manual 1
Contents
1. Precautions for safety...........................................................................................................................................3
1.1. Note ..............................................................................................................................................................................................................3
1.2. Definition of indication.........................................................................................................................................................................4
1.3. Safety standards for laser ....................................................................................................................................................................5
1.4. About user..................................................................................................................................................................................................6
1.5. Exceptions from responsibility...........................................................................................................................................................6
2. Nomenclature ........................................................................................................................................................8
2.1. Parts of the instrument .........................................................................................................................................................................8
2.2. Keyboard.................................................................................................................................................................................................. 10
3. Preparation before measurement.....................................................................................................................11
3.1. Power on/off........................................................................................................................................................................................... 11
3.2. About battery......................................................................................................................................................................................... 12
3.3. Setting up the instrument................................................................................................................................................................. 14
3.4. Centering and levelling-up............................................................................................................................................................... 14
3.5. Assembling and disassembling for three-jaws tribrach....................................................................................................... 17
4. Basic functions.....................................................................................................................................................18
4.1. Display....................................................................................................................................................................................................... 18
4.2. Menu diagram ....................................................................................................................................................................................... 19
4.3. System information ............................................................................................................................................................................. 23
4.4. How to input number and alphabet ............................................................................................................................................ 25
4.5. Point search ............................................................................................................................................................................................ 26
5. Instrument settings.............................................................................................................................................28
5.1. Basic settings.......................................................................................................................................................................................... 28
5.2. Settings..................................................................................................................................................................................................... 29
5.3. EDM settings .......................................................................................................................................................................................... 33
5.4. Function key ........................................................................................................................................................................................... 36
5.5. Communication port setting ........................................................................................................................................................... 41
5.6. Start-up sequence................................................................................................................................................................................ 42
6. Measurement.......................................................................................................................................................43
6.1. Angle measurement............................................................................................................................................................................ 43
6.2 Distance measurement ....................................................................................................................................................................... 44
7. Pre-setting application.......................................................................................................................................46
7.1. Setting job............................................................................................................................................................................................... 46
7.2. Setting station ....................................................................................................................................................................................... 46
7.3. Setting orientation............................................................................................................................................................................... 47
8. Programs ..............................................................................................................................................................50
8.1. Surveying ................................................................................................................................................................................................. 50
8.2. Stake out.................................................................................................................................................................................................. 52
8.3. Free station ............................................................................................................................................................................................. 55
8.4. COGO ........................................................................................................................................................................................................ 58
8.5. Tie distance............................................................................................................................................................................................. 64
8.6. Area & volume ...................................................................................................................................................................................... 67

Stonex R25/R25LR Total Station - User Manual 2
8.7. Remote height....................................................................................................................................................................................... 69
8.8. Reference line/arc ................................................................................................................................................................................ 71
8.9. Construction........................................................................................................................................................................................... 80
8.10. Lead measure ...................................................................................................................................................................................... 82
8.11. 2D-road.................................................................................................................................................................................................. 89
9. Data management...............................................................................................................................................99
9.1. File management.................................................................................................................................................................................. 99
9.2. Data transfer.........................................................................................................................................................................................103
10. Check and adjustment................................................................................................................................. 105
10.1. The instrument constant...............................................................................................................................................................105
10.2. Plate level............................................................................................................................................................................................106
10.3. Circular level.......................................................................................................................................................................................106
10.4. The optical sight...............................................................................................................................................................................107
10.5. Laser plummet ..................................................................................................................................................................................108
10.6. Vertical cross-hair on telescope.................................................................................................................................................108
10.7. Tilt sensor............................................................................................................................................................................................109
10.8. Horizontal collimation error C....................................................................................................................................................110
10.9. Vertical index error..........................................................................................................................................................................112
10.10. EDM optical axis and the telescope sighting axis error................................................................................................114
11. Technical features ........................................................................................................................................ 116
12. Kit components............................................................................................................................................ 117
Appendix I: Atmospheric correction formula and chart ..................................................................................... 118
Appendix II: Correction for refraction and earth curvature.............................................................................. 120
Appendix III: Technical drawing.............................................................................................................................. 121
Limited warranty standard ...................................................................................................................................... 122
Environmental recycling .......................................................................................................................................... 125

Stonex R25/R25LR Total Station - User Manual 3
1. Precautions for safety
1.1. Note
Don’t collimate the sun directly
Avoid insolating the instrument, and don’t collimate the sun directly for protecting eyes and instrument.
Avoid the vibrations on the instrument
When transporting, keep the instrument in the case and try your best to lighten vibrations.
Carry the instrument
When carrying, the instrument handle must be hold tight.
Check the battery power
Before using it, you should check the power whether it is enough.
Battery maintenance
If the instrument is not used for a long time, the battery should be taken out from the instrument and stored in
separate place. Meantime, the battery should be charged every month.
Take out the battery
It is not suggested to take out the battery when the instrument is on, otherwise, the stored data may be lost, so it
is better to replace the battery after having powered off the instrument.
Set up the instrument on the tripod
When using it please insure the connection between tripod and instrument is firm. It is better to work with wooden
tripod for the measurement accuracy.
Assemble the tribrach on the instrument
The setting of tribrach would influence the accuracy. The tribrach should be checked frequently, the screw which
connects the tribrach and alidade must be locked tightly. And the central fixing screw should be tight.
High temperature condition
Don’t put the instrument in high temperature condition for a long time, it is bad for the instrument performance.
Temperature changing sharply

Stonex R25/R25LR Total Station - User Manual 4
The sharp temperature changing on the instrument or prism will shorten the distance measurement range, for
example, after taking the instrument out from a warm car to a cold condition, wait for some time, it can be used
when it adapts the surrounding condition.
The noise from the instrument
While the instrument working, it is normal hearing the noise from instrument motor. This will not affect the
instrument work.
Stored data responsibility
STONEX should not be held liable for the lost data because of wrong operation.
1.2. Definition of indication
For the safe of your product and prevention of injury to operators and other persons as well as prevention of
property damage, items which should be observed are indicated by an exclamation point within a triangle used with
WARNING and CAUTION statements in this manual.
The definitions of the indication are listed below. Be sure you understand them before reading the manual’s main
text.
WARNING:
Ignoring this indication and making an operation error
could possibly result in death or serious injury to the
operator.
CAUTION:
Ignoring this indication and making an operation error
could possibly result in death or serious injury to the
operator.
WARNING:
•Do not perform disassembly or rebuilding. Fire, electric shock or burns could result. Only STONEX
authorized distributors can disassemble or rebuilt.
•Do not collimate the sun directly. The eye injury or blind could result.
•Do not cover the charger. Fire could be result.
•Do not use defection power cable, socket or plug. Fire, electronic shock could result.
•Do not use wet battery or charger. Fire, electronic shock could result.
•Do not close the instrument to burning gas or liquid, and do not use the instrument in coal mine. Blast
could be result.

Stonex R25/R25LR Total Station - User Manual 5
•Do not put the battery in the fire or high temperature condition. Explosion, damage could result.
•Do not use the battery which is not specified by STONEX. Fire, electric shock or burn could result.
•Do not use the power cable which is not specified by STONEX. Fire could result.
•Do not short circuit of the battery. Fire could result.
•When this product encounters disturbance of severe Electrostatic Discharge, perhaps it will have some
degradation of performance like switching on/off automatically and so on.
CAUTION:
•Do not touch the instrument with wet hand. Electric shock could result.
•Do not stand or seat on the carrying case, and do not turn over the carrying case arbitrarily, the
instrument could be damaged.
•Be careful of the tripod tiptoe when setup or move it.
•Do not drop the instrument or the carrying case, and do not use defective belt, agraffe or hinge.
Instrument damage could result.
•Do not touch liquid leaking from the instrument or battery. Harmful chemicals could cause burn or
blisters.
•Please assemble the tribrach carefully, if the tribrach is not stable, series damage could result.
•Do not drop the instrument or tripod, series damage could result. Before use it, check if the central
screw is tight.
1.3. Safety standards for laser
R25 series adopt the class of Laser Product according to IEC Standard Publication 60825-1 Amd. 2:2001. According
this standard, EDM device is classified as Class 3R Laser Product when reflect less measurement is selected, when
the prism and reflective sheet is selected as target, the output is equivalent to the safer class 1. Follow the safety
instructions on the labels to ensure safe use.
CAUTION: CLASS 3R LASER RADIATION WHEN OPEN
AVOID DIRECT EYE EXPOSURE.
CAUTION: CLASS 2 LASER RADIATION WHEN OPEN
DO NOT STARE INTO THE BEAM
Stonex R25/R25LR Total Station - User Manual 6
NOTE FOR SAFETY:
WARNING
•Never point the laser beam at other’s eyes, it could cause serious injury.
•Never look directly into the laser beam source, it could cause permanent eye
damage.
•Never stare at the laser beam, it could cause permanent eye damage.
•Never look at the laser beam through a telescope or other optical devices, it
could cause permanent eye damage.
1.4. About user
This product is for professional use only!
1. The user is required to be a qualified surveyor or have a good knowledge of surveying, in order to
understand the user manual and safety instructions, before operating, inspecting or adjusting.
2. Wear required protectors (safety shoes, helmet, etc.) when operating.
1.5. Exceptions from responsibility
•The user of this products is expected to follow all operating instructions and make periodic checks of
the product’s performance.
•The manufacturer assumes no responsibility for results of a faulty or intentional usage or misuse
including any direct, indirect, consequential damage, and loss of profits.
•The manufacturer assumes no responsibility for consequential damage, and loss of profits by any
disaster, (an earthquake, storms, floods, etc.).
•The manufacturer assumes no responsibility for any damage, and loss of profits due to a change of
data, loss of data, an interruption of business etc., caused by using the product or an unusable product.
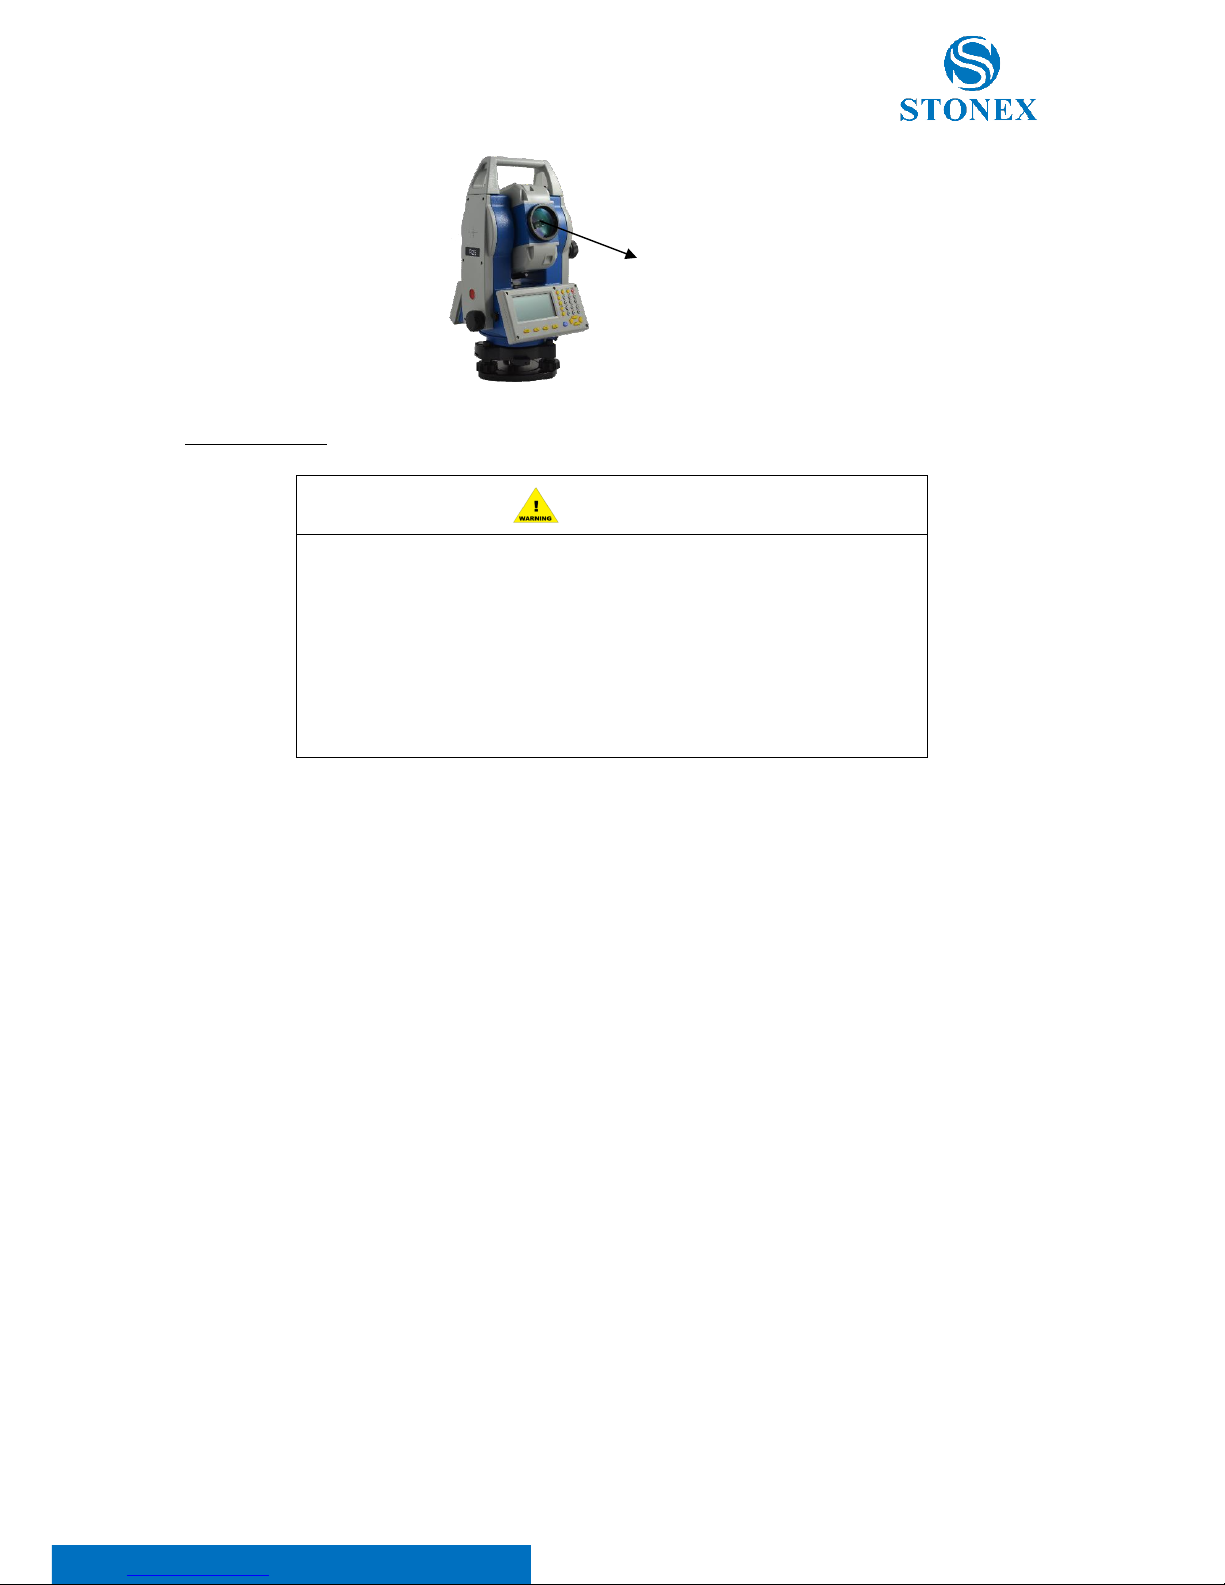
Laser emitter

Stonex R25/R25LR Total Station - User Manual 7
•The manufacturer assumes no responsibility for any damage, and loss of profits caused by usage
except for explained in the user manual.
•The manufacturer assumes no responsibility for damage caused by wrong transport, or action due to
connecting with other products.

Stonex R25/R25LR Total Station - User Manual 8
2. Nomenclature
2.1. Parts of the instrument
Keypad
SD card slot
& USB port
Vertical motion
screw
Eyepiece
Screen
Instrument
height mark
Handle screw
Optical sight
Plate level
Handle
Tribrach
Focusing knob
Battery

Stonex R25/R25LR Total Station - User Manual 9
Vertical motion
screw
Instrument
height mark
Objective
RS-232C port
Leveling screw
Tribrach clamp
Circular level
Model label
Measure
button
Horizontal
motion screw
Stonex R25/R25LR Total Station - User Manual 10
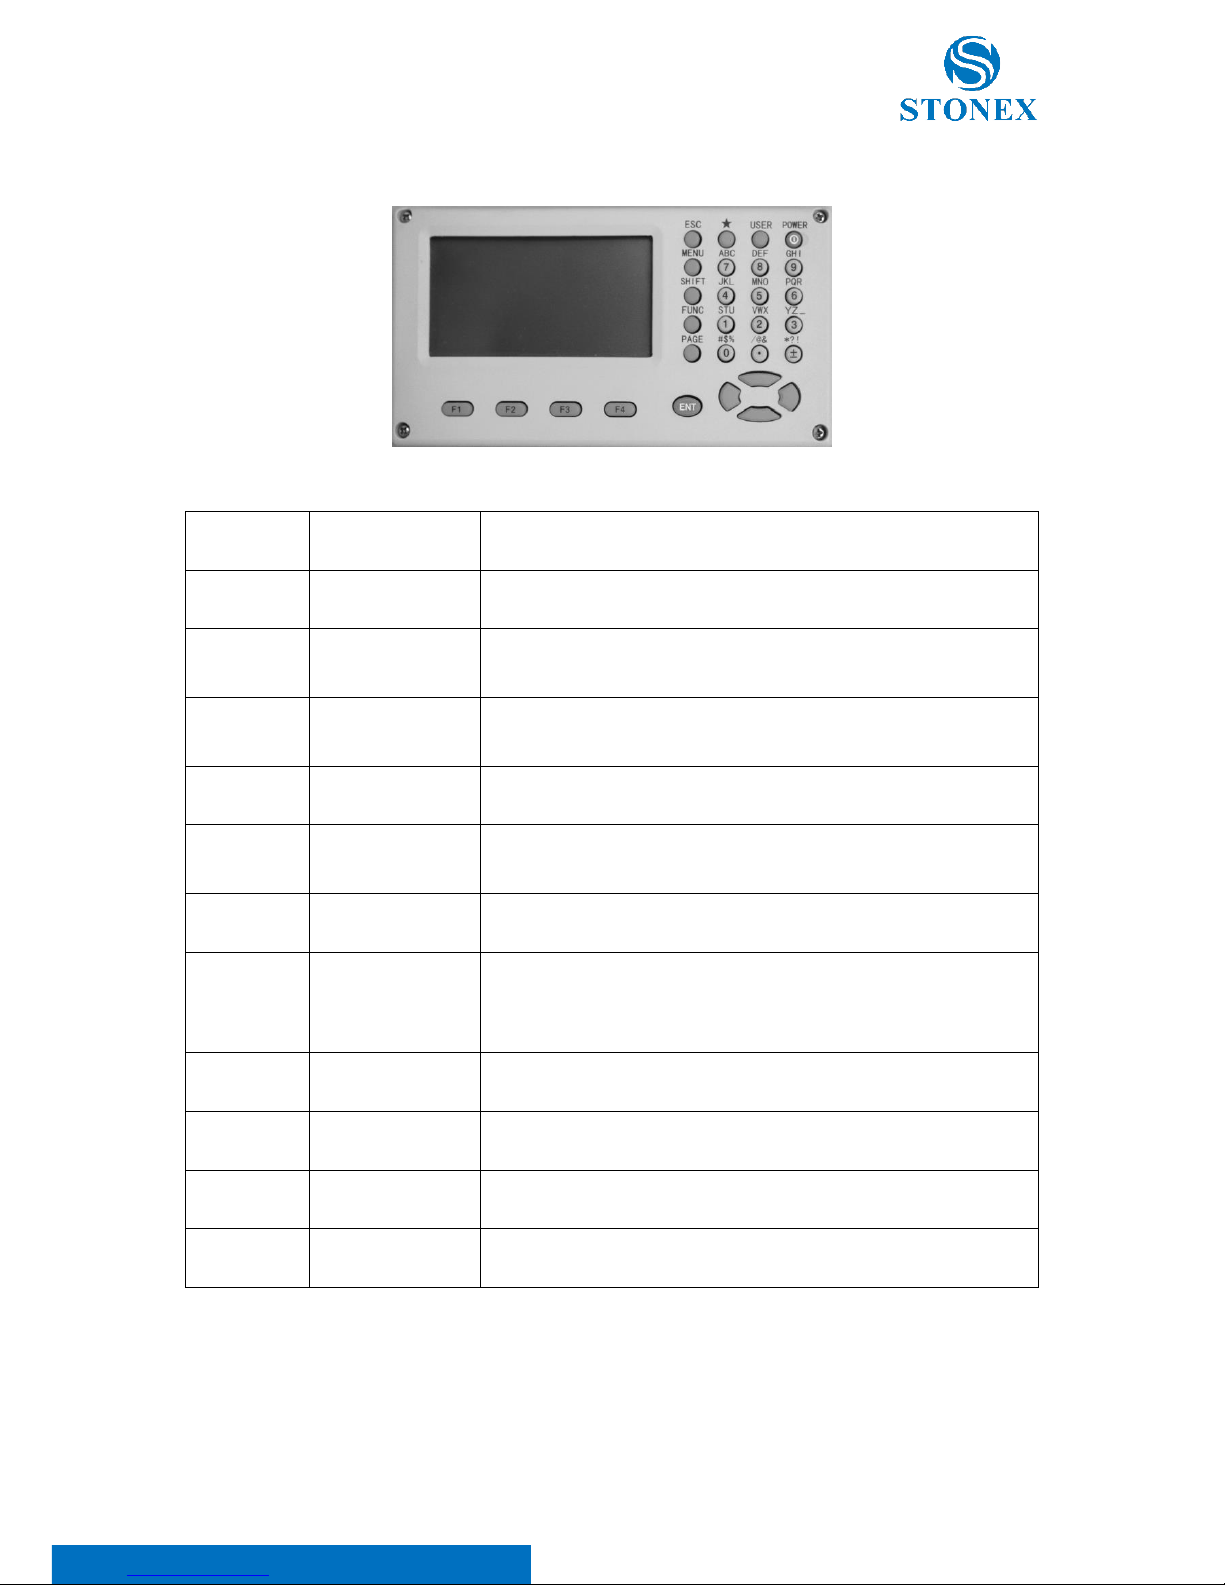
2.2. Keyboard
Fixed Keys
Name
Functions
F1~F4
Select key
Select the functions matching the softkeys
0~9/ A~!
Alphanumeric
keypad
Enter letters numerical values or other characters
SHIFT
Shift key for
character entry
•Shift between number and alphabet when inputting
•Shift targets model when measuring
★
Star key
Essential configurations (including illumination etc) can be set here
USER
User key
Each function from the FUNC menu can be set as the {USER} key (see
5.4. Function key).
PAGE
Page key
Scroll to next page when a dialogue consists of several pages.
MENU
Menu key
Access comprehensive menu display including measuring programs,
specific settings, the data manager, adjustments, communications
parameters, system information and data transfer.
ENT
Enter key
Confirm an entry or selection
ESC
Escape key
Quit a screen or edit mode without saving changes.
FUNC
Function key
Perform sorts of fast function settings defined by program screen
POWER
Power key
Turn on/off the instrument
Stonex R25/R25LR Total Station - User Manual 11
3. Preparation before measurement
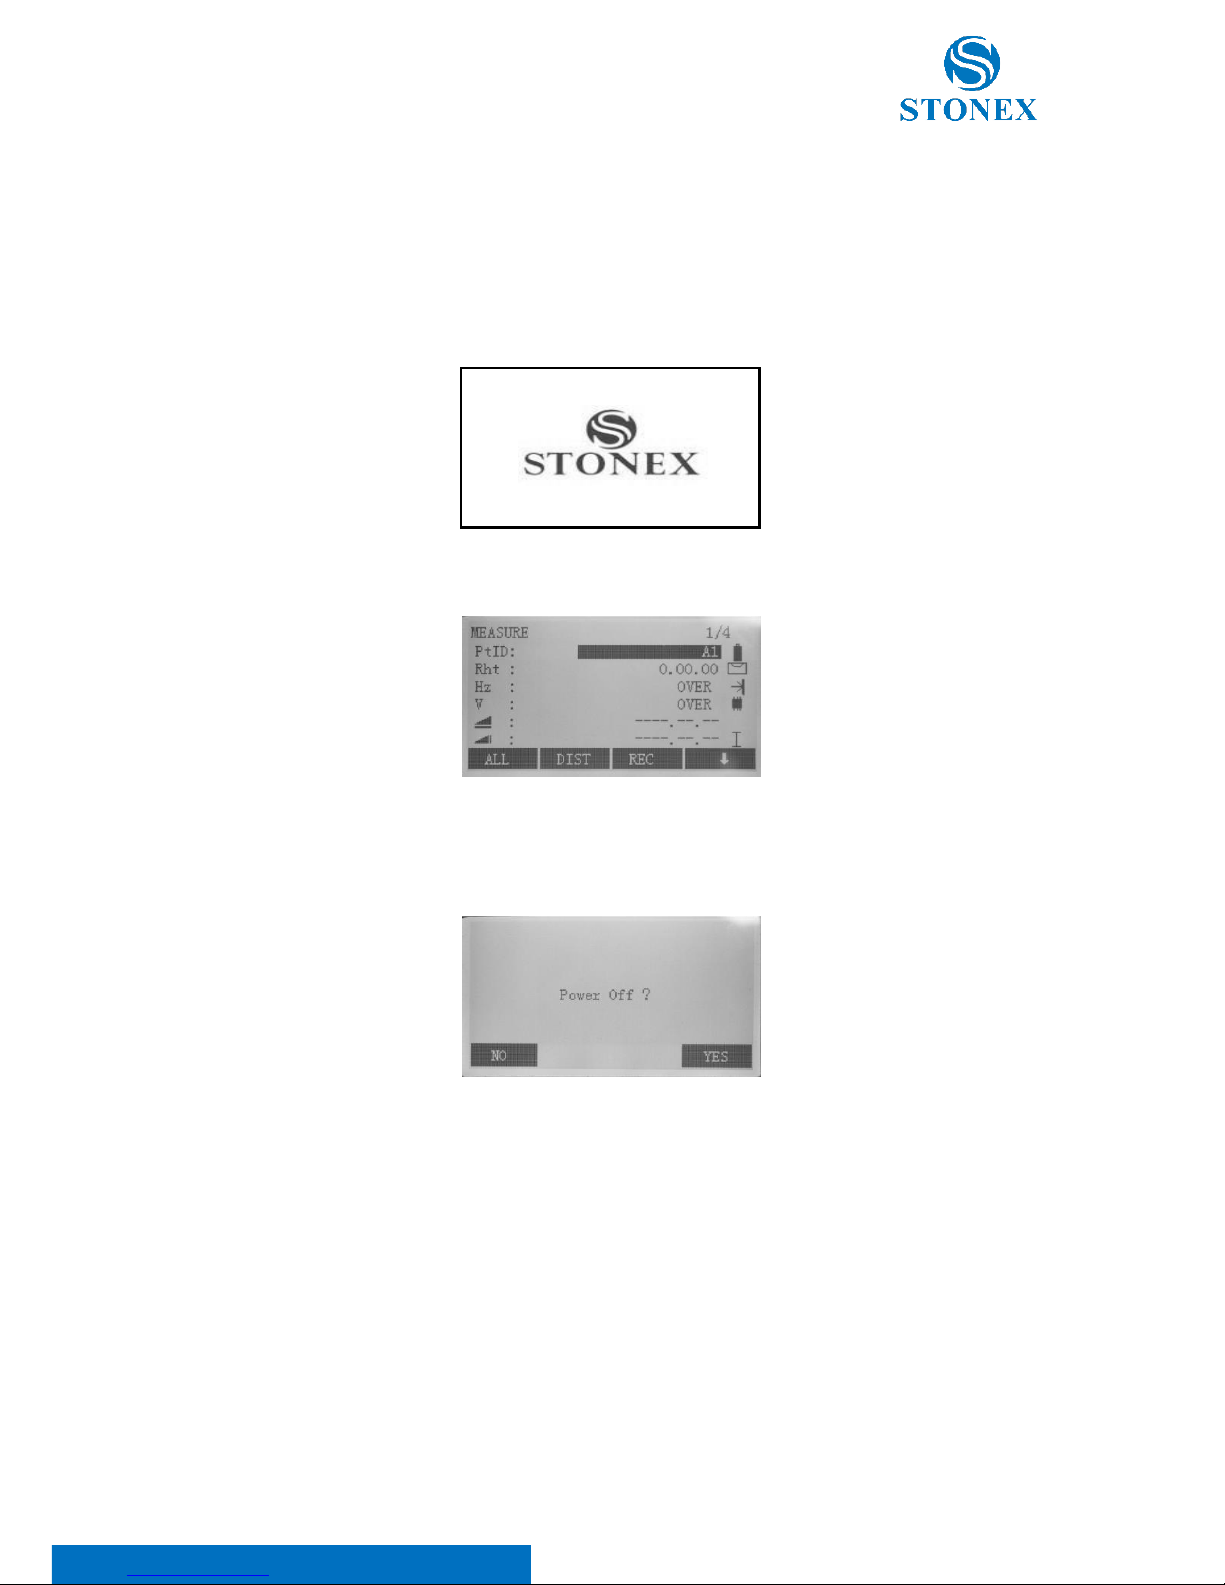
3.1. Power on/off
Power on
Confirm the instrument is leveling, then press the {Power} red key and it will be turned on in no time.
The instrument will display the status screen.
Power off
Press the {Power} key again and the screen will remind whether to power off.
Stonex R25/R25LR Total Station - User Manual 12
3.2. About battery
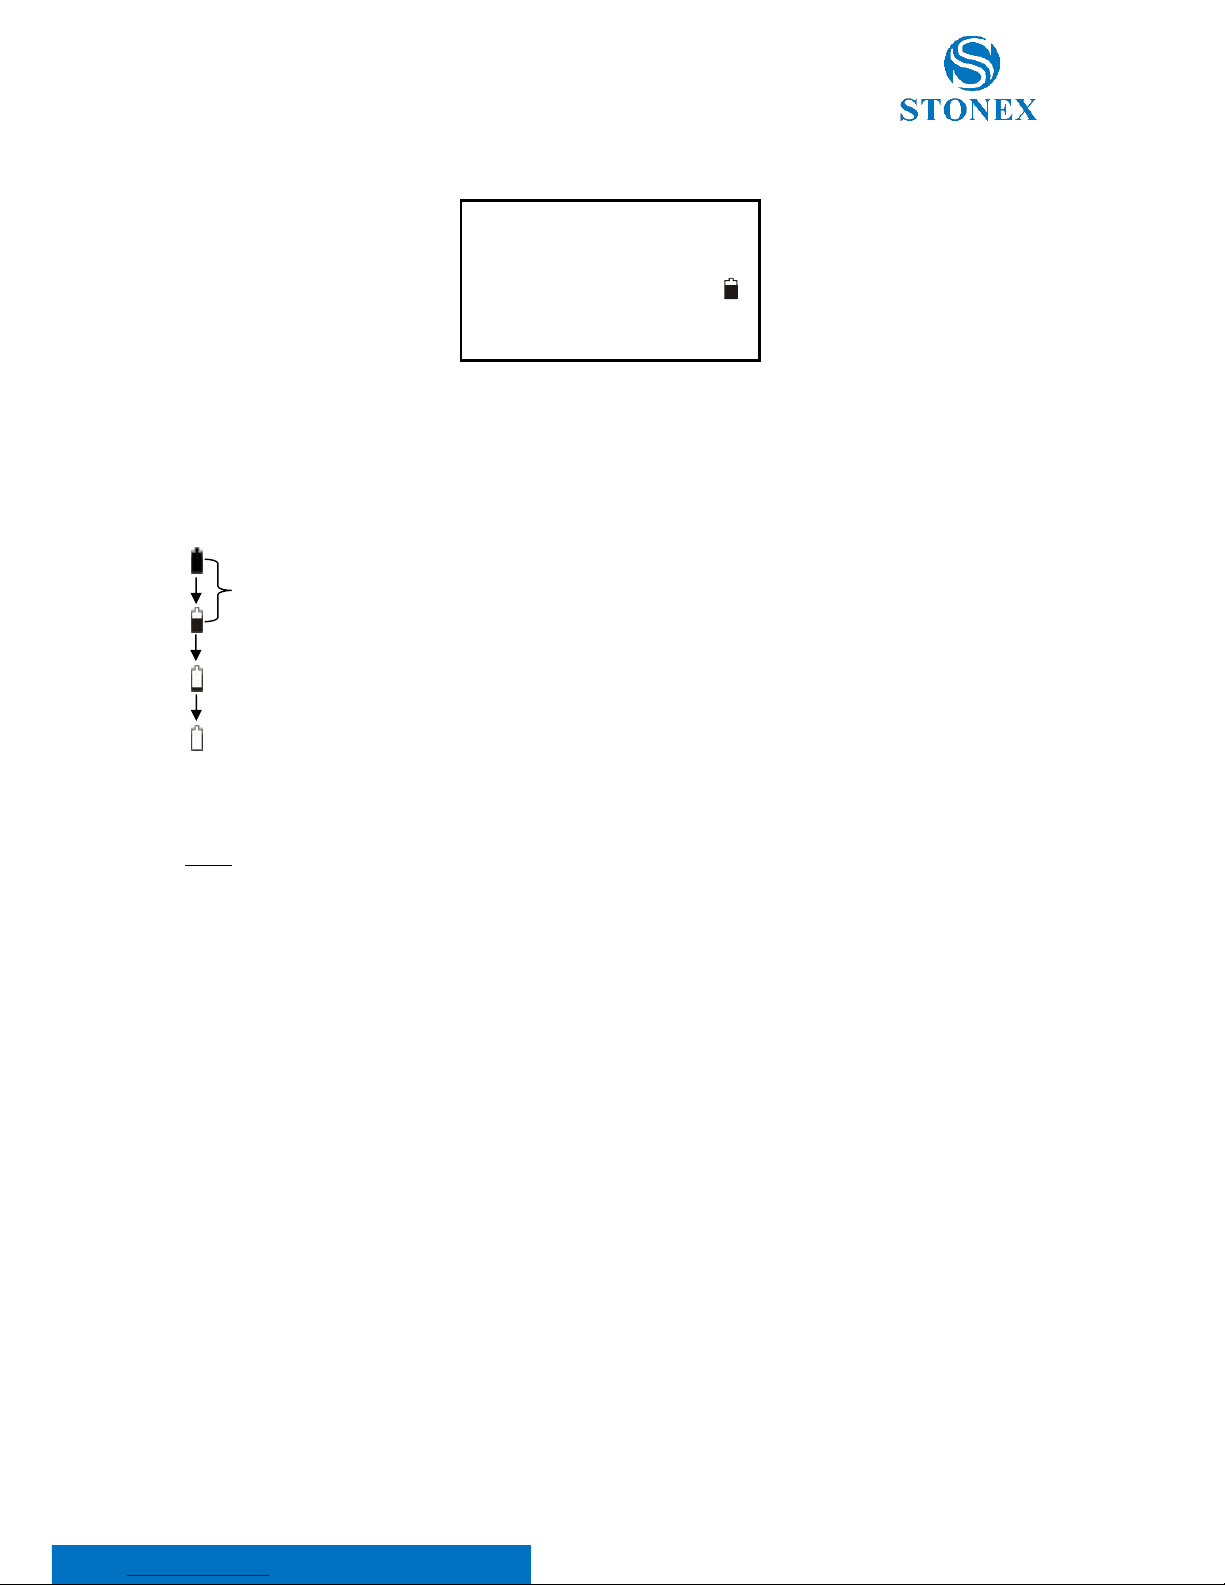
3.2.1. Battery power symbol
NOTE:
•The working time of battery will be affected by many factors, such as ambient temperature, recharging
time, recharging and discharging times. On the data safe side, we suggest the users recharge the
battery full or prepare several full batteries before operation.
•The battery symbol only indicates power capability for current measurement mode. The power
consumption in distance measurement mode is more than in angle mode, if the instrument enters the
distance measurement mode from angle mode, the power maybe auto-off because of lower battery.
•The symbol only indicates the supply power but not the instantaneous power change. And if the
measurement mode changes, the symbol will not show the power’s decrease or increase immediately.
•It is suggested to check every battery power before field work.
Measurement is impossible, it is necessary to replace or recharge battery
The battery is lower, it is better to replace or recharge it
Measurement is possible
Stonex R25/R25LR Total Station - User Manual 13
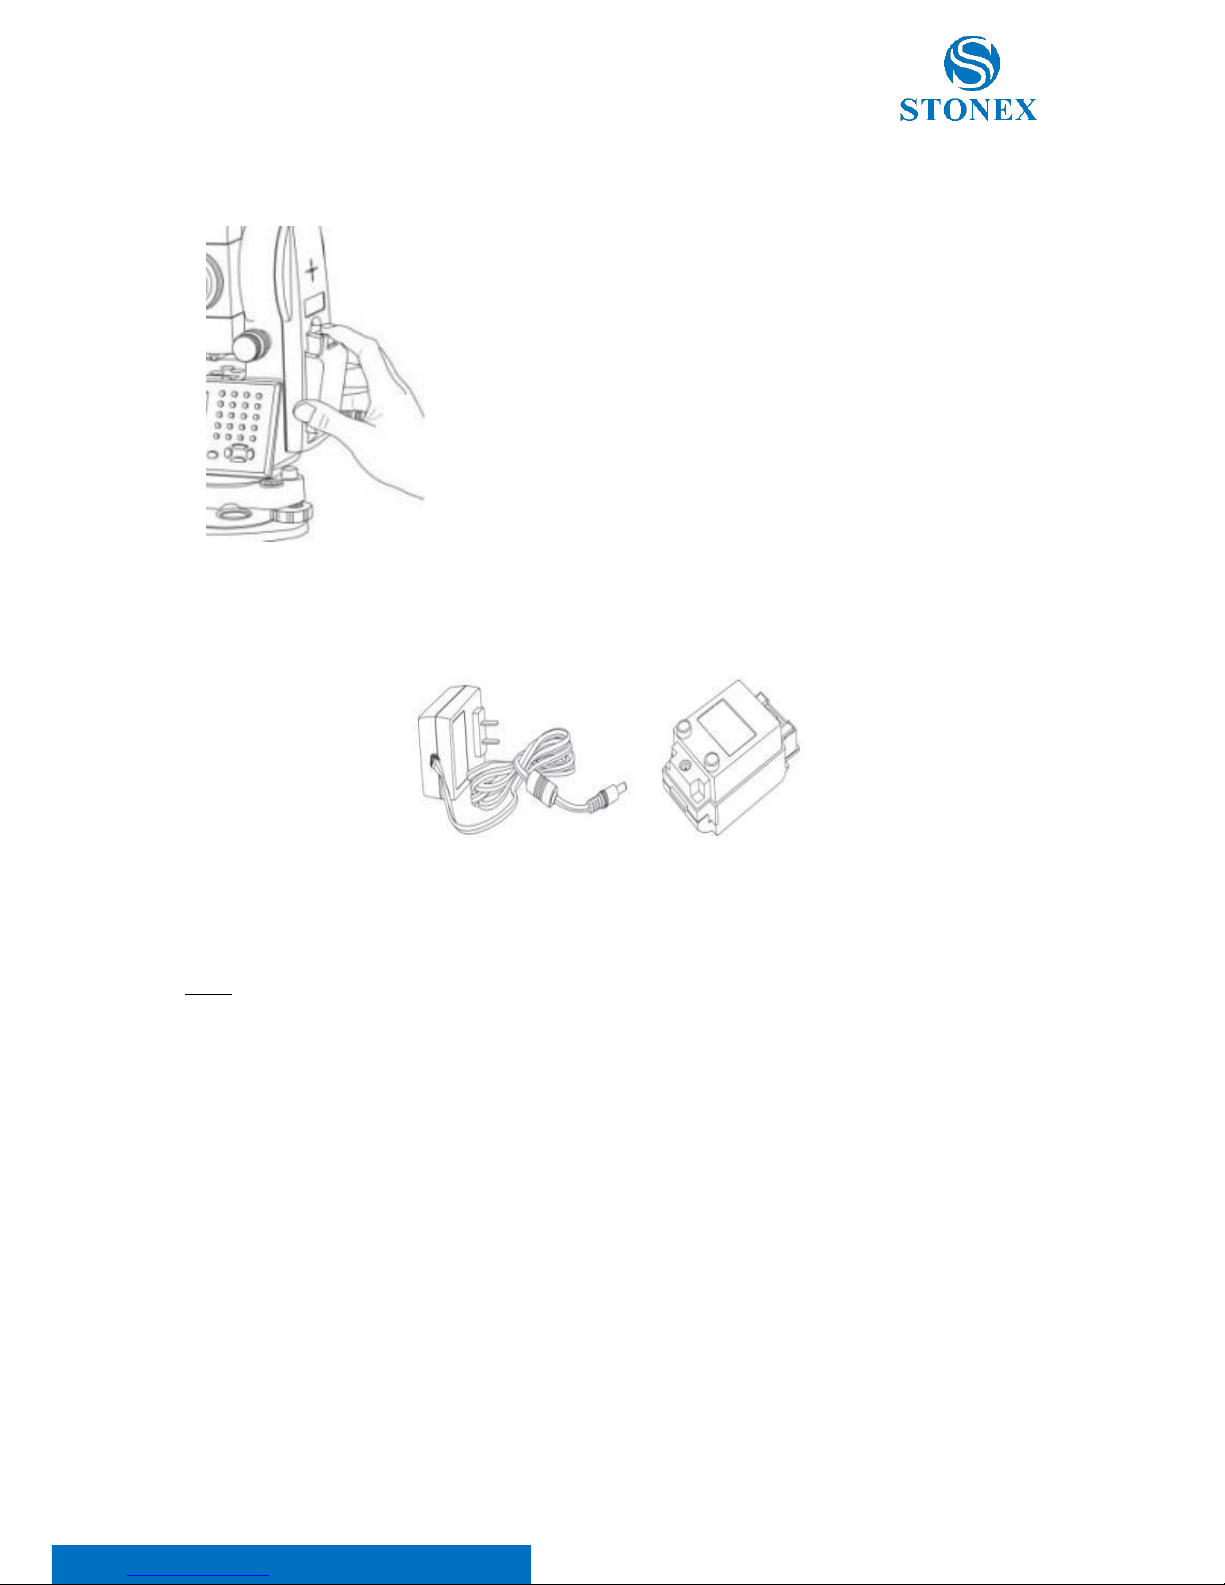
3.2.2. Replace the battery
3.2.3. Recharge the battery
As above figures show, connect the charger and the battery, then plug the charger into the outlet of 100V-240V AC
power supply, recharging will begin.
NOTE:
•For a new (or long time no use) battery, in order to fully extend its capacity, it is absolutely necessary
to carry out 3 to 5 complete charging/discharging cycles, and the charging time must be 10 hours at
least each time.
•The indicator light on the charger will illuminate three separate colors for varies mode conditions:
oSolid Red Light —indicates that the charger is working;
oSolid Green Light —indicates that the charge has finished;
oFlashing Red Light —indicates no battery on charging; poor connection or some problems exist.
•It is recommended to continue charging for 1 or 2 hours after the light turns green.
•Once the red-light flashes constantly after the charger is plugged into the outlet of 100V-240V AC
power supply, please remove the battery and reconnected it after 3 or 5 min.
1) Remove the battery
-Press the button downward as shown left;
-Remove the battery by pulling it toward you.
2) Mount the battery
-Insert the battery to the instrument;
-Press the top of the battery until you hear a Click.

Stonex R25/R25LR Total Station - User Manual 14
3.3. Setting up the instrument
Set up the tripod first: extend the extension legs to suitable lengths and
tighten the screws on the midsections. Make sure the legs are spaced at
equal intervals and the head is approximately level. Set the tripod so that the
head is positioned over the surveying point. Make sure the tripod shoes are
firmly fixed in the ground.
Mount the instrument on the tripod head. Supporting it with one hand,
tighten the centering screw on the bottom of the unit to make sure it is
secured to the tripod.
3.4. Centering and levelling-up
Basic levelling-up with the circular level
Move the foot screws A and B in opposite direction till the circular
bubble is perpendicular to a line shaped with screw A and B. The
direction of rotation in left thumb indicates the movement of the
circular bubble.

Stonex R25/R25LR Total Station - User Manual 15
Move the bubble to the center of the circle by turning screw C.
Accurate levelling-up with the plate level
Loosen the horizontal motion clamp and turn the instrument till the
plate level is parallel to a line shaped with screws A and B. Adjust the
screws A and B to make the bubble in the center of the level.
Turn the instrument approximately 90°. Adjust screw C, till the bubble
in the center of the level.
Repeat above steps until the bubble remains in the center of the plate level while the instrument is rotated to
any position.
Accurate levelling-up with electronic level on screen
It is convenient for R25 series to level-up with electronic level, especially when it is difficult to observe the circular
level and plate level.
Firstly, power on the instrument, press {FUNC} button, and then select “F1(Level/Plummet)”. The electronic level
displays on screen.
Secondly, level it by turning three-foot screws and ensure the bubble is in the plate level. Make sure that the black
spot is in the center.

Stonex R25/R25LR Total Station - User Manual 16
NOTE:
•On this menu you can turn on/off the X/Y compensator by pressing ◄/►keys.
•If the instrument is equipped with laser plummet, opening this menu, the laser plummet adjusting
bar will display. With pressing ▲/▼keys the laser lightness can be adjusted.
Centering with laser plummet
External influences and the surface conditions may lead to the requirement of the adjustment of the laser intensity.
The laser can be adjusted in 25% steps as required. If the instrument is equipped with laser plummet, after activating
electronic level, the laser plummet adjusting bar will display. With pressing ▲/▼keys the laser lightness can be
adjusted.
Press the {FUNC} key, and then click F1 or (1) keys to enter the display shown in the upper figure. With pressing
▲/▼keys you can turn on or off laser plummet and set it as four levels of brightness. Thus, that laser emitting
downwards can be seen.
Loosen the center screw of tripod, and move the base plate on tripod head until the laser spot coincides with ground
mark point. Then tighten the center screw.
Repeat leveling and two steps until the instrument keeps leveling and the laser spot coincides with ground mark
point when rotating alidade of instrument in any direction.
After centering, please turn off laser plummet to save power.

Stonex R25/R25LR Total Station - User Manual 17
3.5. Assembling and disassembling for three-jaws tribrach
It is convenient to assemble or disassemble the instrument from tribrach by loosen or tighten the tribrach clamp.
Disassemble
Rotate the tribrach clamp anticlockwise until the lever is loosen.
One hand holds up the tribrach, another hand holds the carry handle of the instrument and lift out the instrument
from the tribrach.
Assemble
Put the instrument into the tribrach lightly, let the communication port against in the indentation of the tribrach.
Rotate the tribrach clamp clockwise until the lever is tighten.
NOTE: Fix the tribrach clamp: if the instrument doesn’t need assembly or disassembly from tribrach frequently, it is
necessary to fix the tribrach clamp by fixed screw to avoid the disassembly by accident.
Screw out the fixed screw by driver to fix the clamp.
NOTE: These designs, figures and specifications are subject to change without notice. We shall not be held liable for
damages resulting from errors in this instruction manual.
Positing block
Positing groove
Tribrach clamp
Fixed screw

Stonex R25/R25LR Total Station - User Manual 18
4. Basic functions
4.1. Display
R25 series is equipped with two large LCD screens (240×128dots). The LCD could display 8 lines with 24 characters
per line.
NOTE: Do not touch the screen with sharp things.
Once you switch on the instrument, the measure mode is shown on the display directly. As alternative, it is possible
to set another page (such as the electronic bubble display) at every start, see 5.6. Start-up sequence for more
information.
Status screen
Symbols:
Function
Symbol
Description
Current power
Level of the remaining battery
Compensator mode
The compensator is on
The compensator is off
Target type
Distance measurements with prism
Long range distance measurements with prism
Distance measurements with sheet
Distance measurements with no prism
Compensator mode
Page
Current power
Target type
Storage media type
Telescope position
Bluetooth mode
This manual suits for next models
1
Table of contents
Other STONEX Measuring Instrument manuals


