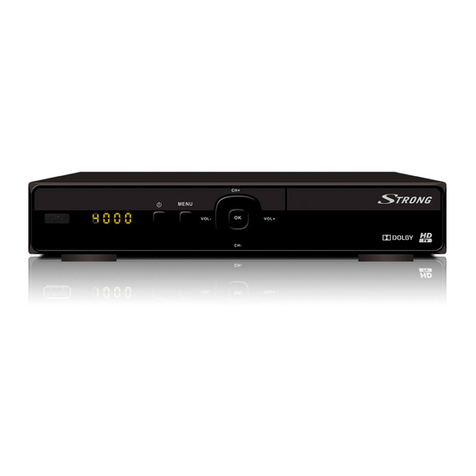
Strong SRT 7335 CI User manual


PART 1 • English
1
English
TABLE OF CONTENTS
1.0 INTRODUCTION 2
1.1 Safety Instructions 2
1.2 Storage 3
1.3 Equipment Set-up 4
1.4 Features & Accessories 4
2.0 YOUR RECEIVER 5
2.1 Front Panel 5
2.2 Rear Panel 6
2.3 Remote Control Unit 7
3.0 CONNECTIONS 9
3.1 Connecting to Satellite Dish 9
3.2 Connecting to TV & VCR 10
3.3 Connecting to Digital Audio Amplifier 11
3.4 Connecting to computer by serial cable 11
3.5 Connecting to external USB - Harddisk 12
4.0 STARTING UP FOR THE FIRST TIME 12
4.1 Language Selection 12
4.2 Select Satellite 12
4.3 Dish adjustment 13
4.4 Channel set-up 13
5.0 MAIN MENU 13
5.1 Channel Organiser 13
5.2 Satellite Search 15
5.3 Installation 18
5.4 Timer 21
5.5 Application 21
5.6 Common Interface 22
6.0 OTHER OPERATIONS 23
6.1 Program Guide (EPG) 23
6.2 Zapping and information banners 23
6.3 Channel list and view mode 23
6.4 PDR functions 24
A.1 TROUBLESHOOTING 26
A.2 SPECIFICATIONS 27

PART 1 • English
2
1.0 INTRODUCTION
1.1 Safety Instructions
The lightning flash with arrowhead symbol within an equilateral triangle is intended to alert the user to
the presence of not isolated dangerous voltage with the inside of the product that may be of sufficient
magnitude to constitute a risk of electric shock to persons. The exclamation point within an equilateral
triangle is intended to alert the user to the presence of important operating and servicing instructions in
the literature accompanying the appliance.
Read All Instructions - Before you use the product, read all operation instructions, For more information
on accessories such as the lithium ion battery, refer to the manuals provided with those products.
Save These Instructions- Save all safety and operating instructions for future reference.
Heat Warnings- Read carefully and follow all warning labels on the product and those described in the instructions.
Follow Instructions- Follow all instructions provided with this product.
Cleaning-Always unplug this product from the wall outlet before cleaning. Use only a damp cloth for cleaning.
Never use any type of liquid or aerosol cleaner, or any type of organic solvent to clean this product.
Attachments-For your safety, and to avoid damaging the product, use only accessories recommended by STRONG.
Water and Moisture- Never use this product around water (near a bathtub, kitchen sink, laundry tub, wet
basement. swimming pool or in the rain)
Location-To avoid damage to the product and prevent personal injury, never place this product on an
unstable stand, tripod, bracket, Follow the instructions that describe how to safely mount the product,
and use only the mounting devices recommended by the manufacturer.
Power Sources-Connect this product only to the power source described on the product label. If you are
not sure about the type of power supply in your home, consult your local power company.
Refer to instruction pages for information on using the product with a battery.
Grounding, Polarization- If this product is used with a specified AC adapter, the adapter may be equipped
with a polarized alternating current line plug (a plug with one blade wider than the other). This safety
feature allows the plug to fit into the power outlet only one way, If you cannot insert the plug into the wall
outlet, pull it out, reverse it, and have the receptacle replaced.
Protecting the Power Cord - The power supply cord should be placed so it will not be walked on. Never
put a heavy object on the power cord or wrap it around the leg of a table or chair. Keep the area around
the power cord connection points, at the power outlet, and at the product connection, free of all AC
adapter or accessory power cords.

PART 1 • English
3
English
GENERAL PRECAUTIONS - SAFETY PRECAUTIONS
Lightning- If a lightning storm occurs while using a specified AC adapter, remove it from the wall outlet
immediately. To avoid damage from unexpected power surges, always unplug the AC adapter from the
power outlet and disconnect it from the receiver when the receiver is not in use.
Overloading-Never overload wall outlets, extension cords, power strips, or other power connection
points with too many plugs.
Foreign Objects, Liquid Spillage-To avoid personal injury caused by fire or electrical shock from contact
with internal high voltage points, never insert a metal object into the product. Avoid using the product
where there is a danger of spillage.
Heat-Never use or store this product near any heat source such as a radiator heat register, stove, or any
type of equipment or appliance that generates heat, including stereo amplifiers.
Servicing-Refer all servicing to qualified personnel. Attempting to remove the covers or disassemble the
product, could expose you to dangerous high voltage points.
Damage Requiring Service- If you notice any of the conditions described below while using a specified AC
adapter. unplug it from the wall outlet and refer servicing to qualified service personnel:
1. Liquid has been spilled onto the product or some other object has fallen into the product.
2. The product has been exposed to water.
3. The product does not operate normally despite following operating instructions. Adjust only the
controls described in the operating instructions ad improper adjustment of other controls could
damage the product and require extensive repair word by a qualified technician.
4. The product has been dropped or damaged in any way.
5. The product exhibits distinct change in performance.
Replacement Parts-When replacement parts are required, mare sure that the authorized service centre
uses only parts with the same characteristics as the originals, as recommended by the manufacturer.
Unauthorized substitution of parts could result in fire, electrical shock, or create other hazards.
Safety Check-Upon completion of servicing or repairs, ask the service technician to perform safety checks
to determine that the product is in good working order.
Apparatus shall not be exposed to dripping or splashing and no objects filled with liquids, such as
vases, shall be placed on the apparatus. Where the mains plug or all-pole mains switch is used as the
disconnect device, the disconnect device shall remain readily operable.
1.2 Storage
Your receiver and its accessories are stored and delivered in a packaging designed to protect against
electric shocks and moisture. When unpacking it, make sure that all the parts are included and keep the
packaging away from children.
When transporting the receiver from one place to another or if you are returning it under warranty make
sure to repack the receiver in its original packaging with its accessories. Failing to comply with such
packaging procedures could void your warranty.

PART 1 • English
4
1.3 Equipment Set-up
We recommend you consult a professional installer to set up your equipment. Otherwise, please follow
the instructions below:
n Refer to the user manual of your TV and your antenna.
n Make sure that Audio/Video cables and outdoor components are in a good condition and the
SCART connections are well shielded.
This manual provides complete instructions for installing and using this receiver. The following symbols
will serve as follow.
WARNING: Indicates warning information.
TIPS: Indicates any other additional important or helpful information.
Move to Represents a menu item within a window.
1.4 Features & Accessories
n HDTV receiver for all digital Free-To-Air TV and Radio programs via satellite.
n 2 Common Interface slots compatible to most popular Conditional Access Modules
(e.g. CryptoWorks, Conax, Viaccess, Irdeto...)
n Exceptional bright and clear TV pictures and excellent sound in DVD quality.
n Austrian and German channels pre-programmed.
n Quick and easy installation & user-friendly menu.
n 5 000 channels memory capacity.
n 4 Favourite lists for TV and Radio.
n 7 Timers with 3 modes (daily , weekly, once)
n Zoom functions for TV pictures.
n Teletext via receiver, multi-lingual subtitling and audio track support.
n Display showing channel number or time.
n Electronic TV Program Guide for up to 3 days.
n Parental lock function and rating control.
n Multi-lingual support on screen menu (OSD).
n USB 2.0 interface for external storage devices provides possibilities for high speed Software Update,
Channel back up, Channel restore, Play back of JPEG pictures and other future coming functions
n Digital sound through optical and coaxial output (S/PDIF).
n Fully DVB compliant, supports MPEG-2 (SD and HD), MPEG-4 (SD and HD).
n Multiple Video Outputs: HDMI, Component(Y, Pb, Pr), SCART (RGB, CVBS), Video RCA.
Accessories:
n 1 x User Manual
n 1 x Remote control unit
n 2 x Batteries (AAA type)
NOTE: The batteries should not be recharged, disassembled, electrically short-circuited or be
mixed or used with other types of batteries

PART 1 • English
5
English
2.0 YOUR RECEIVER
2.1 Front Panel
Figure 1
1. POWER
Switches the receiver power On and Standby.
2.
MENU
Gets into Main Page screen.
3.
OK
Executes the selected item.
4.
pq CH Up/Down
Channel up/down or selects the item of Menu.
5.
tu VOL Up/Down
Volume up/down or selects the item of Menu.
6.
Stand-by LED
Light up red when receiver is in stand-by mode. Off when receiver is in awake mode.
7.
USB LED
Light up green when USB device is connected to USB connector at the back of the receiver.
8.
4 digits indicator
In awake mode displays channel number. In stand-by mode displays current time/
9. Front panel flap
9a 2 Common Interface slots
9b Smart card reader for Conax smart card

PART 1 • English
6
2.2 Rear Panel
1. SAT IN
To connect the coaxial cable from your LNB on the satellite dish to this connector.
2. SAT OUT
Gives you the possibility to connect an extra satellite receiver (analogue or digital).
3.
TV SCART
Use this connector to connect your receiver with your TV set using a SCART cable.
4.
DVD/ VCR SCART
Use this connector to connect your receiver to your video recorder using a SCART cable.
When the receiver is in stand-by mode video/audio signals from your VCR will be looped
through the receiver to your TV set.
5. Y, Pb, Pr
Connects to Component input of TV.
6.
VIDEO
This connector has a constant video signal for additional VCR-connections.
7.
Audio Left/Right
Outputs for Audio Left (White) and Right (Red)
8a. S/PDIF Coax
Output for connecting to a digital audio amplifier
8b.
S/PDIF OPTICAL
Output for connecting to a digital audio amplifier.
9.
HDMI
Output for connecting to HDMI jack of TV.
10.
RS-232 Serial Port
This serial port can be used to connect your PC to your receiver to download new software
versions to your receiver.
11.
USB
Connects to USB device.
12.
Power ON/OFF Switch
Powers on/off.
13. Power Cord
Your receiver requires a current of 90 ~ 240 V AC (Auto-selectable), 50/60 Hz ±5 %. Make
sure to check the power specification before connecting your receiver to the wall outlet.

PART 1 • English
7
English
Important: Connect all components before plugging any power cords into the wall outlet and
switching on the receiver and TV set. Always turn on the receiver first, then the TV.
2.3 Remote Control Unit
1.
Enables or disables the audio.
2.
Switches the receiver between operation and standby mode.
3. RCL
RECALL function to select the previously viewed channel.
4. HDMI
Changes the resolutions of video (Switch HD type)
5. TV/RADIO
Switches between TV and Radio.
6. AV/TV
Selects the TV, VCR, STB (receiver output) or AUTO
(Automatic) mode for the TV SCART output.
7. 0 ~ 9
Select the TV or Radio service channels and individual menu.
8. FAV
Toggles the selected favourite mode.
9. SAT
Displays the Satellite list
10. EPG
Displays the TV or Radio program guide (Electronic
Program Guide).
11. TEXT
Enables teletext mode.
12. AUDIO
Displays the list of available audio languages and audio modes.
13. SUB
Displays the list of available subtitle languages.
14.CH pq
Changes channels or moves to the item in the menu.
15.VOL tu
Adjust the volume or moves to left or move item in the menu.
16 .MENU
Displays the main menu on screen. In menu mode you get
back to viewing mode.
17. EXIT
Returns to the previous step in menu or cancel command /application.

PART 1 • English
8
18. INFO
Displays the program information box on the screen.
19. V+/V-
Turns volume up or down.
20. CH+/CH-
Changes channels up or down.
21.
Moves up a page in the channel list. In viewing mode selects zoom In/out.
22.
Moves down a page in the channel list. In viewing mode selects zoom In/out.
23. STOP
Stops recording, timeshift or playback.
24. PAUSE
Timeshift deactivated: Pauses the playing picture or go again to normal mode.
Timeshift activated: Starts the function. Further it is used to pause the playback.
25. RECORD
Records the program.
26. PLAY
Starts the playback assumed that recording/s were already done. Then you can select a file
from the Recording File List.
27. REWIND
Starts reverse playback and changes the speed of reverse playback
28. F/F
Starts fast forward or fast motion playback and changes the speed of forward playback.

PART 1 • English
9
English
3.0 CONNECTIONS
3.1 Connecting to Satellite Dish
Connecting a fixed satellite dish to your receiver
Make your choice of which satellite you want to receive your signals from, and have your dealer aim your
dish at the requested satellite. Connect a coax cable to your LNB and the other end directly to the SAT IN
connector of your receiver.
Figure 3
Connecting multiple fixed dishes to your receiver using a DiSEqC 1.0 switch
If you want to watch programs from more than one satellite (For example from ASTRA and from HOT BIRD) it
is advisable to use fixed dishes and a DiSEqC 1.0 switch.
Have your Dealer aim the dishes at the requested satellites and connect the LNB with coax cables to the
IN connectors of the DiSEqC 1.0 switch. Connect the OUT connector of the DiSEqC 1.0 switch to the SAT IN
connector at the back of your receiver.
Figure 4

PART 1 • English
10
Connecting a dish on a motorized positioner to your receiver.
Another possibility for watching programs from multiple satellites is by mounting a dish to a motorized
DiSEqC 1.2 positioner.
Have your dealer mount the dish to the positioner, set the correct angle of the elevation and let him set the
center point for your positioner. Connect the LNB with a coax cable to the LNB IN connector of the positioner,
and connect the OUT connector of the positioner to the SAT IN connector at the back of your receiver.
Figure 5
3.2 Connecting to TV & VCR
Connecting by HDMI cable
To fully enjoy your HDTV channels it is advisable to use HDMI or Component video outputs of your receiver.
Connect one end of HDMI cable to the HDMI output of your receiver and another end of cable to HDMI
IN connector on your TV.
Figure 6

PART 1 • English
11
English
Connecting to component output
1. Make sure to use proper cable (3 RCA on each side of cable, usually coloured as Green, Blue, Red).
2. Connect chinches at one side of the cable to Y, Pb, Pr (Green, Blue, Red) outputs on your
receiver and another side of the cable to corresponded inputs on your TV. Very important to
follow colour mark.
Figure 7
Connecting by SCART cables
1. Connect the TV SCART connector at the back of the receiver to the SCART IN connector on
your TV set or connect Video RCA and Audio L/R RCA connectors at the back of the receiver
to corresponded inputs on your TV set.
2. Connect the VCR SCART connector of the receiver to the SCART-IN connector on your VCR set.
(Figure 7)
NOTE: Please, make sure that your receiver is connected by SCART or 3 RCA cable (Video,
Audio L/R) to your TV set when you connect your VCR (or DVD) to receiver. You will not
get video signal from your VCR (DVD) through the receiver if your receiver is connected
only by HDMI or Y, Pb, Pr connector to your TV set.
3.3 Connecting to Digital Audio Amplifier
Connect S/PDIF connector at the back of your receiver to appropriated input of your Digital Audio
Amplifier. (Figure 6)
3.4 Connecting to computer by serial cable
Connect the RS-232 connector on the back of your receiver to the Serial port of your computer using a
serial cable. Instructions how to download software can be found on our website www.strong.tv (support
-> download). However, this receiver can download new system software by OTA update from satellite.

PART 1 • English
12
3.5 Connecting to external USB - Harddisk
Switch on your external HDD (connect the power adapter if applicable) before you connect the USB connector
at the back of your receiver. After finishing the First Installation (Cap. 4.0) proceed with following steps:
1. Unless the USB-Hard disk is already formatted in FAT32 and recognised successfully for the first
time you will get a message to format your device to FAT32 in “Application” >”USB” menu.
2. In this menu press the YELLOW (Format) button on your remote control to confirm. After ~10 to
20 sec. formatting will be finished and you can leave the menu with the MENU or EXIT button.
3. Go to “Application” ->”PDR” menu to adjust the preferred recording duration.
4. Set Timeshift to OFF or ON as desired.
Important: During formatting all data on the hard disk will be deleted and get permanently lost.
STRONG cannot be granted for any loss or damage of data, if you format the hard disk.
4.0 STARTING UP FOR THE FIRST TIME
Ensure that your satellite receiver is correctly connected to your television and dish and your satellite
signal is of good quality. Ask your local STRONG dealer to check your installation or satellite signal if you
are not sure how to do this.
Confirm that the power plug of receiver is plugged into the wall outlet. Turn on the receiver by power
switch on rear panel.
The language section menu will be shown on your TV Screen.
It is recommended that you do first time installation following Installation Wizard step by step.
It will help you easily achieve system configuration and channel installation. If you are advanced user
then you can skip wizard by pressing EXIT button and set-up channels using Installation menu.
4.1 Language Selection
Press OK to choose the language.
4.2 Select Satellite
The Installation Wizard preconfigured for easy installation of ASTRA 1C, 1E (19E) or HOT BIRD (13E). For these
satellites LNB configuration is predefined as Universal LNB connected to the receiver via DiSEqC 1.0 switch input
1. If your dish is aimed to ASTRA 1C, 1E (19E) or HOT BIRD (13E) then select corresponded satellite from the
list (future steps of installation are described in 4.3). If your dish is aimed to another satellite or you have multiple
dish installation then select other (future steps of installation are described in 4.4).

PART 1 • English
13
English
4.3 Dish adjustment
After selection of ASTRA1C,1E(19E) or HOT BIRD(13E) menu WIZARD-DISH ADJUSTMENT will appear.
Adjust your dish position in small steps until the signal strength and quality bars turn green or yellow.
Try to reach the maximum possible strength and quality level. Once you are sure the signal cannot be
improved, fix the dish on this position and press OK on your remote control to start the channel search.
After finished search, the first programmed channel will be displayed on screen.
TIP: Depending from OSD language and satellite selected you may be prompted to select
preinstalled channel list. These channel lists include most popular channels ordered
according to the preference of most of the customers.
4.4 Channel set-up
If you select Other satellite then menu Channel set-up will be displayed on screen. Using pq buttons
select the Satellite item and press OK to display list of satellites. Use pq buttons to select satellite of
your choice and press OK. Using pq buttons select Dish number item and using tu buttons select
dish number and transponder, network search and channels which you want among All channels, FTA and
Scrambled in search for menu. Press OK in Dish number mode to set up Dish menu.
In Dish setup menu configure settings of the LNB, DiSEqC switch and Antenna mode. Please refer to
chapter 5.2.2 Dish set-up for detailed information. If you use fixed dish, then press RED (Auto scan)
button on remote control to start channel search. If you use dish mounted on DiSEqC 1.2 or GOTO X
positioner then select Dish position item and press OK. If you use GOTO X positioner then GOTO X setup
menu will be displayed. Please refer to GOTO X setup description in chapter 5.2.4. After setting up dish
position, press RED (Auto scan) button on remote control to start channel search.
5.0 MAIN MENU
All the important settings and features of your receiver can be operated in Main Menu. The Main Menu
consists of six sub-menus: “Channel Organiser”, “Satellite Search”, “Installation”, “Timer”, “Application” and
“Common Interface” Press the MENU button when the menu is off, the MAIN MENU screen will appear.
5.1 Channel Organiser
In MAIN MENU screen, use pq buttons to select Channel Organiser, then press OK or u to enter the
Channel Organiser menu, which consists of the sub-menus Sort Channels, Add to Favourites and Edit Channels.
5.1.1 Sort Channels
In this menu, you can sort channels by order or move channels to specified position.
NOTE: Channels are sorted in the selected channel list only. Sorting of the channels in one list
do not change order of the channels in another list. I.e. sorting of the channels in list. “All
channels” do not change order of the channels in list of particular satellite and vice versa.

PART 1 • English
14
Sort (RED button)
Press RED button to select one of available sort options.
Original Order the order of the channels will be restored to last stored order
Alphabet A-Z or Z-A channels will be sorted in alphabet order
Frequency Low-High channels will be sorted in frequency order: first channels with low frequency,
then with higher frequency
First FTA Free-To-Air channels will be placed at the beginning of the list, Scrambled
channels at the end
First scrambled Scrambled channels will be placed at the beginning of the list, Free-To-Air
channels at the end
If you want to store new order of channels press YELLOW (Save) or BLUE (Save & Exit) button. If you
do not want to store result of sorting press EXIT button. Message “Do you want to save?” will appear on
screen. Select “NO” to cancel or press OK to save result of channel sort.
Move (GREEN button)
Press GREEN (Move) button to manual sort channels. Use tu buttons to select channel that you want
to move. Press OK button to confirm channel selection. You can select several channels to move them
simultaneously. Now, you can select new position of the channel using pq buttons. Press GREEN (Move)
button to confirm new position of the channel. Repeat these steps for all channels that you want to move.
To save new order of the channels press YELLOW (Save) or BLUE (Save&Exit) button.
5.1.2 Add to Favourites
Enter to this menu in order to prepare lists of your favourite channels.
Use pq buttons to select channels of your choice.
Use tu buttons to select favourite group where to add selected channel.
Press OK button to mark/unmark channel to selected favourite group.
To rename Favourite group press RED button, select group that you wish to rename and press OK.
On screen will appear keyboard. To delete current name of the group select t (GREEN) and press OK.
Select CAPS (RED) to toggle between Capital and small letters. To enter new name use navigation and OK buttons.
To save new name press YELLOW (Save) or BLUE (Save & Exit ) button. To cancel your modifications
press EXIT.
5.1.3 Edit Channels
In this menu you can edit channel name, lock and delete channels.
Edit
Press RED button to edit name of the channel. On screen will appear keyboard. To delete current name
select t (GREEN button) and press OK. To enter new name use navigation and OK buttons. To save new
name press YELLOW (Save) or BLUE (Save & Exit) button. Channel name will be changed in all channel
lists. To cancel your modifications press EXIT.

PART 1 • English
15
English
Lock
Lock function can be used in order to block access to some channels. Press GREEN button to lock/
unlock channel of your choice. Locked channel will be marked by Lock symbol. In order to watch locked
channel you will need to enter PIN code. Channel will be locked in all channel lists.
Delete
Pressing YELLOW button will mark selected channel to delete. To unmark channel select it and press
YELLOW button again. Channel(s) will be deleted after you press BLUE button. Be aware: after pressing
BLUE button channel(s) will be deleted from all channel lists. To cancel delete operation you can press EXIT
button. Message “Do you want to save?” will appear on screen. Press EXIT to cancel or OK to confirm.
5.2 Satellite Search
The Satellite Search menu contains following sub-menus:
Channel set-up allows you to setup channels from selected satellites.
Dish Set-up allows you to setup configuration of your dishes.
Edit satellites allows you to edit predefined satellites and their transponders as well as add new satellites.
GOTO X setup allows you to setup your location in order to use GOTO X type of positioner.
5.2.1 Channel set-up
From this menu you can setup channels from satellite(s) in several modes, access to Dish setup menu,
Positioner setup (if used).
Satellite:
Move focus of the menu to this item. Press OK to display list of available satellites.
Select satellite of your choice and press OK. If satellite doesn’t exist in the list you
should add it first using Edit satellites menu.
Dish number: move focus of the menu to this item. Use tu buttons to select dish number to which
above selected satellite belongs to. Press OK button to enter to Dish setup menu. Dish
number “----“ means that selected satellite do not belongs to any dish.
Dish position:
This item value depends on the mode of the Dish.
If mode of selected dish is Fixed then this item is not selectable.
If mode of selected dish is DiSEqC 1.2 then value cannot be stored (in case dish
position for selected satellite was not stored) or in range from 1 to 64 if position has
been stored. Select item and press OK to setup positioner. See chapter 5.2.1.1 for more
details about Positioner setup. If mode of selected dish is GOTO X then value is GOTO X.
Select item and press OK to setup GOTO X function.
Transponder: Move focus of the menu to this item and press OK. List of transponders of selected
satellite will appear at right side of the screen. You can select transponder in order to
check signal strength and quality of reception. Transponder list contains predefined
transponders. If you need to modify transponder list please use menu Edit satellites as
described in chapter 5.2.3. If you need to scan specific transponder then use Manual
scan as described in this chapter below.

PART 1 • English
16
Network search: if this item is set to “No” then receiver will search for the channels that are available from
preset transponder list of selected satellite. If this item is set to “Yes” then receiver in
addition will search for the channels from transponders information about that can be
found from broadcast. Use this option to get new channels that appeared on satellite.
Search for: you can select type of the channels that will be installed to your receiver. If selected
All channels then receiver will install Free-To-Air and Scrambled channels. If selected
Scrambled then receiver will install only Scrambled channels. If selected FTA then
receiver will install only Free-To-Air channels. Once you complete all settings you can
start channel search process.
Press RED button to install channels from all transponders of the satellite;
Press GREEN button to install channels from transponder selected in Transponder item;
Press YELLOW button to enter to Manual setup channels from specific transponder or
to setup single channel with known Video and Audio PID.
Manual setup of channels
In Manual channel search menu you can setup all channels from specific transponder or single channel.
To setup all channels from specific transponder:
Satellite: indicate name of the satellite where channels will be searched
Frequency: Use 0 ~ 9 buttons to enter frequency of transponder
Polarisation control: Use tu buttons to select polarisation of transponder
Symbol rate: Use 0 ~ 9 buttons to enter symbol rate value
Network search: Use tu buttons to select ON or OFF
Search for: Use tu buttons to select type of channels to be installed Press RED (Search)
button to start channel search.
5.2.1.1 Positioner setup
If in Dish setup menu you have configured Dish mode as “DiSEqC 1.2” then you have to setup position of
the dish to each satellite that you want to install.
In Channel setup menu move menu focus to Dish position item and press OK button on remote control.
Menu Positioner setup will appear on screen.
Satellite: Displays the name of satellite position of antenna for which you setup
Transponder:
Use tu buttons to select reference transponder, receivable in your location, to
measure signal strength and quality
Movement speed:
Use tu buttons to select between Slow and Fast. Slow speed allows you to fine adjust
position of the dish (each press to direction button will turn dish to short angle). Fast
speed can be used to adjust dish position roughly. If Movement speed set to Fast
press to direction button will cause continuous movement of the dish to appropriated
direction, to stop dish you will have to press OK button.
Move: Use tu buttons to move dish to the East/West direction
Centre position: If you press OK button while menu focus is on this item then dish will be turned to
centre position, which corresponds to true South direction.
Limits: Use tu buttons to Enable or Disable software limits of your positioner.
Set limit: Use tu buttons to select East or West limit of dish movement range.

PART 1 • English
17
English
Step by step recommendations of position setup
n Select reference transponder in order to check signal strength and quality during position setup.
n If you do not know current direction of your dish then move menu focus to Centre position
item and press OK. Dish will be turned to true South. Knowing your location longitude you
may understand direction where necessary to move dish in order to reach position of selected
satellite. For example: your longitude is 5° East and you want to setup dish position for ASTRA
1C, 1E (19° East). Then, from centre position, you need to move dish to East direction by
pressing to t button. If your longitude is 25° East then, in order to setup dish position for
ASTRA 1C, 1E (19° East), you need to move dish in West direction (from centre position) by
pressing to u button.
n To setup roughly position of the dish set Movement speed to Fast. Then move menu focus
to Move item of the menu and by short presses to t or u buttons move dish to necessary
direction. Check signal strength and quality indicators. Once levels start increasing – press OK
button to stop the dish. Set Movement speed to Slow and keep adjusting dish position until get
best possible values.
n Once you are sure that dish is fine adjusted press YELLOW (Store) or BLUE (Store & Exit)
button. Dish position for selected satellite will be stored.
NOTE: in order to avoid mechanical damage of your dish please, make sure those mechanical
limits in your motor are set correctly and dish would not hit any objects on its movement.
5.2.2 Dish set-up
In this menu you can setup parameters of your dish(es).
Dish number: Use tu buttons to select number of the dish. This number used in Channel setup
menu to create a link between satellite and corresponded dish configuration
LNB type: Use tu buttons to select type of LNB. If you set type to Universal then you
should enter values of Local Oscillator Frequencies in LO frequencies menu item
LO frequencies: this menu item selectable only in case LNB type is Universal. Press OK button
and using 0 ~ 9 buttons enter values in appeared dialog box.
Band control:
Use tu buttons to select value. Set to Auto in order receiver automatically
select Band by sending 22 kHz control signal. Set to ON in order receiver
generate 22 kHz control signal continuously, or set to OFF in order to disable
22 kHz control signal.
Polarisation control: Use tu buttons to select value. Set to Auto in order receiver automatically
control polarisation. Set to 13 V or 18 V in order receiver supply LNB with
selected power, or set to OFF in order to disable LNB power.
Switch type: if you use DiSEqC switch the select appropriated type.
Switch input: select input number to which LNB is connected.
Dish mode: Use tu buttons to select between Fixed, DiSEqC 1.2 and GOTO X.

PART 1 • English
18
5.2.3 Edit satellites
In this menu you can edit satellite’s name, angle, location and transponder, as well as add new satellite.
Press RED button to edit a satellite’s properties.
Press GREEN to add new satellite.
Edit existing satellite and add new satellite functions are identical.
Name:
press OK button to edit name of the satellite. On screen will appear keyboard.
To delete current name select t (GREEN buttons) and press OK. To enter new
name, use tu and OK buttons. Press YELLOW button to save new name or
press BLUE button to exit
Angle: Use 0 ~ 9 buttons to enter value of orbital position of the satellite.
Location: Use tu buttons to select East or West location of the satellite.
Transponder table:
press OK button to enter to edit transponder table menu. In this menu use
RED button to edit parameters of selected transponder, GREEN button to add
new transponder or YELLOW to delete selected transponder.
To save changes you have made press YELLOW (Save) or BLUE (Save&Exit) button.
5.2.4 GOTO X set-up
In this menu you should set your geographical location, if you use positioner and it supports GOTO X.
Use pq buttons to navigate in the menu.
Use 0 ~ 9 buttons to enter values.
Use tubuttons to select an option.
To save changes you have made press YELLOW (Save) or BLUE (Save&Exit) button.
5.3 Installation
5.3.1 Preference
In this menu, you can set up your personal preferences.
OSD language, Audio language, Subtitle language
Use tu buttons select an item or OK button to display a list..
Banner Timeout
To set banner duration (how long information banner will be displayed on screen).
Use tu buttons select an item or OK button to display a list.
Transparency
Use tu buttons to select the transparency level or OK button to display a list.
CAM messages
To enable or disable displaying of messages from Conditional Access Module. Disabling of CAM
messages could be necessary in order to not disturb you while zapping through channels which can’t be
descrambled by your smart card.

PART 1 • English
19
English
Power On Channel
Use tu to select an item. If your choice is Fixed channel: press OK button to display a channel list,
select a channel and confirm selection with OK button. Your receiver will always start with defined
channel. If your choice is Last Viewed then receiver will awake with the last watched channel.
S/PDIF
Use tu buttons to select Digital audio mode. PCM – the receiver will downmix AC3 audio to PCM
stereo. Dolby – the receiver will by-pass AC3 audio for future decoding by Digital Audio Amplifier.
5.3.2 TV Setting
In this menu, you can configure the TV setting such as HD type, TV type, Aspect Ratio, Screen Control,
RGB/YUV, Brightness, Contrast, Saturation.
HD type
Use tu buttons to select an item. Or press OK button to display a list of options, use pq buttons to
select a video output resolution and press OK button to confirm selection.
TIP: HD type is not selectable if output mode (YUV/RGB) set to RGB.
TV Type
Use tu buttons to select an item. Or press OK button to display a list of options, use pq buttons to
select TV Type and press OK button to confirm selection.
TIP: if you have changed TV type and Video on screen not appears in 15 seconds – press
EXIT button 2 times. Such a problem can appear if your TV do not supports video in
NTSC format.
Aspect Ratio
Set accordingly to aspect ratio of your TV.
Use tu buttons to select an item. Or press OK button to display a list of options, use pq buttons to
select Aspect Ratio and press OK button to confirm selection.
Screen Control
Use tu buttons to select an item. Or press OK button to display a list of options, use pq buttons to
select Aspect Conversion and press OK button to confirm selection.
RGB/YUV
Selects a mode of video output signal.
If you have connected your TV to receiver only by SCART cable then it is recommended to set RGB mode. If
you have connected your TV to receiver by HDMI or Component cable then this value must be set to YUV.
Use tu buttons to select an item. Or press OK button to display a list of options, use pq buttons to
select YUV or RGB mode and press OK button to confirm selection.
Table of contents
Other Strong Receiver manuals

Strong
Strong SRT 7300 CI+ User manual

Strong
Strong skylink SRT 7502 User manual

Strong
Strong SRT 7010 User manual

Strong
Strong SRT 810 User manual

Strong
Strong SRT 6004 User manual

Strong
Strong SRT-4950H User manual

Strong
Strong STR 8106 User manual

Strong
Strong SRT 50 User manual

Strong
Strong SRT 6825 User manual

Strong
Strong SMART GOOGLE TV LEAP-S3UK User manual

Strong
Strong SRT 8201 User manual

Strong
Strong SRT 8100 User manual

Strong
Strong SRT 7007 User manual

Strong
Strong SRT 4668X User manual

Strong
Strong SRT 6011 User manual

Strong
Strong STR 8101 User manual

Strong
Strong SRT 7505 User manual

Strong
Strong SRT 6011 User manual

Strong
Strong SRT 5155 User manual

Strong
Strong SRT 4120 User manual