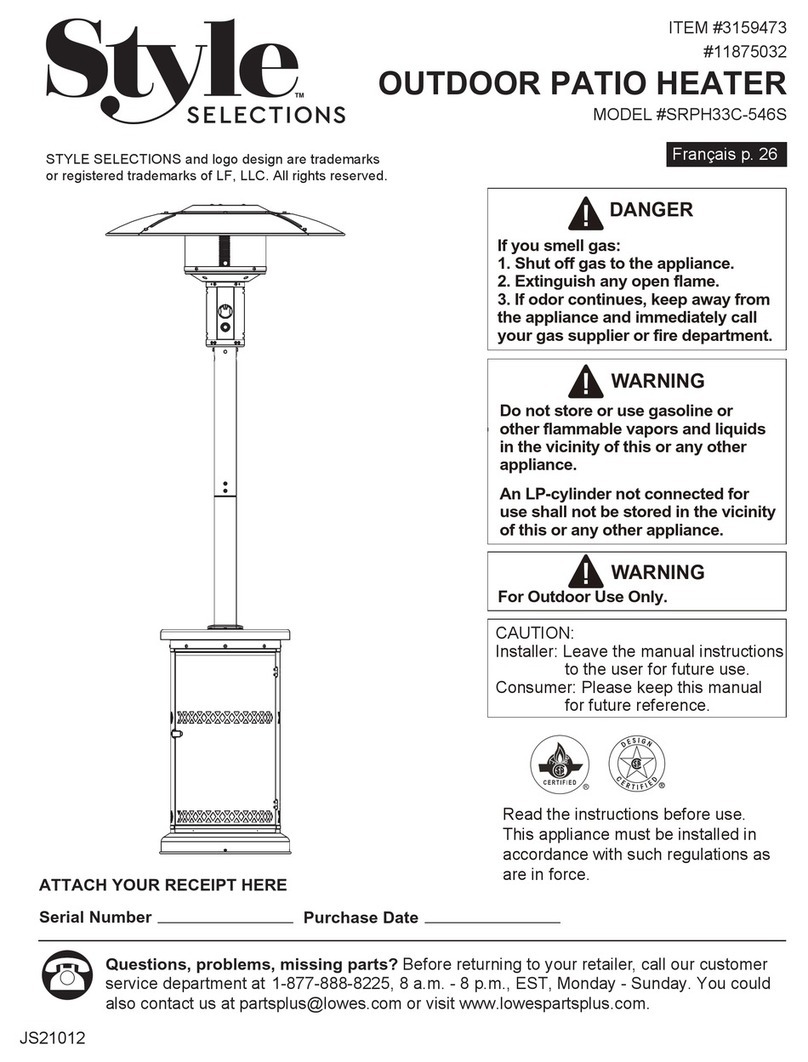
Style selections FHTS80146 User manual

FAUX CONCRETE
1
ANS Z83.26-2014 • CSA 2.37-2014 Gas-Fired Outdoor Infrared Patio Heaters
DANGER
If you smell gas:
1. Shut off gas to the appliance.
2. Extinguish any open flame.
3. If odor continues, keep away from the appliance
and immediately call your gas supplier or fire
department.
DANGER CARBON MONOXIDE HAZARD
This appliance can produce
carbon monoxide which has
no odor. Using it in an enclosed
space can kill you. Never use this
appliance in an enclosed space
such as a camper, tent, car or
home.
WARNING
Do not store or use gasoline or other flammable
vapors and liquids in the vicinity of this or any other
appliance. An LP-cylinder not connected for use shall
not be stored in the vicinity of this or any other
appliance.
WARNING
Improper installation, adjustment, alteration, service
or maintenance can cause property damage, injury or
death. Read the installation, operation and
maintenance instructions thoroughly before installing
or servicing this equipment.
WARNING: For Outdoor Use Only
Table of Contents
Package Contents 2
Hardware Contents & Safety Information 3
Safety Information 4
. . . . . . . . . . . . . . . . . . . . . . . . . . . . . . . . . . . . . . . . . . . . . . . . . . . . . . . . . . 6Assembly Instructions ... . . . . . . . . . . . . . . . . . . . . . . . . . . . . . . . . . . . . . . . . . . . . . . . . . . . . . . . . . . . 9
Operating Instruction 9
Care and Maintenance
.... . . . . . . . . . . . . . . . . . . . . . . . . . . . . . . . . . . . . . . . . . . . . . . . . . . . . . . . . . . . 11
Troubleshooting
. . . . . . . . . . . . . . . . . . . . . . . . . . . . . . . . . . . . . . . . . . . . . . . . . . . . . . . . . 13
Warranty 14
California Proposition 65:
This appliance complies with “ANS Z83.26-2014 • CSA 2.37-2014 Gas-Fired Outdoor Infrared Patio Heaters.”This product can expose you to carbon monoxide, which is a combustion
Handling the brass material on this product can expose you to Lead, which
by product known to the State of California to cause cancer birth defects or other reproductive harm.
For more information go to www.P65Warnings.ca.gov.
is known to the State of California to cause cancer and birth defects or other reproductive harm.
Wash hands after handling. For more information go to www.P65Warnings.ca.gov.
Gas Conversion Kits are also available in Lowes.com
. . . . . . . . . . . . . . . . . . . . . . . . . . . . . . . . . . . . . . . . . . . . . . . . . .
... . . . . . . . . . . . . . . . . . . . . . . . . . . . . . . . . . . . . . . . . . . . . . . . . . . . . . . . . . . .
. . . . . . . . . . . . . . . . . . . . . . . . . . . . . . . . . . . . . . . . . . ..
Installing LP Gas Tank
. . . . . . . . . . . . . . . . . . . . . . . . . . . . . . . . . . . . . . . . . . . . . . . . . . . . . . . . . . . . . . .
... . . . . . . . . . . . . . . . . . . . . . . . . . . . . . . . . . . . . . . . . . . . . . . . . . . . . . . . . . . .
Questions, problems, missing parts? Before returning to your retailer, call our customer
service department at 1-877-888-8225, 8 a.m. - 8 p.m., EST, Monday - Sunday.
ITEM # 1063102/xxxxxxx
# FHTS80146
MODEL
AS21346
STYLE SELECTIONS and logo design
are trademarks or registered trademarks
of LF, LLC. All rights reserved.
LP GAS PATIO HEATER

2
PARTS LIST
1
2
3
6
7
5
Cylinder Housing x 1
Pole-1 x 1
Upper Protective Mesh x 1
8
9
Battery x 1
Polyester Cover x 1
4
PACKAGE CONTENTS
12
3
4
7
5
6
8
9
10
Pole-2 x 1
Pole Cover x 1
11
10
11
Top Cover-1 x 3
Top Cover-2 x 1
Manual Electric Igniter x 1
Control Knob x 1

3
HARDWARE CONTENTS (not show actual size)
SAFETY INFOMATION
Please read and understand this entire manual before attempting to assemble, operate or install
the product.
This manual contains important information about the assembly, operation and maintenance of
this patio heater. General safety information is presented in these first few pages and is also
located throughout the manual. Keep this manual for future reference and to educate new users
of this product. This manual should be read in conjunction with the labeling on the product. Safety
precautions are essential when any mechanical or propane fueled equipment is involved. These
precautions are necessary when using, storing, and servicing. Using this equipment with the
respect and caution demanded will reduce the possibilities of personal injury or property damage.
The following symbols shown below are used extensively throughout this manual. Always heed
these precautions, as they are essential when using any mechanical or fueled equipment.
DANGER
DANGER indicates an imminently hazardous situation
which, if not avoided, will result in death or serious injury.
DANGER
Failure to comply with the precautions and instructions
provided with this heater can result in death, serious
bodily injury and property loss or damage from
hazards of fire, explosion, burn, asphyxiation, and/or
carbon monoxide poisoning. Only persons who can
understand and follow the instructions should use or
service this heater.
M6*20 Bolt
and Washer
AA
AA
AA
AA
Qty: 4
Bolt-1
Qty: 4
AA
AA
AA
BB
AA
AA
AA
CC
AA
AA
AA
EE
M6*10 Bolt
Qty: 4
M6*10 Bolt-1
Qty: 9
Wing Nut
Qty: 3
Stud
Qty: 3
Metal Washer-1
Qty: 9
AA
AA
AA
DD
AA
AA
AA
FF
AA
AA
AA
GG
Qty: 9
AA
AA
AA
HH Metal Washer-2
Qty: 9
AA
AA
AA
II Nut Cover
Qty: 4
AA
AA
AA
JJ Ground Nail
AA
AA
AA
KK Qty: 1
Wrench

4
SAFETY INFORMATION
DANGER
• CARBON MONOXIDE HAZARD
• This heater is a combustion appliance. All
combustion appliances produce carbon monoxide
(CO) during the combustion process. This product is
designed to produce extremely minute, non-hazardous
amounts of CO if used and maintained in accordance
with all warnings and instructions. Do not block air
flow into or out of the heater.
• Carbon Monoxide (CO) poisoning produces flu-like
symptoms, watery eyes, headaches, dizziness, fatigue
and possibly death. You can't see it and you can't
smell it. It's an invisible killer. If these symptoms are
present during operation of this product get fresh air
immediately!
• For outdoor use only.
• Never use inside house, or other unventilated or
enclosed areas.
• This heater consumes air (oxygen). Do not use in
unventilated or enclosed areas to avoid endangering
your life.
DANGER
• EXPLOSION - FIRE HAZARD
• Keep solid combustibles, such as building materials,
paper or cardboard, a safe distance away from the
heater as recommended by the instructions.
• Provide adequate clearances around air openings
into the combustion chamber.
• Never use the heater in spaces which do or may
contain volatile or airborne combustibles, or products
such as gasoline, solvents, paint thinner, dust particles
or unknown chemicals.
• During operation, this product can be a source of
ignition. Keep heater area clear and free from
combustible materials, gasoline, paint thinner, cleaning
solvents and other flammable vapors and liquids. Do
not use heater in areas with high dust content.
Minimum heater clearances from combustible
materials: three (3) feet from the sides & two (2) feet
from the top.
WARNING
We cannot foresee every use which may be made of
our heaters.
Check with your local fire safety authority if you have
questions about heater use.
Other standards govern the use of fuel gases and heat
producing products for specific uses. Your local
authorities can advise you about these.
If no local codes exist, follow National Fuel Gas Code,
ANS Z223.1. In Canada, installation must conform to
local codes. If no local codes exist, follow the current
National standards of CANADA CAN/CGA-B 149.2.
• Never store propane near high heat, open flames,
pilot lights, direct sunlight, other ignition sources or
where temperatures exceed 120 degrees F (49°C).
• Propane vapors are heavier than air and can
accumulate in low places. If you smell gas, leave the
area immediately.
• Never install or remove propane cylinder while heater
is lighted, near flame, pilot lights, other ignition sources
or while heater is hot to touch.
• This heater is red hot during use and can ignite
flammables too close to the burner. Keep flammables
at least 3 feet from sides & 2 feet from top. Keep
gasoline and other flammable liquids and vapors well
away from heater.
• Store the propane cylinder outdoors in a well ventilated
space out of reach of children. Never store the propane
cylinder in an enclosed area (house, garage, etc.). If
heater is to be stored indoors, disconnect the propane
cylinder for outdoor storage.

5
PREPARATION
Before beginning assembly of product, make sure all parts are present. Compare parts with
package contents list and hardware contents above. If any part is missing or damaged, do not
attempt to assemble the product. Contact our customer service for replacement parts.
Estimated Assembly Time: 60 minutes
Tools Required for Assembly (not included):
Leak Detection Solution.
WARNING
California Proposition 65
Combustion by-products produced when using
this product contain chemicals known to the State
of California to cause cancer, birth defects, and
other reproductive harm.
WARNING
BURN HAZARD
• Never leave heater unattended when hot or in use.
• Keep out of reach of children.
WARNING
• This product is fueled by propane gas. Propane gas
is invisible, odorless, and flammable. An odorant is
normally added to help detect leaks and can be
described as a “rotten egg” smell. The odorant can
fade over time so leaking gas is not always detectable
by smell alone.
• Propane gas is heavier than air and leaking propane
will sink to the lowest level possible. It can ignite by
ignition sources including matches, lighters, sparks or
open flames of any kind many feet away from the
original leak. Use only propane gas set up for vapor
withdrawal.
• Store or use propane gas in compliance with local
ordinances and codes or with ANS/NFPA 58. Turn off
propane when not in use.
WARNING
• Alert children and adults to the hazards of high surface
temperatures. Stay away from these surfaces to avoid
burning skin or igniting clothing.
• Carefully supervise young children when in the vicinity
of the heater.
• Do not hang clothing or any other flammable materials
from the heater, or place on or near the heater.
• Replace any guard or protective device removed for
servicing the appliance prior to placing back in service.
• Installation and repair should be done by a qualified
service person. The heater should be inspected
before use and annually by a qualified service person.
More frequent cleaning may be required as necessary.
It is imperative that the control compartment, burners,
and circulating air passageway of the appliance be
kept clean.
SAFETY INFORMATION
CAUTION
CAUTION indicates an imminently hazardous situation
which, if not avoided, may result in minor or moderate
personal injury, or property damage.
CAUTION
SERVICE SAFETY
• Keep all connections and fittings clean. Make sure
propane cylinder valve outlet is clean.
• During set up, check all connections and fittings for
leaks using soapy water. Never use a flame.
• Use as a heating appliance only. Never alter in any
way or use with any device.
WARNING
Certain materials or items, when stored under the
heater, will be subjected to radiant heat and could be
seriously damaged.

6
ASSEMBLY INSTRUCTIONS
Hareware Used
2. Attach the stud (DD) and washer-1 (GG) to the upper
protective mesh (3).
DD Stud
x 3
GG
1
1. Attach the pole cover (6) to the pole-2 (5).
Connect pole-1 (4) and pole-2 (5), use bolt-1 (BB).
2
x 3
4
1
DD
GG
EE
5
6
BB
Hareware Used
BB Bolt-1 x 4
3
3
II
HH
Washer-1
Hareware Used
3. Use M6*10 bolts (EE) and washers (HH) to connect the
top cover-1 (1). Cap the bolts (EE) with the plastic
covers (II).
II Plastic cover
x 3
HH
x 3
Washer-2
x 3
EE M6*10 Bolt-1

7
ASSEMBLY INSTRUCTIONS
Hareware Used
5. Attach the top cover-1 (1) and top cover-2 (2) to the
upper protective mesh (3). Use washer-1 (GG) and wing.
FF Wing nut
x 6
GG
4
5
x 3
2
GG
3
CC
1
6
Washer-1
Hareware Used
6.Connect the upper protective mesh (3) to the pole-1 (4)
use M6*10 Bolt (CC).
CC M6*10 Bolt x 4
1
2
II
HH
EE
Hareware Used
4. Use M6*10 bolts (EE) and washers (HH) to connect
the top cover-1 (1) to top cover-2 (2). Cap the bolts
(EE) with plastic covers (II).
II Plastic cover
x 6
HH
x 6
Washer-2
x 6
EE M6*10 Bolt-1
FF GG
nut (FF).
5
3
4

8
ASSEMBLY INSTRUCTIONS
7
7.
8
8.
Hareware Used
Insert the pole-2 (5) to the cylinder housing (7).
Use M6*20 bolts and washers (AA) and ground nail (JJ).
.
AA M6*20 Bolt
x 4
JJ
x 4
Ground Nail
AA
JJ
7
Fully tighten all bolts with wrench (KK).
5

9
Installing LP Gas Tank
To operate, you will need one precision-filled
standard grill LP gas tank with external valve threads.
.
CAUTION: LP gas tank must be
properly disconnected and removed
prior to moving this
outdoor fireplace.
Inserting LP Gas Tank
WARNING: Make sure LP gas tank valve is closed.
1. Loosen LP gas tank retainer bolt by turning counter-clockwise.
2. Place precision-filled LP gas tank upright into hole in outdoor fireplace
base so the tank valve is facing the gas line connection.
3. Secure tank by turning LP gas tank retainer bolt clockwise until tight.
Connecting LP Gas Tank
1. Before connecting,be sure there is no debris caught
head of the LP gas tank
,head of the regulator
valve or in the head of the burner or burner ports.
2. Connect regulator/hose assembly to tank by turning
knob clockwise until it stops.
1. Before disconnecting make sure the LP gas tank
valve is “CLOSED”.
2. Disconnect regulator/hose assembly from LP gas
turning knob counterclockwise until it
CAUTION: LP gas tank must be
disconnected and removed
prior to moving this fire table.
3. Place the protective cap cover on the LP tank and store the
tank outdoors in a well ventilated area out of direct sunlight.
.
Checking for Leaks
WARNING: Before using this outdoor
fireplace,make sure you have read,
understand and are following
all information provided in the
“Safety Information”section on page 3.
Failure to follow those instructions can
serious, injury or property
Burner Connections
1. Make sure the regulator hose and valve connections are securely
2. Visually check the connection between the burner/venturi
3. Make sure the burner/venturi tube fits over the orifice.
WARNING: Failure to inspect this
instructions could
an explosion which can cause
serious ry or damage to property.
4.
5. If the burner/venturi tube does not rest flush to the orifice,
as shown, please contact 1-877-888-8225 for assistance.
Please refer to diagram for proper installation
Operating Instructions Figure 1
Figure 2
20 lb
9 Kg
17.9 in. / 45.5 cm
12.2 in. / 31 cm
Step 1
Disconnecting LP Gas Tank
is loose.
LP Gas
Connection
LP Gas Valve
with Orifice
X
XX
XX
in the
tank by
properly
cause death,
damage.
fastened to the burner and the tank.
tube and orifice.
or follow these
bodily inju
Figures 1 and 2).
a fire or
connection
death
cause
WARNING: This product contains small batteries.
Swallowed small batteries can cause CHOKING
HAZARD. Seek immediate medical attention if
batteries are swallowed or inhaled. Keep children
away from the small batteries.
9

10
OPERATION INSTRUCTION
Shut Down:
1. Turn control knob clockwise to PILOT. (Normally, burner will make a slight popping sound when
extinguished.) Burner will extinguish but PILOT will remain ON.
2. To extinguish PILOT depress control knob and continue to turn it clockwise to OFF.
3. Turn cylinder valve clockwise to OFF and disconnect regulator when heater is not in use.
Note: After use, some discoloration of the emitter screen is normal.
Operation Checklist
For a safe and pleasurable heating experience, perform this check before each use.
Before Operating:
1. Be familiar with entire owner’s manual and understand all precautions noted.
2. All components are properly assembled, intact and operable.
3. No alterations have been made.
4. All gas connections are secure and do not leak.
5. Wind velocity is below 10 mph.
6. Unit will operate at reduced efficiency below 40°F.
7. Heater is outdoors (outside any non-enclosed area).
8. There is adequate fresh air ventilation.
When heater is ON:
The flame should be blue with straight yellow tops. If excessive yellow flame is detected, turn off
heater and consult “Troubleshooting” on page 13.
Re-lighting:
Note: For your safety, control knob cannot be turned OFF without first
depressing control knob in PILOT position and then rotating it to OFF.
1. Turn control knob to OFF.
2. Wait at least 5 minutes, to let gas dissipate, before attempting to relight Pilot.
3. Repeat the “Lighting” steps on prior page.
WARNING
FOR YOUR SAFETY
Be careful when attempting to manually ignite this heater. Holding in the control knob for more
than 10 seconds before igniting the gas will cause a ball of flame upon ignition.
WARNING
FOR YOUR SAFETY
Heater will be hot after use. Handle with extreme care.

OPERATION INSTRUCTION
11
CARE AND MAINTENANCE
9. Heater is away from gasoline or other flammable liquids or vapors.
10. Heater is away from windows, air intake openings, sprinklers and other water sources.
11. Heater is at least 24 in. on top and at least 36 in. on sides from combustible materials.
12. Heater is on a hard and level surface.
13. There are no signs of spider or insect nests.
14. All burner passages are clear.
15. All air circulation passages are clear.
16. Children and adults should be alerted to the hazards of high surface temperatures and should stay
away to avoid burns or clothing ignition.
17. Young children should be carefully supervised when they are in the area of the heater.
18. Clothing or other protective material should not be hung from the heater, or placed on or near the
heater.
19. Any guard or other protective device removed for servicing the heater must be replaced prior to
operating the heater.
20. Installation and repair should be done by a qualified service person. The heater should be inspected
before use and at least annually by a qualified service person.
21. More frequent cleaning may be required as necessary. It is imperative that control compartment,
burner and circulating air passageways of the heater be kept clean.
1. Gas control is in OFF position.
2. Gas Tank valve is OFF.
3. Disconnect Gas line.
After Operation
FOR YOUR SAFETY:
• DO NOT touch or move heater for at least 45 minutes after use.
• Reflector is hot to the touch.
• Allow reflector to cool before touching.
To enjoy years of outstanding performance from your heater, make sure you perform the following
maintenance activities on a regular basis:
1. Keep exterior surfaces clean.
2. Use warm soapy water for cleaning. Never use flammable or corrosive cleaning agents.
3. While cleaning your unit, be sure to keep the area around the burner and pilot assembly dry at all times. Do
not submerge the control valve assembly. If the gas control is submerged in water, DO NOT use it. It must be
replaced.
4. Keep the appliance area clear and free from combustible materials, gasoline and other flammable vapors
and liquids.
5. Do not obstruct the flow of combustion and ventilation air.
6. Keep the ventilation opening(s) of the cylinder enclosure free and clear from debris.
7. Air flow must be unobstructed. Keep controls, burner, and circulating air passageways clean.
Signs of possible blockage include:
WARNING

12
CARE AND MAINTENANCE
Gas odor with extreme yellow tipping of flame.
Heater does NOT reach the desired temperature.
Heater glow is excessively uneven.
Heater makes popping noises.
Spiders and insects can nest in burner or orifices. This dangerous condition can damage heater and
render it unsafe for use. Clean burner holes by using a heavy-duty pipe cleaner. Compressed air may
help clear away smaller particles.
Carbon deposits may create a fire hazard. Disassembly the reflector, unscrew the reflector spacer,
take off the screen, take down one side of protective guards. Then take the glass tube from the heater
and wash and clear. After that assembly the glass tube and the rest of parts.
Note: In a salt-air environment (such as near an ocean), corrosion occurs more quickly than normal.
Frequently check for corroded areas and repair them promptly.
TIP:
Use high-quality automobile wax to help maintain the appearance of
your heater. Apply to exterior surfaces from the pole down. Do not
apply to emitter screen or domes.
Storage
Turn Control Knob OFF.
Disconnect LP cylinder.
Store heater upright in an area sheltered from direct contact with inclement weather (such as rain,
sleet, hail, snow, dust and debris).
If desired, cover heater to protect exterior surfaces and to help prevent build-up in air passages.
Note: Wait until heater is cool before covering.
Service
Only a qualified service person should repair gas passages and associated components.
Caution: Always allow heater to cool before attempting service.

TROUBLESHOOTING
PROBLEM POSSIBLE CAUSE CORRECTIVE ACTION
Pilot won’t light.
Pilot won’t stay lit.
Burner won’t light.
Burner flame is low.
Carbon build-up
Thick black smoke.
Cylinder valve is closed. Open valve.
Blockage in orifice or pilot tube.
Air in gas line.
Low gas pressure with cylinder valve
fully open.
Igniter fails.
Propane cylinder is frosted over.
Blockage in orifice.
Control knob is not in ON position.
Gas pressure is low.
Control knob fully ON.
Dirt or film on reflector and burner screen.
Blockage in burner. Remove blockage and clean burner
inside and outside.
Check burner and orifices for
blockage.
Clean reflector and burner screen.
Outdoor temperature is less than 40ºF and
tank is less than 1/4 full.
Turn cylinder valve OFF and replace
cylinder.
Use a full cylinder.
Turn control knob to ON.
Dirt built up around pilot.
Connection between gas valve and pilot.
assembly is loose.
Thermocouple is not operating correctly.
Clean or replace orifice or
pilot tube.
Open gas line and bleed it
(pressing control knob in) for not
more than 1 - 2 minutes or until
you smell gas.
Turn cylinder valve OFF and replace
cylinder.
Use match to light pilot; obtain new
igniter and replace.
Clean dirt from around pilot.
Tighten connection and perform
leak check.
Replace thermocouple.
Wait until the propane cylinder
warms up and becomes unfrosted.
Clear blockage.
Note: Heater operates
at reduced efficiency
below 40ºF (5ºC).
13

14
ONE-YEAR LIMITED WARRANTY
This product is inspected, tested and carefully packaged to minimize the chance of damage during
shipment. If a part within one year from the date of purchase proves to be defective in material or
fabrication under normal use, the part will be repaired or replaced. The Company's obligation under
the warranty is to replace or repair defective parts at our discretion. Any expenses or damage resulting
from the installation, removal or transportation of the product will be the responsibility of the owner and
are not covered by this warranty. The owner assumes all other risks arising from the use or misuse
of the product. The warranty will be void if the product damage or failure is deemed by the Company
to be caused by accident, alteration, misuse, abuse, incorrect installation or removal, or connection to
an incorrect power source by the owner. The Company neither assumes, nor authorizes any person
or entity to assume for it any obligation or liability associated with its products.
For replacement parts, call our customer service department at 1-877-888-8225, 8 a.m. - 8 p.m., EST, Monday - Sunday.
REPLACEMENT PARTS LIST
PART DESCRIPTION PART#
1
3
PART
DESCRIPTION PART#
6
7
2
4
5
1063102-1 Cylinder Housing
Pole-1
Upper Protective
Mesh Battery
Polyester Cover
Pole-2
Pole cover
Top cover-1
Top cover-2
Manual electric igniter
Control knob
PART
DESCRIPTION PART#
Hardware Pack
1063102-AA
A
A
8
9
10
11
AA
AA
AA
AA
1063102-2
1063102-3
1063102-4
1063102-5
1063102-6
1063102-7
M6*20 Bolt
AA
AA
AA
AA
Qty: 4
Bolt-1
Qty: 4
AA
AA
AA
BB
AA
AA
AA
CC
AA
AA
AA
EE
M6*10 Bolt
Qty: 4
M6-10 Bolt-1
Qty: 9
Wing Nut
Qty: 3
Stud
Qty: 3
Metal Washer-1
Qty: 9
AA
AA
AA
DD
AA
AA
AA
FF
AA
AA
AA
GG
Qty: 9
AA
AA
AA
HH Metal Washer-2
Qty: 9
AA
AA
AA
I I Plastic cover
Qty: 4
AA
AA
AA
JJ Ground nail
AA
AA
AA
KK Qty: 1
Wrench
1063102-11
8
9
12
3
4
7
5
6
11
10
1063102-8
1063102-9
1063102-10
Printed in (China).

.
15
ANS Z83.26-2014 • CSA 2.37-2014, Appareils de chauffage extérieurs à infrarouge au
gaz pour terrasse
DANGER
Si vous détectez une odeur de gaz :
1. Coupez l’alimentation en gaz de l’appareil.
2. Éteignez toute flamme nue.
3. Si l’odeur persiste, tenez-vous à distance de
l’appareil et appelez immédiatement le fournisseur
de gaz ou le service d’incendie.
DANGER RISQUE LIÉ AU MONOXYDE DE
CARBONE
Cet appareil peut générer du monoxyde
de carbone, un gaz inodore. L’utilisation
de cet appareil dans un endroit fermé
pourrait causer la mort. N’utilisez
jamais cet appareil dans un endroit
fermé comme une caravane, une tente,
une automobile ou une maison.
AVERTISSEMENT
N’entreposez pas et n’utilisez pas d’essence ni
aucun autre liquide ou gaz inflammable à proximité
de cet appareil ou de tout autre appareil. Ne rangez
pas de bouteille de propane non raccordée à
proximité de cet appareil ni de tout autre appareil.
AVERTISSEMENT
Une installation, un réglage, une modification, une
utilisation ou un entretien inadéquat peut causer des
dommages matériels, des blessures ou la mort. Lisez
attentivement le mode d’emploi et les instructions sur le
fonctionnement et l’entretien avant de procéder à
l’installation ou à l’entretien de l’appareil
AVERTISSEMENT :
Pour un usage à l’extérieur seulement.
Table des matières
Contenu de l’emballage 16
Quincaillerie incluse et consignes de sécurité 17
Consignes de sécurité 18
. . . . . . . . . . . . . . . . . . . . . . . . . . . . . . . . . . . . . . . . . . . . . . . . . . . . . 20Instructions pour l’assemblage . . . . . . . . . . . . . . . . . . . . . . . . . . . . . . . . . . . . . . . . . . . . . . . 23
Mode d’emploi 23
Entretien ..... . . . . . . . . . . . . . . . . . . . . . . . . . . . . . . . . . . . . . . . . . . . . . . . . . . . . . . . . . . 25
Dépannage
. . . . . . . . . . . . . . . . . . . . . . . . . . . . . . . . . . . . . . . . . . . . . . . . . . . . . . . . . 27
Garantie 28
Proposition 65 de la Californie : Cet article peut vous exposer au monoxyde de carbone, qui est un sous-produit
de combustion reconnu par l’État de la Californie comme étant la cause de cancers, d’anomalies congénitales
ou d’autres problèmes liés aux fonctions reproductrices. Pour plus de renseignements, rendez-vous au
www.P65Warnings.ca.gov.
Proposition 65 de la Californie : La manipulation des pièces en laiton de cet article peut vous exposer au plomb,
un produit chimique reconnu par l’État de la Californie comme étant la cause de cancers, d’anomalies
congénitales et d’autres problèmes liés aux fonctions reproductrices. Lavez-vous les mains après avoir
manipulé l’article. Pour plus de renseignements, rendez-vous au www.P65Warnings.ca.gov.
Cet appareil est conforme à la norme « ANS Z83.26-2014 • CSA 2.37-2014 Appareils de chauffage extérieurs
à infrarouge au gaz pour terrasse. »
Des trousses de conversion au gaz sont également offertes sur le site Lowes.com
. . . . . . . . . . . . . . . . . . . . . . . . . . . . . . . . . . . . . . . . . . . . . . . . . .
. . . . . . . . . . . . . . . . . . . . . . . . . . . . . . . . . . . . . . . . . . . . . . . . . . . . . . . . .
. . . . . . . . . . . . . . . . . . . . . . . . . . . . . . . . . . . . . . ..
Installation de la bouteille de propane
. . . . . . . . . . . . . . . . . . . . . . . . . . . . . . . . . . . . . . . . . . . . . . . . . . . . . . . . . . . . . .
. . . . . . . . . . . . . . . . . . . . . . . . . . . . . . . . . . . . . . . . . . . . . . . . . . . . . . . . . . . .
Des questions, des problèmes, des pièces manquantes? Avant de retourner l’article au détaillant,
appelez notre service à la clientèle au 1 877 888-8225, de 8 h à 20 h (HNE), du lundi au dimanche.
Vous pouvez également communiquer avec nous à l’adresse [email protected] ou consulter le www.lowespartsplus.com.
ARTICLE #1063102
MODÈLE #FHTS80146
CHAUFFE-TERRASSE
AU GAZ PROPANE EN FAUX BÉTON
STYLE SELECTIONS et le logo sont des
marques de commerce ou des marques
de commerce déposées de LF, LLC.
Tous droits réservés.
au gaz propane en faux béton
.
. . .
..... .
.
.
. . .

16
LISTE DES PIÈCES
1
2
3
6
7
5
Logement de la bouteille x 1
Tige-1 x 1
Grillage de protection
supérieur x 1
Pile x 1
Housse en polyester x 1
4
CONTENU DE L’EMBALLAGE
8
9
10
Tige-2 x 1
Couvercle de tige x 1
11
Couvercle supérieur-1 x 3
Couvercle supérieur-2 x 1
Allumeur électrique
manuel x 1
Bouton de commande x 1
8
9
12
3
4
7
5
6
11
10

17
QUINCAILLERIE INCLUSE (non illustrée à la taille réelle)
CONSIGNES DE SÉCURITÉ
Assurez-vous de lire et de comprendre l’intégralité du présent manuel avant de tenter d’assembler,
d’installer ou d’utiliser l’article.
Ce manuel contient des renseignements importants au sujet de l’assemblage, de l’utilisation et de
l’entretien du chauffe-terrasse. Ce manuel contient des consignes de sécurité générales,
dans ses premières pages entre autres. Veuillez conserver ce guide pour vous y référer ultérieurement.
Il sera également utile pour les nouveaux utilisateurs de cet article. Consultez ce manuel ainsi que les
étiquettes apposées sur l’article. Vous devez prendre des mesures de sécurité lors de l’utilisation de
tout appareil mécanique ou alimenté au propane. Ces mesures de sécurité sont nécessaires à
l’utilisation, à l’entreposage et à l’entretien. Vous réduirez les risques de blessure ou de dommage
matériel en respectant les instructions et en faisant preuve de prudence lorsque vous utilisez cet
appareil. Les symboles suivants sont abondamment utilisés dans ce guide. Vous devez suivre ces
mesures, car elles sont essentielles pour utiliser correctement tout appareil mécanique ou alimenté au
gaz.
DANGER
DANGER indique un risque imminent qui entraînera la
mort ou des blessures graves s’il n’est pas prévenu.
DANGER
Le non-respect des consignes de sécurité et des
instructions fournies avec ce chauffe-terrasse peut causer
la mort, des blessures graves ou des pertes et
dommages matériels dus au risque d’incendie,
d’explosion, de brûlure, d’asphyxie et d’empoisonnement
au monoxyde de carbone. Seules les personnes aptes
à comprendre et à suivre les instructions doivent utiliser
ou faire l’entretien de ce chauffe-terrasse.
Boulon et rondelle
M6 de 20 mm
Qté : 4
AA
AA
AA
AA
Boulon-1
Qté : 4
AA
AA
AA
BB
AA
AA
AA
CC
AA
AA
AA
EE
Boulon
M6 de 10 mm
Qté : 4
Boulon-1
M6 de 10 mm
Qté : 9
Écrou à oreilles
Qté : 3
Goujon
Qté : 3
Rondelle en métal-1
Qté : 9
AA
AA
AA
DD
AA
AA
AA
FF
AA
AA
AA
GG
AA
AA
AA
HH Rondelle en métal-2
Qté : 9
AA
AA
AA
II Cache-écrou
Qté : 9
AA
AA
AA
JJ Clou d’ancrage
Qté : 4
AA
AA
AA
KK Clé
Qté : 1

18
CONSIGNES DE SÉCURITÉ
DANGER
• RISQUE LIÉ AU MONOXYDE DE CARBONE
• Ce chauffe-terrasse est un appareil à combustion.
Tous les appareils à combustion produisent du monoxyde
de carbone (CO) pendant la combustion. Cet article est
conçu pour produire des quantités extrêmement minimes
de CO qui ne représentent aucun danger. Cependant,
il doit être utilisé et entretenu conformément à tous les
avertissements et à toutes les instructions. N’obstruez
pas les entrées et les sorties d’air du chauffe-terrasse
• Le monoxyde de carbone (CO) entraîne des symptômes
semblables à ceux de la grippe : yeux larmoyants,
maux de tête, étourdissements et fatigue. Il peut
également causer la mort. Il est invisible et inodore,
mais il demeure toutefois mortel. Si vous présentez ces
symptômes au cours de l’utilisation de l’appareil,
recherchez immédiatement de l’air frais!
• Pour un usage à l’extérieur seulement.
• N’utilisez jamais cet article dans la maison ou dans tout
autre espace clos ou non aéré.
• Ce chauffe-terrasse consomme de l’air (oxygène).
Afin d’éviter de mettre votre vie en danger;n’utilisez pas
cet article dans des endroits clos ou non ventilés.
DANGER
• RISQUES D’EXPLOSION OU D’INCENDIE
• Gardez le chauffe-terrasse à une distance sécuritaire
des combustibles solides comme les matériaux de
construction, le papier ou le carton, tel qu’il est indiqué
dans les instructions.
• Assurez-vous qu’il y a suffisamment d’espace autour
des orifices d’aération de la chambre de combustion.
• N’utilisez jamais ce chauffe-terrasse dans des endroits
qui contiennent ou qui pourraient contenir des
combustibles volatils ou en suspension, ou encore des
produits comme de l’essence, des solvants, du diluant
à peinture, de la poussière ou des produits chimiques
inconnus.
• Pendant son utilisation, cet appareil peut être une
source d’inflammation. Assurez-vous que l’espace autour
de l’appareil est propre et ne contient ni matériaux
combustibles ni essence ni diluant à peinture ni solvants
de nettoyage ni d’autres gaz ou liquides inflammables.
N’utilisez pas le chauffe-terrasse dans des endroits où
il y a beaucoup de poussière. Distances minimales
entre le chauffe-terrasse et les matériaux
combustibles : 90 cm des côtés et 60 cm du haut.
AVERTISSEMENT
Nous ne pouvons pas prévoir toutes les utilisations qui
seront faites de nos appareils.
Veuillez consulter les autorités locales en matière de
sécurité incendie si vous avez des questions au sujet
de l’utilisation du chauffe-terrasse.
D’autres normes régissent l’utilisation de gaz de
combustion et de produits de chauffage utilisés à des fins
particulières. Veuillez consulter les autorités locales
à ce sujet.
En l’absence de telles normes, respectez le National Fuel
Gas Code, ANS Z223.1. Au Canada, l’installation doit
être effectuée conformément à la réglementation locale.
Si aucune réglementation n’existe, respectez la norme
nationale du Canada CAN/CGA-B 149.2.
• N’entreposez jamais le propane près d’une source de
chaleur élevée, d’une flamme nue, d’une veilleuse, de
toute autre source d’inflammation, ou aux rayons du
soleil,ainsi que dans un endroit où les températures
dépassent 49 °C (120 °F).
• Le gaz propane est plus lourd que l’air. Il peut donc
s’accumuler près du sol. Si vous détectez une odeur de
gaz, éloignez-vous immédiatement de l’endroit où vous
vous trouvez.
• Vous ne devriez ni installer ni retirer une bouteille de
propane lorsque l’appareil fonctionne ou qu’il est chaud,
ou si vous vous trouvez près d’une flamme, d’une
veilleuse ou de toute autre source d’inflammation.
• Ce chauffe-terrasse devient brûlant lorsqu’il est en
marche, et les produits inflammables risquent de prendre
feu s’ils sont trop près du brûleur. Tenez les produits
inflammables éloignés d’au moins 60 cm du haut du
chauffe-terrasse et 90 cm de ses côtés. Tenez l’essence
et les autres liquides ou vapeurs inflammables loin
du chauffe-terrasse
• La bouteille de propane doit être entreposée à
l’extérieur, dans un endroit bien aéré et hors de la portée
des enfants. N’entreposez jamais la bouteille de propane
dans un espace clos (maison, garage, etc.). Si vous
rangez le chauffe-terrasse à l’intérieur, retirez d’abord la
bouteille de propane que vous entreposerez à l’extérieur.

19
PRÉPARATION
Avant de commencer l’assemblage de l’article assurez-vous d’avoir toutes les pièces. Comparez le
contenu de l’emballage avec la liste des pièces et celle de la quincaillerie incluse ci-dessus. S’il y a des
pièces manquantes ou endommagées, ne tentez pas d’assembler l’article. Communiquez avec le
service à la clientèle pour obtenir des pièces de rechange.
Temps d’assemblage approximatif : 60 minutes.
Outils nécessaires pour l’assemblage (non inclus) :
Solution de détection des fuites.
AVERTISSEMENT
Proposition 65 de la Californie
Les sous-produits de combustion créés lors de l’utilisation
de l’appareil contiennent des produits chimiques reconnus
par l’État de la Californie comme étant la cause de
cancers, d’anomalies congénitales et d’autres problèmes
liés aux fonctions reproductrices.
AVERTISSEMENT
RISQUE DE BRÛLURE
• Ne laissez jamais le chauffe-terrasse sans surveillance
lorsqu’il est chaud ou en marche.
• Tenez l’article hors de la portée des enfants.
AVERTISSEMENT
• Cet article est alimenté au gaz propane. Le gaz
propane est invisible, inodore et inflammable. Une
substance odorante est habituellement ajoutée au gaz
afin de permettre de détecter les fuites. Elle a une odeur
d’« œuf pourri ». Cependant, la substance odorante perd
son effet avec le temps. Ainsi, les fuites de gaz ne
peuvent pas toujours être détectées à l’odeur.
• Le gaz propane est plus lourd que l’air. C’est pourquoi
il s’accumulera le plus bas possible. Des sources
d’inflammation comme une allumette, un briquet, une
étincelle ou toute flamme nue, même à plusieurs mètres
de la fuite, peuvent l’enflammer. Utilisez seulement du
gaz propane destiné à être retiré pour utilisation à l’état
gazeux.
• L’entreposage ou l’utilisation du gaz propane doit être
conforme aux codes et règlements locaux ou au code
ANS/NFPA 58. Coupez l’alimentation en propane lorsque
vous ne vous servez pas du gaz.
AVERTISSEMENT
• Prévenez enfants et adultes des risques que
représentent les surfaces pouvant atteindre des
températures élevées. Tenez-vous loin de ces surfaces
pour éviter de vous brûler ou que vos vêtements
prennent feu.
• Surveillez attentivement les jeunes enfants lorsqu’ils se
trouvent à proximité du chauffe-terrasse.
• N’accrochez pas et ne placez pas de vêtements ni de
matières inflammables sur le chauffe-terrasse ou près
de celui-ci
• Avant d’utiliser l’appareil après avoir procédé à son
entretien, réinstallez tout protecteur que vous auriez
pu enlever.
• L’installation et les réparations doivent être effectuées
par une personne qualifiée. Le chauffe-terrasse devrait
être inspecté avant chaque utilisation et au moins une fois
par année par une personne qualifiée. Un nettoyage plus
fréquent peut être nécessaire. Il est essentiel de garder
toujours propres le compartiment de contrôle, les brûleurs
et le conduit d’aération.
CONSIGNES DE SÉCURITÉ
ATTENTION
ATTENTION indique un risque imminent qui, s’il n’est pas
évité, pourrait provoquer des blessures mineures ou
moyennement graves, ou des dommages matériels.
ATTENTION
CONSIGNES DE SÉCURITÉ RELATIVES À L’ENTRETIEN
• Assurez-vous que tous les branchements et les
raccords sont propres. Assurez-vous que le tuyau de
sortie de la valve de la bouteille de propane est propre.
• En vous servant d’eau savonneuse, vérifiez au cours
de l’assemblage qu’aucun branchement ni raccord ne
présente des fuites. N’effectuez jamais cette vérification
à l’aide d’une flamme.
• Utilisez seulement cet article comme appareil de
chauffage. Ne le modifiez d’aucune façon et ne l’utilisez
avec aucun appareil.
AVERTISSEMENT
Certains matériaux ou objets placés sous le
chauffe-terrasse pendant son utilisation sont exposés à
une chaleur radiante et peuvent être considérablement
endommagés.

20
INSTRUCTIONS POUR L’ASSEMBLAGE
Quincaillerie utilisée
2. Fixez le goujon (DD) et la rondelle-1 (GG) au grillage
de protection supérieur (3).
DD Goujon
x 3
GG
1
1. Fixez le couvercle de la tige (6) à la tige-2 (5).
Fixez la tige-1 (4) et la tige-2 (5)
à l’aide du boulon-1 (BB).
2
x 3
4
1
EE
5
6
BB
Quincaillerie utilisée
BB Boulon-1 x 4
3
3
II
HH
Rondelle-1
Quincaillerie utilisée
3.Utilisez des boulons M6 de 10 mm (EE) et des rondelles
(HH) pour fixer le couvercle supérieur-1 (1). Coiffez les
boulons (EE) d’un couvercle en plastique (II).
II Couvercle
en plastique
x 3
HH
x 3
Rondelle-2
x 3
EE Boulon-1
M6 de 10 mm
DD
GG
3
Table of contents
Languages:
Other Style selections Patio Heater manuals