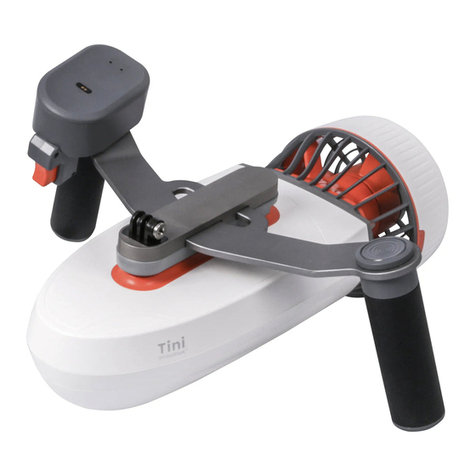
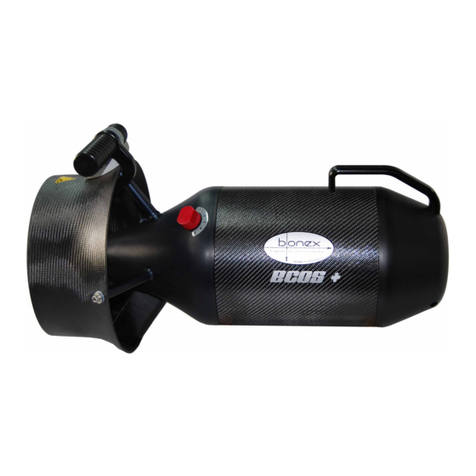
Sublue WhiteShark Tini User manual

SUBLUE Tianjin (Headquarters)
ADD. No.1,Quanzhou Road,Zhongguancun Science and
Tech.Park,Binhai Tianjin CHN
Web www.sublue.com
The final right of interpretation belongs to Sublue
TM
Please read this User Manual carefully before using
and store it in a safe place
* As with other electronic products, care should be taken to prevent the risk of electric shock during use.
V10
WhiteSharkTM Tini
USER MANUAL

When using this product for the first time, please read the "WhiteShark Tini User
Manual" for product information and instructions.
You can choose the following ways to get related service and support for frequently
asked questions (FAQ), user manual, and teaching videos, etc.
Recommendations
1
2
Recommendations and Support
Support
Website: http://www.sublue.com
Other regions:
Please contact your dealer for support.
Information of General
Regional Agent
China:
Service Hotline: 400-806-2688
Working time: Monday to Friday,
9:00 to 18:00
(Beijing time)
The United States:
Service Hotline: +1 855 206 8698
Working time: Monday to Friday,
9:00 to 18:00
(Los Angeles time)

When using this product for the first time, please read the "WhiteShark Tini User
Manual" for product information and instructions.
You can choose the following ways to get related service and support for frequently
asked questions (FAQ), user manual, and teaching videos, etc.
Recommendations
1
2
Recommendations and Support
Support
Website: http://www.sublue.com
Other regions:
Please contact your dealer for support.
Information of General
Regional Agent
China:
Service Hotline: 400-806-2688
Working time: Monday to Friday,
9:00 to 18:00
(Beijing time)
The United States:
Service Hotline: +1 855 206 8698
Email: [email protected]
Working time: Monday to Friday,
9:00 to 18:00
(Los Angeles time)

Notice
1
2
3
4
5
6
7
8
9
10
11
12
13
14
15
16
17
Please fully charge the batteries of the power system and the control handle.
Do not take alcohol or medication before or during using this product.
Try to use this product in an open area. To avoid danger, don't let clothes, algae, ropes, shark
prevention nets, shells, sand or other debris in the water be twisted into the propeller.
Do not replace the battery in water, replace the battery in a dry environment, and ensure that
the device and hands are dry.
To protect the service life of motor, don't run it continuously more than 30S in air. If there is an
abnormal state (such as smell of burning), release the switch immediately to stop the
machine and cut off the power supply at once.
Do not try this product directly on the beach to avoid sand, shells or other debris getting into
the propeller.
The surface of the product should not be in contact with volatile or acidic substances such as
gasoline or rubber water, and sharp objects.
Do not place heavy objects on the product.
Do not throw the battery into fire. When the product is not in use, please prevent it from direct
sunlight. High temperature can damage the battery and can cause an explosion or leakage.
Do not use this product beyond its specified limit depth (20m).
There should be adequate lighting when diving in dark waters or at night.
This product is not intended for use in water area with mixed sand or similar physical
properties.
Don't use it when the machine malfunctions.
The product will sink in the water. If you release it when it is being used in the water, it will sink.
So we recommend fixing an anti-lost rope to it during use.
When not using this product, be sure to take it out of the water.
Non-manufacturer after-sales service person must not repair without authorization. Improper
repair may result in water leakage, damage, fire or electric shock.
If several users are using the products at the same time, for the sake of safety, ensure the
distance between each other is more than 1m.
This product cannot be used as a
life-saving appliance.
Be sure to read the User’s Manual
carefully before using this product, and
be familiar with all operating methods
and precautions.
Please ensure that there is a
companion caring for you within a
certain distance during use of the
product.
Before using, the product should be fully
inspected to confirm that the battery is in
good condition and the power capacity is
sufficient. And confirm that the propellers
and thrusters are running and functioning
normally.
Before using the product, you should fully
understand the water area you want to
enter. Ensure that you are swimming and
diving in the appropriate water area with
the water area management authority.
Always pay attention to the surrounding
water area during use to ensure that there
is no danger of collision between boats
and swimmers.
Always remove the battery from the
product before transporting or carrying
the product by air, and store the battery
separately in accordance with relevant
regulations.
Donot put your fingers into the propeller.
Donot attach clothing or other objects
near the propeller.
Do not wear loose clothing or devices
that are easily sucked into the propeller
by water.
Wear a swimming hat when using this
product, and pay attention to people
with long hair to avoid twisting hair or
clothing into the propeller.
When using this product, always pay
attention to the battery power and make
sure to return before battery exhaustion.
Donnot let your face or mask against the
rear of the propeller.
To ensure safety, users shall be either
wearing life jackets or equipped with
life-saving equipment under any
circumstances.
Warning
Warning
Please read the User Manual and
precautions carefully before using
this product!
Overview
Contents
Preparation before the First Use
Instructions for Assembly
Operation Instructions
1
1
1
3
4
6
6
6
8
8
8
8
9
10
10
13
Brief Introduction
Product Features
List of Items
Name of Components
Unpacking for Inspection
Check Battery Power Capacity and Charge
Read the User Manual
Start Use
Assembly the Power System and Handle Bracket
Assembly the Handle and Handle Bracket
Operation Instructions
Description of Indicator Lights
Use the Product Correctly
15
15
15
16
Proper Grip and Hold Posture
Turning in Water
Float Up and Drop Down
Battery
Maintenance
General Troubleshooting Method
Product Parameters
Optional Accessories
16
16
17
18
18
18
19
20
20
21
22
24
27
Cleaning after Use
Storage
Introduction to the Battery of Power System
Battery Charging
Battery Replacement
Introduction to Battery of Control Handle
Charging of Control Handle
Storage and Maintenance of the Power System
Battery and the Control Handle
©2019 Sublue All Rights Reserved
Symbol Description:
*
Appendix 29
Warning
Notice
Annotation (detailed explanation and description)

1 2
WhiteShark Tini is a brand new underwater scooter product launched by Sublue for
worldwide diving, swimming and water enthusiasts. It has two speeds which can be
freely switched, realizing an all-round upgrade of power, performance and experience.
WhiteShark Tini adopts Sublue's self-developed high-efficiency power system and
wireless control technology, with an innovative modular design. Its components can be
flexibly assembled, and it is convenient to carry, meeting the diversified needs such as
single boosting, double boosting, multiple boosting, and power assisting. In addition to
carrying a sports camera, WhiteShark Tini can be equipped with a waterproof device to
mount a mobile phone and easily record underwater moments.
Modular design
The modular design is easy to disassemble, carry and store.
Product Introduction
1
2
Product Overview
Product Features
Wireless connection
Wireless control is provided, with diverse play methods and unlimited possibilities.
Two-level speed change
Multi-machine combination
Long service time
Load extension
Optional accessories
Tini can be equipped with a variety of official accessories, including floater and mobile
phone waterproof holder, double-boosting combination handle, inflatable floating plate*,
which can realize multiple functions in one machine.
There is a standard sports camera mounting point under the front end of the product,
and a mobile phone waterproof holder can be added by the floater to allow you to take
phone underwater shooting.
Quick replacement of battery
The unique battery sealing patent technology enables quick battery replacement within
5 seconds and ensures a reliable underwater sealing.
The single handle can control up to four power systems, realizing unlimited superposition
of power and more DIY possibilities.
The high and low speeds can be switched at any time by handle, and you can enjoy the
underwater experience from free swimming to extreme speed.
Tini adopts advanced DC brush-less motor technology realizing a higher single-machine
single-propeller performance and a longer underwater lasting power through multiple
designs and tests.
The above-mentioned accessories need to be purchased separately. Please contact
Sublue or Sublue's dealer if necessary.

3 4
Components Name
4
1. Thruster cylinder
2. State indicator
3. Rear cover of thruster
4. Water-inflow grille of thruster
5. Switch/ networking toggle button
6. Battery compartment cover
7. Battery compartment
8. Installation slide way
9. Propeller
Tini power system ×1 Control handle ×1 Control handle ×1 Single-boosting
handle bracket ×1
Handle bracket
decorative cover ×1 Quick-release
screws ×2 Lithium ion battery
& charging base ×1 Charging adapter
& cable ×1
Magnetic charging
cable ×1 Mounting screw
×1 Expository documents
×3 Machine sticker
×1
Before using this product, please check carefully whether the product package
includes the above items. If there is any item lost, please contact Sublue or your
dealer.
Please check if the product is damaged.
This product package does not contain accessories other than those mentioned
above. Other accessories can be purchased separately from Sublue.
List of Items
3
Tini Power System
5
6
7
89
2
1
3
4

5 6
Check appearance
After unpacking the product, please check carefully whether the inorganic body shell is
broken, the protective cover is fallen, the propeller blade is damaged, the battery back
cover cannot be opened, the battery swells or has liquid leakage, the battery sealing pad
is damaged, and other conditions affect the use of the product.
Unpacking for Inspection
1
Preparation before the First Use
Check function
*For the operation method, please refer to the relevant content in the following instructions.
1. Switch/gear button
3. State indicator
5. Tightening handle
2. Start button
4. Networking button
6. Charging port of handle
Control Handle
Single thruster Handle Bracket
(1) Check whether the power system can be started and networked normally*, start the
thruster after networking, and check whether the propeller is running normally;
(2) Check whether the control handle can be started and networked normally*, press the
start button after networking, check whether the start button is stuck, whether it can
normally control the starting and shutdown of the power system's propeller, and check
whether the speed levels can be switched normally.
2
1
3
22
3
3
4
5
6
Connect the charger to the AC mains supply (100-240VAC, 50/60Hz).
2
Check battery power and charge it
Charging the Battery of Power System
Charging Charging completed
1
If you find any of the problems when unpacking, don't use it, and please contact
Sublue After-sale Service Center or its authorized service center. Do not run the
product for more than 30 seconds without water.
1.
2.
3.
Universal mounting point of
sports camera
Handle mounting hole
Mounting hole for quick-re-
lease screw

7 8
Before using, please carefully read the user manual and be familiar with the product
operation and instructions.
Explore the underwater world with your WhiteShark Tini.
Read the User Manual
3
4
Start Use
The control handle is embedded with a magnetic charging connector, which can be
charged with the magnetic charging cable of Sublue.
Charging of Control Handle
Socket Adapter Battery and Charging Base
Assembly of Power System and Handle Bracket
1
Instructions for Assembly
1 2
Install the handle bracket onto the installation
slide way of the power system Tighten the quick-release screws of
the handle bracket
When charging, please note that the positive
and negative signs of the charging plug
should be in the same direction as those of
the battery to avoid mis-insertion.
To charge the control handle, an adapter with output voltage of 5V and current of
1A and above is required.
Please clean the water or dirt at the contact before charging.
Before using the product, please be familiar with the product performance in an
absolutely safe water environment and fullymaster the operations.

910
Assembly of Handle and Handle Bracket
2
3 4
Tighten the quick-release screws of
the handle bracket Complete the assembly of
power system and handle bracket
Operation Description
1
Directions for Operation
Switch/speed-level
adjustment button
Switch/ networking toggle button
Networking button
Start button
To start
the power
system1
Press the power system
switch/networking toggle
button for 3S. The power
system light will be on and
the start is successful
Items Operation Method RemarksPhotos
To start
the control
handle
Press and hold the control
handle switch/speed-level
adjustment button for 3S.
The handle light will be on
and the start is successful
The start speed is "low
speed" by default.
The initial start speed is
"low speed" by default.
The decorative cover is connected by the buckles and the handle bracket. If you
need to remove the cover, the elasticity of the plastic itself can be used to remove it
with a little force.
The control handle can be installed on the
left or right side according to the needs.
Before each use, check whether the
tightening handle is tight.
Pass the control handle and the grip handle
through the handle bracket mounting holes
and tighten them.

11 12
When the power system is started, please don't do any operation on the control handle;
When the product leaves the factory, the power system and the control handle have been networked, so the
product can be used directly, and there is no need to carry out networking operation. When you have multiple
equipment that need to be used in combination, you can use the networking function according to your needs;
The control handle can control multiple power systems, and for each networking, it cannot determine the
number of power systems that need to be networked, so the operator needs to judge the completion of the
power system networking based on the indicator, and then press the handle's start button to exit the networking
mode of the handle;
The control handle and the power system can be turned on and operated independently, so there is a possibility
that the speed level display is inconsistent after being turned on. At this time, the speed level of the control handle
shall prevail, and except starting the networking mode, the control handle can perform any operation to change
the speed level of the power system to be consistent with that of the control handle.
*
*
*
*
In the shutdown state,
press the power system
switch/networking button
for 6S to enter the
networking mode
Items Operation Method RemarksPhotos Items Operation Method RemarksPhotos
Power
system
networking2
Pressing for 3S will turn on
the power system, and
continue pressing until 6S
to enter the networking
mode. After successful
networking, it will
automatically exit this
mode
automatically shut down without
any operation in 40 minutes
③The battery power capacity is
too low during operation
Control
handle
networking2
In the power-on state, press
and hold the handle
networking button for 3S to
enter the networking mode
After the power system
and the control handle
are successfully
networked, press the start
button of the control
handle to exit the
networking mode3
Motor start
After the power system and the
control handle are started and
networked, press the control
handle start button to start
propeller
Press to start, release to
stop
To shut
down the
control
handle
①Press and hold the control
handle switch/speed-level
adjustment button for 3S in the
power-on state
②The control handle will be
automatically shut down without
any operation in 10 minutes
③The battery power capacity is
too low during operation
All indicators of the
control handle are off
When it has been turned on
and successfully connected
to the network, press the
control handle
switch/speed-level
adjustment button to adjust
speed. The speed will be
adjusted once you press it
Speed level
adjustment4
There are two speed
levels, and the speed level
is "low speed" after each
restart
①In the power-on state,
press the power system
switch/networking toggle
button for 3S
②The system will be
Power
system
shutdown
There are two speed
levels, and the speed level
is "low speed" after each
restart
1
2
3
1
2
3

13 14
When the control handle gives out a low battery power alarm, the handle can
continue to run for about 30 minutes. Please pay attention to return according to
the actual situation.
Please shut down the product before charging the control handle
Description of Indicator of Control Handle
Led B
Led A
Description of Indicator of Power System
The WhiteShark Tini body and the control handle contain LED indicators for alerting
state and battery power. Their location and definition are as follows:
As the color of battery power indicator may subject to a change, please pay
attention to the change and make a safe return.
Please stop using the product when the indicator is failed, and contact Sublue
after-sales service or designated dealer as soon as possible.
Led A
Led B
Description of indicator lamp
2
Indicates that the LED indicator flashes
regularly during the indication process
Indicates that the LED indicator is always
on during the indication process
Indicates that the LED indicator is off
Indicates that the LED indicator flashes
regularly during the indication process
Indicates that the LED indicator is always
onduring the indication process
Indicates that the LED indicator is off
The two LED indicators
are always on Powering on
LED lamps are all off Shutdown
LED indicator flashes Networking
LED indicator is always
on Running
LED indicator displays
product battery power Running
AB
AB
AB
AB
AB
AB
AB
LED A:
High speed
Low speed Red
Green
LED B:battery power ≥75%
75%>battery power ≥50%
50%>battery power ≥25%
Green
Yellow
Red
Green indicator flashes
LED B indicator flashes
once per S Low battery
power capacity LED B: Redbattery power <25%
LED indicator flashes Fault prompt Red indicator flashes
The two LED indicators
are always on Powering on
LED lamps are all off Shutdown
LED B indicator flashes Networking
LED lamp is always on Running
LED indicator displays
product battery power Low battery
power alert
AB
AB
AB
AB
AB
A
A
LED A: High speed
Low speed Red
Green
LED A:
battery power<30% Low speed:
High speed: Green
Red
Green indicator flashes
LED A indicator flashes Charging LED A: Red
LED A indicator is always
on Charging
completed LED A: Green
B
B
Other manuals for WhiteShark Tini
2
Table of contents
Languages:
Other Sublue Diving Vehicle manuals