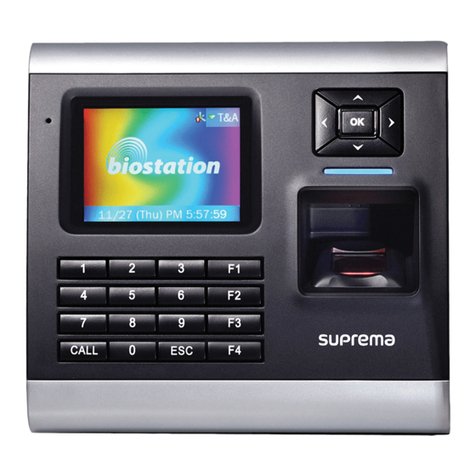
suprema BioStation 2 User manual

English
Version 1.3
BioStation 2
INSTALLATION GUIDE
www.supremainc.com
EN 101.00.BS2 V1.30A

Contents
Safety Instructions ..........................................................................................3
Getting Started ................................................................................................5
Components ...................................................................................................................................................5
Parts................................................................................................................................................................6
Cables and Connectors......................................................................................................................................................8
How to Enroll a Fingerprint......................................................................................................................10
Choose Ideal Fingers to Enroll .........................................................................................................................................10
How to Enroll Fingerprints.............................................................................................................................................10
Installation ..................................................................................................... 11
Mounting the Bracket and Product .........................................................................................................11
Connecting to Power..................................................................................................................................12
Connecting to a Network ..........................................................................................................................13
Ethernet Connection..........................................................................................................................................................13
Connecting to TTL Input and Output .....................................................................................................14
TTL input connection.......................................................................................................................................................14
TTL output connection....................................................................................................................................................14
Connecting to an Intercom ..........................................................................................................................15
Connecting to a Relay ...............................................................................................................................15
Fail Safe Lock ....................................................................................................................................................................15
Fail Secure Lock ................................................................................................................................................................16
Connecting to an Automatic door................................................................................................................................16
Connecting as a standalone.........................................................................................................................17
Connecting to Secure I/O 2 ......................................................................................................................18
Connecting as a Wiegand device.............................................................................................................19
Product Specifications ................................................................................. 20
Product Specifications ...................................................................오류! 책갈피가 정의되어 있지 않습니다.
Dimensions...................................................................................................................................................21
FCC Compliance Information...................................................................... 22
Appendix ........................................................................................................ 23
Disclaimers ...................................................................................................................................................23
Copyright Notice .........................................................................................................................................23

Safety Instructions
3
Safety Instructions
Please read the following instructions carefully before using the product. This information is important for ensuring the safety of the user
and for preventing damage to the user's property.
Warning
Violation of the instructions may cause serious injury or death.
Installation Instructions
Do not install the product in direct sunlight or in a location that is damp or dusty.
•This can cause a fire or electric shock.
Do not install the product near any heat source such as electric heaters.
•This can cause a fire from overheat or electric shock.
Install the product in a dry place.
•Moisture can cause product damage or electric shock.
Install the product in a place where there is no electromagnetic interference.
•This can cause product damage or electric shock.
Have qualified service professionals install or repair the product.
•Otherwise, it can cause a fire, electric shock, or injury.
•If the product is damaged due to a user's unauthorized installation or dismantling of the product, a service fee will be charged for repair.
Operating Instructions
Be careful not to spill any liquid such as water, drinks, or chemicals inside the product.
•This can cause fire, electric shock, or product damage.
Caution
Ignoring these instructions may result in minor injuries or damage to the product.
Installation Instructions
Protect the power cord from being walked on or pinched.
•This can cause product damage or injury.
Keep the product away from strong magnetic objects such as magnets, TVs, monitors (especially CRT monitors), or speakers.
•This can cause a product failure.
Only use a DC 12V power adapter that provides a current of at least 500mA.
•This device does not work if the proper power source is not used.
After all the cables are properly installed, apply the liquid silicone underneath and above the cables within the groove
approximately 10mm wide. The cable cover must be installed to ensure the IP65 rating.
•Non-proper installation of the cable cover may cause device malfunction or damage from water and dust.
If installing the product outside where the product is completely exposed, it is recommended to install the product together with
the enclosure.
Use a separate power supply for Secure I/O 2, electric lock and BioStation 2 respectively.
•If connecting and using the power supply to these devices together, the devices may malfunction.

Safety Instructions
4
Operating Instructions
Do not drop the product or subject it to shock or impact during use.
•This can cause a failure.
Keep the password secret from others and change it periodically.
•Failure to do so may lead to an illegal intrusion.
Do not press the buttons on the product with excessive force or with a sharp tool.
•This can cause a failure.
Be careful not to contaminate or damage the fingerprint sensor with a dirty hand or materials.
•This can decrease performance or cause failure to read a fingerprint.
Clean the product with a soft, dry cloth. Do not use alcohol, benzene, or water.
•This can cause a product failure.
BioStation 2 uses the capacitive button. If there is much moisture (humidity) like a rainy weather or on the product, wipe with a
soft and dry cloth.
There is a risk of fire if batteries are replaced by an incorrect type.
Dispose of batteries in accordance with local and national disposal regulations.

Getting Started
5
Getting Started
Components
The components may differ depending on where the product is installed.
Note
BioStation 2
Wall bracket
Fixing screws
(4)
PVC anchors
(4)
Allen Key
(For bracket)
Diode
(1)
Cable cover
Connector cables
(1x2-pin, 1x -pin3, 3x4-ping, 1x5-pin)
Ferrite core
(1)
Drilling Template
Quick Guide

Getting Started
6
Parts
Name Description
Microphone Transmits the user's voice to the intercom.
LCD screen Displays various information or settings.
Numpad/Intercom/ESC
button
•1to 9: Enters numbers/characters or selects a menu item.
•: Connects to the intercom.
•ESC: Opens the menu, moves back to the previous screen, or cancels input
Function buttons Serves as T&A function key or selects a sub-menu item.
Arrow keys/OK button
•: Changes the character type.
•: Changes the character type or selects a T&A event.
•: Deletes numbers/characters.
•: Inserts symbols or configures an item.
•OK: Selects an item or saves the settings.
Speaker Makes a sound.
LED lamp Shows the status of the product with different colors.
Fingerprint sensor Reads fingerprints.
RF card reader Reads RF cards.
Fingerprint sensor
Arrow keys/OK button
Numpad/Intercom/ESC
button
Function buttons
LED lamp
Microphone
LCD screen
USB memory port
TTL input (4-pin)
Power (2-pin)
RS-485 (4-pin)
TTL output (4-pin)
DIP switches
Ethernet
Wiegand input (4-pin)
Wiegand output (4-pin)
Intercom (5-pin)
Relay (3-pin)
RF card reader
Mini-USB cable port
Speaker

Getting Started
7
USB memory port Connects a USB memory stick.
Mini-USB cable port To be supported later.
TTL input (4-pin) Connects a TTL input/output cable.
RS-485 (4-pin) Connects an RS-485 cable.
TTL output (4-pin) Connects a TTL input/output cable.
Relay (3-pin) Connects a relay cable.
Power (2-pin) Connects the power cable.
DIP switch Turns on the termination resistor for the RS-485 interface
•To use the termination resistor, set DIP switch 1 to ON.
Ethernet Connects an Ethernet cable.
Wiegand input (4-pin) Connects a Wiegand input/output cable.
Wiegand output (4-pin) Connects a Wiegand input/output cable.
Intercom (5-pin) Connects the intercom cable.

Getting Started
8
Cables and Connectors
Power
Pin Name Color
1
PWR +VDC
Red (White stripe)
2
PWR GND
Black (White stripe)
Relay
Pin Name Color
1
RLY NO
White
2
RLY COM
Blue
3
RLY NC
Orange
RS-485
Pin Name Color
1
485 TRXP
Blue
2
485 TRXN
Yellow
3
485 GND
Black
4
SH GND
Gray
TTL input/output
Pin Name Color
1
TTL IN0 / OUT0
Red
2
TTL IN1 / OUT1
Yellow
3
TTL GND
Black
4
SH GND
Gray
Wiegand input/output
Pin Name Color
1
WG IN0 / OUT0
Green
2
WG IN1 / OUT1
White
3
WG GND
Black
4 SH GND Gray

Getting Started
9
Intercom
Pin Name Color
1
INPH +VDC
Red
2
INPH GND
Black
3
INPH AUD
Orange
4
INPH DTA
Blue
5
SH GND
Gray

Getting Started
10
How to Enroll a Fingerprint
Correct fingerprint enrollment is critical in improving fingerprint recognition. BioStation 2 is loaded with powerful fingerprint algorithm
which is capable of recognizing a fingerprint even when the angle or position of the finger on the reader is not optimal. Nevertheless,
enrolling a fingerprint with the following instructions can improve the recognition performance.
Choose Ideal Fingers to Enroll
•Each person can enroll up to ten fingerprints. If a finger is injured or scratched, it is recommended
to use another finger.
•If the fingerprint recognition fails, you can enroll the same finger multiple times, which will
improves the recognition performance.
•If a finger is injured or the fingerprint is not clear, please enroll a different finger.
•The index finger and middle finger are preferred for enrolling fingerprints. Other fingers may have
a lower recognition rate because those fingers tend to have difficulty being placed at the center of
the fingerprint sensor.
How to Enroll Fingerprints
1
When enrolling a fingerprint, the “Scan 1st finger”message will appear on the LCD screen. Place a finger on the fingerprint sensor, and
then press softly in order to improve the recognition.
2
After a beep sounds, you will be notified to scan again then remove your finger and place it again to scan.
(
You are required to scan the same finger twice for enrollment.)
Precautions for enrolling fingerprints
Enrolling fingerprints is the most important procedure because this device uses enrolled fingerprints to compare them with a scanned fingerprint.
Please ensure the following when enrolling fingerprints:
•Place the finger firmly on the fingerprint sensor for it to be read completely.
•The center of the fingerprint should be placed at the center of the fingerprint sensor.
•If a finger is injured or the fingerprint is not clear, please enroll another finger.
•Follow the instructions on the screen and place the finger correctly without movement when the finger is read.
•Place your finger to completely cover the sensor with maximum surface.
When the fingerprint recognition fails
BioStation 2 can read fingerprints regardless of the change in seasons or condition of the fingers. However, the external environment or the finger's
position can affect the recognition performance.
If the fingerprint recognition fails, the following actions are recommended.
•If there is water or sweat on the finger, please wipe it off before scanning the finger.
•If the finger is too dry, please blow softly on the fingertip before scanning the finger.
•If the finger is injured, please enroll another finger.
•If the fingerprint recognition failure persists, please follow‘Precautions for enrolling fingerprints’to re-enroll the fingerprint.
Notes

Installation
11
Installation
Mounting the Bracket and Product
1Using the included drilling template, set the installation position. Mount the bracket firmly onto the surface using the mounting
screws where the BioStation 2 is to be installed.
If the BioStation 2 should be installed onto a concrete wall, make a hole with a drill, and then insert a PVC anchor into the hole before screwing the
mounting screw.
2Assemble the cable cover with the BioStation 2 and then attach the device onto the mounted bracket.
•If the cable cover is not assembled, waterproof/dustproof performance will not be guaranteed.
•To ensure the IP65 rating, apply the liquid silicone underneath and above the cables within the groove approximately 10mm. Then, assemble the
cable cover. The IP65 rating means that the BioStation 2 is totally dust proof and resistant to lower pressure water jets.
Note
Note

Installation
12
3Assemble the BioStation 2 with the bracket by using the hex socket head screws on the bottom of the BioStation 2 with the allen key.
Connecting to Power
•Use a power adapter that has a DC 12 V (± 10%) output with the minimum current of 1,500 mA. It is recommended to use a power adapter with the
IEC/EN 60950-1 certification. If the power adapter is shared by other devices, the power adapter should provide a current more than the sum of the
power consumption of all devices connected to the adapter.
•Use a separate power supply for Secure I/O 2, the electric lock, and the product respectively. If connecting and using the power supply to these
devices together, the devices may malfunction.
Note
1 - PWR +VDC Red (White stripe)
2 - PWR GND Black (White stripe)
UPS
(Optional)
DC
Power
BioStation 2

Installation
13
Connecting to a Network
Ethernet Connection
Connecting to a PC through a hub
A normal CAT-5 UTP cable can be used to connect to a hub.
Connecting to a PC directly
BioStation 2 can be connected directly to a PC by using a normal straight type CAT-5 UTP cable because it supports an automatic MDI/MDIX
function.
BioStation 2
PC
H
ub
BioStation 2
PC

Installation
14
Connecting to TTL Input and Output
TTL input connection
TTL output connection
Controller
BioStation 2
Cable Shield (Optional)
1 - TTL OUT0 Red
2 - TTL OUT1 Yellow
3 - TTL GND Black
4 - SH GND Gray
Door sensor
BioStation 2
1 - TTL IN0 Red
2 - TTL IN1 Yellow
3 - TTL GND Black
4 - SH GND Gray
Door button Cable Shield (Optional)

Installation
15
Connecting to an Intercom
Connecting to a Relay
Fail Safe Lock
To use the fail safe lock, connect N/C terminal as shown below. Normally, there is a current flowing through the relay and the door is
opened when the relay is activated by blocking current flows. The door is opened when there is a blackout or power failure caused by
external conditions.
•Install a diode at both ends of the wire at the door lock as shown in the figure to protect the relay from the reverse current induced when the door
lock operates.
•Make sure that the direction of the installed diode is correct.
•Install a diode close to the door lock.
•Use a separate power source for the BioStation 2 from the door lock.
Note
BioStation 2
Deadbolt /
Door strike
DC
Power
2 - RLY COM Blue
3 - RLY NC Orange
BioStation 2
Cable Shield (Optional)
Intercom Connection
1 - INPH +VDC Red
2 - INPH GND Black
3 - INPH AUD Orange
4 - INPH DTA Blue
5 - SH GND Gray
Intercom
Power Connection
1 - PWR +VDC Red (White stripe)
2 - PWR GND Black (White stripe
)
UPS
(Optional)
DC Power

Installation
16
Fail Secure Lock
To use the fail secure lock, connect N/O terminal as shown below. Normally, there is no current flowing through the relay and the door is
opened when the relay is activated by the current. The door is locked when there is a blackout or power failure caused by external
conditions.
•Install a diode at both ends of the wire at the door lock as shown in the figure to protect the relay from the reverse current induced when the door
lock operates.
•Make sure that the direction of the installed diode is correct.
•Install a diode close to the door lock.
•Use a separate power source for the BioStation 2 from the door lock.
Connecting to an Automatic door
BioStation 2
Automatic door
controller
Sensor
1 - RLY NO White
2 - RLY COM Blue
Door button
Door lock
Note
BioStation 2
1 - RLY NO White
2 - RLY COM Blue
Deadbolt /
Door strike
DC
Power

Installation
17
Connecting as a standalone
BioStation 2 can be connected directly to a door lock, a door button, and a door sensor without any additional I/O device.
•You can use the master device as a multi-door controller with the slave devices that are connected by the RS485 interface. The slave devices will be
used as dummy readers in this setting, and the authentication is performed on the master device.
•When Xpass is used as a master device, only the card authentication is available.
•The maximum number of slave devices can vary depending upon authentication methods, number of users, and number of devices. Additionally,
the number of slave devices will directly affect fingerprint authentication speed.
•A master device can control up to 31 slave devices. RS485 connection bandwidth restricts maximum number of the slave devices to 7 when using
the fingerprint authentication mode.
•For more details, contact Suprema technical support team at support@supremainc.com.
Note
BioStation 2
PC
Door button
Door sensor
Or
Cable Shield (Optional)
TTL
TTL Connection
1 - TTL IN0 Red
2 - TTL IN1 Yellow
3 - TTL GND Black
4 - SH GND Gray
Relay Connection
1 - RLY NO White
2 - RLY COM Blue
3 - RLY NC Orange
H
ub
Fail Safe Lock
Fail Secure Lock
DC Power
DC Power
Deadbolt /
Door strike
Power Connection
1 - PWR +VDC Red (White stripe)
2 - PWR GND Black (White stripe)
Relay
Power

Installation
18
Connecting to Secure I/O 2
BioStation2 can be connected to the Secure I/O 2 using a RS-485 connection. Secure I/O 2 will prevent unauthorized entry by
maintaining system status independent from connection to the BioStation 2.
•RS-485 should be AWG24 and twisted pair. The maximum length is 1.2 km.
•Connect a termination resistor (120Ω) to both ends of a RS-485 daisy chain connection. It should be installed at both ends
of the daisy chain. If it is installed in the middle of the chain, the quality of communication will be deteriorated because it re
duces the signal level. If the termination resistor of the BioStation 2 is required, set the #1 DIP switch to ON.
•You can use the master device as a multi-door controller with the slave devices that are connected by the RS485 interface. The slave devices will be
used as dummy readers in this setting, and the authentication is performed on the master device.
•When Xpass is used as a master device, only the card authentication is available.
•The maximum number of slave devices can vary depending upon authentication methods, number of users, and number of devices. Additionally,
the number of slave devices will directly affect fingerprint authentication speed.
•A master device can control up to 31 slave devices. RS485 connection bandwidth restricts maximum number of the slave devices to 7 when using
the fingerprint authentication mode.
•For more details, contact Suprema technical support team at support@supremainc.com.
Note
BioStation 2
PC
Door lock
Secure I/O 2
Door button
Door sensor
RS-485 Connection
1 - 485 TRXP Blue
2 - 485 TRXN Yellow
3 - 485 GND Black
4 - SH GND Gray
Cable Shield (Optional)
DC Power
DC Power
DC Power
H
ub
RS-485
Power
Power Connection
1 - PWR +VDC Red (White stripe)
2 - PWR GND Black (White stripe)

Installation
19
Connecting as a Wiegand device
Controller
1 - WG IN0 Green
2 - WG IN1 White
3 - WG GND Black
4 - SH GND Gray
RFID Reader
BioStation 2
Using as a Wiegand input device
Using as a Wiegand output device
Cable Shield (Optional)
BioStation 2
1 - WG OUT0 Green
2 - WG OUT1 White
3 - WG GND Black
4 - SH GND Gray

Product Specifications
20
Product Specifications
Category Feature Specification
Main
Biometric Fingerprint
IP Rating IP 65
RF Option*
•
BS2-OMPW: 13.56Mhz MIFARE, MIFARE Plus, DESFire/EV1, FeliCa, NFC,
ISO14443A, ISO15693
•BS2-OIPW: 13.56MHz MIFARE, MIFARE Plus, DESFire/EV1, FeliCa, iCLASS
SE/SR, NFC, ISO14443A/B, ISO15693
•BS2-OHPW: 125kHz HID Prox
•BS2-OEPW: 125kHz EM
Capacity
Max. User (1:1) 500,000
Max. User (1:N) 20,000
Max. Template (1:1) 1,000,000
Max. Template (1:N) 40,000
Max. Text Log 3,000,000
Interface
Wi-Fi Yes
TCP/IP Yes
RS-485 1ch Host or Slave (Selectable)
RS-232 Yes
Wiegand 1ch Input, 1ch Output
TTL Input 2ch Inputs, 2ch Outputs
Relay 1 Relay
USB USB 2.0 (Host)
Relay
Voltage Max. 24VDC
Current 0.5A, Max. 1.A
Hardware
CPU 1.0 GHz
Memory 8GB Flash + 128 MB RAM
LCD 2.8” QVGA Color LCD
LED Multi-Color
Sound 16-bit Hi-Fi
Operating Temp. -20°C ~ 50°C
Tamper Yes
Power 9V ~ 18V
PoE Optional
Dimensions (W x H x D mm) 142 x 144 x 45(38)
Certificates CE, FCC, KC, RoHS, REACH, WEEE
* For detailed information on our supported card list, contact Suprema technical support team at support@supremainc.com.
Other manuals for BioStation 2
2
Table of contents
Other suprema Security System manuals

suprema
suprema bioentry PLUS User manual

suprema
suprema FSF2DB User manual

suprema
suprema BioStation T2 User manual

suprema
suprema biostation User manual

suprema
suprema BioLite Net User manual

suprema
suprema BioStar Service manual

suprema
suprema Alarm Zone User manual

suprema
suprema Secure I/O User manual

suprema
suprema DM-20 User manual
Popular Security System manuals by other brands

Maxxima
Maxxima MEL-S20100W installation instructions

Teletek electronics
Teletek electronics SensoIRIS MCP150MR installation instructions

Fermax
Fermax CONTROL CAMERA KIT B/W manual

XtendLan
XtendLan DPM-D246-IP user manual

NAPCO
NAPCO Magnum Alert 1016e Quick Star User Guide

Aico
Aico EI169/160 Instruction leaflet