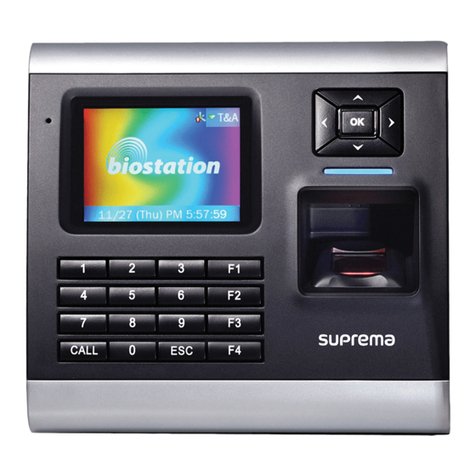
suprema BioStar Service manual


Table of Contents
Copyright © 2008, Suprema Inc. On the web: www.supremainc.com
01 About the BioStar System ....................................................... 2
1.1 Logical Configuration ....................................................................................3
1.2 Access Control Features ...............................................................................5
1.2.1 User Authentication ............................................................................................ 5
1.2.2 User Management .............................................................................................. 6
1.2.3 Access Group Management ............................................................................. 6
1.2.4 Device Management .......................................................................................... 6
1.2.5 Door Management .............................................................................................. 7
1.2.6 Zone Management .............................................................................................. 7
02 Install the BioStar Software ................................................... 8
2.1 System Requirements ...................................................................................8
2.2 Run the BioStar Express Installer .................................................................9
2.3 Install the BioStar Server Application ........................................................10
2.3.1 Configure the BioStar Server .......................................................................... 11
2.4 Install the BioStar Client Application .........................................................13
2.4.1 Log in to BioStar for the First Time ................................................................. 14
2.5 Customize the BioStar Interface .................................................................15
2.5.1 Change the Theme ............................................................................................ 15
2.5.2 Customize the Toolbar ...................................................................................... 16
2.5.3 Change Event Views ......................................................................................... 17
2.6 Migrate a Database from BioAdmin to BioStar .........................................17
03 Setup the BioStar System ..................................................... 18
3.1 Create Administrative Accounts .................................................................18
3.1.1 Administration Concepts ................................................................................. 18
3.1.2 Add and Customize Administrative Accounts .............................................. 19
3.1.2.1 Add an administrative account ..................................................................... 19
3.1.2.2 Change an administrative account level or
password .......................................................................................................... 20
3.1.2.3 Create a custom administration level .......................................................... 21

Table of Contents
Copyright © 2008, Suprema Inc. On the web: www.supremainc.com
3.2 Setup Devices .............................................................................................22
3.2.1 Search for and Add Devices ........................................................................... 22
3.2.2 Search for and Add Slave Devices ................................................................ 24
3.2.3 Configure a BioStation Device ........................................................................ 25
3.2.3.1 Connect a BioStation device via wireless LAN .......................................... 26
3.2.4 Configure a BioEntry Plus Device .................................................................. 28
3.2.4.1 Issue command cards .................................................................................... 29
3.2.5 Change Wiegand Formats ............................................................................... 30
3.2.5.1 Configure a 26-bit Wiegand format .............................................................. 31
3.2.5.2 Configure a pass-through Wiegand format ................................................ 31
3.2.5.3 Configure a custom Wiegand format ........................................................... 32
3.3 Setup Doors ................................................................................................33
3.3.1 Add a Door ......................................................................................................... 33
3.3.2 Associate a Device With a Door .................................................................... 33
3.3.3 Configure a Door ............................................................................................... 34
3.3.4 Create a Door Group ......................................................................................... 35
3.4 Setup Zones ................................................................................................35
3.4.1 Determine Which Zones to Use ...................................................................... 35
3.4.2 Add and Configure Zones ................................................................................ 36
3.4.2.1 Add a zone ........................................................................................................ 36
3.4.2.2 Add a device to a zone ................................................................................... 37
3.4.2.3 Configure zone inputs ..................................................................................... 38
3.4.2.4 Configure alarm actions and outputs ........................................................... 39
3.4.2.5 Configure arm and disarm settings .............................................................. 39
3.4.2.6 Select access groups ..................................................................................... 40
3.4.2.7 View zone events ............................................................................................ 40
3.5 Setup Users ................................................................................................40
3.5.1 Create a User Account ..................................................................................... 41
3.5.2 Register Fingerprints ........................................................................................ 42
3.5.2.1 Place fingers on the sensor ........................................................................... 43
3.5.2.2 Register fingerprints ....................................................................................... 43
3.5.2.3 Enroll users via command cards .................................................................. 44
3.5.3 Issue Access Cards .......................................................................................... 45
3.5.3.1 Issue EM4100 cards ........................................................................................ 45
3.5.3.2 Issue HID proximity cards .............................................................................. 46
3.5.3.3 Issue MIFARE CSN cards .............................................................................. 47

Table of Contents
Copyright © 2008, Suprema Inc. On the web: www.supremainc.com
3.5.3.4 Issue MIFARE template cards ....................................................................... 47
3.5.3.5 Change the MIFARE site key ......................................................................... 49
3.5.3.6 Edit the MIFARE layout ................................................................................... 49
3.5.4 Transfer User Data ........................................................................................... 51
3.5.4.1 Transfer a user to a device ............................................................................ 51
3.5.4.2 Synchronize all users ..................................................................................... 52
3.5.4.3 Retrieve user data from a device ................................................................. 52
3.6 Setup Timezones ........................................................................................53
3.6.1 Create a Timezone ............................................................................................ 53
3.6.2 Create a Holiday Schedule .............................................................................. 54
3.7 Setup Access Groups ..................................................................................54
3.7.1 Add an Access Group ...................................................................................... 54
3.7.2 Add Users to Access Groups .......................................................................... 56
3.7.3 Assign Access Groups to Users ..................................................................... 57
3.7.4 Transfer Access Groups to Devices .............................................................. 57
3.8 Setup Alarms ..............................................................................................58
3.8.1 Configure Alarm Settings and Sounds .......................................................... 58
3.8.1.1 Customize alarm actions ................................................................................ 58
3.8.1.2 Add custom alarm sounds ............................................................................. 59
3.8.2 Configure email notifications .......................................................................... 59
3.8.3 Configure Settings for External Devices ....................................................... 60
3.8.3.1 Configure outputs to external devices ......................................................... 60
3.8.3.2 Configure inputs from external devices ...................................................... 61
04 Manage the BioStar System .................................................. 63
4.1 Monitor Events in Real Time ......................................................................63
4.2 View Event Logs .........................................................................................64
4.2.1 Upload Logs to BioStar .................................................................................... 64
4.2.2 View Logs in User, Door, and Zone Panes .................................................... 65
4.2.3 View Logs from the Monitoring Pane ............................................................ 65
4.3 Control Doors, Alarms, and Devices Remotely ..........................................66
4.3.1 Open or Close Doors ......................................................................................... 66
4.3.2 Release Alarms ................................................................................................. 66
4.3.3 Lock or Unlock Devices ................................................................................... 66
4.3.3.1 Lock or unlock connected devices .............................................................. 67

Table of Contents
Copyright © 2008, Suprema Inc. On the web: www.supremainc.com
4.3.3.2 Set automatic device locking ........................................................................ 67
4.3.3.3 Reset a device lock ......................................................................................... 68
4.4 Manage Users ............................................................................................69
4.4.1 Delete Users ...................................................................................................... 69
4.4.1.1 Delete users via command cards ................................................................. 70
4.4.2 Transfer Users to Other Departments ........................................................... 70
4.4.3 Customize User Information Fields ................................................................ 71
4.4.3.1 Add new information fields ............................................................................ 71
4.4.3.2 Modify existing information fields ................................................................ 71
4.4.4 Export User Data ............................................................................................... 72
4.4.5 Import User Data ............................................................................................... 73
4.5 Manage Devices .........................................................................................74
4.5.1 Remove Devices ................................................................................................ 74
4.5.2 Upgrade Device Firmware ............................................................................... 74
4.6 Activate Fingerprint Encryption ..................................................................75
4.7 Change the Fingerprint Template ...............................................................75
05 Customize Settings ............................................................... 76
5.1 Customize Device Settings .........................................................................76
5.1.1 Customize Settings for BioStation Devices .................................................. 76
5.1.1.1 Operation Mode tab ........................................................................................ 77
5.1.1.2 Fingerprint tab .................................................................................................. 78
5.1.1.3 Network tab ...................................................................................................... 80
5.1.1.4 Access Control tab .......................................................................................... 81
5.1.1.5 Input tab ............................................................................................................ 82
5.1.1.6 Output tab ......................................................................................................... 83
5.1.1.7 Display/Sound tab ........................................................................................... 85
5.1.1.8 Wiegand tab ..................................................................................................... 86
5.1.2 Customize Settings for BioEntry Plus Devices ............................................. 87
5.1.2.1 Operation Mode tab ........................................................................................ 87
5.1.2.2 Fingerprint tab .................................................................................................. 88
5.1.2.3 Network tab ...................................................................................................... 89
5.1.2.4 Access Control tab .......................................................................................... 90
5.1.2.5 Input tab ............................................................................................................ 91
5.1.2.6 Output tab ......................................................................................................... 92

Table of Contents
Copyright © 2008, Suprema Inc. On the web: www.supremainc.com
5.1.2.7 Command Card tab .......................................................................................... 93
5.1.2.8 Wiegand tab ..................................................................................................... 94
5.2 Customize Door Settings ............................................................................94
5.2.1 Details tab .......................................................................................................... 95
5.2.2 Alarm tab ............................................................................................................ 96
5.3 Customize Zone Settings ............................................................................97
5.3.1 Customize Settings for Anti-Passback Zones .............................................. 97
5.3.1.1 Details tab ......................................................................................................... 97
5.3.1.2 Alarm tab .......................................................................................................... 98
5.3.1.3 Access Group tab ............................................................................................ 98
5.3.2 Customize Settings for Entrance Limit Zones ............................................... 99
5.3.2.1 Details tab ......................................................................................................... 99
5.3.2.2 Alarm tab ........................................................................................................ 100
5.3.2.3 Access Group tab .......................................................................................... 100
5.3.3 Customize Settings for Alarm Zones ............................................................ 101
5.3.3.1 Details tab ....................................................................................................... 101
5.3.3.2 Alarm tab ........................................................................................................ 102
5.3.3.3 Access Group tab .......................................................................................... 102
5.3.4 Customize Settings for Fire Alarm Zones .................................................... 103
5.3.4.1 Details tab ....................................................................................................... 103
5.3.4.2 Alarm tab ........................................................................................................ 103
5.3.5 Customize Settings for Access Zones ......................................................... 104
5.3.5.1 Details tab ....................................................................................................... 104
5.4 Customize User Settings ..........................................................................105
5.4.1 Details Tab ....................................................................................................... 105
5.4.2 Fingerprints Tab .............................................................................................. 106
5.4.3 Card Tab ........................................................................................................... 106
06 Solve Problems .................................................................... 107
Glossary .................................................................................... 108

Warranty and Disclaimers
1
Copyright © 2008, Suprema Inc. On the web: www.supremainc.com
Suprema Warranty Policy
Suprema warrants to Buyer, subject to the limitations set forth below, that each product shall operate in
substantial accordance with the published specifications for such product for a period of one (1) year from the
date of shipment of products ("Warranty Period"). If Buyer notifies Suprema in writing within the Warranty Period
of any defects covered by this warranty, Suprema shall, at its option, repair or replace the defective product that
is returned to Suprema within the Warranty Period, with freight and insurance prepaid by Buyer. Such repair or
replacement shall be Suprema's exclusive remedy for breach of warranty with respect to the Product. This
limited warranty shall not extend to any product that has been: (i) subject to unusual physical or electrical stress,
misuse, neglect, accident or abuse, or damaged by any other external causes; (ii) improperly repaired, altered or
modified in any way unless such modification is approved in writing by the Supplier; (iii) improperly installed or
used in violation of instructions furnished by Suprema.
Suprema shall be notified in writing of defects in the RMA (Return Material Authorization) report supplied by
Suprema not later than thirty days after such defects have appeared and at the latest one year after the date of
shipment of the Product. The report should include full details of each defective product, model number, invoice
number, and serial number. No product without an RMA number issued by Suprema may be accepted and all
defects must be reproducible for warranty service.
Except as expressly provided herein, the products are provided "as is" without warranty of any kind, either
express or implied, including, but not limited to, warranties or merchantability and fitness for a particular purpose.
Disclaimers
The information in this document is provided in connection with Suprema products. No license, express or
implied, by estoppels or otherwise, to any intellectual property rights is granted by this document, except as
provided in Suprema's Terms and Conditions of Sale for such products.
Suprema assumes no liability whatsoever and Suprema disclaims any express or implied warranty, relating to
sale and/or use of Suprema products, including liability or warranties relating to fitness for a particular purpose,
merchantability, or infringement of any patent, copyright, or other intellectual property right.
Suprema products are not intended for use in medical, life saving, or life sustaining applications or other
applications in which the failure of the Suprema product could create a situation where personal injury or death
may occur. Should Buyer purchase or use Suprema products for any such unintended or unauthorized
application, Buyer shall indemnify and hold Suprema and its officers, employees, subsidiaries, affiliates, and
distributors harmless against all claims, costs, damages, expenses, and reasonable attorney fees arising out of,
directly or indirectly, any claim of personal injury or death associated with such unintended or unauthorized use,
even if such claim alleges that Suprema was negligent regarding the design or manufacture of the part.
Suprema reserves the right to make changes to specifications and product descriptions at any time without
notice to improve reliability, function, or design. Designers must not rely on the absence or characteristics of any
features or instructions marked "reserved" or "undefined." Supreme reserves these for future definition and shall
have no responsibility whatsoever for conflicts or incompatibilities arising from future changes to them.
Please contact Suprema, local Suprema sales representatives or local distributors to obtain the latest
specifications before placing your order.
Copyright Notice
This document is copyrighted © 2008 by Suprema, Inc. All rights reserved. All other product names,
trademarks, or registered trademarks are property of their respective owners.
01
2
BioStar is Suprema's next-generation access control system, based on IP connectivity and
biometric security. Most system devices integrate fingerprint scanners and card readers
for multiple levels of user authentication. However, Suprema's biometric devices, installed
at each door, work not only as card or fingerprint scanners and card readers, but also as
intelligent access controllers.
The licensed standard edition of BioStar is unlocked by a USB dongle. Without the
dongle, BioStar functions as a free, but limited-capability version. With the dongle,
BioStar offers greater versatility and additional features, as shown in the table below:
BioStar V1.0 supports the following devices:
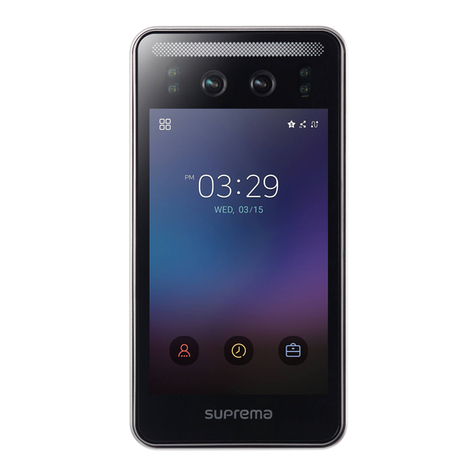
•
BioStation (V1.5 or later)
- BioStation is a multifunctional
terminal with a keypad and a 2.5-inch color LCD monitor that
allows you to perform user enrollment and administration functions
directly from the device. BioStation can be connected to a network
via a wireless LAN or Ethernet and includes USB host and device
interfaces for easy data transfer. BioStation MIFARE (BSM) models
also support entry control via smart cards.
Standard Edition Free Version
Maximum # of doors 512 20
Maximum # of clients 32 2
Zone support Yes No
Email Notifications Yes No
Server Matching Yes No
About the BioStar System

1. About the BioStar System
3
Copyright © 2008, Suprema Inc. On the web: www.supremainc.com
•
BioEntry Plus (V1.2 or later)
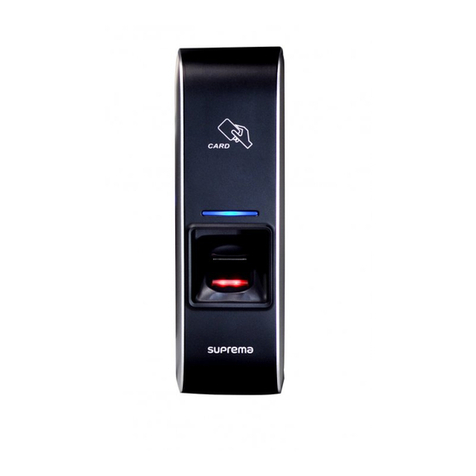
- BioEntry Plus is an IP-based access
control device that includes both fingerprint recognition and entry via
access card. The device can be controlled independently via command
cards or managed entirely via the BioStar interface. BioEntry Plus can be
connected to electric door strikes via an internal relay or used with the
Secure I/O device for extra security and expanded capability.
•
SFR300 USB
- The SFR300 USB device is a fingerprint
scanner that can be used for convenient user enrollment. Installing
the device is simple: plug it into a USB connection on any
computer that is connected to the BioStar server and install a driver.
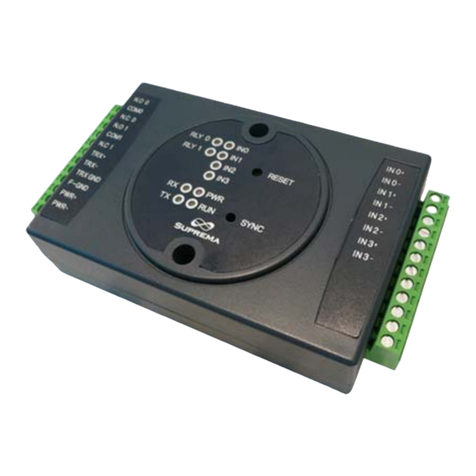
•
Secure I/O
- The Secure I/O device provides a convenient way to
increase the security of externally mounted devices or expand the
capabilities of your system. When doors are controlled by a secure
I/O device, intruders cannot open doors even if they succeed in
uninstalling external devices. To further increase security, the
secure I/O device provides encrypted communications between door
components. The Secure I/O device has four input switches and two output relays to
allow control of multiple components with a single device.
1.1 Logical Configuration
BioStar is a distributed intelligence system. Instead of the complex wiring and
centralized control required by conventional access control systems, Suprema's
access control devices can be connected via TCP/IP or wirelessly to a local area
network or connected directly via serial connections. User information, access
rules, and other data can be distributed to each device to speed up authorization
time and provide continual operation even when the connection to the network
is lost.

1. About the BioStar System
4
Copyright © 2008, Suprema Inc. On the web: www.supremainc.com
As the following graphic illustrates, the BioStar system does not require separate
access controllers. This feature provides a distinct advantage over other access
control systems, because BioStation or BioEntry Plus devices act simultane-
ously as both a controller and a reader. As a result, Suprema's distributed intel-
ligence approach requires less hardware and less wiring than conventional,
centralized access control systems.
BioStar is a server-client application that supports up to 32 clients (2 clients
maximum in the free version). A typical configuration consists of numerous
access control devices connected to a central server via Ethernet, WLAN, and/or
RS485. BioStar is compatible with MS SQL Server and MySQL databases.
Overall, the system supports a maximum of 512 doors and 512 devices (20 doors
and devices in the free version). Networked devices can be easily grouped
together to create various combinations of anti-passback or alarm zones, as
illustrated by the graphic below.

1. About the BioStar System
5
Copyright © 2008, Suprema Inc. On the web: www.supremainc.com
1.2 Access Control Features
The BioStar system goes a step beyond conventional access control systems, by
combining unique biometric identification with configurable access card
capabilities.
1.2.1 User Authentication
Suprema's access control devices incorporate advanced, award-winning
fingerprint recognition algorithms to provide secure access control. When used
with the numerical keypads on BioStation terminals, the system allows for a
wide variety of user authentication modes:
•
Fingerprint or access card
- either a fingerprint scan or access card may
be used to gain entry.
•
Fingerprint + access card
- both fingerprint scan and access card are
required for access.
•
User ID + fingerprint
- a user ID and fingerprint scan are used in
combination; the user ID identifies the user and the fingerprint scan is used
for authorization.
•
User ID + password
- a user ID and password are used in combination; the
user ID identifies the user and the password is used for authorization.
•
User ID + card + fingerprint
- a user ID, access card, and fingerprint scan
are used in combination.
•
Fingerprint only
- authentication via a fingerprint scan is the only method
to gain entry.
•
Card only
- authentication via an access card is the only method to gain
entry.
BioStar stores two templates of each fingerprint and up to two fingerprints per
user (four templates total). If desired, one fingerprint can be used as a duress
signal, to activate alarms or send alerts in situations where a user is required to
gain access under duress. Duplicate templates of each print enhance authenti-
cation performance by reducing the likelihood of false rejections. For more
information about registering fingerprints, see section 3.5.2.
BioStar also provides administrators with the ability to read EM4100 and HID
proximity cards and read, issue, and format MIFARE® access cards. For more
information about access cards, see section 3.5.3.

1. About the BioStar System
6
Copyright © 2008, Suprema Inc. On the web: www.supremainc.com
1.2.2 User Management
BioStar supports both manual and automatic modes for user management.
Manual synchronization is available for enrolling different subsets of users to
particular devices or when the total number of users in the BioStar database
exceeds the limits of a BioStation or BioEntry Plus device. Automatic synchroni-
zation is available when managing user records at the device is not required or
desired.
BioStar collects log records from devices and allows the data to be exported to a
delimited text file (.CSV) for custom reporting. The software supports an
unlimited number of user records—the maximum amount of data stored is
subject only to the capabilities of the underlying database and hardware
configuration. For more information about user management, see sections 4.1,
4.2, and 4.4.
1.2.3 Access Group Management
BioStar allows administrators to build custom access groups by combining
permissions for timezones and doors. With this capability, BioStar provides
customizable, scheduled access control.
BioStar supports up to 128 timezones that consist of a seven day schedule, plus
two holiday schedules. Each day in a timezone can include as many as five
distinct time periods.
In total, BioStar supports up to 128 access groups that can be transferred to all
connected devices. For more information about access groups, see section 3.7.
1.2.4 Device Management
Administrators can control multiple aspects of devices via the BioStar software.
In addition to authentication behaviors, BioStar supports the configuration of
inputs, output relays, actions, and sounds. The system includes options for
customizing sound and display settings for BioStation devices and event settings
for BioEntry Plus devices.
The system provides configuration options for controlling external devices, such
as door strikes and alarm sirens. BioStar can also connect to and communicate
with third-party devices via a Wiegand interface. For more information about
device management, see sections 3.2 and 4.5.

1. About the BioStar System
7
Copyright © 2008, Suprema Inc. On the web: www.supremainc.com
1.2.5 Door Management
BioStar allows for comprehensive control of doors and connected devices, such
as door relays, alarm relays, door sensors, and exit switches. Each door can be
operated by up to two devices and, when two devices are connected to a door,
administrators can apply anti-passback controls.
BioStar allows specific configuration of alarm events for doors that are forced
open or held open longer than a specified interval, including activating alarm
sounds from individual devices, sending signals to external alarm sirens,
displaying warnings in the BioStar user interface, and sending e-mail
notifications (not available in the free version). In addition, administrators or
operators can remotely lock and unlock doors or reset alarms. For more
information about door management, see sections 3.3 and 4.3.
1.2.6 Zone Management
The BioStar system gives administrators complete control of various zones (not
available in the free version). Zones can be created with devices connected via
Ethernet or RS485 and can include a master device and up to 65 member
devices. In addition, individual devices can be included in up to four zones.
BioStar supports zones for increased access control, such as anti-passback and
entrance limit zones, as well as zones that provide control for alarm or fire alarm
outputs and actions. BioStar also allows administrators to synchronize time,
event logs, and user data for all devices in a specified zone. For more information
about zone management, see section 3.4.

02
8
Installing BioStar is a fairly simplistic process, provided that you address a few prerequi-
sites before beginning the installation:
• First, you must select a PC that can remain running constantly to function as the
BioStar server. The server will receive and store log data from connected devices in real
time.
• Second, you must choose a type of database to use. The BioStar server supports either
MySQL or MS SQL Server (including the scaled-down, free MS SQL Server Express).
Regardless of which database you choose, you must have sufficient access rights and
privileges to connect to the database and create new tables.
• Third, ensure that the PCs you will use for both server and client applications meet the
minimum requirements listed in section 2.1.
The BioStar installation CD includes a BioStar express installer, a BioStar server
installer, and a BioStar client installer. The express installer will install both the server
and client applications with minimal input (see section 2.2). However, you may choose to
install the server and client applications independently if you need to specify additional
database options or desire to install the applications on separate PCs (see sections 2.3
and 2.4).
2.1 System Requirements
BioStar supports the following operating systems (32-bit versions only):
•WindowsVista
• Windows XP, Service Pack 1 or later
• Windows 2003
• Windows 2000, Service Pack 4 or later
Install the BioStar Software

2. Install the BioStar Software
9
Copyright © 2008, Suprema Inc. On the web: www.supremainc.com
The minimum system requirements for installing and operating the BioStar
software include the following:
•
CPU
- Intel Pentium or similar processor, capable of processing speeds of
1GHz or faster
•
RAM
- 512MB
•
HDD
- 5GB
However, Suprema recommends the following hardware configuration for
optimal performance:
•
CPU
- Intel Pentium Dual Core or similar processor, capable of processing
speeds of 2GHz or faster
•
RAM
- 1GB for Windows XP; 2GB for other operating systems
•
HDD
- 10GB
2.2 Run the BioStar Express Installer
You should run the BioStar express installer when you desire to install both the
server and client applications on the same PC and are willing to use the MS SQL
Server Express database with default settings. You will be required to intervene
in the express installation process only when MS SQL Server or a variation is
already installed. In this case, you will be asked whether or not you wish to
install MS SQL Server Express. If you choose not to install the express version,
you will be required to provide the correct authentication details, as described in
step 6 of section 2.3.
The express installer will install the following components:
• BioStar server application
• Auxiliary libraries - OpenSSL and Microsoft Visual C++ Redistributable
• MS SQL Server Express
• BioStar client application
• BADB Conv (database migration tool)
Before you run the BioStar express installer, close all other open applications. If
you have previously installed BioAdmin on the same machine, ensure that you
stop the BioAdmin server before beginning the installation. To run the express
installer,
1. Insert the BioStar installation CD into a compatible media drive.
2. Locate the installation directory and run
BioStar 1.0 Express Setup
.
3. Follow the on-screen prompts to begin the installation.

2. Install the BioStar Software
10
Copyright © 2008, Suprema Inc. On the web: www.supremainc.com
2.3 Install the BioStar Server Application
If you do not choose to use the express installer, you must install the BioStar
server and client applications separately. After you ensure that your
system meets the minimum requirements listed in section 2.1 and address the
prerequisites mentioned in the introduction to this chapter, close all other open
applications. If you have previously installed BioAdmin on the same machine,
ensure that you stop the BioAdmin server before beginning the installation.
The BioStar server installer will add the following components to your system:
• BioStar server application
• MS SQL Server Express (optional)
• Auxiliary libraries - OpenSSL and Microsoft Visual C++ 2005
Redistributable
• BADB Conv (database migration tool)
To install the BioStar server application,
1. Insert the BioStar installation CD into a compatible media drive.
2. Locate the installation directory and run
BioStar 1.0 Server Setup
.
3. Follow the on-screen prompts to begin the installation.
4. During the installation, you will be required to accept the OpenSSL license
agreement and select a destination folder for the OpenSSL program files.
5. You will also be asked whether or not you wish to install the MS SQL Server
Express edition. If you will use a pre-installed version of MS SQL Server or
MySQL, you may click
No
when this message appears. If you decide to use
the express edition in this step, you can skip to step 7. The database setup
process will be automated when you install the express edition.

2. Install the BioStar Software
11
Copyright © 2008, Suprema Inc. On the web: www.supremainc.com
6. When the Create Database [BioStar] window appears, select a database type
(MS SQL Server or MySQL). The database server address and port numbers
will be automatically populated, but you should verify that they are correct.
If you choose MS SQL Server, you must configure the authentication method
as well (MySQL allows only server authentication):
•
Server authentication
- this option uses login IDs and passwords to
authenticate users that are created by and stored on the SQL Server.
These credentials are not based on Windows user accounts.
•
Windows authentication
- this option uses Windows users accounts
for authentication. When users connect through a Windows user
account, the SQL Server validates the account name and password using
the Windows principal token in the operating system. The SQL Server
does not ask for a password and does not independently validate user
identification. Windows authentication is the default authentication mode
for MS SQL Server.
Note:
You must choose the authentication mode that is supported by the database.
You must also provide the proper credentials to create new tables in the database.
7. Click
Setup
to create the SQL database.
8. When the SQL database setup is complete, click
Finish
.
9. The setup program will perform a few remaining processes before the
server installation is complete. Click
Finish
.
2.3.1 Configure the BioStar Server
In some cases, you may require manual configuration of the BioStar server. If
you are having trouble connecting to the server from the client application, for
example, you may need to alter your server settings. In addition, you must stop
and restart the server application to apply any changes you have made to server
configurations or database settings.

2. Install the BioStar Software
12
Copyright © 2008, Suprema Inc. On the web: www.supremainc.com
To open the server configuration utility, locate and run the BSServerConfig.exe
file. By default, a shortcut to this utility will be added to the desktop during
installation of the BioStar server. You may also locate this file inside the “Server”
folder where the BioStar application was installed.
The server configuration utility allows you to monitor and control the following:
•
Status
- view and modify the current status of the BioStar server (
Stopped
or
Started
). You can stop and start the server by clicking the
Start
or
Stop
button on the right.
•
Connection
- view and modify the details for the connection between the
server and devices.
-
TCP Port
- enter the port that devices and client applications use to
connect to the server. You should use a port that is not shared with any
other software applications. In most cases, you can use the default port
(1480).
-
Thread Count
- enter the maximum thread count that the BioStar
server can create. You can enter any number between 32 and 512;
however, keep in mind a larger thread count will consume more
system resources.
-
Client List
- click this button to view a list of devices that are connected
to the BioStar server. The list shows the IP address of each device and
whether or not a SSL certificate has been issued to the device. You can
issue or remove SSL certificates directly from the utility.

2. Install the BioStar Software
13
Copyright © 2008, Suprema Inc. On the web: www.supremainc.com
•
Database
- view and modify database settings. For more information about
how to alter these settings, see the procedure for setting up the BioStar
server in section 2.3.
-
Max Connection
- specify the maximum number of connections
between the server and the database. In most cases, the default value (1)
is appropriate.
•
SSL
- view or modify the settings for OpenSSL. Click Browse to locate the
path for the OpenSSL application or click Change to change the pass phrase.
2.4 Install the BioStar Client Application
Before you install the BioStar client application, close all other running
applications. The client application installer will add the following components
to your system:
• BioStar client application
• Auxiliary libraries - OpenSSL and Microsoft Visual C++ 2005
Redistributable
To install BioStar client application,
1. Insert the BioStar installation CD into a compatible media drive.
2. Run
BioStar 1.0 Client Setup
to launch the installation wizard.
3. Follow the on-screen prompts to install the BioStar Client.

2. Install the BioStar Software
14
Copyright © 2008, Suprema Inc. On the web: www.supremainc.com
2.4.1 Log in to BioStar for the First Time
If you restarted the system after installation, the BioStar server should run
automatically in the background. If you have not restarted the system, you may
be required to manually connect to the server before proceeding (see section
2.3.1). When logging in to BioStar for the first time, you will be prompted to
create an administrator account.
To log in for the first time,
1. Launch the BioStar program. If BioStar successfully connects to the server,
the Add New Administrator window will open automatically. In this case, skip
to step 6. If BioStar cannot connect to the server, the Login window will open
and display the message “Cannot connect to server.”
2. Click
Server Setting
. This will open the “Connect Server” window.
3. Enter the IP address and port number of the BioStar server.
4. Click
Test
to verify the connection.
5. Click
Save
to store the connection settings. This will open the Add New
Administrator window.
Table of contents
Other suprema Security System manuals

suprema
suprema FSF2DB User manual

suprema
suprema Alarm Zone User manual

suprema
suprema BioStation 2 User manual

suprema
suprema Secure I/O User manual

suprema
suprema bioentry PLUS User manual

suprema
suprema biostation User manual

suprema
suprema DM-20 User manual

suprema
suprema BioStation T2 User manual

suprema
suprema BioLite Net User manual