manuals.online logo
Brands
  1. Home
  2. •
  3. Brands
  4. •
  5. Surecom
  6. •
  7. Switch
  8. •
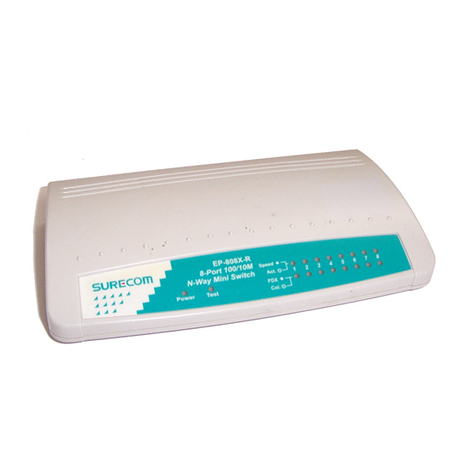
  9. Surecom EP-508 User manual

Surecom EP-508 User manual

Size: 18.2 x 25.6 cm (LxW)
3
12
3-Year Warranty
The manufacturer warrants to the original consumer /
purchaser free from defects in materials or workmanship
for limited time from the original factory shipment date.
KEEP THIS STUB FOR YOUR RECORDS
Model: Serial :
Date Purchased:
Where Purchased:
FromWhom:
MANUFACTURER DISTRIBUTOR
SURECOM
3-Year Warranty
TO:
ATTN:
WARRANTY REGISTRATION CARD
Please complete this form and return it within 10 days of
purchase to validate warranty
Name/Title:
Company:
Address:
Tel.No.: Signature:
Purchase Model: Serial No.:
Purchase from:
Address:
Date of Purchase:
Place
Stamp
Here
"1
"1
Features Overview
•IEEE 802.3 10BASE2 / 10BASE-T compliant
•EP-508: eight 10BASE-T ports
•EP-508T: one BNC port and eight RJ-45 ports
•Either the RJ-45 or BNC port as the cascading
port
•Port auto-partitioning and reconnection to
faciltate faulty segment isolation
•Polarity auto-detection and auto-correction for
UTP/STP ports
•Data collision and jabber handling functions
•Two LEDs per port to indicate Link/Receiveand
Partition status
•LEDs to indicate Power and Collision status
3. Link/Receive (GREEN) Indicators
These LEDs indicate the state of the data link.
The LED remains on when the connection is OK.
These LEDs blink to indicate data is being received
on the segment.
4. Partition (RED) Indicators
These LEDs light to indicate a port on the hub is
malfunctioning. Faulty ports are automatically
isolated by the hub. When the port recovers,
however, the partition LED returns to normal status.
Package Contents
•One EP-608/EP-608ST Hub
•One AC Power Adapter
•One BNC T-Connector (for EP-508T only)
•This Users' Guide
•Four Pieces of Rubber Foot
•Two Pieces of Self-Tapping Screw
•Two Pieces of Anchor Screw
Panel
The illustrations that follow depict the various exter-
nal components of the hub.
Figure 1: EP-508 Front Panel
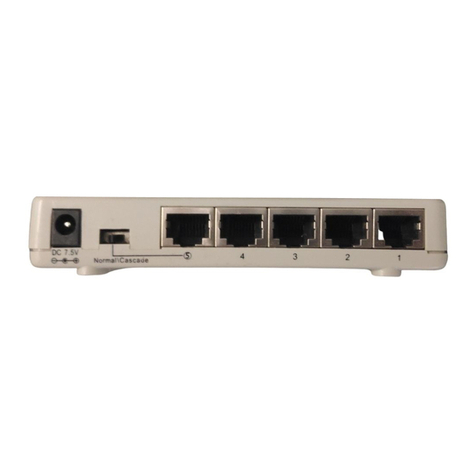
1. RJ-45 UTP/STP Ports
The hub is equipped with 8 RJ-45 UTP/STP ports
for making 10BASE-T hub-to-workstation
connections.
2. Cascade Enable Slide-Switch
Slide this switch to the right to enable cascading
with straight UTP/STP cable.
3. AC Adapter Port
Plug the AC adapter jack into this port.
4. BNC Port (For EP-508T only)
The hub is equipped with one BNC port for
making 10BASE2 hub-to-workstation connections.
Wall Mounting
After you have decided on a suitable location for
mounting the hub, mark the location for inserting two
screws 165mm apart. At the marked locations, drill
two holes and insert an anchor screw in each hole.
Insert a self-tapping screw in each hole. Align wall-
mount slots of the hub with the screws and slide the hub
down until the screws are securely fastened to the hub.
You can now complete the installation procedure by
marking the necessary cable connections.
1. Power (RED) Indicator
When the power LED is lit it indicates that the
hub's power is on.
2. Collision (YELLOW) Indicator
This LED indicator blinks when the hub detects a
collision on the network.
Figure 2: EP-508T Front Panel
Figure 3: EP-508 Rear Panel
Figure 4: EP-508T Rear Panel

Size: 18.2 x 25.6 cm (LxW)
www.surecom-net.com
www.surecom.com.tw
#47150800ZZZ0
45
EP-508/EP-508T
8-Port Ethernet Mini Hub
Users' Guide
Figure 6: 10BASE-T Cascading
CascadingHubs
When your 10BASE-T network needs to grow past the
eight available UTP/STP connections provided by the
hub, you should consider purchasing an additional hub
and cascading it with the original hub.
This EP-608/EP-608ST Hub features a cascade enable
switch. This switch allows you to use straight UTP/
STP cables instead of the traditional cables when cas-
cading hubs.
The following diagram illustrates 10BASE-T cascad-
ing.
MakingNetworkConnections
EP-608/EP-608ST has eight RJ-45 ports for attach-
ing up to eight 10BASE-T based workstations. To es-
tablish such connections:
1. Ensure that both the hub and the soon-to-be-
connected workstation are in the power off mode.
2. Plug one end of the UTP/STP cable into an
available 10BASE-T hub's port.
3. Plug the other end into the workstation's network
interface card.
EP-508T has one BNC port for making 10BASE2
connections. To establish such connections:
1. Ensure that both the hub and the soon-to-be-
connected workstation are in the power off mode.
2. Plug one end of the coaxial cable into the hub's
BNC port.
3. Connect the other end of the coaxial cable to the
workstation's BNC connector located on the
network interface card.
Figure 5: 10BASE-T or 10BASE2 hub-to-workstation connection
Federal Communications
Commission Statement
This equipment generates, uses, and can radiate radio frequency
energy and, if not installed and used in accordance with the in-
structions, may cause harmful interference to radio communications.
This equipment has been tested and found to comply with the lim-
its for a class A computing device, pursuant to Part 15 of the FCC
rules. These limits are designed to provide reasonable protection
against harmful interference when operated in a commercial envi-
ronment. Operation of this equipment in a residential area is likely
to cause interference, in which case the user, at his own expense,
will be required to take whatever measures are necessary to correct
the interference.
CE Declaration of conformity
This equipment complies with the requirements relating to electro-
magnetic compatibility, EN 55022 class A for ITE and EN 50082-
1, the essential protection requirements of Council Directive 89/
336/EEC on the approximation of the laws of the Member States
relating to electromagnetic compatibility.
Note: If port1 (BNC PORT) of EP-508T does not
connect to the coaxial cable after power is applied to the
hub, port1 (BNC PORT) is indicated by flashing of the Red
LED. The port1 LED does not flash after connecting the
coaxial cable to port1 and using the hub.
The following figure illustrates a simple network to-
pology using a 10BASE-T or 10BASE2 hub-to-work-
station connection.

This manual suits for next models

1

Other Surecom Switch manuals

Surecom EP-816DX-FS User manual

Surecom

Surecom EP-816DX-FS User manual

Surecom EP-816DX-AS User manual

Surecom

Surecom EP-816DX-AS User manual

Surecom EP-824DX User manual

Surecom

Surecom EP-824DX User manual

Surecom 824DXFS2B User manual

Surecom

Surecom 824DXFS2B User manual

Surecom EP-517T User manual

Surecom

Surecom EP-517T User manual

Surecom EP-802X User manual

Surecom

Surecom EP-802X User manual

Surecom EP-804CG User manual

Surecom

Surecom EP-804CG User manual

Surecom EP-805X User manual

Surecom

Surecom EP-805X User manual

Surecom EP-808X-R User manual

Surecom

Surecom EP-808X-R User manual

Surecom EP-804CG-S User manual

Surecom

Surecom EP-804CG-S User manual

Surecom EP-824DX-B User manual

Surecom

Surecom EP-824DX-B User manual

Surecom EX-516DX-T User manual

Surecom

Surecom EX-516DX-T User manual

Surecom EP532D User manual

Surecom

Surecom EP532D User manual

Surecom EP-710CG User manual

Surecom

Surecom EP-710CG User manual

Surecom EP-824DX-FS User manual

Surecom

Surecom EP-824DX-FS User manual

Surecom EP-816DX-FS User manual

Surecom

Surecom EP-816DX-FS User manual

Surecom EP-816DX-AS User manual

Surecom

Surecom EP-816DX-AS User manual

Surecom EP-726DG User manual

Surecom

Surecom EP-726DG User manual

Surecom EP-808DG-S User manual

Surecom

Surecom EP-808DG-S User manual

Surecom EP-824DX-FS User manual

Surecom

Surecom EP-824DX-FS User manual

Surecom EP-824DX-CS User manual

Surecom

Surecom EP-824DX-CS User manual

Surecom EP-716X User manual

Surecom

Surecom EP-716X User manual

Surecom EP-516DX-T User manual

Surecom

Surecom EP-516DX-T User manual

Surecom EP-505ST User manual

Surecom

Surecom EP-505ST User manual

Popular Switch manuals by other brands

TRENDnet TE100-S16Eg Specifications

TRENDnet

TRENDnet TE100-S16Eg Specifications

Toa CC-3011B instruction manual

Toa

Toa CC-3011B instruction manual

SMART-AVI SM-DPN-4Q-S quick start guide

SMART-AVI

SMART-AVI SM-DPN-4Q-S quick start guide

Panduit ATLONA AT-UHD-CLSO-601 Application programming interface

Panduit

Panduit ATLONA AT-UHD-CLSO-601 Application programming interface

Lenovo RackSwitch G8264CS Cli command reference

Lenovo

Lenovo RackSwitch G8264CS Cli command reference

Keithley 3700 series Reference manual

Keithley

Keithley 3700 series Reference manual

Smartwares SH5-RPS-36A quick start guide

Smartwares

Smartwares SH5-RPS-36A quick start guide

Kramer ProScale VP-728 user manual

Kramer

Kramer ProScale VP-728 user manual

HP 6125G Configuration guide

HP

HP 6125G Configuration guide

StarTech.com StarView SV431USB user manual

StarTech.com

StarTech.com StarView SV431USB user manual

Mercusys MS108 installation guide

Mercusys

Mercusys MS108 installation guide

Lindy 42347 user manual

Lindy

Lindy 42347 user manual

Samson 3768 Mounting and operating instructions

Samson

Samson 3768 Mounting and operating instructions

Dell PowerConnect M8428-k Getting started guide

Dell

Dell PowerConnect M8428-k Getting started guide

Honeywell Home PLS730B installation guide

Honeywell Home

Honeywell Home PLS730B installation guide

LogiLink HD0006 Specifications

LogiLink

LogiLink HD0006 Specifications

Armacost Lighting AL-28068 quick start guide

Armacost Lighting

Armacost Lighting AL-28068 quick start guide

Ubiquiti ES-48-500W quick start guide

Ubiquiti

Ubiquiti ES-48-500W quick start guide

manuals.online logo
manuals.online logoBrands
  • About & Mission
  • Contact us
  • Privacy Policy
  • Terms and Conditions

Copyright 2025 Manuals.Online. All Rights Reserved.