SURF & TURF Amalfi Parasol User manual

Amalfi Parasol Instructions

The Amalfi is manufactured using high quality materials and fabrics and is designed to
give many years of trouble free use and enjoyment. The following information is to inform,
how to operate your Amalfi parasol to ensure ease of operation. Please follow these
instructions as they are designed to assist operation and prolong the life of your parasol.
Your Amalfi parasol is principally intended for use in low to moderate wind conditions and
will provide you with many hours of protection from the sun and light rain. You will get
maximum benefit from your parasol when you use it in accordance with our instruction
and in the weather conditions for which it was designed.
General Information
Do not leave parasol open when unattended, particularly in windy conditions.
Parasol should be closed and securely strapped in strong winds and adverse weather
conditions.
Always secure your parasol to an appropriate base.
Any modifications to your parasol, except those made by Surf & Turf Instant Shelters Ltd.
may invalidate the warranty.
Make sure parasol canopy is dry and clean prior to storing away for extended periods
of time to prevent mould from developing.
Inspect the installation fitting / base on a regular basis and tighten if required.
Periodically clear the parasol frame, removing cobwebs, insects, dirt and other foreign
objects that can interfere with the mechanical operation of the parasol.
Be careful when closing the parasol to ensure that the canopy does not get caught or
“pinched” by the parasol arms. This is particularly important before storing the parasol
away for extended periods of time or if the parasol is to be laid horizontally for storage.
Damage to the fabric caused by “pinching” is not covered by warranty.
AMALFI PARASOL

Simple Maintenance Procedures:
1. In coastal or metropolitan environments frequent washing (with a hose) of the
complete unit is very beneficial.
2. Should the 16 rotating mechanism stop pin holes become filled with sand or dust
lift the parasol spigot up 20cm and allow the dust cover to be lifted and the 16 holes
can be cleaned.
3. Periodic cleaning of the slider tracks with mineral turpentine is recommended.
It is important to keep tracks free of dirt, grit, cobwebs and other foreign objects.
Spray can be used to lubricate the tracks after cleaning.
4. Always fold the canopy as described in section “TO CLOSE AMALFI PARASOL”.
This will prolong the new look of the canvas and prevent marking and holes caused
by “pinching” in the parasol frame.
5. If you have a cover bag it is advisable to fit it if the parasol is not being used for
some time.
6. It is recommended that if the parasol is not being used for a period of time during
the winter months, then it is a good policy to put the umbrella in storage. You may
even remove the spigot if required.
7. The canvas canopy can be cleaned or mould removed by using a mild mixture of
an approved mould remover and or warm soapy water using a soft brush. Test first
on the strap to ensure no damage will be caused to the parasol canopy fabric.
AMALFI PARASOL

Note:
When Amalfi is closed, the double pulley is near the top inside of the mast.
When Amalfi is open, the double pulley is lower down inside the mast.
PARTS IDENTIFICATION

1. Arms
2. Arrowhead end fitting
3. Small Strop
4. Stop closure button on 4 arms only
5. Struts
6. Bottom hub
7. Tube locator
8. Stainless steel cable
9. Hub tube
10. Tube holder
11. Top hub
12. Cord guide plug
13. Top hub pulley
14. Main arm
15. Small end fitting
16. Large strop
17. Barrel coupler
18. Top stay
19. Slider car
20. Slider car knob
21. Dust covers
22. Top bracket
23. Mast cap
24. Mast wall pulley
25. “P” fitting
26. Swivel pulleys
27. Mast
28. Main arm barrel coupler
29. Winder cord
30. Winder handle
31. Winder housing
32. Winder drum
33. Spigot
34. Nylon indexing shield
35. Rotating / lift handle
36. Rotating lock pin
37. Lift off pin
38. Stabiliser Arm Block
PARTS IDENTIFICATION
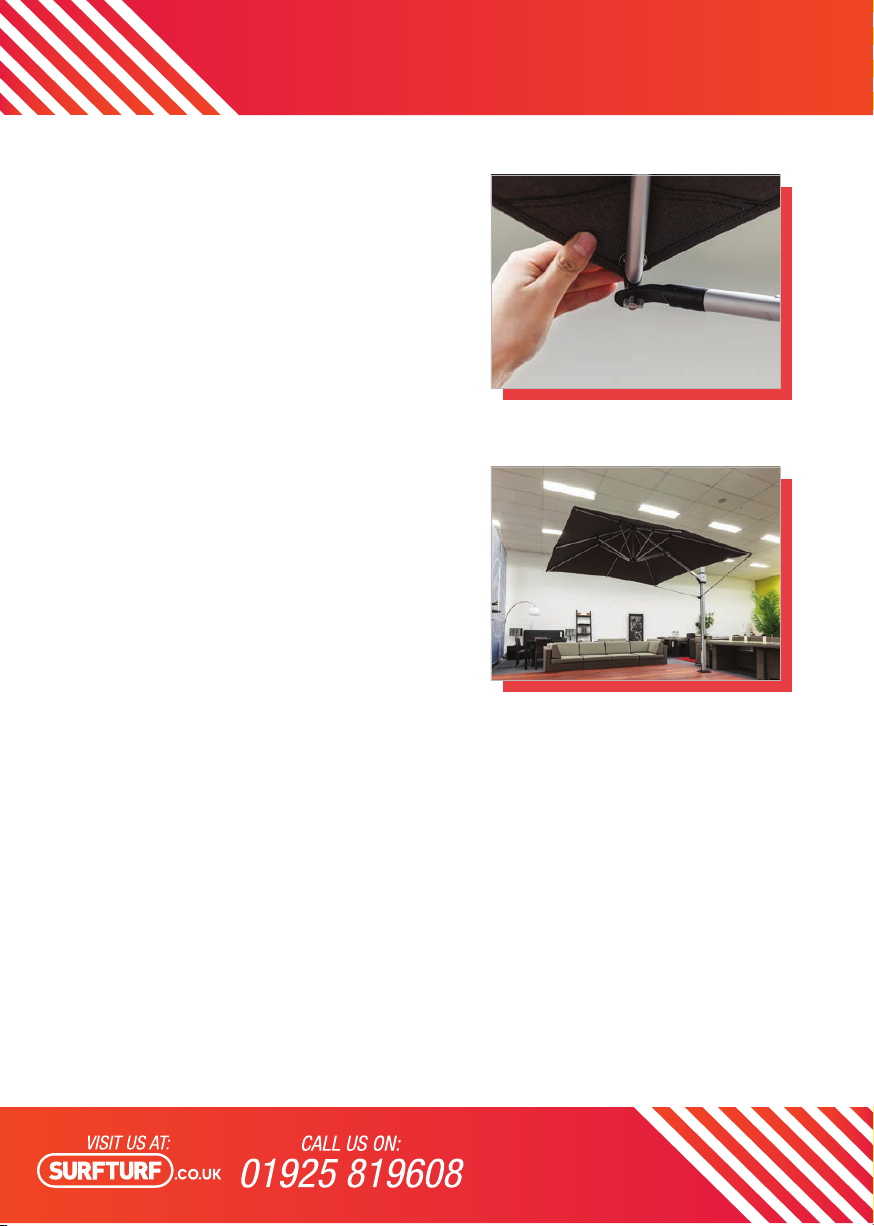
1. Remove the strap from the canopy.
2. Gently spread the canopy arms open
with your hands (refer Figure A).
3. Ensure the slider knob is loose
and slider can move freely (refer
Figure B). Insert the winder handle (30)
into the winder housing (31) on the mast
and roate in a clockwise direction.
4. Continue winding until the canopy is
fully open. (The bottom hub (6) will be
seated into the hub tube (9) and the
edge of the canopy should be tight
(refer Figure C).
Note: The winder handle will become a
little harder to wind as the parasol
nears fully open. This is normal
particularly when the canopy is new.
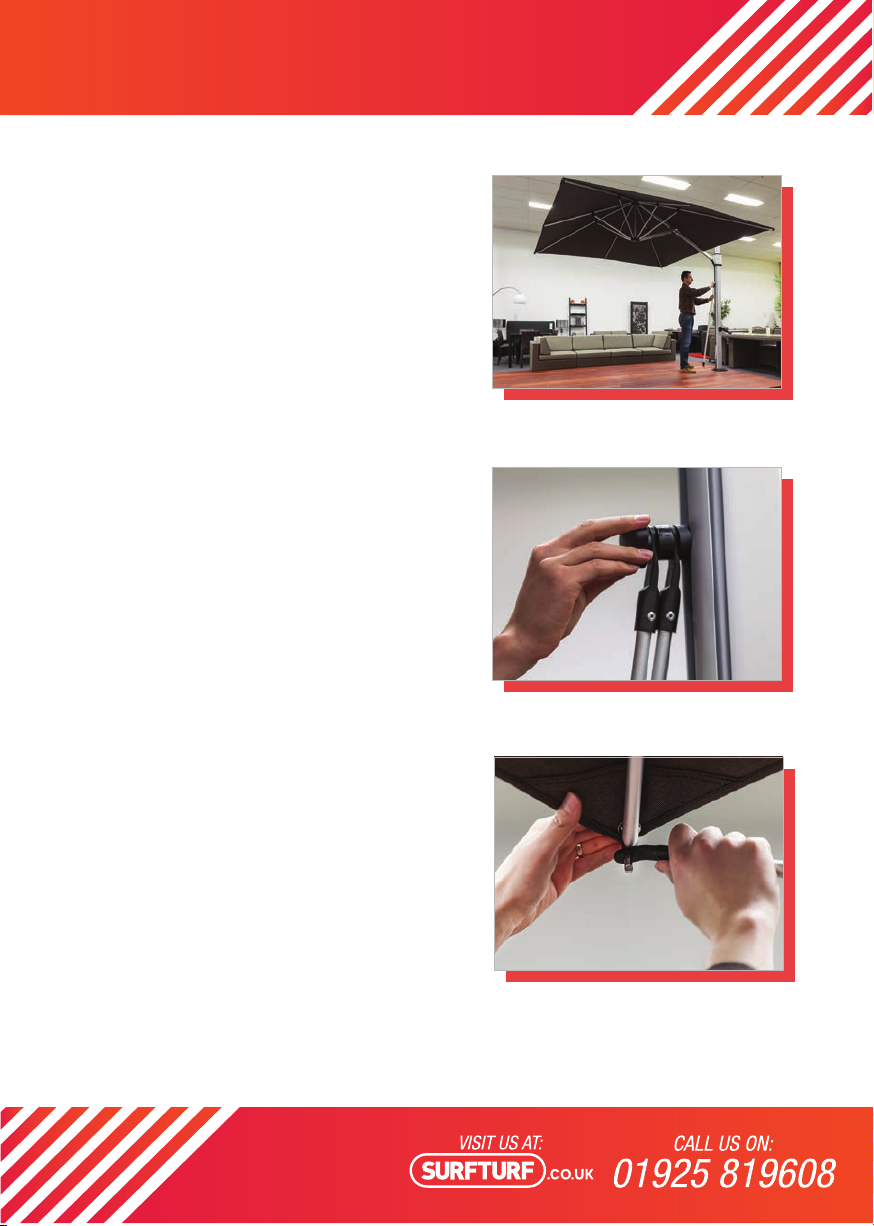
5. Once the canopy is fully opened, hold
the slider knob (20) and push the
slider up until the canopy is
horizontal and slider is at its highest
position. Tighten slider knob (20)
clockwise to secure the parasol.
6. The winder handle may be removed if
desired.
Gently spread the canopy arms open
Figure A
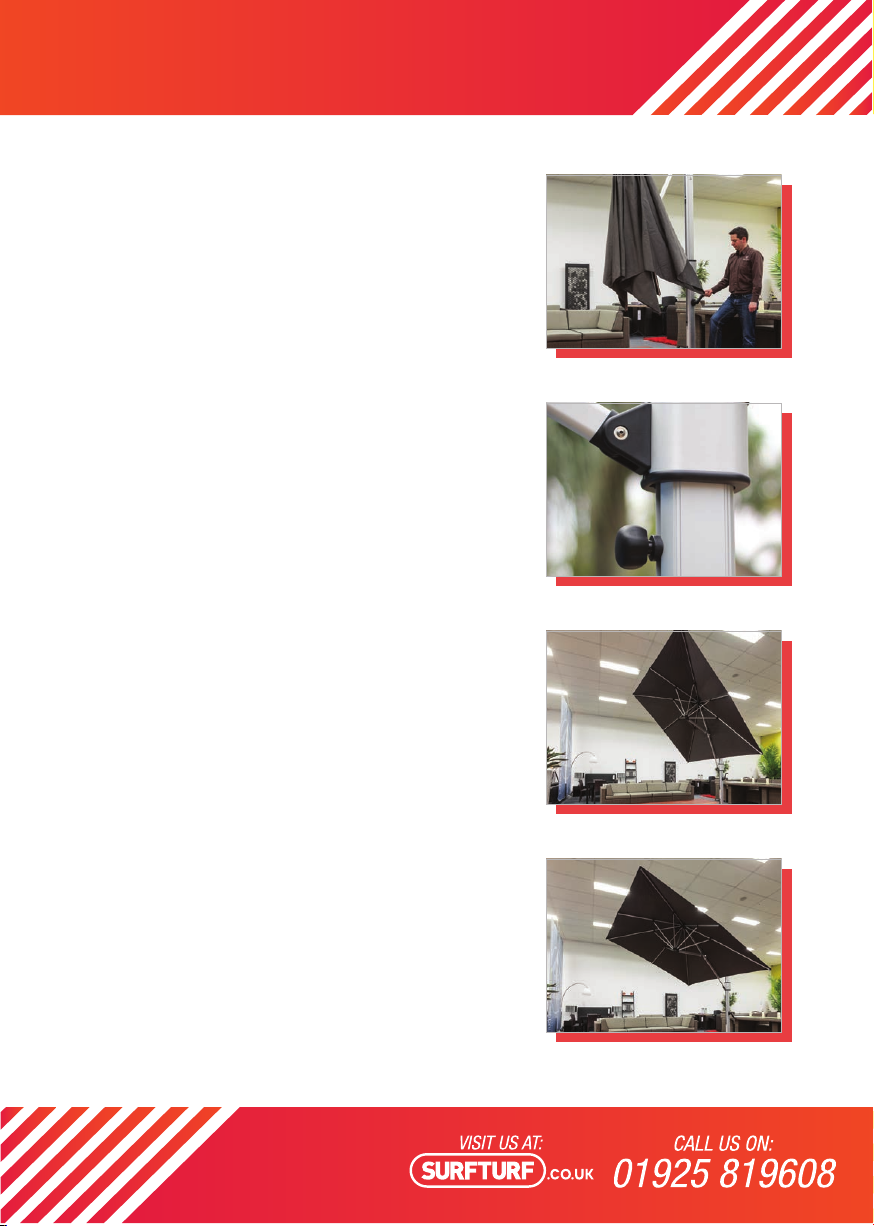
Ensure tilt knob is loose (turn anti-clockwise)
when opening and closing parasol
Figure B
Edge of canopy should be tight
Figure C
TO OPEN PARASOL

Ensure tilt knob is loose (turn anti-clockwise)
when closing parasol
Figure A
Fit the cover bag over mast and frame and zip up
Figure B
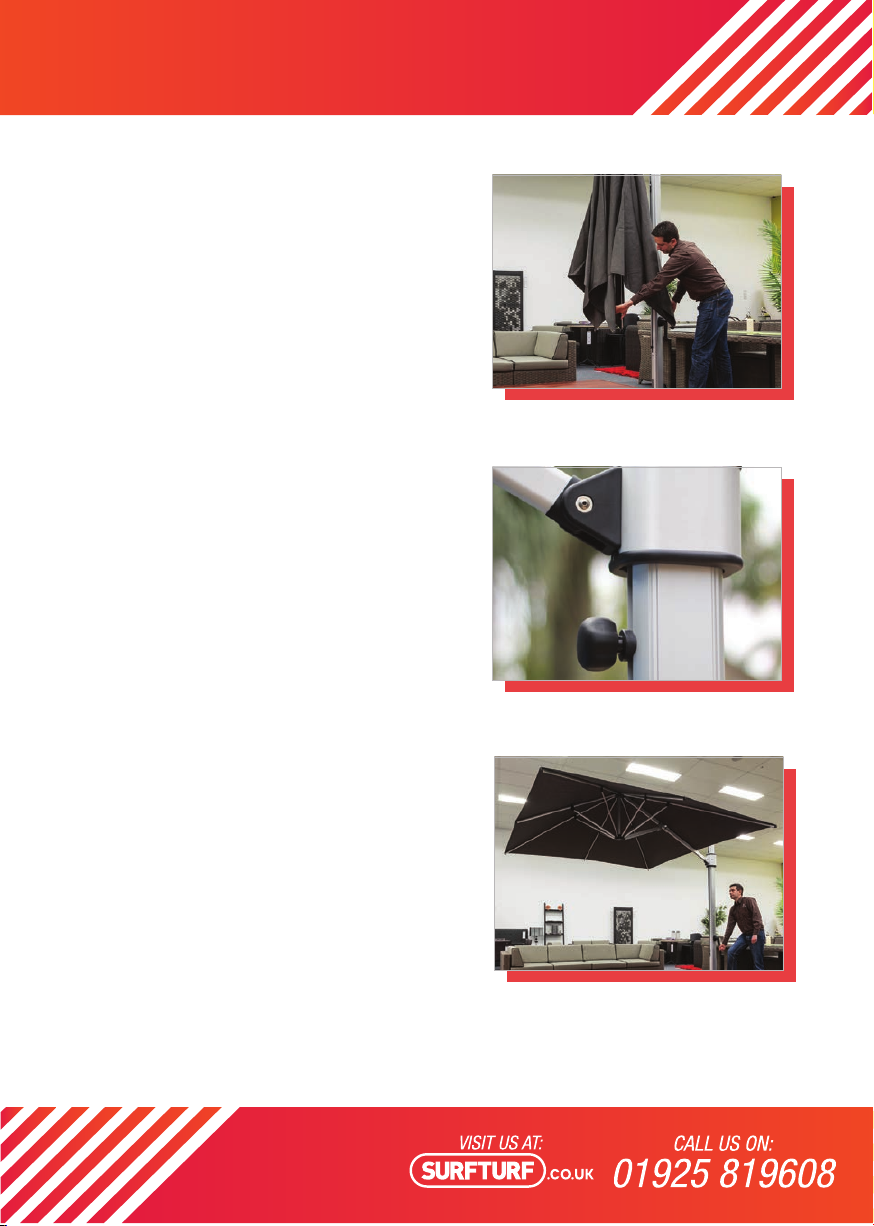
1. Turn the sider tilt knob (20) anti-clockwise
until loose.
2. Rotate the winder handle (30) in an
anti-clockwise direction. The canopy will begin to
collapse. Continue winding in an anti-clockwise
direction until the canopy is mostly closed and
the canopy arms are pointing almost vertically
down to the ground.
3. Hold the slider tilt knob and pull the slider
down the mast towards the ground. The canopy
should now be fully closed. Reach around with
one arm and pull the canopy back towards the
mast to complete closing.
4. IMPORTANT: Fold the canopy neatly to
prevent any “pinching” of the canvas by the
parasol frame. To do this stand in front of the
canopy and find the front four panels of fabric.
Put these together towards your body and then
roll all four panels together back towards the
parasol frame. Hold the rolled panels with one
hand, while grabbing the fifth panel folding it
over the roll to hold it in place. Alternate folding
over remaining panels from left to right with the
sixth, seventh and eighth panel.
5. Secure folded panels in place with the canopy
strap, wrapping it around the mast and canopy.
Gently push the folded canopy back against the
mast so that it is compact.
6. FITTING THE OPTIONAL COVERBAG: Stand
in front of the folded canopy and open the
coverbag zip completely. Use the handle rod to
lift the coverbag behind the mast and up as high
as possible to clear the top of the parasol. Pull
the coverbag down over the top of the mast and
canopy. Zip the coverbag closed. The zip should
be on the front side of the canopy, not at the
back of the mast.
TO CLOSE PARASOL
Start with the parasol almost completely closed
Figure A
Tilt knob loose to open
Figure B
1. Gently spread the canopy arms open
with your hands. Make sure the slider
knob (2) is loose (turn anticlockwise
to loosen). Open the canopy by
inserting the handle (30) into the winder
housing (31) on the mast and rotate
in an anti-clockwise direction.
2. Wind the handle (30) until the canopy is
fully open and the bottom hub (6) is fully
in the hub tube (9) and the edge of the
canopy is tight.
3. Hold the slider knob (20) and raise
the slider (19) up the mast. (refer
Figure B.)
4. Once you have moved the slider to
the required position, tighten the tilt
knob by turning clockwise firmly.
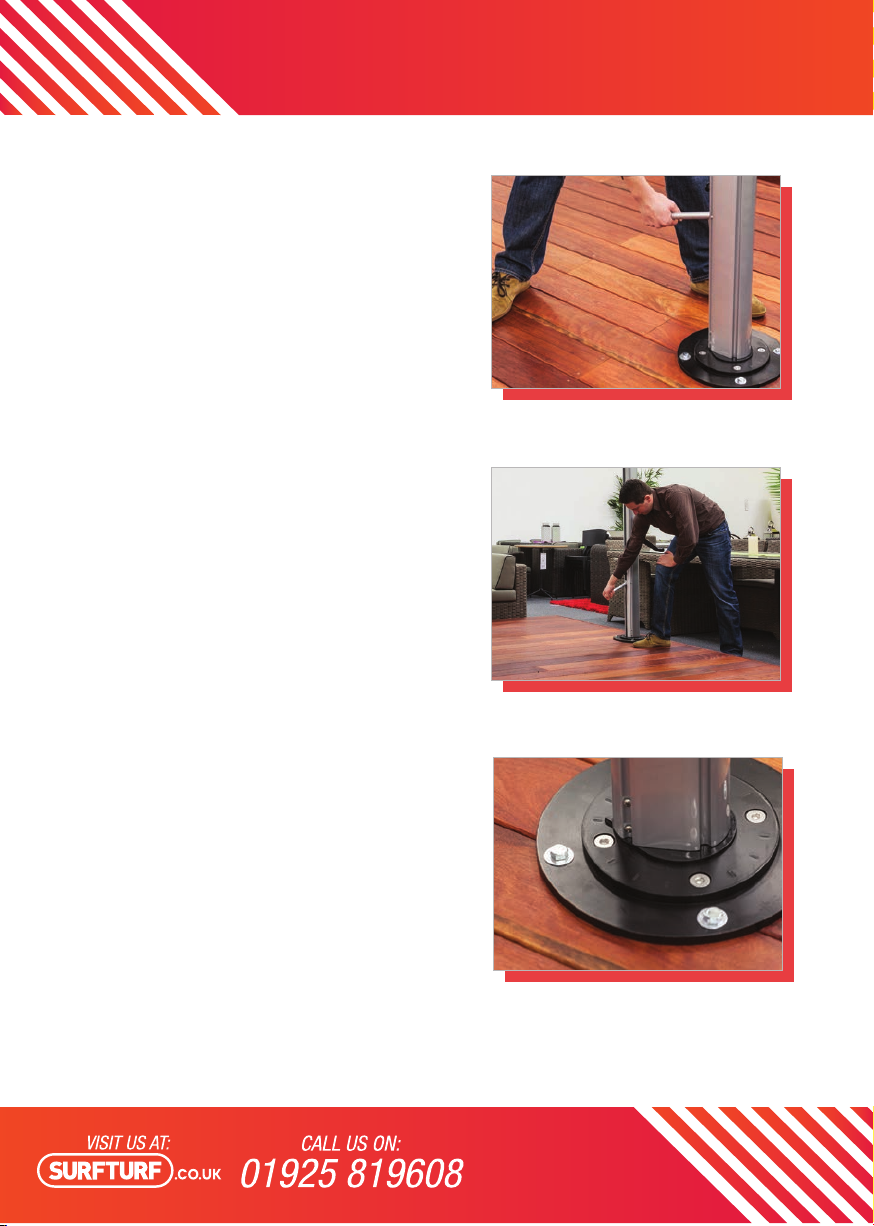
5. The tilt angle of the canopy can be
adjusted at any time by loosening the
slider knob (20) and sliding the
slider up and down the mast.
6. When closing the parasol alway
start by loosening the slider knob
(20) anti-clockwise. Refer insturctions
“TO CLOSE AMALFI PARASOL”
NOTE: The optimum strength of the
parasol is reached only when the slider
is at its maximum height and the
parasol canopy edge is horizontal to the
ground. The strength of the parasol is
lessened when the canopy is in an angled
position.
Tilt position 1 (approx. 30 degrees)
Figure C
Tilt position 2 (approx. 60 degrees)
Figure D
TO TILT CANOPY
Lift rotation handle
Figure A
Rotate the parasol by using the handle
Figure B
Align the indicator arrow with a notch
Figure C
There are 16 pre-determined location holes
in the spigot. These location holes are
found at every 22.5 degrees interval around
the spigot base. They are located where
indicated on the spigot base and are under
the nylon indexing shield (34) which acts as
a dust cover for the holes not in use.
1. Pull the rotation lift handle (35) out from
the mast cavity (refer Figure A)
2. Lift up on the handle and feel the
resistance from the spring that houses
the rotating lock pin (36).
WARNING: In lifting this handle you are
not attempting to lift the whole parasol,
rather just the spring on the rotating lock
pin that locates the rotation lock pin.
Do not apply too much force when
lifting up on the handle.
3. By using the rotating lift handle (35) as a
lever you may rotate the parasol on the
base (refer Figure B) until you arrive at
the new required position.
NOTE: There is some resistance to
rotation as the weight of the parasol
when opened and friction need to be
overcome. For easier rotation close
the parasol canopy first.
4. Each position is marked by a notch on the
spigot base. Align the indicator arrow
with a notch (refer Figure C). Once
aligned with a notch, lower the rotating handle
down to locate the rotating lock pin.
WARNING: Do not force the rotating handle down
if the indicator arrow is between notch positions.
The rotating handle should close down easily.
If any resistance is encountered do not force it,
rotate the parasol further slightly to locate the correct hole position.
TO ROTATE PARASOL
Slide stay block up the mast
Figure A
Screw stays into stay block
Figure B
Align the indicator arrow with a notch
Figure C
Stabiliser bars can be fitted to the Amalfi
parasol to assist its performance in a wider
range of wind conditions. It is an optional
extra and is available.
1. Slide the stay block (38) up the
internal mast housing to a height
roughly the same as the height of the
stabiliser bars when standing vertical
(refer Figure A).
2. Attach the threaded stainless screw
with the two aluminium stays attached
to the stay block and tighten the screw
sufficiently for the stay block to remain
in position without sliding down the
mast (refer Figure B).
3. Swing either aluminum stay arm off
the ground and attach to the parasol
arm using the “T-lock”. Position the
T-lock to vertical and slide the hole
in the plastic fitting at the end of the
stabiliser bar over (refer Figure C).
Set the T-lock to horizontal to lock
the bar in place (refer Figure D).
TO USE (OPTIONAL) STABILISER BARS
4. Attach the remaining arm to the other
side. NOTE: There is adjustment to the
outer end of the stays so as to align
the knob/screw connection with the
parasol arm ends.
5. You may need to loosen the central
threaded stainless screw and adjust
up or down the mast until you have
applied a little upward tension on the
parasol arms. Tighten this screw in
position (refer Figure E for parasol).
CAUTION: Do not over tension as this
may disort the parasol arms.
Reverse the process to remove.
This must be removed to close the
parasol or tilt the canopy.
IMPORTANT: Your Amalfi parasol, even when
fitted with the stabilising bars is not a
permanent, all-weather structure. The parasol
should be closed and folded when not in use
and never left open when unattended or in
strong winds.
Parasol with stays attached
Figure E
Set T-lock to horizontal
Figure D
Parasol with stays attached
Figure E
TO USE (OPTIONAL) STABILISER BARS

Use the Cross Base with your parasol
if you do not wish to carry out an inground
fitting. The Cross Base allows you the
flexibility to move the parasol around.
However it should only be used in light
wind conditions.
1. Unpack two cross base sections
and install the 4 end plates with the
screws provided (refer Figure A).
2. Lay the top section (cut out facing
down) over the bottom section (cut
out facing up) (refer Figure B).
3. Place the parasol spigot onto the
cross base, lining up the four holes
in the spigot plate with the four holes
on the cross base (refer Figure C).
Figure A
Figure B
Figure C
MOBILE INSTALLATION

Your Amalfi parasol comes fully assembled in the box that it is delivered in. Once
you have fixed the spigot correctly you may lift the Amalfi parasol onto the spigot.
1. Fixing the Amalfi base plate to a timber deck:
If you wish to locate your Amalfi parasol on to a timber deck then the following
installation method should be adhered to. Your Amalfi base plate must be bolted to
the frame of the deck and not only to the deck planking. You need to fasten to one or
two wooden supports between the deck joists that form the structural frame of the deck.
It is suggested that two 20cm by 5cm timber braces be secured hard up under the deck
planking and between the deck bearers and fasten these braces to the deck frame with
suitable fastenings. These may be large galvanised coach screws, builders brackets or
similar.
Base Plate
To Deck Installation
Amalfi Spigot
Counter Sunk
Bolts & Nuts
20mm Deck Panels
200 x 50mm Deck
Timber Bearer
Washer
50mm Thick Nogs
Nut
Amalfi Base Plate
200 x 50mm Thick Nogs
200 x 50mm Deck
Timber Bearer
PERMANENT INSTALLATION

2. Fixing the Amalfi base plate to a concrete patio:
When installing your parasol on a concrete surface you may fix the base plate to the
concrete using four concrete screws or fastenings. Once you have installed your base
plate to the concrete, use the four stainless steel screws provided to attach the spigot to
the base plate. The reason for this is that should your wish to remove the parasol and
spigot for any reason, say season or security reasons, you can remove the spigot
easily and leave only the deck plate which is a permanent fixing.
Important: When installing a base plate first and then the spigot screwed on top you
still need to direct one of the spigot screws holes in your preferred direction.
Amalfi Spigot
Amalfi 315mm Base Plate
Base Plate
To Slab Installation
M10 Concrete Screw Minimum Length 75mm
Concrete slab minimum depth
100mm no screw or fixing to
be within 150mm of
closet edge of concrete slab
PERMANENT INSTALLATION

3. Fixing in lawn, soil or patio:
When installation is required in soil or sand, an in-ground fitting must be used.
This is a galvanised steel fitting which must be concreted into position. Because
terrain differs from thick clay to sand or fine soil then a different sized hole must be
prepared and a different volume of concrete used. As a guide only a hole 45cm by
45cm by 60cm deep is a minimum requirement for heavy clay terrain. Even then a
post hole borer can be used to deepen the centre of the footing. When pouring the
concrete it is advisable to drop a few lengths of re-inforcing steel bar into the hole
to prevent the concrete from cracking. Remember, depth of hole is better than width
and it is much easier to make the hole over size than to try to re-stabilise the in-ground
fitting should it start ot move over time.
Important: Rotation of the spigot, the screw holes in the spigot and the in-ground
fitting are identical you should aim one of the screw holes in your preffered position.
Also ensure the in-ground fitting plate is level in the concrete. Allow adequate time
for the concrete to cure before using the parasol.
Tip: To ensure that concrete slurry does not come up the four threaded holes in the in-ground fitting it is advisable
to insert the four screws into the in-ground fiting and stick some tap over the underside of the holes. You can also
leave the four grub screws in the four threaded holes until after the concrete has set. Remove these four grub
screws before attatching the Amalfi spigot.
minimum length 75mm
clipse Spigot
oncrete
700mm
Inground tting in soil
or ga rden bed
Soil
500mm
Amalfi Spigot
Inground fitting through
bitumen or loose pavers
Amalfi Spigot
Soil Concrete 600mm
400mm
Inground fitting in soil
or garden bed
Amalfi Spigot
Soil Concrete
600mm
600mm
450mm
PERMANENT INSTALLATION

Maintenance Instructions For Your Amalfi Parasol:
Be careful when closing the parasol to ensure that the canopy does not get
caught or “pinched” by the parasol arms. This is particularly important before storing
the parasol away for extended periods of time or if the parasol is to be laid
horizontally for storage. Damage to the fabric caused by “pinching” is not covered
by warranty.
In coastal or metropolitan environments it is beneficial to wash off any dirt, pollen
sand salt residue from the parasol frame and fabric using a hose or soft bristle
brush.
Periodic spraying of silicon spray into the gear box through the winder hole will
assist operation and prolong the life of the winder unit.
If you have purchased a protective cover bag it is advisable to use it if the parasol
is not to be used for some time. The parasol must be dry before being packed in a
cover bag.
Inspect the installation fitting/base on a regular basis and tighten as necessary.
Periodically check all the connecting brackets and joints of the parasol to ensure
that all bolts/fittings are tight and secure. Tighten any bolts as required.
General Information:
You will get maximum benefit from your parasol when you use it in accordance with
our instructions and in the weather conditions for which it was designed.
Do not leave the parasol open when unattended, particularly in windy conditions.
The parasol shoud be closed and securely strapped in strong winds and adverse
weather conditions.
Always secure your parasol to an appropriate footing/base.
Any modifications to your parasol, except those made by Surf & Turf Instant Shelter Ltd.
may invalidate the warranty.
Make sure the parasol is dry and clean prior to storing away for extended periods
of time to prevent mould from developing.
PARASOL CARE

HOW TO CLEAN YOUR OUTDOOR PARASOL FABRIC
Recasens acrylic canvas fabric is water and mould repellent and will last a very
long time if maintained well. However, over time, the accumulation of dust,
pollution particles, organic plant matter, pollen and general dirt can embed itself
into the fabric and shorten the life of it.
It is a good idea to periodically give your parasol fabric a light brush down with
a soft bristled brush/broom and water from a garden hose. This will help to
dislodge and remove loose dust and dirt that has settled on the fabric before it
can embed itself deeply. Although mould will not grow directly on clean
acrylic canvas, as dirt and organic matter embeds itself into the fabric the mould
will be able to grow on the embedded dirt and organic matter, so it is best to
remove dirt early.
How To Clean Light Dirt And Marks From Your Outdoor Parasol Fabric:
Depending on how often you use your parasol, you may eventually need to give
it a more thorough wash to remove any embedded dirt or early signs of mould
growth. To do this you will need to mix warm water and sugar soap in a bucket.
Use a soft bristled brush (or a long broom) to generously work this soapy water
into a lather over the parasol fabric. Focus mostly on the areas with the most dirt
or stains, then allow the soapy water to soak into the parasol fabric.
Once you are finished soaking the parasol fabric, rinse it thoroughly with a hose
until all soap residue is removed, and then air dry the fabric.
Once you have finished soaking the parasol fabric, rinse it thoroughly with a hose
until all the soap residue is removed, and then air dry the fabric.
Recasens fabrics also has the highest possible UV protection rating of UPF 80
according to the European UV standard 801, cutting out the maximum amount
of harmful UV light for excellent sun protection.
Recasens 100% Solution-Dyed Acrylic Canvas Fabric
Surf & Turf uses the finest marine grade solution-dyed acrylic canvas fabric
manufactured by S.A. Recasens in Spain. This premium outdoor fabric has the
best available colour fastness rating of 7.8 out of 8.
PARASOL CARE

How To Remove Heavy Dirt Or Mould From Your Outdoor Parasol Acrylic
Canvas Fabric:
If you have heavy dirt or mould growth in your acrylic canvas fabric and the
instructions above have not removed it, you may need to repeat the instructions
again, but add between half and one cup of bleach to the bucket of soapy water.
The acrylic canvas fabric used by Instashade should not fade or lose colour when
using bleach (diluted with water) when cleaning. Feel free to test the bleach
mixture on the canopy strap first to check that there is no colour loss.
The best way to remove heavy dirt and mould is to remove the canopy from the
parasol and soak it in warm water with something like bleach or “Vanish Oxi
Action”. You might need to change the water and repeat this process until all the
dirt or stains are removed. It is then essential that the fabric is thoroughly rinsed
with water to remove any cleaning product. A good way to do this is to put the
fabric through a gentle machine wash with cold water and washing detergent.
Once this is done, put the parasol fabric back on to the parasol frame wet and
then allow to air dry..
PARASOL CARE

PARASOL BASE CARE
SUMMARY
Do not let dirt build up on the bases. Cleaning with mild soap and water,
and seasonal touch-up of any scratches, chips or occasional rust seepage
from crevices or hidden, unfinished surfaces inherent in some designs is all
that is required. Never leave bases standing in water. To keep your bases
looking their best, you may wish to store them when not in use for any
extended period of time.
Brush off dust and dirt with a soft brush. NEVER brush with stiff brushes
since this can damage the fabric finish.
Brush off dust and dirt with a soft brush. NEVER brush with stiff brushes
since this can damage the fabric finish.
Remove the roof fabric from the parasol.
Prepare a solution of something like bleach or “Vanish Oxi Action” in
warm water (no more than 30°c).
Scrub with a soft brush, allowing the solution to penetrate the fabric.
Spray the parasol with clean water. If a hose is used, avoid high preassure.
Light Cleaning
Deep Cleaning
Prepare a solution of sugar soap in warm water (no more than 30°c)
and apply it to the fabric and stitching.
Scrub with a soft brush, allowing the solution to penetrate the fabric.
Rinse with water to remove all traces of soap.
Let air dry and do not close the parasol until the canvas is completely dry.
You may need to change the water and repeat if necessary.
Ensure that all the product is rinsed from the fabric put on a gentle
machine was on a Gentle Machine wash with cold water and laundry
detergent.
Let air dry and do not close the parasol until the canvas is
completely dry.
PARASOL CARE

AMALFI PARASOL
Table of contents
Other SURF & TURF Shelter manuals


Popular Shelter manuals by other brands

Trigano Jardin
Trigano Jardin J-87905P1 manual

PLASTIC VACUUM FORMING
PLASTIC VACUUM FORMING The Blynd Bow Assembly instructions

No Butts Bin
No Butts Bin SR1554-F Assembly instructions

ShelterLogic
ShelterLogic Shed-in-a-Box Assembly manual

Gazebo penguin
Gazebo penguin 7171020 instruction manual

No Butts Bin
No Butts Bin SR1588 Assembly instructions


Landscape Forms
Landscape Forms Kaleidoscope smart shelter Installation and maintenance manual

Walford Timber
Walford Timber Premier Assembly instructions

TMG
TMG TMG-DT4041CG product manual

ThePondguy
ThePondguy PondShelter 160350 Installation & maintenance manual

Cabela's
Cabela's Ice Team 8434 manual

Let's Go Aero
Let's Go Aero ArcHaus Moon Assembly & Use Guide