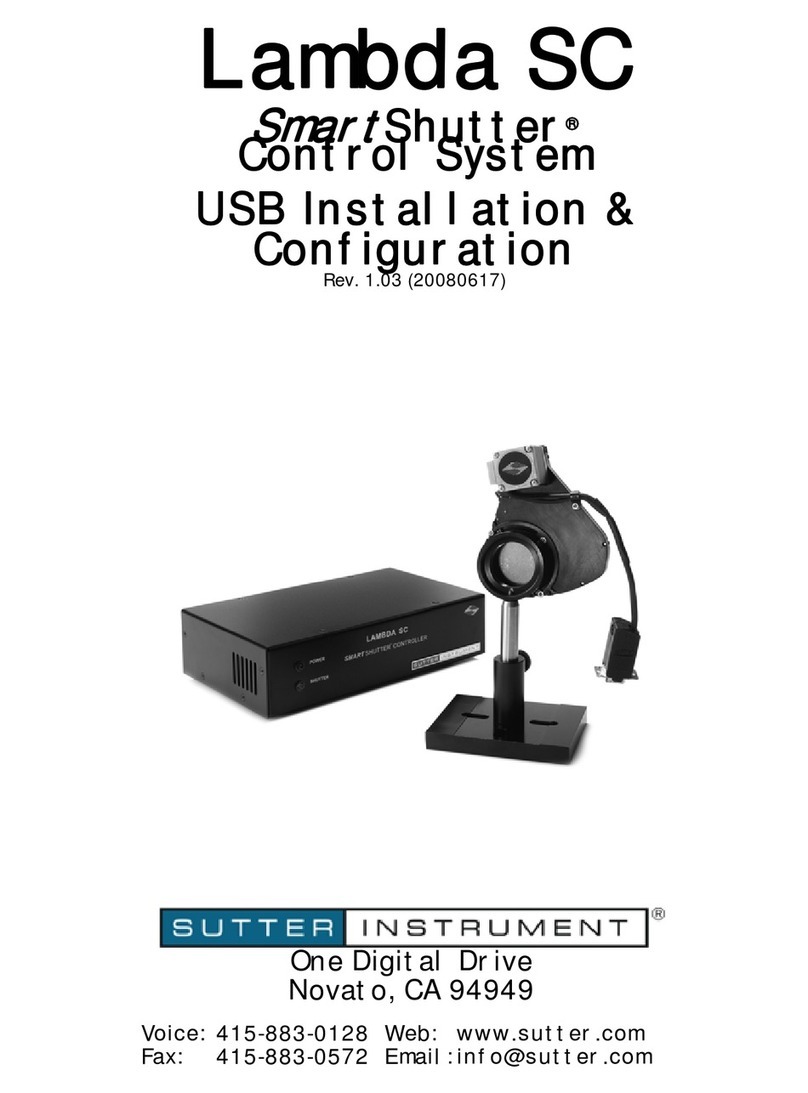
Sutter Instrument SmartShutter Lambda SC User manual

One Digital Drive
Novato, CA 94949
Voice: 415-883-0128 Web: www.sutter.com
Fax: 415-883-0572 Email: info@sutter.com
Lambda SC
Smart
Shutter®
Control System
Operation Manual
Rev. 1.14c( 20190606)

LAMBDA SC OPERATION MANUAL – REV. 1.14C (20190606)
ii
Copyright © 2019 Sutter Instrument Company. All Rights Reserved.
LAMBDA 10® and
Smart
Shutter®are registered trademarks of Sutter Instrument
Company.


iii
LAMBDA SC OPERATION MANUAL – REV. 1.14C (20190606)
TABLE OF CONTENTS
1. GENERAL INFORMATION ...........................................................................................................1
1.1 About This Manual...........................................................................................................................1
1.2 Technical Support.............................................................................................................................1
2. SAFETY WARNING ........................................................................................................................3
2.1 Safety Considerations when Using High-Intensity Light Sources..............................................3
2.2 The
Smart
Shutter is Not a Safety Shutter....................................................................................3
3. PRECAUTIONS ...............................................................................................................................5
3.1 On Operation.....................................................................................................................................5
4. ACCESSORIES .................................................................................................................................7
4.1
Smart
Shutters...................................................................................................................................7
4.2 Mounts ...............................................................................................................................................7
4.3 Adapters.............................................................................................................................................7
5. UNPACKING....................................................................................................................................9
6. FIRST TIME USE ..........................................................................................................................11
6.1 Some Basic Information.................................................................................................................11
6.2 Line Power (Mains) ........................................................................................................................12
6.3 Basic Operation...............................................................................................................................12
6.3.1 Initialization .............................................................................................................................12
6.5 Make It Go .......................................................................................................................................13
7.
SMART
SHUTTER .........................................................................................................................15
7.1 Step Motor Based Shutter Advantages ........................................................................................15
7.2 Modes ...............................................................................................................................................16
7.3 Special Considerations....................................................................................................................16
7.3.1 Mounting...................................................................................................................................16
7.3.2 Opening and Closing Times....................................................................................................17
7.3.3 Repetition Rates and Duty Cycle............................................................................................18
8. CONTROLLER...............................................................................................................................19
8.1 Principles of Operation...................................................................................................................19
8.2 Rear Panel Connectors and Switches...........................................................................................19
8.2.1
SMART
SHUTTER ..................................................................................................................19
8.2.2 USB Port ...................................................................................................................................19
8.2.3 Serial Port .................................................................................................................................19
8.2.4 TTL Input and Output............................................................................................................20
8.2.5 Power Switch............................................................................................................................20
8.2.6 Line Power................................................................................................................................20
8.2.7 Fuse Label.................................................................................................................................20
8.2.8 Fuse............................................................................................................................................20
8.3 Front Panel......................................................................................................................................20
8.3.1 Power Light ..............................................................................................................................21
8.3.2 Shutter Light ............................................................................................................................21
8.3.3 Manual Shutter Control Switch .............................................................................................21

iv
LAMBDA SC OPERATION MANUAL – REV. 1.14C (20190606)
9. MANUAL CONTROL ....................................................................................................................23
10. REMOTE CONTROL...................................................................................................................25
10.1 Input Command Structure ..........................................................................................................25
10.2 Input Command Structure ..........................................................................................................25
10.3 Shutter Commands.......................................................................................................................29
10.3.1 Open Shutter ..........................................................................................................................29
10.3.2 Close Shutter ..........................................................................................................................29
10.3.3 Fast-Mode Shutter .................................................................................................................29
10.3.4 Soft-Mode Shutter..................................................................................................................29
10.3.5 Neutral Density Mode Shutter.............................................................................................30
10.4 Special Commands........................................................................................................................30
10.4.1 Status.......................................................................................................................................33
10.4.2 All Motors Power On .............................................................................................................36
10.4.3 All Motors Power Off.............................................................................................................36
10.4.4 Transfer to On Line...............................................................................................................37
10.4.5 Set Delay Timer......................................................................................................................37
10.4.6 Set Exposure Timer ...............................................................................................................37
10.4.7 More Information on Timers:...............................................................................................37
10.4.8 TTL IN Pulse Trigger Disabled............................................................................................38
10.4.9 TTL IN High Triggers SmartShutter to Open...................................................................38
10.4.10 TTL IN Low Triggers SmartShutter to Open..................................................................38
10.4.11 TTL IN Rising Edge Triggers SmartShutter to Toggle ..................................................38
10.4.12 TTL IN Falling Edge Triggers SmartShutter to Toggle .................................................39
10.4.13 TTL OUT Synch Signal Disabled ......................................................................................39
10.4.14 Opening Shutter Sets TTL OUT to High .........................................................................39
10.4.15 Opening Shutter Sets TTL OUT to Low...........................................................................39
10.4.16 Restore Controller to the Factory-Default Configuration...............................................39
10.4.17 Saves the Current Configuration to the Controller .........................................................39
10.4.18 Set Number of Repeat Cycles for Free Run......................................................................39
10.4.19 Start Free Run on Power Up..............................................................................................39
10.4.20 Start Free Run on Trigger Pulse from TTL IN................................................................39
10.4.21 Start Free Run Immediately...............................................................................................39
10.4.22 Reset (to Last Saved Configuration)..................................................................................39
10.4.23 Get Controller Type and Configuration ............................................................................40
10.5 Shutter Control without Remote Control Commands via the Dedicated TTL Line.............40
10.6
SmartShutter
Movement Errors: Causes and Solutions ........................................................41
10.6.1 Movement Errors after Successive Moves. .........................................................................41
10.7 Remote Control Command Programming.................................................................................41
10.7.1 Preparing the Command Byte..............................................................................................42
10.7.2 Command Transmission Protocol........................................................................................42
10.7.2.1 Confirmation Command Echo .......................................................................................42
10.7.2.2 Command Completion Indicator ...................................................................................42
11. REMOTE CONTROL: Serial Port..............................................................................................43
11.1 Connecting to the Serial Port......................................................................................................43
11.2 Input Command Set and Protocol ..............................................................................................44
12. REMOTE CONTROL: USB Port................................................................................................45
12.1 Installing the Lambda SC as a USB Device on a Windows System........................................45
LAMBDA SC OPERATION MANUAL – REV. 1.14C (20190606)
v
12.1.1 Installation Steps ...................................................................................................................45
12.1.2 Interactive USB Device Driver Installation (Windows Only) ...........................................47
12.2 Installing the USB Interface for Non-Windows Systems.........................................................49
12.3 Verifying USB Communication Between Remote Computer and Lambda SC.....................49
12.4 Uninstalling the USB Driver for the Lambda SC.....................................................................51
13. REMOTE CONTROL: LOGIC LEVEL (TTL) INPUT FOR SHUTTER CONTROL ............53
13.1 TTL IN Modes...............................................................................................................................53
13.1.1 Trigger on High......................................................................................................................53
13.1.2 Trigger on Low .......................................................................................................................53
13.1.3 Toggle on Rising Edge ...........................................................................................................53
13.1.4 Toggle on Falling Edge..........................................................................................................53
13.1.5 Triggering the Start of a Free Run of Timer Cycles ..........................................................53
13.1.6 Disabling Triggering/Toggling Control................................................................................53
13.2 Using the PC’s Parallel Port for Shutter Control.....................................................................53
14. PAIRED SHUTTERS FOR SHORT EXPOSURE TIMES ........................................................55
15. MAINTENANCE..........................................................................................................................57
APPENDIX A. Stepping Motor Operation ........................................................................................59
APPENDIX B. Fuse Replacement .....................................................................................................61
APPENDIX C. Mounting a
Smart
Shutter in a Lambda LS.............................................................63
APPENDIX D. DISCLAIMER ...........................................................................................................65
APPENDIX E. LIMITED WARRANTY............................................................................................67
APPENDIX F. TECHNICAL SPECIFICATIONS ...........................................................................69
APPENDIX G. Remote Control Command Reference......................................................................71
INDEX .................................................................................................................................................81
TABLE OF FIGURES
Figure 6-1. Lambda SC cabinet (rear view)........................................................................................... 12
Figure 6-2. Switch, fuse, and power connection...................................................................................12
Figure 7-1. 25-mm SmartShutter.. .........................................................................................................15
Figure 7-2. 35-mm
SmartShutter
.......................................................................................................... 16
Figure 7-3. SmartShutter timing............................................................................................................ 17
Figure 8-1. Electrical connections.......................................................................................................... 19
Figure 8-2. Lambda SC front panel controls. .......................................................................................20
Figure 8-3. Lambda SC front panel with manual shutter control switch. ........................................ 21
Figure 11-1. Serial port pin assignments ..............................................................................................43
Figure 12-1 -- The USB cable device connector.....................................................................................46
Figure 12-2 -- The Lambda SC USB receptacle. ...................................................................................46

vi
LAMBDA SC OPERATION MANUAL – REV. 1.14C (20190606)
Figure 12-3 -- Host connector end of USB cable. ..................................................................................46
Figure 12-4 -- USB host receptacle on remote computer.....................................................................46
Figure 12-5 -- New USB device detected message box. ........................................................................47
Figure 12-6 -- Digital Signature dialog box............................................................................................ 47
Figure 12-7 -- Specifying location of driver files....................................................................................48
Figure 12-8 -- Browsing for the driver file needed. ............................................................................... 49
Figure 12-9 -- USBTest main screen ...................................................................................................... 50
Figure 14-1. Two-shutter configuration showing exposure times ......................................................55
Figure B-1. Power entry module............................................................................................................ 61
Figure B-2. Fuse holder...........................................................................................................................61
TABLE OF TABLES
Table 10-1. Remote control command categories .................................................................................25
Table 10-2. Remote control commands.................................................................................................. 26
Table 10-3. Shutter commands ............................................................................................................... 29
Table 10-4. Special command codes........................................................................................................30
Table 10-5. Status command return codes and data ............................................................................33
Table 10-6. Timer command time encoding .......................................................................................... 37
Table 10-7. "Get Controller Type and Configuration" command return codes and data .................40
Table 13-1. Commands for PC parallel port control of SmartShutter via TTL IN........................... 54
Table F-1. Lambda SC controller cables ................................................................................................70
Table G-2. Complete Lambda SC remote-control command reference.............................................. 71
Table G-3. Timer command time encoding ...........................................................................................74
Table G-4. Status command return codes and data. ............................................................................75
Table G-5. "Get Controller Type and Config." command return codes and data...............................79

LAMBDA SC OPERATION MANUAL – REV. 1.14C (20190606)
1
1. GENERAL INFORMATION
1.1 About This Manual
The Lambda SC is a
Smart
Shutter control system designed for rapid aperture control of
wavelength and is comprised of two subsystems: 1) a controller, and 2) one
Smart
Shutter
that is placed in the optical pathway of your existing experimental setup. Installation of the
Smart
Shutter is discussed in the
SMART
SHUTTER section while installation of the
controller is discussed in the CONTROLLER section. This unit supports a single
Smart
Shutter. Finally, the remote operation of the Lambda SC through its USB or RS-232
serial port is discussed in the REMOTE CONTROL sections.
In the next few pages you will find unpacking instructions followed by some
quick-start
directions in the FIRST TIME USE section to help you get acquainted with the manual
operation of the Lambda SC. Please take the time to read these instructions to assure the
safe and proper use of this instrument.
This manual is continually being updated. If there are any areas that you feel should be
covered in greater detail we would like to hear from you. Please contact our Technical
Support staff with your suggestions (415-883-0128 or info@sutter.com).
1.2 Technical Support
Unlimited technical support is provided by Sutter Instrument Company at no charge to our
customers. Our technical support staff is available between the hours of 8:00 AM and 5:00
PM (Pacific Time) at (415) 883-0128. You may also E-mail your queries to info@sutter.com.
NOTE: The RS-232 serial port is absent on early versions of the Lambda SC controller. If you
have a version of the Lambda SC that does not have the serial port, and you would like to
have it added, please contact Sutter Instrument Co. to arrange for an upgrade.

2
LAMBDA SC OPERATION MANUAL – REV. 1.14C (20190606)
(This page intentionally blank.)

LAMBDA SC OPERATION MANUAL – REV. 1.14C (20190606)
3
2. SAFETY WARNING
Replace fuse only with the same type and rating:
5 x 20 mm glass tube, T1.0A, 250V, IEC 60127-2, Sheet III
(such as a Bussmann GDC-1A or Littelfuse 218 001)
To prevent fire or shock hazard do not expose the unit to rain or moisture.
To avoid electrical shock and exposure to hazardous electrical voltages:
Do not disassemble the unit. Refer servicing to qualified personnel.
Always use the grounded power supply cord set provided to connect the unit to a
grounded outlet (3-prong). This is required to protect you from injury in the event that
an electrical hazard develops.
2.1 Safety Considerations when Using High-Intensity Light Sources
Failure to comply with any of the following precautions may result in injury to the users of
this device as well as those working in the general area near the device.
Never look into the optical pathway of the high intensity light sources typically used with
this instrument. Doing so can cause permanent eye damage.
The high-intensity light sources typically used with this instrument also produce a
significant amount of heat. Direct contact with the housing of those instruments can
cause serious burns.
2.2 The
Smart
Shutter is Not a Safety Shutter
Sutter Instrument Co.’s
Smart
Shutter is
not
intended to be a ‘safety shutter.’ A safety
shutter usually closes automatically in the event of a power failure and is designed with the
primary goal of ensuring that it will not allow any unintended exposure. For laser safety
applications, a shutter is normally designed so that no single component failure allows an
unintended exposure to the laser beam. The
Smart
Shutter is intended for use in the
controlling of light in scientific and industrial applications. The
Smart
Shutter was designed
for high performance and durability, but without certain features that would be desirable in a
safety shutter application.

4
LAMBDA SC OPERATION MANUAL – REV. 1.14C (20190606)
(This page intentionally blank.)

LAMBDA SC OPERATION MANUAL – REV. 1.14C (20190606)
5
3. PRECAUTIONS
3.1 On Operation
Failure to comply with any of the following precautions may damage this device.
•DO NOT CONNECT OR DISCONNECT THE CABLES BETWEEN THE
CONTROLLER AND THE MECHANICAL UNITS WHILE POWER IS ON.
Please allow at least 20 seconds after turning the unit off before disconnecting the
mechanical units. Failure to do this may result in damage to the electronics.
•Operate the Lambda SC using 100V - 240V AC., 50/60 Hz line voltage.
•The Lambda SC is designed for operation in a laboratory environment (pollution degree
I).
•The Lambda SC is designed for connection to a standard laboratory power outlet
(overvoltage category II).
•Operate only in a location where there is a free flow of fresh air on all sides.
NEVER ALLOW THE FREE FLOW OF AIR TO BE RESTRICTED.
•Since the Lambda SC is a microprocessor-controlled device, it should be accorded the
same system wiring precautions as any 'computer type' system. A surge protector is
recommended.

6
LAMBDA SC OPERATION MANUAL – REV. 1.14C (20190606)
(This page intentionally blank.)

LAMBDA SC OPERATION MANUAL – REV. 1.14C (20190606)
7
4. ACCESSORIES
4.1
Smart
Shutters
SmartShutters are available in 25-, 35-, or 50-mm sizes. The 25- and 35-mm SmartShutters
are completely exchangeable without requiring modification of the Lambda SC controller.
When exchanging a 25- or 35-mm SmartShutter with a 50-mm version, or vice versa, the
Lambda SC controller box must be returned to Sutter Instrument Co. for reprogramming.
4.2 Mounts
An 8-32 screw-mount hole exists on the edge of the SmartShutter opposite the motor, into
which may be attached a mounting post of any desired length. When the SmartShutter is
mounted on a post using this screw-mount hole, the exact center of the shutter aperture is
precisely aligned with the vertical center of the post. A ___-long post is available from Sutter
Instrument Co. This post, along with posts of other dimensions, as well as post holders and
bases, are available from most laboratory equipment suppliers.
A SmartShutter can also be mounted on a Sutter Instrument Co. Filter Wheel with a special
enclosure, as well as with other Sutter Instrument Co. products, such as the Lambda LS,
Lambda DG-4, Lambda DG-5, and various Lambda 10 series Filter Wheel controllers. Please
consult with Sutter Instrument Co.’s Technical Support for the different configuration
possibilities.
4.3 Adapters
Most microscopes, cameras, light sources and other optical instruments to which a
SmartShutter may be interfaced will require some sort of adapter to link the devices.
Adapters for interfacing the SmartShutter to most instruments are available from Sutter
Instrument Company or can be custom built by Sutter. Suitable adapters are available from
other sources, as well, but Sutter Instrument Company assumes no responsibility for the
performance, suitability and safety of adapters built by the user or other manufacturers.

8
LAMBDA SC OPERATION MANUAL – REV. 1.14C (20190606)
(This page intentionally blank.)

LAMBDA SC OPERATION MANUAL – REV. 1.14C (20190606)
9
5. UNPACKING
The Lambda SC and associated hardware comes packed in a single carton. The following is a
list of the components found there. If you believe that any of these components are missing
or show obvious signs of damage from shipping, please contact the factory.
One standalone SmartShutter.
A mounting rod and base holder for the SmartShutter are included if ordered.
LAMBDA SC controller.
9-pin SmartShutter to controller connecting cable.
USB interface cable
Power cord.
CD-ROM disc containing device driver and utility/configuration software for the USB
interface.
Manual.
The Lambda SC is shipped to you in a prefabricated foam mold. Please take note of this
method of packaging. Should it ever be necessary to ship the Lambda SC to another location,
the same method of packaging should be employed. Additional packing material may be
purchased from Sutter Instruments C o m p a n y.
IMPORTANT: Improper packaging is a form of abuse and, as such, can be responsible for
voiding the warranty where shipping damage is sustained because of such packing.

10
LAMBDA SC OPERATION MANUAL – REV. 1.14C (20190606)
(This page intentionally blank.)

LAMBDA SC OPERATION MANUAL – REV. 1.14C (20190606)
11
6. FIRST TIME USE
6.1 Some Basic Information
The Lambda SC is a microprocessor-controlled, high-speed shutter controller designed for
microscopy and other applications that require rapid and accurate wavelength switching. The
Lambda SC controller can control one SmartShutter and features a USB input for remote
control.
The controller is designed around an embedded microcontroller, which automatically
determines the equipment installed. The electronics for controlling a SmartShutter are
already installed, even if you did not order that option. If you add a SmartShutter later or
change the size of the SmartShutter, there are no additional electronics to buy, although you
may need to have the controller reprogrammed if switching between 25- or 35-mm
SmartShutter and a 50-mm one, or vice versa.
The controller runs the attached SmartShutter under remote control through a USB or RS-
232 serial input using the same simple protocol as the original Lambda 10- series controllers
with only minor differences. The controller is programmed with a superset of commands,
based on the Lambda 10-3 and 10-B, some commands of which are unique to the Lambda SC.
The controller can also be configured for it to be under basic control of an external signaling
device connected to the controller’s TTL IN connector.
The following instructions are meant to help you set up the Lambda SC and familiarize you
with the remote mode of SmartShutter control.
The Lambda SC controller can control one
SmartShutter
. Shutters are commonly used to
turn off a light source in order to prevent photo bleaching or other photo damage. In
addition, they may be used to select between multiple light sources or light paths, such as
transmitted light versus fluorescence excitation. SmartShutters, in particular, have the
ability to be placed into one of several modes. These modes determine the way the actual
shutter action works: Fast Mode, Soft Mode, and Neutral Density Mode. Fast Mode provides
for the fastest open/close action of the shutter. Soft Mode, is slightly slower than Fast Mode,
and provides for a somewhat gradual open/close action, as well as being quieter. Neutral
Density Mode allows for the control of the aperture of the open state of the shutter – between
1 and 144 microsteps may be selected for the Neutral Density Mode. Neutral Density Mode
also provides for the control of light intensity without affecting the wavelength.
The primary use of the shutter is as an accessory to optical filter wheels, such as those used
with the Lambda 10 series of controllers, but it is also used as a stand-alone piece for the
transmitted light arm of inverted microscopes. Electro-mechanical shutters actuated by
solenoids have been used by most optical manufacturers for decades, and have some
outstanding features. They act quickly, can be driven by simple electronics, and their
packaging is quite thin. On the other hand, these units fail frequently and usually cannot be
repaired. There is effectively no warranty from the manufacturer for the end user. Although
they can produce short bursts of operation at 30 Hertz, they will overheat and fail quickly if
this rate of opening is maintained. These shutters also produce a good deal of vibration and
audible noise.

12
LAMBDA SC OPERATION MANUAL – REV. 1.14C (20190606)
6.2 Line Power (Mains)
The power cord provided with the Lambda SC connects to the Power Entry Module located
on the back of the unit (see diagram below). This Module also includes the Line Fuse and
Power Switch.
Figure 6-1. Lambda SC cabinet (rear view)
Figure 6-2. Switch, fuse, and power connection
The Lambda SC has a “universal” power supply that runs on 110 volts or 220 volts AC, 50 or
60 Hz. You do not need to change settings or fuses to suit local conditions. Make certain that
the ON/OFF Switch located on the back panel of the Lambda SC cabinet is turned OFF. Plug
the power cord provided with the Lambda SC into the Line Input socket on the Power Entry
Module and then to a power source of the appropriate voltage and frequency.
You must replace the fuse with the appropriate value (see the Technical Specifications),
otherwise your protection from fire and electric shock will be compromised.
6.3 Basic Operation
6.3.1 Initialization
At power on the Lambda SC will open or close the SmartShutter according to its internally
saved configuration. Additionally, the mode of the SmartShutter (Fast, Soft, or Neutral
Density (and number of microsteps)) is determined by the settings in the internally saved
configuration. When powering up the Lambda SC for the first time after having received it
and setting it up, the state and mode of the SmartShutter defaults to the factory settings
(State = Closed, Mode = Fast; and for TTL control, Trigger = High).
The actual configuration can be verified and changed by installing the Lambda SC COM
Utility software for connection to the computer’s RS-232 serial port, or the Lambda SC USB
Table of contents
Other Sutter Instrument Control System manuals

Sutter Instrument
Sutter Instrument MPC-365 Series User manual

Sutter Instrument
Sutter Instrument Lambda 10-2 Installation manual

Sutter Instrument
Sutter Instrument Lambda SC Quick guide

Sutter Instrument
Sutter Instrument MPC-325 Series User manual

Sutter Instrument
Sutter Instrument MPC-385 Series User manual