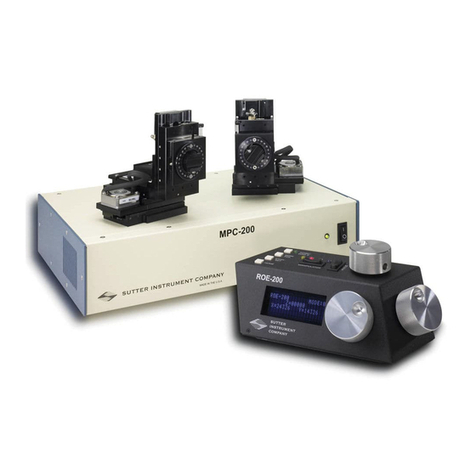
Sutter Instrument MPC-385 Series User manual

One Digital Drive
Novato, CA 94949
Voice: 415-883-0128 Web: www.sutter.com
Fax: 415-883-0572 Email: info@sutter.com
MPC-385
Series
Multi Motorized-Micromanipulator
Control System
Operation Manual
Rev. 3.21k (20201120)

MPC-385 SERIES OPERATION MANUAL – REV. 3.21K (20201120)
2
Copyright © 2020 Sutter Instrument Company. All Rights Reserved.


MPC-385 SERIES OPERATION MANUAL – REV. 3.21K (20201120)
3
DISCLAIMER
The MPC-385-series system consists of one or two MPC-200 controllers, an ROE-200 user
control device, and one or more electromechanical micromanipulator devices. The purpose of
the system is for the manipulation at the micro level of micropipettes and probes used in
conjunction with a microscope. No other use is recommended.
This instrument is designed for use in a laboratory environment. It is not intended, nor
should it be used in human experimentation or applied to humans in any way. This is not a
medical device.
Do not open or attempt to repair the instrument. High voltages are present and inadvertent
movement of the micromanipulator electromechanical could cause injury.
Do not allow unauthorized and/or untrained operative to use this device.
Any misuse will be the sole responsibility of the user/owner and Sutter Instrument Company
assumes no implied or inferred liability for direct or consequential damages from this
instrument if it is operated or used in any way other than for which it is designed.
SAFETY WARNINGS AND PRECAUTIONS
Electrical
Operate the MPC-200 using 110-- 240 V AC., 50-60 Hz line voltage. This instrument is
designed for use in a laboratory environment that has low electrical noise and mechanical
vibration. Surge suppression is always recommended . If the system includes two MPC-
200 controllers daisy-chained together, surge suppression is strongly recommended.
Fuse Replacement: Replace only with the same type and rating:
T2A, 250V, 5 x 20mm, Time Delay fuse (IEC 60127-2, Sheet III)
(Examples: Bussmann GDC-2A. GMC-2A or S506-2-R (RoHS); or
Littelfuse 218 200 or 218 200P (RoHS))
A spare fuse is in the power input module. Please refer to the fuse-replacement appendix
for more details on fuse ratings and for instructions on how to change the fuse.
Avoiding Electrical Shock and Fire-related Injury
Always use the grounded power supply cord set provided to connect the system to
a grounded outlet (3-prong). This is required to protect you from injury in the event
that an electrical hazard occurs.
Do not disassemble the system. Refer servicing to qualified personnel.
To prevent fire or shock hazard do not expose the unit to rain or moisture.
Electromagnetic Interference
To comply with FDA and CE electromagnetic immunity and interference standards; and to
reduce the electromagnetic coupling between this and other equipment in your lab always
use the type and length of interconnect cables provided with the unit for the interconnection

4
MPC-385 SERIES OPERATION MANUAL – REV. 3.21K (20201120)
of one or more MP-2x5/M electromechanical devices, host computer via USB interface, (see
the Technical Specifications appendix for more details).
Operational
Failure to comply with any of the following precautions may damage this device.
This instrument is designed for operation in a laboratory environment (Pollution
Degree I) that is free from mechanical vibrations, electrical noise and transients.
This unit is not designed for operation at altitudes above 2000 meters nor was it tested
for safety above 2000 meters.
DO NOT CONNECT OR DISCONNECT THE CABLES BETWEEN THE
CONTROLLER AND THE MECHANICAL UNITS WHILE POWER IS ON.
Please allow at least 20 seconds after turning the unit off before disconnecting the
mechanical units. Failure to do this may result in damage to the electronics.
Operate this instrument only according to the instructions included in this manual.
Do not operate if there is any obvious damage to any part of the instrument.
Operate only in a location where there is a free flow of fresh air on all sides.
NEVER ALLOW THE FREE FLOW OF AIR TO BE RESTRICTED.
Do not operate this instrument near flammable materials. The use of any hazardous
materials with this instrument is not recommended and if undertaken is done so at the
users’ own risk.
Do not attempt to operate the instrument with the manipulator shipping screws in
place - severe motor damage may result.
Do not operate if there is any obvious damage to any part of the instrument. Do not
attempt to operate the instrument with the manipulator shipping screws in place - severe
motor damage may result. When transporting the mechanical manipulator, be sure to
install the shipping screws supplied in their correct locations. Failure to do this may
result in damage to the motors.
Never touch any part of the micromanipulator electromechanical device while it is in
operation and moving. Doing so can result in physical injury (e.g., fingers can be caught
and pinched between the moving parts of the micromanipulator).
As with all microinjection devices, sharp micropipettes can fly out of their holder
unexpectedly. Always take precautions to prevent this from happening. Never loosen the
micropipette holder chuck when the tubing is pressurized, and never point micropipette
holders at yourself or others. Always wear safety glasses when using sharp glass
micropipettes with pressure microinjectors.
Do not handle the manipulator mechanical while the power is on and take care to
ensure no cables pass close to the mechanical manipulator.

MPC-385 SERIES OPERATION MANUAL – REV. 3.21K (20201120)
5
Other
Use this instrument only for microinjection purposes in conjunction with the
procedures and guidelines in this manual.
Retain the original packaging for future transport of the instrument.
Some applications, such as piezo-impact microinjection call for the use of mercury in
the micropipette tip. The use of any hazardous materials with any Sutter Instrument’s
instrument is not recommended and if undertaken is done so at the users’ own risk.
When transporting the mechanical manipulator, be sure to install the shipping screws
supplied in their correct locations. Failure to do this may result in damage to the
motors.
This instrument contains no user-serviceable components — do not open the
instrument casing. This instrument should be serviced and repaired only by Sutter
Instrument or an authorized Sutter Instrument servicing agent.
Sutter Instrument reserves the right to change specifications without prior notice.
This device is intended only for research purposes.
Handling Micropipettes
Failure to comply with any of the following precautions may result in injury to the users
of this device as well as those working in the general area near the device.
The micropipettes used with this instrument are very sharp and relatively fragile.
Contact with the pulled micropipette tips, therefore, should be avoided to prevent
accidentally impaling yourself.
Always dispose of micropipettes by placing them into a well-marked, spill-proof
“sharps” container.

6
MPC-385 SERIES OPERATION MANUAL – REV. 3.21K (20201120)
(This page intentionally left blank.)

MPC-385 SERIES OPERATION MANUAL – REV. 3.21K (20201120)
7
TABLE OF CONTENTS
DISCLAIMER .......................................................................................................................................3
SAFETY WARNINGS AND PRECAUTIONS....................................................................................3
Electrical ..................................................................................................................................................3
Avoiding Electrical Shock and Fire-related Injury..............................................................................3
Electromagnetic Interference ................................................................................................................3
Operational ..............................................................................................................................................4
Other.........................................................................................................................................................5
Handling Micropipettes..........................................................................................................................5
1. INTRODUCTION...........................................................................................................................11
1.1 Structure of the MPC-385-Series Documentation Package.......................................................11
1.2 Components of the MPC-385 Series .............................................................................................11
2. MPC-200 MULTI-MANIPULATOR CONTROLLER AND ROE-200 INPUT DEVICE
OPERATIONS ....................................................................................................................................13
2.1 Electrical Connections and Initial Operating Instructions........................................................13
2.2 Initial Operating Instructions .......................................................................................................13
2.3 Main Controls on the ROE-200.....................................................................................................15
2.3.1 White Buttons:..........................................................................................................................15
2.3.2 Black Selector Switches:..........................................................................................................16
2.3.3 Other Controls on the ROE-200.............................................................................................17
2.4 Controls on the MPC-200 ..............................................................................................................18
3. MP-285/M MANIPULATOR MECHANICAL MOUNTING INSTRUCTIONS.........................23
3.1 Mounting MP-285/M to a Stand or Platform ..............................................................................23
3.2 Setting Headstage/Pipette Angle and Pipette Exchange ...........................................................24
3.3 Headstage Mounting ......................................................................................................................24
3.4 Other Accessories............................................................................................................................26
3.5 Minimizing Electrical Noise ..........................................................................................................26
3.6 Instructions Used in Special Installations Only..........................................................................26
3.6.1 Installing and Using the Right-Angle Adapter (285300).....................................................26
3.6.2 Instructions for Changing Handedness.................................................................................26
4. OPERATIONS ................................................................................................................................27
4.1 First Time Use ................................................................................................................................27
4.1.1 Line Power (Mains)..................................................................................................................27
4.2 Make It Go .......................................................................................................................................27
4.3 Basic Operation...............................................................................................................................28
4.3.1 Initialization .............................................................................................................................28
4.3.1 Standard Screen .......................................................................................................................28
4.3.2 No Manipulator Connected Screen ........................................................................................28
4.3.3 Diagonal-Mode Screen (DIAGONAL)....................................................................................28
4.3.4 Move in progress screen: .........................................................................................................29
4.3.5 Setting Work Position (WORK POS).....................................................................................29
5. EXTERNAL CONTROL ................................................................................................................31
5.1 General.............................................................................................................................................31

8
MPC-385 SERIES OPERATION MANUAL – REV. 3.21K (20201120)
5.2 Virtual COM Port (VCP) Serial Port Settings.............................................................................31
5.3 Protocol and Handshaking ............................................................................................................31
5.4 Command Sequence Formatting ..................................................................................................32
5.5 Axis Position Command Parameters............................................................................................32
5.6 Microsteps and Microns (Micrometers)........................................................................................33
5.7 Travel Speed....................................................................................................................................33
5.8 Commands .......................................................................................................................................34
5.8.1 Get Connected-Devices Status (‘A’) Command (FW <v3)..................................................34
5.8.2 Get Connected-Devices Status (‘U’) Command (FW v3+)..................................................34
5.8.3 Get Active Device & Firmware Version (‘K’) Command.....................................................35
5.8.4 Get Current Position (‘C’) Command....................................................................................36
5.8.5 Change Active Device (‘I’) Command ....................................................................................37
5.8.6 Move to Controller-Defined HOME Position (‘H’) Command............................................37
5.8.7 Move to Controller-Defined WORK Position (‘Y’) Command ............................................38
5.8.8 Move to Center Position (‘N’) Command (FW =< 1.03) ....................................................38
5.8.9 Calibrate (‘N’) Command (FW > 1.03)..................................................................................38
5.8.10 Move to Specified Position Orthogonally at Full Speed (‘M’) Command ........................39
5.8.11 Move to Specified Position in a Straight Line at Specified Speed (‘S’) Command .........39
5.8.12 Interrupt Move (‘^C’) Command........................................................................................41
5.8.13 Turn OFF S-Move command streaming data (‘F’) Command .........................................41
5.8.14 Turn ON S-Move command streaming data (‘O’) Command...........................................41
5.8.15 Set ROE MODE (‘L’) Command..........................................................................................42
5.8.16 Command Notes.....................................................................................................................42
6. MAINTENANCE............................................................................................................................49
APPENDIX A. LIMITED WARRANTY............................................................................................51
APPENDIX B. ACCESSORIES .........................................................................................................53
APPENDIX C. FUSE REPLACEMENT...........................................................................................55
APPENDIX D. TECHNICAL SPECIFICATIONS ...........................................................................57
D.1. MP-285/M ......................................................................................................................................57
D.2. MPC-200 Controller......................................................................................................................57
D.3. ROE-200.........................................................................................................................................58
APPENDIX E. QUICK REFERENCE ..............................................................................................59
E.1. Manual Operation.........................................................................................................................59
E.2. Configuration.................................................................................................................................59
E.3. External Control............................................................................................................................60
INDEX .................................................................................................................................................69
TABLE OF FIGURES
Figure 2-1. Rear of MPC-200 controller cabinet. ..................................................................................13
Figure 2-2. Top view of ROE-200............................................................................................................ 15
Figure 2-3. Side view of ROE-200. ..........................................................................................................17
Figure 2-4. Configuration switches on rear of MPC-200 controller cabinet. .....................................19

MPC-385 SERIES OPERATION MANUAL – REV. 3.21K (20201120)
9
Figure 2-5. Configuration switches (rear of MPC-200 controller). .....................................................21
Figure 3-1. Angled side view of MP-285/M showing swing gate and mounting adapter plate. .......23
Figure 3-2. Locations of screws used to open swing gate and changing pipette angle......................24
Figure 3-3. Headstage mounting. ........................................................................................................... 25
Figure 3-4. Using a dovetail for headstage mounting........................................................................... 25
Figure 4-1. MPC-200 Controller cabinet (rear view) showing power connection and fuse.............. 27
Figure 4-2. Power switch (front panel). .................................................................................................27
Figure C-1. Rear view of the MPC-200 controller cabinet showing the power entry module and
fuse location............................................................................................................................. 55
TABLE OF TABLES
Table 2-1. Configuration switch settings for different angles of steepness........................................ 20
Table 5-1. USB-VCP interface serial port settings. ..............................................................................31
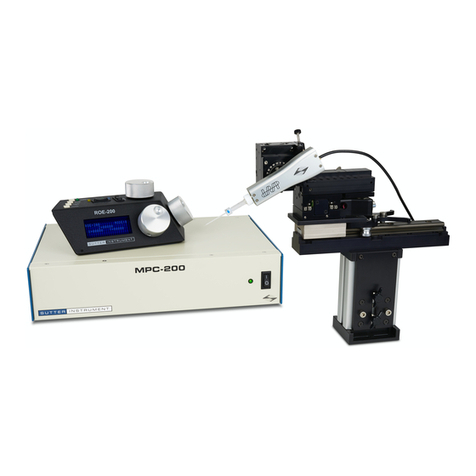
Table 5-2. Microns/microsteps conversion factors (multipliers).......................................................... 33
Table 5-3. Travel distances and bounds.................................................................................................33
Table 5-4. Travel speeds........................................................................................................................... 34
Table 5-5. Get Connected Devices Status (‘A’ Command (FW <3)....................................................34
Table 5-6. Get Connected Devices Status (‘A’ (FW <3) or ‘U’ (FW 3+)) Command. ......................35
Table 5-7. Get Active Device & Firmware Version (‘K’) Command. ..................................................35
Table 5-8. Get Current Position (‘C’) command. ..................................................................................37
Table 5-9. Change Active Device (‘I’) command. ..................................................................................37
Table 5-10. Move to controller-defined HOME position (‘H’) command. .......................................... 38
Table 5-11. Move to controller -defined WORK position (‘Y’) command........................................... 38
Table 5-12. Move to Center Position (‘N’) command (FW <= 1.03).................................................. 38
Table 5-13. Calibrate (‘N’) command (FW > 1.03)............................................................................... 39
Table 5-14. Move to specified position (‘M’) command. ....................................................................... 39
Table 5-15. Move to Specified Position in a Straight Line at Specified Speed (‘S’) command.........40
Table 5-16. Straight-Line Move ‘S’ Command Speeds.........................................................................40
Table 5-17. Interrupt move in progress (‘^C’) command. ..................................................................41
Table 5-18. Command to disable current-position streaming data during an ‘S’-command-initiated
move. ........................................................................................................................................ 41
Table 5-19. Command to disable current-position streaming data during an ‘S’-command-initiated
move. ........................................................................................................................................ 42
Table 5-20. Set ROE MODE (‘L’) command. ........................................................................................42

10
MPC-385 SERIES OPERATION MANUAL – REV. 3.21K (20201120)
Table 5-21. Straight-line move ‘S’ command speeds. ........................................................................... 45
Table 6-1. MPC-385 Controller cables and receptacles/connectors. ...................................................57
Table E-1. ROE-200 configuration switches (rear)............................................................................... 59
Table E-2. MPC-200 rear-panel config. Switches 1 – 4 (angle setting) for Device, A or B. .............. 59
Table E-3. MPC-200 rear-panel config. Switches 5 – 8 for Device A or B..........................................60
Table E-4. MPC-200 rear-panel RIGHT TRAN config. switches for Device A or B. ........................ 60
Table E-5. USB-VCP interface serial port settings............................................................................... 60
Table E-6. Microns/microsteps conversion factors (multipliers)......................................................... 61
Table E-7. Ranges and bounds................................................................................................................ 61
Table E-8. Travel speeds.......................................................................................................................... 62
Table E-9. MPC-200 external-control commands.................................................................................62
Table E-10. Straight-line move ‘S’ command speeds............................................................................66

MPC-385 SERIES OPERATION MANUAL – REV. 3.21K (20201120)
11
1. INTRODUCTION
1.1 Structure of the MPC-385-Series Documentation Package
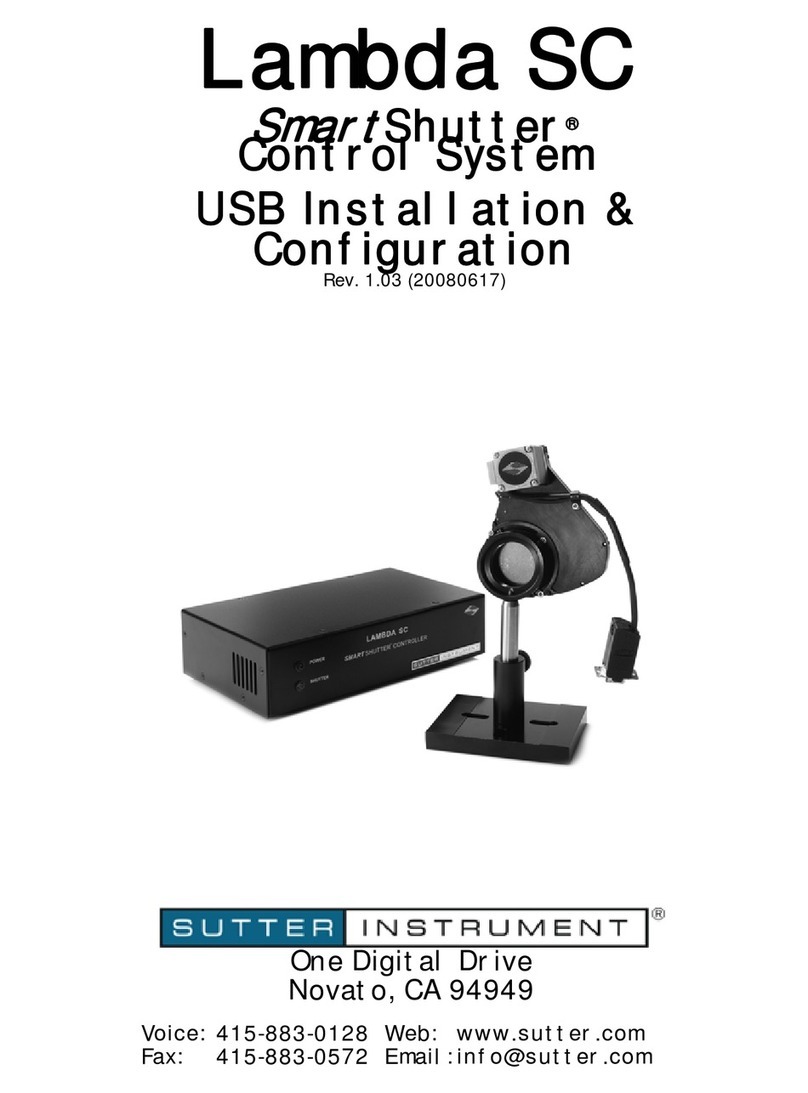
The MPC-385-Series is a manipulator system comprised of the MPC-200 controller, the ROE-
200 input device and one or more MP-285/M stepper motor manipulators. The manual
consists of two parts, “Operations” that describes the functions of the MPC-200 controller
and ROE input device and “Setup” that describes how to install the MP-285/M mechanicals.
1.2 Components of the MPC-385 Series
Carefully remove all components from the shipping container. In addition to this manual, the
following should be included in each MPC-385 system:
1. MPC-385 (a single manipulator system):
MPC-200 controller
ROE-200 Rotary Optical Encoder input device
MP-285/M manipulator mechanicals
DB-25 cable (connects MP-285/M mechanicals to the controller).
RJ-45 cable (8 conductor) connects the ROE to the controller
RJ-12 cable (6 conductor) daisy-chains two MPC-200 controllers
USB cable for computer control of the MPC-385 system
Power cable appropriate for your location
X285210 mounting adapter plates and hardware to attach mechanicals to their
mounting surfaces
X285204 four-inch dovetail extensions for mounting headstages
dovetail rod clamps
2.5mm hex wrench(s) for removing the shipping screws
1.5mm hex wrench(s) for adjusting pipette angle
2. MPC-385-2 (a two-manipulator system). Same as for the MPC-385, with the following
exceptions:
Two MP-285/M manipulator mechanicals
Two DB-25 cables (connect MP-285/M mechanicals to the controller).
Two X285210 mounting adapter plates and hardware to attach mechanicals to their
mounting surfaces
Two X285204 four-inch dovetail extensions for mounting headstages
Two dovetail rod clamps
3. MPC-385-3 (a three-manipulator system). Same as for the MPC-385-2, with the following
exceptions:
Two MPC-200 controllers

12
MPC-385 SERIES OPERATION MANUAL – REV. 3.21K (20201120)
Three MP-285/M manipulator mechanicals
Three DB-25 cables (connect MP-285/M mechanicals to the controller).
Three X285210 mounting adapter plates and hardware to attach mechanicals to their
mounting surfaces
Three X285204 four-inch dovetail extensions for mounting headstages
4. MPC-385-4 (a four-manipulator system). Same as for the MPC-385-3, with the following
exceptions:
Four MP-285/M manipulator mechanicals
Four DB-25 cables (connect MP-285/M mechanicals to the controller).
Four X285210 mounting adapter plates and hardware to attach mechanicals to their
mounting surfaces
Four X285204 four-inch dovetail extensions for mounting headstages
Four dovetail rod clamps
IMPORTANT
Once the MPC-385-series system has been unpacked, remove the two shipping screws,
indicated by the red warning tags, from each MP-285/M micromanipulator mechanical. These
screws must be removed before operating the manipulator. Save the screws, warning tags,
and hex wrench if future transport of the manipulator is needed. Once these screws have
been removed, handle the micromanipulator with care. The mechanism can be damaged if
the axes are moved with the screws in place.

MPC-385 SERIES OPERATION MANUAL – REV. 3.21K (20201120)
13
2. MPC-200 MULTI-MANIPULATOR CONTROLLER AND ROE-200
INPUT DEVICE OPERATIONS
2.1 Electrical Connections and Initial Operating Instructions
Initially, you may want to simply connect the two manipulators, the controller, and the ROE
together and try some gross movements in order to get a feel for the controls and how to
make simple movements. It is perfectly acceptable to set the manipulators in the middle of a
bench top, make all electrical connections and then observe each unit’s movement by eye.
Even if you wish to directly install the manipulators in your rig, it is useful to follow the
initial setup procedure to learn how to move the units to allow easy access to the mounting
screws.
1. Connect the power cord to the power entry module on the back of the MPC-200 controller.
Figure 2-1. Rear of MPC-200 controller cabinet.
2. With the power OFF (front panel switch in the “0” position), connect the ROE-200 input
box to the MPC-200 controller using the RJ-45 8-conductor cable.*Use the
CONTROLLER output on the back of the ROE and the COMMAND INPUT on the back of
the controller.
3. With the power OFF, run a DB-25 cable from each of the two MP-285/M mechanicals to the
DB-25 connectors marked “MANIPULATOR A” and “MANIPULATOR B” on the back of
the controller.*
* CAUTION: Never connect or disconnect the ROE or the MP-285/M while the power is
on!
2.2 Initial Operating Instructions
After all connections are made, power up the MPC-395 using the 0/I switch on the front of
the controller. As it initializes, you will see a startup screen on the ROE-200 that briefly
displays the name of the device and the version of the installed firmware. As the power
switch is the only control you will need to access on the MPC-200, the controller can
ultimately be placed in an out of the way location (e.g., under your bench).
POWER CORD
FUSE HOLDER
DAISY CHAIN SECOND
CONTROLLER
CONNECT ROE-200
CONNECT
MANIPULATORS

14
MPC-385 SERIES OPERATION MANUAL – REV. 3.21K (20201120)
Once the start-up sequence has finished, you will see a display that gives the coordinates of
the manipulator. The LED marked 1 will light and the left-hand corner of the display shows
“Drive A” to indicate that the ROE is ready to operate the MP-285/M connected at the
MANIPULATOR A output. Confirm that you get a coordinate display and that you have
removed the shipping screws from both manipulators. If you do not get a coordinate display,
go to the trouble shooting section at the back of the manual. If you have not yet removed the
shipping screws, turn the power off again and remove all shipping screws from both
manipulators.
All functions necessary during normal operation are provided by 4 push buttons and two
rocker switches on the top of the ROE-200. Other setup functions are done via buttons and
DIP switches located on the back of the ROE-200 and DIP switches on the back of the MPC-
200 controller.
The three ROE knobs control the three axes of either manipulator (right knob X, left knob Y,
and top knob Z (see Page 15)). Turn any one of the three knobs and notice that the
corresponding axis moves and the coordinate for that axis changes on the MP285/M
connected to the MANIPULATOR A output.
The MPC-200 controller and ROE-200 have a built in Centering function. This is activated
by pressing the white “CENTER” button on the back of the ROE. If both MP-285/M
manipulators are sitting in a wide-open area, and the shipping screws are removed, press the
CENTER button. The ROE-200 display will display the message “PLEASE WAIT MOVE IN
PROGRESS” and the first manipulator will center. After the CENTER operation is complete,
the manipulator axes will each be at the center of travel and the display will read 12500 for
X, Y and Z.
From this location, you can move 12500 microns in each direction on each axis. The unit will
stop automatically at each end of travel (00000 or 25000 microns). These ends are
determined by firmware. Each axis also has magnetic end of travel switches that are not
activated in normal operation. If the magnetic switches are activated, you will see the
message EOT (for End Of Travel) on one of the displayed axes.
If you wish, you can easily switch to the second manipulator (connected to the
MANIPULATOR B output on the back of the controller). This is done by pressing the
Manipulator toggle once. The LED marked 2 will light and the left-hand corner of the display
will change to “Drive B”. While you are controlling the second manipulator, press CENTER
to make sure that this manipulator’s coordinate system is initialized. After centering, you
can demonstrate that the manual knobs are now moving this manipulator.
When the MPC-200 controller is first turned on, the speed of movement is at its fastest,
coarsest Mode. Movement mode can be finer and slower by changing the black “Mode” toggle
switch. As MODE increases from 0, smaller movements are commanded by the same turn of
the ROE knob. MODE 5 or 6 is probably what you will use for the final approach to a cell.
MODE 0 or “Accelerated Mode” is used for fast movements to move the pipette large
distances. In MODE 0, when you turn the ROE knobs slowly, you get relatively slow
movement that is useful for final moves to place a pipette near a cell. Conversely, when you
make prolonged, rapid turns of the ROE knob, the controller/ROE automatically accelerates
to maximum speed to allow for prolonged, long distance movements. This would be most
useful for manual pipette exchange.

MPC-385 SERIES OPERATION MANUAL – REV. 3.21K (20201120)
15
If you toggle from Drive A to Drive B and back again you will see that the display coordinates
and Mode settings are maintained for Drive A while you are using Drive B and vice versa.
The remaining functions of the ROE are explained in the next section.
2.3 Main Controls on the ROE-200
2.3.1 White Buttons:
DIAG/NORM: Pressing the DIAG/NORM button will cause the green LED near the button to
light, indicating the MPC-200/ROE-200 is in Diagonal mode. In this mode, rotation of the Z-
axis knob produces diagonal movement. A second press will put the manipulator back into
Normal mode. When in diagonal mode, the X and Y knobs remain active, allowing you to
readjust the X and Y positioning of the pipette as you approach a cell in diagonal mode. Angle
of diagonal mode movement is set via DIP switches on the back of the MPC-200 controller
(see controller DIP switch setting instructions on Pages 19-21). When using MODE 9 (MODE
toggle set to 9), Diagonal mode produces short, quick, impulse-like movement that may be
useful in sharp pipette impalements.
When you switch to Diagonal mode, the ROE-200 display is changed from absolute to relative
coordinates and the current location is set to 0,0,0. This allows users to invoke relative
measurements using the display as a measuring device. A fourth coordinate that gives
movement along the diagonal is also added for users who wish to measure the movement of
along the axis coaxial with a pipette. When you return to Normal mode, the absolute
coordinate system is recovered. The relative coordinate feature can be disabled via DIP
switch 2 on back of the ROE-200.
Figure 2-2. Top view of ROE-200.
HOME: When pressed, the manipulator will make a move along a stereotypic path to the
location 0,0,0 or "home”. Home is the location where you would most likely exchange your
pipette and is maximal up on the Z-axis, maximal right on the X-axis (maximal left on a left-
handed manipulator) and maximal front on the Y-axis. The stereotypic path of the movement

16
MPC-385 SERIES OPERATION MANUAL – REV. 3.21K (20201120)
is first along the currently set diagonal until either the X-axis or Z-axis reaches its origin (0).
Which one of these occurs first is a function of the diagonal angle and the location at the time
HOME is pressed. Once the first limit is reached, the unit will move the two remaining axes
simultaneously to their origins (0). The only allowed change in this stereotyped move is that
the Y-axis move can be eliminated. This is done via DIP switch 8 on the back of the MPC-200
controller. (See Controller DIP switch setting instructions on Page 21).
WORK POS.: This button has three functions:
1. With the STOP/SET button is held down, a momentary press of WORK POS. makes the
current location the "Work Position". A beeper will sound to indicate that the operation is
complete, and the location has been saved. Typically, this is a location where the pipette
tip is under the microscope objective and near the cells or tissue of interest.
2. Once you have defined a Work Position, a momentary press of WORK POS. will cause the
manipulator to move to the defined Work Position, providing the manipulator last move
was to Home. The move will occur along the predefined path that the manipulator moved
to get to Home (described above) but in the opposite direction. This is the reason why
Work Position moves must follow Home moves; the move to Home defines the return trip.
In either case, the movement along the diagonal as you come in and out of the
preparation/dish/bath should assure that the pipette tip will not hit anything on the way
in or out.
3. When WORK POS. is held down for longer than 2 seconds, the current manipulator is
locked so that none of the buttons or the ROE knobs will cause it to move. The lock is
released by holding WORK POS. down again. A beep will indicate that the lock is enabled
or disabled, and the display will indicate the locked state.
Note that like HOME, the Y axis movement can be disabled when WORK POS is pressed, as
set via DIP switch 8 on the back of the MPC-200 controller (see Controller DIP switch
setting instructions on Page 21).
STOP/SET: This button has two functions:
1. When held down, STOP/SET" performs a "Set" function in combination with the "WORK
POS." key. Think of it as a shift key when held down.
2. A momentary press of STOP/SET during a robotic move (see HOME, WORK POS. and
CENTER) will immediately "Stop" the movement. Think of this as your panic button
when you see your pipette headed somewhere that you don't want it to go!
2.3.2 Black Selector Switches:
MODE: The MODE Selector controls the speed and the relative fineness of movement of the
manipulator produced by rotating the ROE knobs. As MODE increases from 0 to 9,
movement gets finer and slower. As explained in "INITIAL OPERATING INSTRUCTIONS",
MODE 0 is Accelerated Mode. In MODE 0, slow turns of the ROE knob produce medium
course moves for moving a pipette under a microscope in the vicinity of a cell. Prolonged, fast
turns of the ROE knobs cause the controller to accelerate to top speed for long, imprecise
movements for rapid manual positioning of the pipette. The remaining MODES (1-9) produce
moves of increasing sensitivity and decreasing speed. In practice, most users will find that
MODE 5 or 6 will provide the necessary dexterity of movement for the final approach to a
cell. The current MODE setting is displayed in the upper right of the ROE-200 display.

MPC-385 SERIES OPERATION MANUAL – REV. 3.21K (20201120)
17
MANIPULATOR: The MANIPULATOR Selector toggles the active manipulator. Both an
LED and the named manipulator on the ROE display change to signify which manipulator is
active. When the MANIPULATOR A output is selected, LED 1 will light, and the display will
say “Drive A” in the upper right-hand corner. When the MANIPULATOR B output is
selected, LED 2 will light, and the display will say “Drive B”.
The status of a manipulator is preserved when you toggle to the other manipulator. Status
includes the current position, current MODE (speed) setting, whether you are in diagonal or
orthogonal movement, and whether the manipulator is currently locked. In addition, a
separate WORK POS is maintained for each manipulator in use.
A separate set of DIP switches is present on the back of the controller for controlling setup of
the two different manipulator outputs (see Controls on the MPC-200).
You can also configure how the MANIPULATOR Selector operates. The selector can function
as a two position toggle, where pressing the left side of the toggle selects Manipulator 1 and
pressing the right side of the toggle selects Manipulator 2, or the selector can function in a
cyclical fashion, pressing once on either side selects the other manipulator or pressing twice
reselects the manipulator you are already on. Selection method is determined by DIP switch
3 on the back of the ROE.
Figure 2-3. Side view of ROE-200.
2.3.3 Other Controls on the ROE-200
CENTER (round push button on the back of ROE-200): CENTER is an initialization
function that is used when the unit is first set up and occasionally during normal operation.
CENTER should only be done in the absence of a pipette as the manipulator makes large
robotic movements to its extreme ranges of motion. To CENTER, press and release the white
button on the back of the ROE-200. This will cause a prolonged movement in each axis to the
end of travel (EOT) sensors beyond the origin (0,0,0). Once the sensors are found, a short
move in the opposite direction is made and this location is defined as (0,0,0). Finally, the unit
moves to the location (12500 (X), 12500 (Y), 12500 (Z)), the center of travel of each axis. If
the unit is turned off or STOP/SET is pressed during the running of CENTER, the unit will

18
MPC-385 SERIES OPERATION MANUAL – REV. 3.21K (20201120)
not be correctly initialized. In this case, it is necessary to cycle the power off and on and run
CENTER again to its completion.
DIP Switches (on back of ROE-200): There are four DIP switches on the back of the ROE-
200 which govern global and/or ROE settings.
Switch 1: When ON, all modes on the MODE selector, except Mode 0 and 5, are
disabled. Some users may find that they only need Accelerated Mode and a single fine
mode. This will allow them to more easily switch between the two. Factory default is
OFF, enabling all modes.
Switch 2: When OFF, relative coordinates during Diagonal Mode are disabled. The
factory default is ON (display of relative coordinates enabled during Diagonal Mode).
Switch 3: When OFF, the MANIPULATOR Selector functions in a cyclical fashion.
After reaching the highest-numerated manipulator, a further push of
MANIPULATOR cycles the user back to the lowest-numerated manipulator. When
DIP switch 3 is set to ON, the selector does not cycle back to the first manipulator.
Factory default is OFF, allowing cycling back.
Switch 4: Reserved for future use. NOTE: Must be kept ON for proper functioning!
2.4 Controls on the MPC-200
Power Switch: The power switch for the MPC-200 is located on the front panel of the
controller. At power up, the microprocessor in the ROE-200 scans the attached equipment
and configures the system accordingly. Among the checks/configurations that are made:
1. Determines the number and type of manipulators that are attached. The MPC-200/ROE-
200 system is able determine how many and what type of manipulators (MP-285/M, MP-
225/M, or MP-265/M) are connected and to what outputs they are connected. It then sets
the current for each output to the correct value for the mechanicals found. If no
manipulators are found, the controller will return the message "NO MANIPULATOR
DETECTED, PLEASE TURN OFF CONTROLLER AND ATTACH MANIPULATOR"
2. The ROE-200 can connect to more than one MPC-200 controller. On power up, the ROE
determines how many controllers are attached and configures properly. If the power is off
on the second controller, the ROE-200 displays a message "PLEASE TURN ON ALL
CONTROLLERS, THEN PRESS SET TO START".
DIP Switches: Two banks of 8 DIP switches are located on the back of the MPC-200
controller. Each bank is assigned to, and configures, one of the two manipulator outputs on
the back of the controller (MANIPULATOR A or B). Users familiar with the Sutter
Instrument MP-225 controller will find that they have the same function as the configuration
DIP switches on the MP-225 ROE. The switches are numbered 1 through 8. In all cases, the 0
or OFF position is opposite the direction of the switch number and the 1 or ON position is in
the direction of the switch number and is also indicated by an arrow and the word “ON” next
to Switch 1. For any new switch settings to take effect, the controller must be powered off
and on.
The figure below shows the two banks of switches on the back of the MPC-200 controller.
This manual suits for next models
2
Table of contents
Other Sutter Instrument Control System manuals

Sutter Instrument
Sutter Instrument Lambda 10-2 Installation manual

Sutter Instrument
Sutter Instrument MPC-325 Series User manual

Sutter Instrument
Sutter Instrument SmartShutter Lambda SC User manual

Sutter Instrument
Sutter Instrument MPC-365 Series User manual

Sutter Instrument
Sutter Instrument Lambda SC Quick guide
Popular Control System manuals by other brands

heat-timer
heat-timer Digi-Span Elite Series HWE-SS Installation and operation instructions

ZKTeco
ZKTeco QR500 How to use

2VV
2VV IC3-CONTROL Installation and operation manual

Conrad
Conrad 56 16 00 operating instructions

RTI
RTI It's Under Control CB-8 Installation and operation guide

IDTECK
IDTECK iTDC user manual