manuals.online logo
Brands
  1. Home
  2. •
  3. Brands
  4. •
  5. System Sensor
  6. •
  7. Security Sensor
  8. •
  9. System Sensor 2112LP User manual

System Sensor 2112LP User manual

D150-03-00 1 I56-597-03R
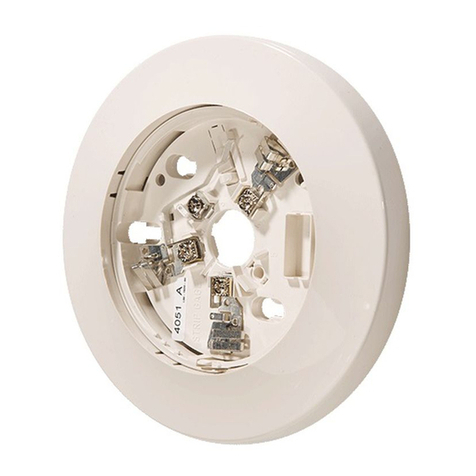
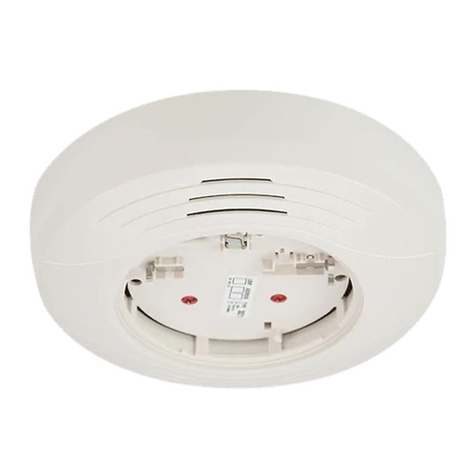
B112LP Plug-in Detector Base
For use with the following smoke detectors:
IN US: 1151, 2151
IN CANADA: 1151A, 2151A
IN EUROPE: 1151E, 2151E
INSTALLATION AND MAINTENANCE INSTRUCTIONS
3825 Ohio Avenue, St. Charles, Illinois 60174
1-800-SENSOR2, FAX: 630-377-6495
www.systemsensor.com
Before Installing
Please thoroughly read the System Sensor manual I56-407,
Guide for Proper Use of System Smoke Detectors, which pro-
vides detailed information on detector spacing, placement,
zoning, wiring, and special applications. Copies of this
manual are available at no charge from System Sensor. (For
installation in Canada, refer to CAN/ULC-S524, Standard
for the Installation of Fire Alarm Systems and CEC Part 1,
Sec. 32.)
NOTICE: This manual should be left with the owner/user
of this equipment.
IMPORTANT: The detector used with this base must be
tested and maintained regularly following NFPA 72 require-
ments. The detector used with this base should be cleaned
at least once a year.
Specifications
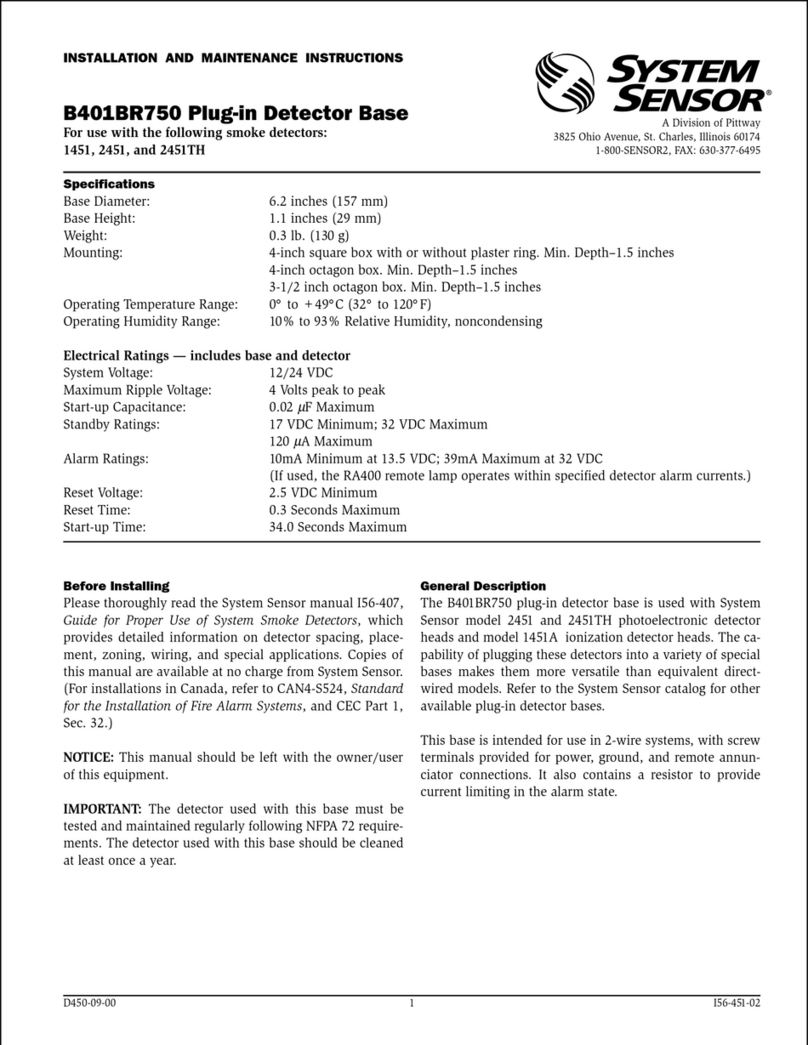
Base Diameter: 6.2 inches (157 mm)
Base Height: 0.95 inches (24 mm)
Weight: 0.3 lb. (137 g)
Mounting: 4-inch square box with or without plaster ring. Min. depth–1.5 inches
3-1/2-inch octagon box. Min. depth–1.5 inches
Operating Temperature Range: 0° to 49°C (32° to 120°F)
Operating Humidity Range: 10% to 93% Relative Humidity, Noncondensing
Electrical Ratings - includes base and detector
System Voltage: 24 VDC
Maximum Ripple Voltage: 4 Volts peak-to-peak
Start-Up Capacitance: 0.02µF Maximum
Standby Ratings: 20 VDC Minimum
29 VDC Maximum
120 µA Maximum
Alarm Ratings: 17 mA Minimum
36 mA Maximum
Reset Voltage: 1.4 VDC Minimum
Reset Time: 0.3 Seconds Maximum
(The optional RA400Z operates within specified detector alarm currents.)
Start-up Time: 34.0 Seconds Maximum
Relay Contact Ratings:
Resistive or Inductive (60% Power Factor)
Form A: 2.0 A @ 30 VAC/DC
Form C: 2.0 A @ 30 VAC/DC
0.6 A @ 110 VDC
1.0 A @ 125 VAC
General Description
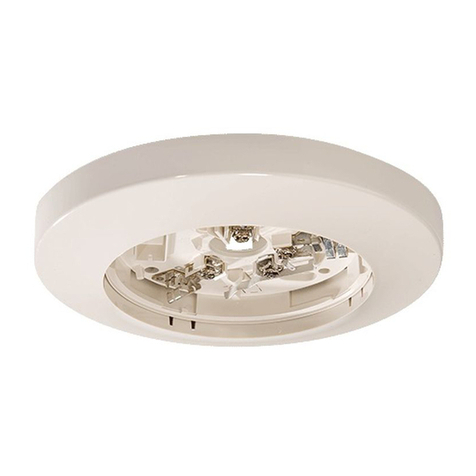
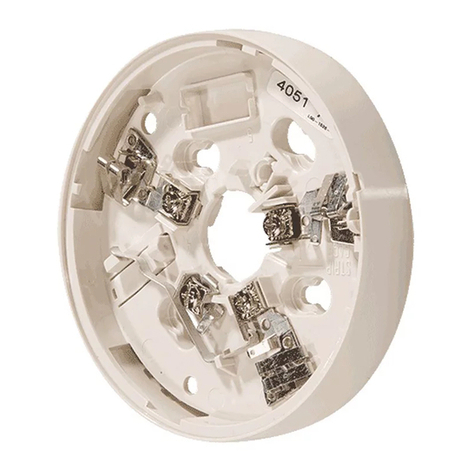
The Model B112LP detector base is designed for use with
System Sensor model 2151 photoelectronic and 1151 ioniza-
tion detector heads. This four-wire base is equipped with
screw terminals for the connection of power, ground, and
an optional remote annunciator.
Mounting
The detector base mounts directly to 3-1/2 inch and 4-inch
octagon boxes and 4-inch square boxes, with or without
plaster rings. To mount the base, remove the decorative
ring by rotating it in either direction to unhook the snaps
before separating the ring from the base. Use the screws
supplied with the junction box to attach the base to the
box through the appropriate slots in the base (see Figure
1). Position the decorative ring around the base and rotate
it in either direction until the ring snaps into place.
D150-03-00 4 I56-597-03R
©2001 System Sensor
Three-Year Limited Warranty
System Sensor warrants its enclosed smoke detector base to be free from
defects in materials and workmanship under normal use and service for a
period of three years from date of manufacture. System Sensor makes no
other express warranty for this smoke detector base. No agent, represen-
tative, dealer, or employee of the Company has the authority to increase
or alter the obligations or limitations of this Warranty. The Company’s
obligation of this Warranty shall be limited to the repair or replacement
of any part of the smoke detector base which is found to be defective in
materials or workmanship under normal use and service during the three
year period commencing with the date of manufacture. After phoning
System Sensor’s toll free number 800-SENSOR2 (736-7672) for a Return
Authorization number, send defective units postage prepaid to: System
Sensor, Repair Department, RA #__________, 3825 Ohio Avenue, St.
Charles, IL 60174. Please include a note describing the malfunction and
suspected cause of failure. The Company shall not be obligated to repair
or replace units which are found to be defective because of damage,
unreasonable use, modifications, or alterations occurring after the date
of manufacture. In no case shall the Company be liable for any conse-
quential or incidental damages for breach of this or any other Warranty,
expressed or implied whatsoever, even if the loss or damage is caused by
the Company’s negligence or fault. Some states do not allow the exclu-
sion or limitation of incidental or consequential damages, so the above
limitation or exclusion may not apply to you. This Warranty gives you
specific legal rights, and you may also have other rights which vary from
state to state.
Please refer to insert for the Limitations of Fire Alarm Systems
I56-597-03R
D150-03-00 2 I56-597-03R
Installation Guidelines
NOTE: Refer to the releasing device manufacturer’s
instructions for connection instructions.
Allowable loop resistance is an important specification for
control panels as well as for smoke detectors and their
bases. The alarm system cannot be expected to operate
correctly if system components have incompatible allow-
able loop resistances. Therefore, before beginning installa-
tion, refer to the control panel manufacturer’s loop resis-
tance specification to ensure that it is listed as compatible
with the System Sensor base and smoke detector being
installed.
All wiring must be installed in compliance with the
National Electrical Code, all applicable local codes and any
special requirements of the authority having jurisdiction,
using the proper wire size. The conductors used to connect
smoke detectors to control panels and accessory devices
should be color-coded to reduce the likelihood of wiring
errors. Improper connections can prevent a system from
responding properly in the event of a fire.
Wiring
For signal wiring (the wiring between interconnected
detectors), it is recommended that the wire be no smaller
than AWG 18. However, the screws and clamping plate in
the base can accommodate wire sizes up to AWG 12. The
use of twisted pair wiring for the power (+ and -) loop is
recommended to minimize the effects of electrical interfer-
ence.
NOTE: To ensure that electrical connections are super-
vised, DO NOT loop wires under terminals 2, 3,
and 5 –break the wire at each terminal.
To make electrical connections, strip approximately 3/8” (1
cm) insulation from the end of each wire. Slide the wires
under the clamp plate and tighten the terminal screw.
If the base is being installed in a zoned system, check the
zone wiring before installing the smoke detector head. The
built-in shorting spring makes it convenient to do this.
After the detector base is wired and attached to the electri-
cal box, position the shorting spring against terminal 3. Use
the slot in the retaining clip to hold the spring against the
terminal, as shown in Figure 1. This shorts the negative-in
and negative-out leads so that loop wiring can be tested
for continuity.
The shorting spring in the base will disengage automati-
cally when the detector head is removed from the base.
DO NOT remove the shorting spring since it reengages as
the detector head is turned into the base, completing the
circuit.
SNAP ON
DECORATIVE
RING
SCREWS (NOT
SUPPLIED)
DETECTOR
BASE
BOX (NOT
SUPPLIED)
SHORTING
SPRING
C503-00
Figure 1. Mounting base to box:
Tamper-resistance Feature
NOTE: DO NOT use the tamper-resistance feature if the
System Sensor XR2 Removal Tool will be used to
remove detectors from the base.
This detector base can be made tamper resistant so the
detector cannot be removed without the use of a tool. To
make the base tamper-resistant, break off the smaller tab at
the scribed line on the tamper-resistance tab, on the detec-
tor mounting bracket (see Figure 3A), before installing the
detector.
To remove the detector from the base after it has been made
tamper resistant, remove the decorative ring by rotating it
in either direction and pulling it away from the base. Then,
insert a small screwdriver into the notch, as indicated in
figure 3B, and press the plastic lever toward the mounting
surface before rotating the detector counterclockwise for
removal.
D150-03-00 3 I56-597-03R
DETECTOR
POWER LOOP
(+)
(–)
ALARM
INITIATION LOOP
FCI
CONTROL PANEL
ALARM RELAY
AUXILIARY CONTACTS
N.O.
12
N.C.
13
C.
14
(2.8 VDC)
(+) (—)
1 4
ALARM
RELAY
REMOTE
ANNUNCIATOR
OUTPUT
(+IN) 2 3 (+OUT)
SPORTING
SPRING 5 (–IN, –OUT)
(IN)
10
(OUT)
11
ALARM RELAY
8
(IN)
9
(OUT)
FIRST DETECTOR IN LOOP
ALARM RELAY
AUXILIARY CONTACTS
N.O.
12
N.C.
13
C.
14
(2.8 VDC)
(+) (—)
1 4
ALARM
RELAY
REMOTE
ANNUNCIATOR
OUTPUT
(+IN) 2 3 (+OUT)
SPORTING
SPRING 5 (–IN, –OUT)
(IN)
10
(OUT)
11
ALARM RELAY
8
(IN)
9
(OUT)
FIRST DETECTOR IN LOOP EOL
RESISTOR
EOL RELAY
(+)
(–)
NOTE: Schematic
Shown for
Reference
1
2
34
5
891011
12
13
14
UL LISTED 4-WIRE CONTROL PANEL
REMOTE
ANNUNCIATOR
RELEASING
DEVICE
(OPTIONAL)
1
2
34
5
891011
12
13
14
REMOTE
ANNUNCIATOR
POWER LOOP
+
POWER LOOP –
ALARM CIRCUIT
RELEASING
DEVICE
(OPTIONAL)
EOL RELAY
RESISTOR
+
–
+
–+
–
EOL
Figure 2. Typical wiring diagram:
Figure 3A. Activating the tamper-resistance feature:
PLASTIC LEVER
BREAK TAB AT
DOTTED LINE BY
TWISTING TOWARD
CENTER OF BASE.
USE SMALL-BLADED
SCREWDRIVER TO
PUSH PLASTIC LEVER
IN DIRECTION OF
ARROW.
Figure 3B. Removing detector head from base:
C0130-00
C0533-00
C0532-00

Other System Sensor Security Sensor manuals

System Sensor B114LPBT User manual

System Sensor

System Sensor B114LPBT User manual

System Sensor B112LP User manual

System Sensor

System Sensor B112LP User manual

System Sensor WFDNA Series Technical specifications

System Sensor

System Sensor WFDNA Series Technical specifications

System Sensor WFDT User manual

System Sensor

System Sensor WFDT User manual

System Sensor WFD Series User manual

System Sensor

System Sensor WFD Series User manual

System Sensor B501 User manual

System Sensor

System Sensor B501 User manual

System Sensor RTS151KEYA User manual

System Sensor

System Sensor RTS151KEYA User manual

System Sensor Accuflow LFD20 User manual

System Sensor

System Sensor Accuflow LFD20 User manual

System Sensor 2151 User manual

System Sensor

System Sensor 2151 User manual

System Sensor B401R User manual

System Sensor

System Sensor B401R User manual

System Sensor B401BR750 User manual

System Sensor

System Sensor B401BR750 User manual

System Sensor B501BI-IV User manual

System Sensor

System Sensor B501BI-IV User manual

System Sensor B210LP User manual

System Sensor

System Sensor B210LP User manual

System Sensor EBR User manual

System Sensor

System Sensor EBR User manual

System Sensor B801RA User manual

System Sensor

System Sensor B801RA User manual

System Sensor B401BR User manual

System Sensor

System Sensor B401BR User manual

System Sensor B110LPA User manual

System Sensor

System Sensor B110LPA User manual

System Sensor B110LP User manual

System Sensor

System Sensor B110LP User manual

System Sensor 6424 User manual

System Sensor

System Sensor 6424 User manual

System Sensor WFDTNRN User manual

System Sensor

System Sensor WFDTNRN User manual

System Sensor B501AUS User manual

System Sensor

System Sensor B501AUS User manual

System Sensor JTWB-BCD-5151EIS User manual

System Sensor

System Sensor JTWB-BCD-5151EIS User manual

System Sensor 2351TEM User manual

System Sensor

System Sensor 2351TEM User manual

System Sensor WFDE Series User manual

System Sensor

System Sensor WFDE Series User manual

Popular Security Sensor manuals by other brands

Guide 532 Instructions of use

Guide

Guide 532 Instructions of use

Rielta FOTON-SH2-RK installation guide

Rielta

Rielta FOTON-SH2-RK installation guide

Optex VX Shield series installation instructions

Optex

Optex VX Shield series installation instructions

EDWARDS SYSTEMS TECHNOLOGY EST3 Operation manual

EDWARDS SYSTEMS TECHNOLOGY

EDWARDS SYSTEMS TECHNOLOGY EST3 Operation manual

Milesight EM300 Series user guide

Milesight

Milesight EM300 Series user guide

DoCash Golf user manual

DoCash

DoCash Golf user manual

Besantek BST-CBF01 instruction manual

Besantek

Besantek BST-CBF01 instruction manual

Stahl INTRINSPAK 9001 Series Product information

Stahl

Stahl INTRINSPAK 9001 Series Product information

Interlogix PB501 Installation sheet

Interlogix

Interlogix PB501 Installation sheet

THORLABS SPDMA Operation manual

THORLABS

THORLABS SPDMA Operation manual

Airthings Wave Plus operating manual

Airthings

Airthings Wave Plus operating manual

Endress+Hauser USR30 technical information

Endress+Hauser

Endress+Hauser USR30 technical information

Kyla KSEN-231 Easy start guide

Kyla

Kyla KSEN-231 Easy start guide

AVS Electronics ONE PA manual

AVS Electronics

AVS Electronics ONE PA manual

Reer PI M12 NF operating instructions

Reer

Reer PI M12 NF operating instructions

Eldat RFD01 operating instructions

Eldat

Eldat RFD01 operating instructions

NookBox IRD-23 installation guide

NookBox

NookBox IRD-23 installation guide

Niko 350-20060 manual

Niko

Niko 350-20060 manual

manuals.online logo
manuals.online logoBrands
  • About & Mission
  • Contact us
  • Privacy Policy
  • Terms and Conditions

Copyright 2025 Manuals.Online. All Rights Reserved.