44111-0016 — Aug. 2019
©2019 Systems, LLC
1.50"
3.00"
Decal Size: 1.5 x 3
File Name: 1751-0736 Rev A
Arc Flash and
Shock Hazard
PPE [Personal Protection
Equipment] Required
De-energize equipment before
working on or inside. Do not
open cover without appropriate
PPE. Refer to NFPA 70E for
PPE requirements. This panel
may contain more than one
power source.
Hazardous Voltage
Will Result in Death
or Serious Injury
1751-0736 Rev A
1.50"
3.00"
Control Box Size: Overlay
Decal Size: 1.5 x 3
File Name: 1751-0857 Rev A
Lockout/Tagout
power before
servicing.
Comply with
OSHA 1910.147
1.28"
2.43"
Control Box Size:
Decal Size: 2.75 x 1.25
File Name: 1751-0735
PROUDLY
MADEIN USA
SYSTEMS, INC.
GERMANTOWN, WI
MALVERN, AR
1751-0735
2
File Name: 1751-0330 REV C
Decal Size: 5.375 x 1.75
FORK
HERE
1751-0330 Rev C
File Name: 1751-0330 REV C
Decal Size: 5.375 x 1.75
FORK
HERE
1751-0330 Rev C
1751-0330
3
3
6
8
8
1751-0726 Rev B
File Name: 1751-0726 Rev B
Decal Size: 5.92 x 2.36
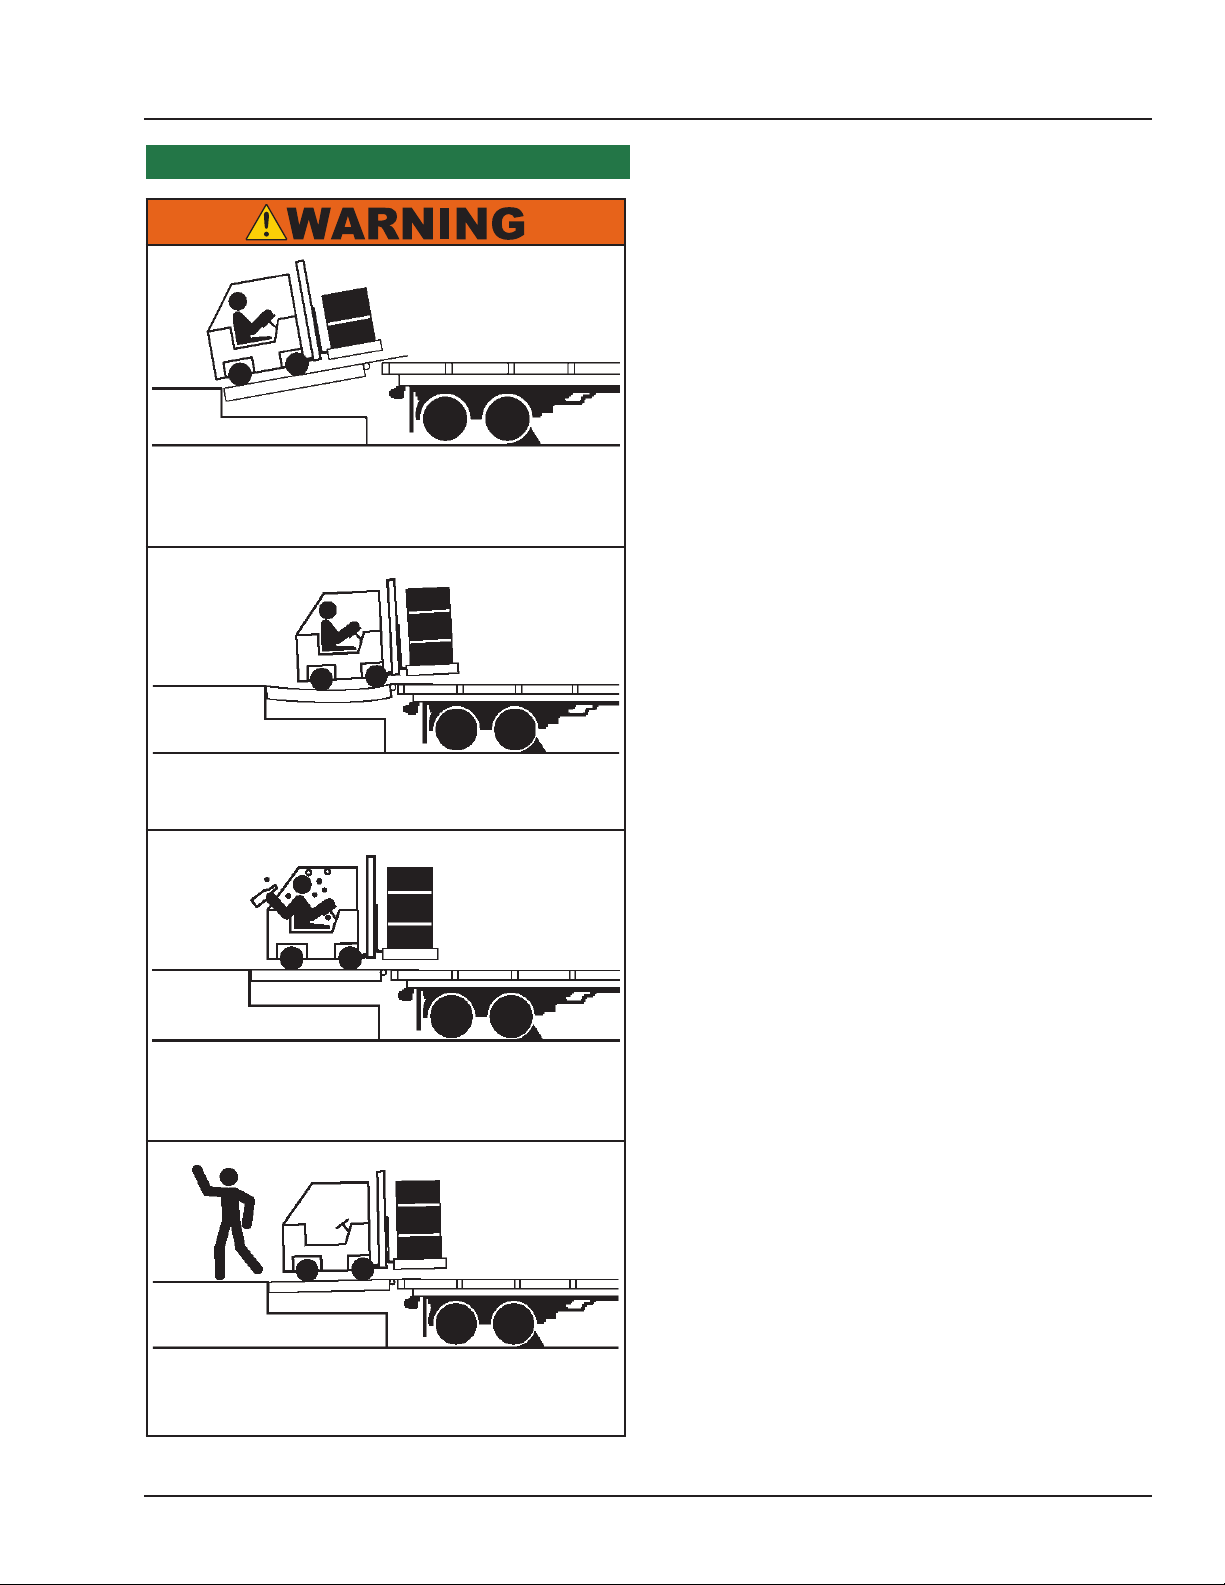
CRUSH HAZARD
DO NOT ENTER PIT unless dock leveler is
securely supported by maintenance prop. Place
barriers on driveway and dock floor to indicate
service work being performed. Failure to comply
will result in death or serious injury. Refer to
owner‘s/user‘s manual for proper maintenance
procedures.
1751-0726
5
File Name: 1751-0329 Rev A
Decal Size: 13 x 2
DO NOT
FORK THIS SIDE
1751-0329 Rev A
File Name: 1751-0329 Rev A
Decal Size: 13 x 2
DO NOT
FORK THIS SIDE
1751-0329 Rev A
1751-0329
1
1
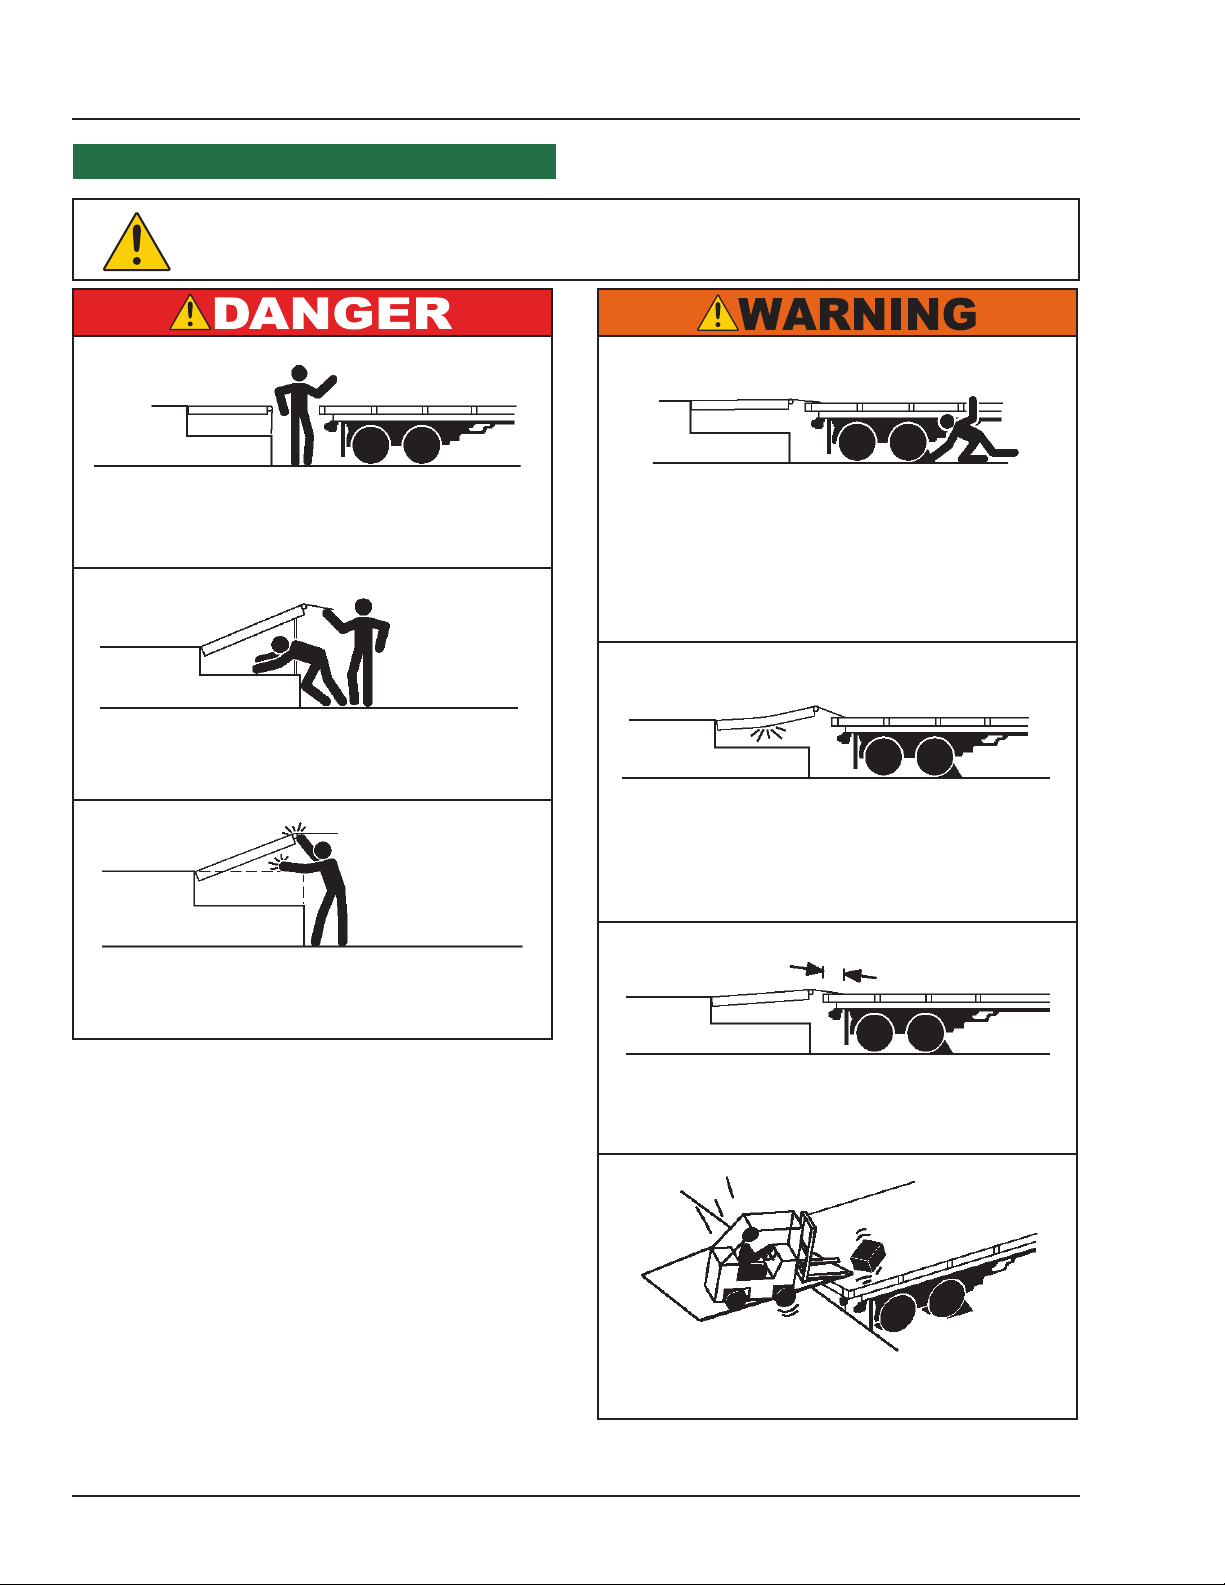
Unsupported dock leveler
ramps can lower unexpectedly.
Before allowing vehicle to leave
the dock always:
•
•
Ensure no equipment,
material or people are on
dock leveler.
Return dock leveler to its
stored position at dock level.
Failure to follow posted instructions will result in death or serious injury.
Call 262.255.1510 for replacement placards, warning labels, or owner’s/user’s manuals.
File Name: 1751-0730 Rev B
Decal Size: 9.12 x 3.25
MAINTENANCE/SERVICE
7. Stay clear of hinges and front and
sides of moving dock leveler.
8. N e v e r u s e d a m a g e d o r
malfunctioning dock leveler. Report
problems immediately to supervisor.
1. Read and follow all instructions,
w a r n i n g s a n d m a i n t e n a n c e
sched ules in t he own er‘s/ user ‘s
manual.
2. Maintenance/Service of dock leveler
restricted to trained personnel.
3. Place barriers on the driveway and
dock floor to indicate service work is
being performed.
4. DO NOT ENTER PIT unless dock
leveler is securely supported by
maintenance prop.
5. Ifelectrically powered turn off and use
OSHA lockout/tagout procedures.
OPERATION
1. Read and follow all instructions and
warnings in owner’s/user’s manual.
2. Use of dock leveler restricted to
trained operators
3. Always c hock t rail er whe els or
en ga ge t r uc k re st ra in t b ef or e
operating dock leveler or beginning to
load or unload.
4. Never use hands or equipment to
move ramp or lip
5. Beforeactivating dock leveler:
Ensure trailer is backed in against
bumpers.
Remove any end loads if required.
Check trailer alignment to avoid lip
interference. If lip does not lower to
trailer bed, reposition vehicle.
6. Ensure truck bed supports extended
lip or leveler frame supports the ramp
before driving on ramp.
•
•
•
1751-0730 Rev B
1751-0730
4
4
Decal Size: 8.72 x 1.02
Material: Ritrama 3-1190 (3.5 mil thick) calendered vinyl
02 hi-tack permanent acrylic adhesive
Ritrama 3-7146 (1.0 mil thick) clear polyester laminate
File Name: 1751-0729 Rev A
CRUSH HAZARD
Do not work under dock leveler unless this maintenance prop has been secured in the
upright position. Failure to comply will result in death or serious injury. See owner’s/user’s
manual for proper procedures 1751-0729 Rev A
1751-0729
7
4
Left Platform Side
6
Right Platform Side
1751-0640
9
2
1751-0138
10
10
11
3
1
5
9
File Name: 1751-0727 Rev B
Decal Size: 5.06 x 2.40
CRUSH HAZARD
Maintenance prop must
support leveler behind bar.
Do not force maintenance
prop forward of bar to
support lip. Refer to
owner’s/user’s manual for
proper use. Failure to
comply will result in
death or serious injury. 1751-0727 Rev B
2.40"
5.05"
Decal Size: 5.05 x 2.40
File Name: 1751-0731 Rev A
CRUSH HAZARD
Open the pin latch and insert
through the maintenance
prop housing and prop
completely. Close the pin latch
to secure prop. Use every
time dock leveler is serviced.
Failure to comply will result
in death or serious injury.
1751-0731 Rev A
1751-0731
11
Right Platform Side
48
17
www. .comDockSystemsInc
1.800.643.5424
Decal Size:6x2
File Name: 1751.0651
1751-0651
Decal Placement
for H Series
1751-0727
Serial Tag
9
File Name: 1751-0138 Rev B
Decal Size: 4 x 2
CRUSH HAZARD
DO NOT REMOVE hydraulic cylinder until leveler is
safely supported by maintenance prop. Refer to
owner’s/user’s manual for proper maintenance
procedure. Failure to comply will result in death or
serious injury. 1751-0138 Rev B
www.DockSystemsInc.com 1.800.643.5424
HP SERIES
TM
Decal Size:6x2.4
File Name: 1751.0640
www. .comDockSystemsInc
1.800.643.5424
Decal Size:6x2
File Name: 1751.0651
Two positions one on top of each fork pocket.
Figure 2
Note: This is a example of dock leveler safety decals. See specic model manual for correct safety decal
sheet, or consult Systems, LLC Tech Services.
Safety Decals
PRECAUTIONS