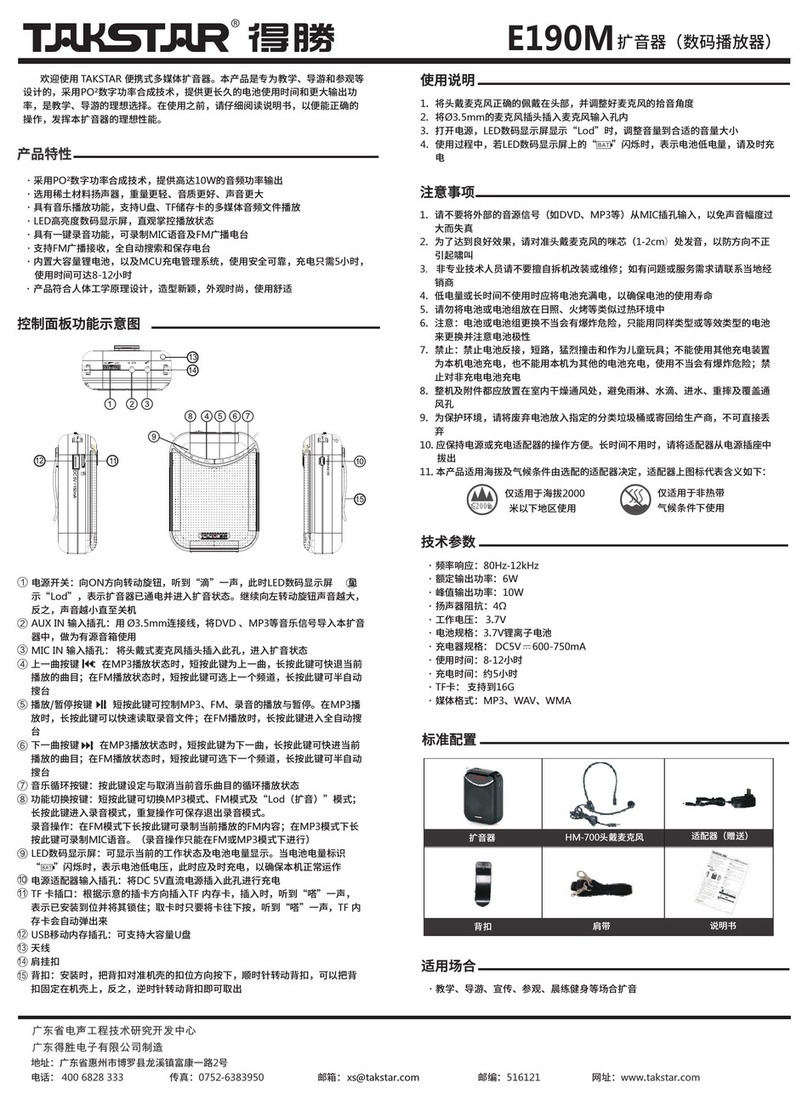
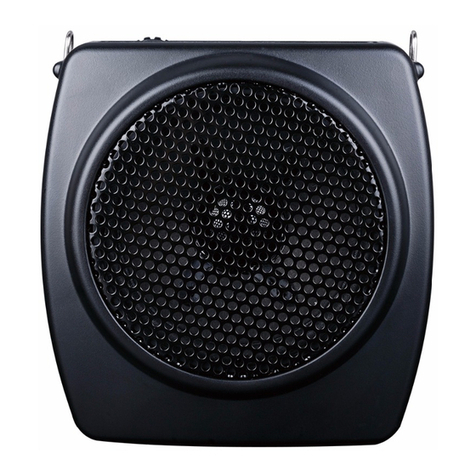
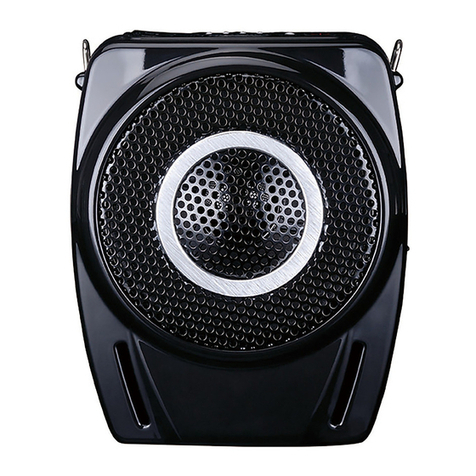
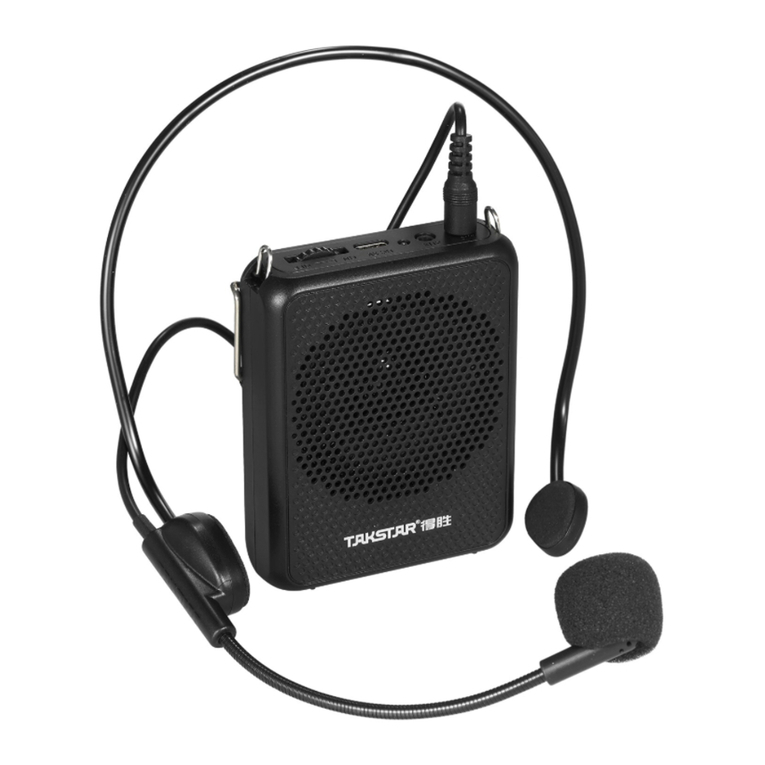
Takstar E180M User manual

Wired Amplifier
有线扩音器
E180M

前言
尊敬的用户:
感谢您选购得胜E180M新版有线扩音器,为了您能够更好的了解使用本产品,建议
您在使用前仔细阅读本说明书。
若存在有疑问或者您有宝贵的建议,可通过拨打得胜官方
服务热线400 6828 333或微信扫描二维码关注得胜官方公众
号与我们联系。
产品特性
• 全新数字扩音技术,10W大功率音频输出,声音清晰保真
• 新增电池电量显示,让工作状态显示更加直观和准确
• 具有无线播放功能,连接手机、电脑、PAD等设备播放音乐
• 具有音乐播放功能,支持U盘、TF存储卡上的多媒体音频文件播放
• 具有AUX音频信号输入功能,可充当小音箱使用
• 内置4500mAh大容量锂离子电池,使用时间可达30小时左右,可循环充电使用,节能环保
• 内置MCU智能充电管理系统,具有电池保护功能,使电池处于安全可靠的模式下使用
• 产品造型新颖,外观时尚,壳体采用ABS工程原料成型,经久耐用
• 具有肩挂及腰挂等多种佩戴方式,使用更方便
1
适用范围
• 教学、导游、培训、促销、宣传、晨练、娱乐等场合
有线扩音器
新版
E180M

技术参数
主机(扩音器)参数
• 充电时间:约3小时
• 使用时间:约30小时
• 充电方式:Type-C
• 产品规格:100x90x35.5mm
• 单机重量:约200g
• 充电电压:DC 5V/1.5A
• 频率响应:80Hz-18KHz
• 额定功率:5W
• 峰值功率:10W
• 扬声器阻抗:4Ω
• 工作电压:DC 3.5-4.2V
• 电池规格:3.7V/4500mAh
音头参数
• 拾音器:背极式驻极体
• 指向性:单指向
• 频率响应:100Hz-12.5KHz
• 灵敏度:-42~-48dB(0dB=1V/Pa,at 1KHz)
注:以上数据由得胜实验室测试得到,并拥有最终解释权!
产品配置
扩音器…………………………………...…………………….....1台
有线麦克风…………………………………...………………….1个
腰带…………………………………...……………………………1条
充电线…………………………………...……………………..….1条
说明书…………………………………...……………………..….1份
2
有线扩音器
新版
E180M

功能示意
扩音器
3
① 电源开关和音量调整旋钮:向“ON”方向转动旋钮,听到“嘀”一声,此时LED
显示屏亮起,同时出现“— — — —”符号及电池电量显示,表示扩音器已通电并进入
扩音状态。继续向左转动旋钮声音增大,反之,声音逐渐减小至关机。
② LED显示屏:显示当前的工作模式、电池电量等信息。“ ”为电池电量符号,
充电时,电池电量符号逐格流水点亮;充满电时,电池电量符号满格显示。
③ “M”模式切换键:开机状态下,短按该键可切换工作模式,并伴随相应的语音提示。
(当插入TF卡和麦克风的状态下,长按此键进入录音模式,并且显示屏显示“REC“及
语音提示“录音模式”。录音过程显示屏“00:00”数值变动,表示录音时长,录制完成
后长按此键可退出并保存录音。退出录音模式后,会自动循环播放刚才的录音)
④ 上一曲按键:短按切换上一曲。
⑤ 播放/暂停按键:短按该按键控制音乐的播放及暂停。在蓝牙播放时,长按此键
可以断开蓝牙连接;在TF卡模式下播放音乐时,长按此键出现“ ”单曲循环符号,
进入单曲循环播放状态,再次长按此键,“ ”符号消失,退出单曲循环播放。
⑥ 下一曲按键:短按切换下一曲。
有线扩音器
新版
E180M
DC 5V AUX MIC
USB
①
③⑥ ⑤ ④
②
⑨
⑩
⑪
⑦
⑧
⑫

4
⑦ U盘插孔:可将存放有音乐文件的U盘插入此孔进行播放。
⑧ TF卡插槽:按照正确插卡方向插入TF内存卡。插入时,听到“哒”一声,表示已安装
到位;取卡时把卡往下按压,听到“哒”一声,TF内存卡将自动弹出来。
提示:请确保TF卡中储存的是MP3、WAV格式的音频文件,否则不能正常读取歌曲文件
甚至会有损坏机器的风险;拷入歌曲前请先将TF卡按FAT16、FAT32格式进行格式化,
其他方式的格式化(如exFAT、NTFS格式)会导致录音无法保存或者储存的歌曲无法播放。
⑨ MIC输入接口:将有线麦克风插头插入此孔,进入有线人声扩音状态。操作时,请不要
将麦克风的拾音面朝向扩音器的扬声器,以免产生啸叫。
⑩ AUX 输入接口:通过Φ3.5mm音频连接线与手机、电脑、平板、MP3等播放设备连接,
可将扩音器作为有源音箱使用。
⑪ 充电接口:通过连接Type-C数据线为扩音器充电。
⑫ 挂扣:用于安装肩带,可将扩音器斜挂于肩上使用。
使用说明
1.将头戴麦克风正确佩戴于头部,并调整好麦克风的拾音角度
2.然后将Φ3.5mm的有线头戴麦克风插头插入MIC输入接口孔内
3.打开扩音器电源开关,LED数码显示屏亮,调整音量旋钮到合适的音量大小即可使用
使用步骤
首次使用本机时,需要与手机或蓝牙设备配对连接,步骤如下:
① 先打开扩音器电源开关,点按“M”键切换成蓝牙模式,显示屏出现“BLUE”工作
模式时,表示蓝牙正在搜索配对状态。
② 进入手机“设置”菜单,找到蓝牙功能选项,开启手机的蓝牙功能,待搜索到
“TAKSTAR E180M”,点击“TAKSTAR E180M”进行连接,当扩音器出现提示音
“蓝牙已连接”,表示蓝牙连接成功,手机、笔记本、平板、iPad等设备蓝牙连接扩音器
成功后,可实现播放音乐功能。
蓝牙配对
有线扩音器
新版
E180M

5
安全警示
为避免电击、高温、着火、辐射、爆炸、机械危险以及使用不当等可能造成的人身伤害或
财产损失,使用本产品前,请仔细阅读并遵守以下事项:
1. 使用产品时请确认所连设备与本产品是否匹配以及合理调整音量大小,不要在超过产
品功率及大音量下长时间使用,以免造成产品异常;
2. 使用中若发现有异常(如冒烟、异味等),请立即关闭电源开关并拔掉电源插头,
然后将产品送售后服务网点检修;
3. 消费者若使用电源适配器供电,则应购买配套使用获得CCC认证并满足标准要求
的电源适配器;
4. 本产品及附件都应放置在室内干燥通风处,请勿长期存放在潮湿、灰尘多的环境,
使用中避免靠近火源、雨淋、进水、过度碰撞、抛掷、振动本机及覆盖通风孔,以免
损坏其功能;
5. 若产品需要固定于墙壁或天花板时,请确保固定到位,防止因固定强度不足导致产品
发生跌落危险;
6. 使用该产品时需遵守相关安全规定,法律法规明确禁止使用场合请勿使用本产品,以
免导致意外事故;
7. 请不要自行拆机改装或维修,以防止出现人身伤害,如有问题或服务需求请联系当地
售后服务网点跟进处理。
有线扩音器
新版
E180M
关于图标含义解释
此符号表示,根据WEEE指令(2012/19/EU)和国家法律,由于这种类型的废弃物
会有潜在的有害物质,可能对环境和人类健康产生负面影响,所以本产品不应与
您的家庭垃圾一起处置,应将本产品应交由授权的电气和电子设备(WEEE)回收站回收。
同时,您在正确处理本产品的同时将有助于自然资源的有效利用。如需了解更多有关您
可以在何处放置废物回收设备的信息,请联系您当地的城市办事处、废物管理局或家庭
废物处理服务部门。

6
关于本说明书
本说明书中内容符合截止印刷之日的技术规格。由于得胜公司会不断改进产品, 本说明书
可能不符合您的特定产品的技术规格。要获取最新版说明书,请访问得胜官网,然后下载
说明书文件。技术规格、设备或另售的附件在各个地区可能有所不同,如有问题请与当地
得胜销售网点确认。如需更多支持和深层产品信息,请浏览得胜官方网站:
https://www.takstar.com
有线扩音器
新版
E180M
环保说明

Wired Amplifier
Preface
Dear Customer,
Thank you for purchasing Takstar E180M Wired Amplifier – New Edition. In order to
better understand and use the product, please read this manual carefully. If you
have any questions or suggestions, please contact our local dealer.
Features
• New digital amplification, 10W high-power output of high clarity and fidelity.
• Added battery level display for clear and intuitive status overview.
• Play music wirelessly from devices such as smartphone, computer and tablet.
• Play multimedia files stored on USB drive and TF card directly.
• With AUX audio input to use as a small speaker.
• Built-in 4500mAh large-capacity lithium-ion battery lasts about 30 hours,
rechargeable and eco-friendly.
• MCU-based smart charging system protects battery and ensures battery
safety and reliability.
• Stylish design, rugged and durable casing made of ABS engineering material.
• Strap across shoulder or around waist, any way you like.
7
Application
•
entertainment, etc.
Teaching, tour guide, training, sales, promotion, morning exercise,
E180M New Edition

Specifications
Voice Amplifier
• Charging Voltage: DC 5V/1.5A
• Charging Time: about 3 hours
• Playtime: about 30 hours
• Charging Port: Type-C
• Dimensions: 100x90x35.5mm
• Net Weight: about 200g
• Frequency Response: 80Hz-18KHz
• Rated Power: 5W
• Peak Power: 10W
• Speaker Impedance: 4Ω
• Working Voltage: DC 3.5-4.2V
• Battery: 3.7V/4500mAh
Headset Mic
• Capsule: back electret
• Polar Pattern: unidirectional
• Frequency Response: 100Hz-12.5KHz
• Sensitivity: -42~-48dB (0dB=1V/Pa, at 1KHz)
Note: The above data are measured by Takstar laboratory which has the final
interpretation right!
Package Contents
Voice Amplifier………………………………………………… 1 PCS
Wired Headset Mic………………………………………………………1 PCS
Strap………………………………………………………………………… 1 PCS
Charging Cable……………………………………………………………1 PCS
User Manual…………………………………………………………………1 PCS
…………
8
Wired Amplifier
E180M New Edition

Function Descriptions
① Power switch & volume dial: rotate the dial to ON until you hear a click to power
on the device and then gradually increase the volume level. Once powered on, the
LED display shows “----” and battery level, meaning the device is ready for voice
amplification. Likewise, rotate to OFF to gradually decrease the volume level and
eventually power off the device.
② LED display: display information such as the current work mode and battery
level. is the battery level symbol whose bars light up in succession while
recharging and become fully lit when fully charged.
③ M mode button: when powered on, short press to switch work mode, accompanied
by corresponding voice prompt. (While a storage device and a mic are connected,
long press this button to enter recording mode, accompanied by a “REC” symbol
on LED display and a “Recording mode” voice prompt. During recording, the LED
display shows recording duration in “00:00” format. Long press this button again
to exit and save recording. Upon exiting recording mode, the device will automatically
play the newly recorded audio in a loop.)
9
DC 5V AUX MIC
USB
①
③⑥ ⑤ ④
②
⑨
⑩
⑪
⑦
⑧
⑫
Wired Amplifier
E180M New Edition

10
④ Previous track button: short press to switch to the previous track.
⑤ Play/Pause button: short press to play or pause the music. When playing in
Bluetooth, long press this button to disconnect Bluetooth. When playing music in
TF card mode, long press this button to loop a single song, accompanied by a
single loop symbol ; long press this button again to cancel single-song loop,
and the symbol will disappear.
⑥ Next track button: short press to switch to the next track.
⑦USB interface: insert a USB flash drive to play audio files.
⑧ TF card slot: insert a TF memory card following the correct direction until you
hear a click to install it in place. To remove the TF card, press it down until it clicks
to eject the card.
Tip: Please make sure the audio files in the TF card are stored in MP3 and/or WAV
format, otherwise it won't be readable and may even damage the device. Please
format the TF card to FAT16 or FAT32 file system before copying songs, because
other file system (e.g., exFAT, NTFS) will cause failure to save recordings or play
songs.
⑨ MIC input: insert a wired mic to start wired voice amplification. Do not point
the mic capsule towards the loudspeaker to avoid feedback.
⑩ AUX input: connect to a playback device (e.g., phone, tablet, MP3 player) via a
Ø3.5mm audio cable, so to use the amplifier as an active speaker.
⑪ Charging port: charge the amplifier via a Type-C charging cable.
⑫ Strap clip: used to install the shoulder strap for wearing the amplifier across
shoulder.
Wired Amplifier
E180M New Edition

Operation Instructions
1. Wear the headset mic correctly on your head, and adjust the pickup angle of
the mic.
2. Then insert the ø3.5mm wired headset mic plug into the MIC input interface.
3. Power up the amplifier, the LED display will light up, then adjust the volume
knob to an appropriate level.
How to Use
Upon first use, you need to connect this device to your phone or Bluetooth device,
following below steps:
①
Bluetooth discovery and pairing, indicated by a “BLUE” symbol.
② Enter SETTINGS menu on your phone, find and enable Bluetooth, wait
until “TAKSTAR E180M” is discovered and tap on it to connect. When
connected successfully, there will be a voice prompt about “Bluetooth
Connected”. Devices such as cell phones, laptops, tablets, and iPads can
play music via Bluetooth thereafter.
Power up the amplifier, press [M] to switch to Bluetooth mode and start
Bluetooth Pairing
Safety Instructions
To avoid electric shock, overheat, fire, radiation, explosion, mechanical risk
and injury or property loss due to improper use, please read and observe
the following items before use:
1. Please check if the power of the connected equipment matches with that
of this product before operation. Adjust the volume to proper level during
operation. Do not operate at over-power or high-volume level for extended
time to avoid product malfunction.
11
Wired Amplifier
E180M New Edition

2. If there is any abnormality during use (e.g., smoke, strange odor), please
kill the power switch and unplug from power source, then send the product
to the local after-sales service for repair.
3. Power adapter used, if any, should be approved by CCC certification or
similar standards and comply with the power supply requirements.
4. Keep this product and its accessories in a dry and ventilated area. Do not
store in a humid or dusty area for extended time. Keep away from fire, rain,
liquid intrusion, bumping, throwing, vibrating, or from blocking any
ventilation openings, to prevent malfunction.
5. The product must, when installed on walls or ceilings, be fixed firmly in
place at adequate strength to prevent from falling.
6. Please abide by safety rules during operation. Do not use the product in
places prohibited by laws or regulations to avoid accident.
7. Do not disassemble or repair the product by yourself to avoid injury. If
you have any questions or require any services, please contact our local
after-sales service.
12
Wired Amplifier
E180M New Edition

This symbol indicates that this product should not be disposed of with your
household waste, according to the WEEE directive (2012/19/EU) and your
national law. This product should be handed over to an authorized collection site
for recycling waste electrical and electronic equipment (WEEE). Improper handling
of this type of waste could have a possible negative impact on the environment
and human health due to potentially hazardous substances that are generally
associated with WEEE. At the same time, your cooperation in the correct disposal
of this product will contribute to the effective usage of natural resources. For more
information about where you can drop off your waste equipment for recycling,
please contact your local city office, waste authority, or your household waste
disposal service.
About This Manual
This manual contains up-to-date technical specifications as of printing.
However, specifications contained herein may not conform to your particular
product since Takstar is constantly improving its products. Also, specifications,
devices or accessories available may vary from region to region. If you have
any questions, please contact our local sales outlet. For the latest version/
more information, please visit our website: https://www.takstar.com/
13
Wired Amplifier
E180M New Edition
Label Meanings


Other manuals for E180M
2
Table of contents
Other Takstar Amplifier manuals

Takstar
Takstar E20W User manual

Takstar
Takstar E180M User manual

Takstar
Takstar E200W User manual

Takstar
Takstar E300 User manual

Takstar
Takstar E118M User manual

Takstar
Takstar E20 User manual

Takstar
Takstar E188 User manual

Takstar
Takstar EKAX-1L User manual

Takstar
Takstar E280 User manual

Takstar
Takstar WDA-700 User manual

Takstar
Takstar E220 User manual

Takstar
Takstar EKX-4A User manual

Takstar
Takstar WDA-900 User manual

Takstar
Takstar E180 User manual

Takstar
Takstar E5M User manual

Takstar
Takstar E500W User manual

Takstar
Takstar E126W User manual
Takstar
Takstar E230 User manual

Takstar
Takstar E160W User manual

Takstar
Takstar E190M User manual