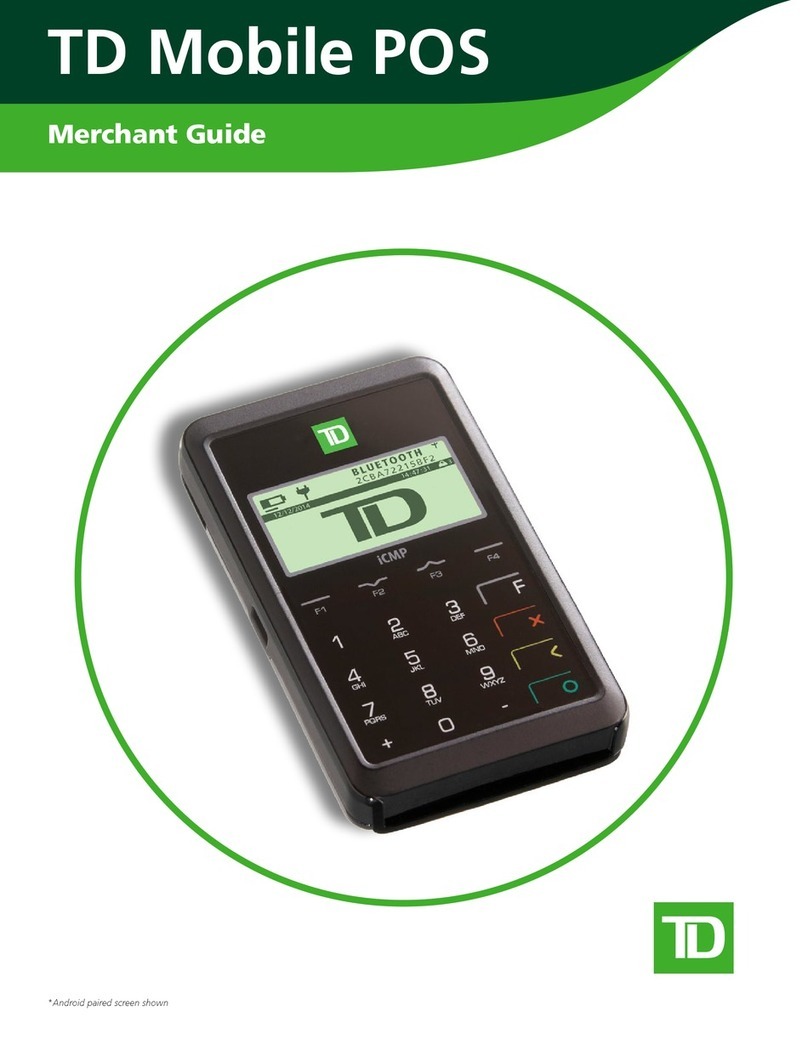
TD Mobile Pay User manual

TD Mobile Pay
Merchant Guide

COPYRIGHT ©2022 by The Toronto-Dominion Bank
This publication is conidential and proprietary to The Toronto-Dominion Bank and is intended solely for the use of Merchant customers of
TD Merchant Solutions. This publication may not be reproduced or distributed, in whole or in part, for any other purpose without the written
permission of an authorized representative of The Toronto-Dominion Bank.
The Bluetooth® word mark and logos are registered trademarks owned by Bluetooth SIG, Inc. and any use of such marks by TD is under
license. Other trademarks and trade names are those of their respective owners.
NOTICE
The Toronto-Dominion Bank reserves the right to make changes to speciications at any time and without notice. The Toronto-Dominion Bank
assumes no responsibility for the use by the Merchant customers of the information furnished in this publication, including without limitation
for infringements of intellectual property rights or other rights of third parties resulting from its use.

i
Table of Contents
Who should use this guide?.....................................................1
Overview of the TD Mobile Pay Solution.................................1
The purpose of this guide....................................................................... 1
Requirements ................................................................................................... 1
What is the TD Mobile Pay solution?............................................................. 1
The card reader.......................................................................................3
Screens..............................................................................................................3
TD Mobile Pay application......................................................................5
New Sale screen ..............................................................................................5
Connection Manager screen.........................................................................6
Menu screen .....................................................................................................7
Merchant Portal.......................................................................................8
Financial transactions ............................................................8
New Sale..................................................................................................8
Select product..................................................................................................9
Quick Sale.........................................................................................................9
New Sale - Payment ......................................................................................10
Discounts ........................................................................................................10
Voids and refunds .................................................................................. 11
Voids .................................................................................................................11
Refunds.............................................................................................................11
Receipts ................................................................................................. 12
Receipt example ............................................................................................ 12
Resend a receipt ............................................................................................ 13
Download a receipt ....................................................................................... 13
Reviewing sales..................................................................................... 13
Dashboard ...................................................................................................... 13
Sales history ................................................................................................... 14
Settlement ............................................................................................. 15
Coniguration ........................................................................ 15
Manage your product catalog ............................................................. 15
Add a new product........................................................................................ 15
Disable or enable a product ........................................................................ 16
Delete a product ............................................................................................ 16
Manage your product categories ........................................................ 16
Add a category .............................................................................................. 16
Edit a Category .............................................................................................. 17
Delete a category .......................................................................................... 17
Manage your taxes ................................................................................17
Add a tax......................................................................................................... 17
Edit a tax ......................................................................................................... 17
Disable a tax................................................................................................... 18
Delete a tax..................................................................................................... 18
Customize your receipts ....................................................................... 18

ii
Manage your card readers................................................................... 18
View a card reader ........................................................................................ 18
Connecting to your card reader.................................................................. 18
Edit a card reader’s name (alias) ................................................................ 19
Reinitialize a card reader.............................................................................. 19
Deactivate a card reader ............................................................................ 20
Adjust a card reader's volume.................................................................... 20
Replace a card reader ................................................................................. 20
Update your account profile ............................................................... 20
Change your account name....................................................................... 20
Change your language preference ........................................................... 20
Change your email ....................................................................................... 20
Change your mobile number....................................................................... 21
Security.................................................................................................. 21
Change your password ................................................................................ 21
Change your authentication preference ................................................... 21
View your business proile............................................................................22
Manage your sta / users.....................................................................22
Add a new sta user account......................................................................22
View your sta / user accounts...................................................................22
Reports...................................................................................23
Run a report...........................................................................................23
Navigation ......................................................................................................23
Report label ....................................................................................................23
Detailed transactions report ................................................................23
Product sales report..............................................................................25
Tax report ..............................................................................................26
Statements ............................................................................26
View merchant statements ..................................................................26
Download a statement ................................................................................ 26
Troubleshooting .................................................................... 27
Signing in using SMS/text MFA ............................................................ 27
Forgot Your Password ........................................................................... 27
Connecting to your card reader ..........................................................28
Accepting payment ..............................................................................28
What do I do if the card reader displays a security alert?..................28
Why isn’t my card reader powering on? ..............................................28
What problems can I easily resolve?....................................................29
Why isn’t my card reader connecting to the application?..................29
Remove the card reader from your mobile phone (Android) ................ 29
Remove the card reader from your mobile phone (iOS)........................ 29
Remove the mobile phone app from the card reader............................ 29
Reference.............................................................................. 30
Storing the card reader ....................................................................... 30
Maintaining the card reader ............................................................... 30
Lost or stolen equipment..................................................................... 30
Police information......................................................................................... 30

1
Who should use this guide?
You would use this guide if you use the TD Mobile Pay Solution. It includes hardware functionality, performing
inancial transactions, coniguration and troubleshooting.
Overview of the TD Mobile Pay Solution
The purpose of this guide
This guide will provide helpful information about the equipment, its features and TD Merchant Solutions. Please
ensure you read this guide so that you become familiar with the capabilities of the TD Mobile Pay and how it
can support your business needs.
This guide provides instruction on the use and functionality of the TD Mobile Pay solution. The provision of
Visa®, MasterCard®, American Express® and/or Interac® Direct Payment merchant services to you (the user) by
TD Merchant Solutions is governed by the Merchant Services Agreement and any other agreement(s) that
govern the services that we may provide to you.
The use of the TD Mobile Pay solution with respect to the provision of merchant services by a third party is
governed by any agreement(s) with such third party.
Requirements
• A mobile phone with the Android™or iOS™operating system
• A mobile phone that:
• is Bluetooth® Low Energy (BLE) compatible
• has a camera if you wish to add images to the Product catalog
What is the TD Mobile Pay solution?
The TD Mobile Pay solution is comprised of two components.
The card reader and the mobile application
The card reader and the mobile phone app work
together as one solution.
• The TD Mobile Pay app is like your electronic
cash register where you enter the customer’s
purchase and the card reader is where the
customer pays for their purchase with their
credit or debit card.
• On the TD Mobile Pay app you can:
• connect to the card reader via
Bluetooth,
• review transactions,
• perform refunds / voids,
• administer your product catalog, and
• administer your account.
0
WXY
9
TUV
8
PRS
7
MNO
6
JKL
5
GHI
4
DEF
3
ABC
2
QZ
1
EQUINOX
Menu
10:36:22 Jun 30 Wed

2
The Merchant Portal
The merchant portal is a website that mimics the
administration capabilities of the smartphone app and is
accessible via web browser. You can:
• review transactions and perform refunds / voids,
• administer user accounts,
• pull reports, and review your monthly statements.
To access the TD Mobile Pay Merchant Portal, go to
www.mobilepay.td.com/MerchantPortal/.
Functionality
Between the two components (TD Mobile Pay app / card reader and Merchant Portal) there are some overlapping
functionality which allows you options as how to access information and perform tasks. Below is a list of
functionality and where they can be performed:
Functionality TD Mobile Pay app Card Reader Merchant Portal
Financial Transactions
Sales
Discounts
Refunds
Voids
Review Sales
Process Payments
Yes
Yes
Yes
Yes
Yes
-
-
-
-
-
-
Yes
-
-
Yes
Yes
Yes
-
Product Catalog
Add Products
Add Categories
Yes
Yes
-
-
-
-
Receipts
Resend
Download
Customization
Yes
Yes
-
-
-
Yes
Yes
Yes
Bonding Yes Yes -
Security
Change MFA Method
Change Password
Update Account Proile
Yes
Yes
Yes
-
-
-
Yes
Yes
Yes
Reports and Statements - - Yes
Manage Staff - - Yes
Manage Taxes Yes - -
Manage Card Readers Yes -Yes

3
The card reader
The card reader allows the customer to enter inancial
transaction information. Refer to the diagram to the
right to familiarize yourself with the terminal layout.
1. Power key
Press to power the terminal on.
Press and hold for 3 seconds to power
the terminal o.
2. Command keys
In order left to right, Cancel, Correction,
and OK / Enter.
3. Card readers
a) Swipe cards
b) Insert chipped cards
c) Contactless cards
Screens
There are two main screens that you will use to
navigate the card reader. They are the:
• Idle screen
• Menu screen
Idle screen
The default screen is called the Idle screen. It displays
important information and icons. They are:
1. Bluetooth icon
You will see the Bluetooth icon on this bar
will be dierent depending on which setup
or comms method is chosen.
The grey icon indicates that Bluetooth is not
connected to the TD Mobile Pay app.
The orange icon indicates that the card reader
is connecting to the TD Mobile Pay app.
The green icon indicates that the card reader
is connected to the TD Mobile Pay app.
2. Power
The battery icon in the top-right corner
indicates the terminal battery level. When
the charging plug icon appears in the
top-right it means it is charging.
3. Menu
Press this to open the Menu screen.
0
WXY
9
TUV
8
PRS
7
MNO
6
JKL
5
GHI
4
DEF
3
ABC
2
QZ
1
EQUINOX
Menu
10:36:22 Jun 30 Wed
1
2
3a
3c
3b
Menu
10:36:22 Jun 30 Wed
1 2
3

4
Menu screen
The screen is displays the following icons: Settings,
Device Info, and Service.
Settings
The Settings menu contains the BLE (Bluetooth)
Coniguration and the card reader Speaker Volume
menus. To access the Settings screen you will need to
enter a four-digit passcode. This passcode is the last
numbers of the Device ID on the back of the card
reader and begins with LW.
Device Info
The Device Info screen displays the card reader
information such as Terminal ID and Serial Number.
Service
The Service screen is only used by TD Merchant
Solutions Technicians.
10:36:22 Jun 30 Wed
SettingsDevice Info Service

5
TD Mobile Pay application
There are three main screens that you will frequently use to navigate the mobile application. They are the:
• New Sale screen,
• Connection Manager screen, and
• Menu screen.
New Sale screen
The New Sale screen is the default screen once you log into the TD Mobile Pay app. From here you can do the following:
Icon Description
Menu This icon accesses the Menu
screen where you can access:
New Sale, Dashboard, Product
Catalog, Card Readers, Sales
History, and Settings.
Search This icon is only used if you have
created a product catalog. If you
have, you can search for an
existing product.
Cart This icon displays whether there is
an existing sale in progress with a
number indicating the amount of
items. If you press this icon you
can access the existing sale and
submit it for payment.
Quick Sale This icon allows you to perform a
sale with out using items in the
product catalog.
New Product This icon allows you to quickly add
a new product to your product
catalog. It will no longer appear
once you create your irst product.
You must then use the Product
Catalog option to add products.

6
Connection Manager screen
The Connection Manager screen is where you can review, ind, and connect the TD Mobile Pay app to a card
reader. From here you will see the following:
Icon / Button Description
Menu This icon accesses the Menu
screen where you can access:
New Sale, Dashboard, Product
Catalog, Card Readers, Sales
History, and Settings.
New Sale This icon will take you to the New
Sale screen.
Scan Press this button to search for
nearby active card readers to
connect the TD Mobile Pay app to.
Bonded
Devices
This section displays which card
reader is currently connected to
the TD Mobile Pay app.
The bonded device must have
green checkmark to be able to
process transactions.
Available
Devices
This section displays all the card
readers that are available to be
connected to the TD Mobile Pay app.
If you don't have a bonded device
you will see the option to start the
Card Reader Wizard in this section.

7
Menu screen
The Menu screen is where you access coniguration and information on your solution.
In the top-left corner you will see the application status and indicates whether the TD Mobile Pay app is
connected to a card reader (Ready for use) or is not connected (Action Required).
From this menu you can access the following:
Icon Description
Connection
Manager
This is the gear icon in the top-right
corner of the screen and it will take
you to the Connection Manager
screen to connect a card reader to
the TD Mobile Pay app.
New Sale This will take you to the New Sale
screen.
Dashboard This will take you to the Dashboard
screen to show high level sales
information for your business.
Product
Catalog
This will allow you to add, edit, or
remove items and categories from
your Product Catalog.
Card Readers This will take you to the Card
Readers screen and allow you to
view your card reader status.
Sales History This will take you to the Sales
History screen to show detailed
sales information for your business.
Support This displays contact information and
a link to the Troubleshooting Wizard to
help you connect your card reader to
the TD Mobile Pay app.
Settings This is the gear icon in the
bottom-left corner of the screen
and will take you to the Settings
screen where you can access and
change your personal proile, view
your business proile, and modify
the receipt message.

8
Merchant Portal
The Merchant Portal is an online website that allows you to monitor and update your account, to view reports
and analytics, and track your sales. The information is arranged into the following tabs:
• Dashboard – a quick overview of current and historical transactions
• Sales History – a detailed view of transactions
• Reports – three reports (Detailed Transactions, Product Sales, and Tax)
• Monthly Statements – access your available historical monthly statements
• Card Readers – a list of the terminals used by your business
• Sta – add, edit, and delete user IDs for your business
• Settings – view and edit your login proile, view your business proile, and edit the custom message
on your receipt
To access the Merchant Portal go to www.mobilepay.td.com/MerchantPortal/.
Financial transactions
All inancial transactions must be initiated from the TD Mobile Pay application and payment must be received
via the card reader.
New Sale
Before starting a sale ensure that your card reader:
• is active. Press the Power key to wake up your card reader.
• status in the top-left corner reads Ready for Use and there
is there is a green checkmark on the card reader icon.
There are two ways to perform a sale. They are Select Product or
Quick Sale.

9
Select Product
You would perform this when you have already entered the product on the application so that it can be selected from a
list of available products on the catalog.
Quick Sale
You would perform this when the product cannot be selected from a list of available products on the catalog.
Select product
1. On the TD Mobile app: Go to the New Sale Screen.
2. Select the product for purchase and the Add to Cart screen appears.
3. Enter the quantity for sale by pressing the +/-buttons or manually entering in the quantity.
4. Press the checkmark in the top-right corner of the screen to add the item to the cart.
5. Repeat steps 2 and 4 to select more products. When inished go to Step 6.
6. Press the Cart icon in the top-right corner of the screen.
You can make changes to the sale here before submitting the products for payment. Swipe the
product to the left to access the Edit and Delete buttons.
7. Go to New Sale - Payment.
Quick Sale
1. On the TD Mobile app: Go to the New Sale Screen.
2. Select Quick Sale.
3. Enter a product or service name.
4. Specify a price for the product or service.
5. Select the appropriate taxes.
a) Choose the applicable tax or taxes. (See Managing Taxes to deine what taxes are available on
this screen.)
For example, if you’d like to sell something for a total of $10.00 with tax included, but don’t
want to calculate what the base price is, the app can do it for you. You can enter $10, check
Tax Included in Price, choose the applicable tax and the app will calculate the base price and
it will show it on the Cart screen.
b) You can select Tax Included in Price if you’d like the tax to be included in the price.
c) Press Conirm.
6. Enter Quantity.
7. Select the checkmark in the top-right corner of the screen to add the item to the cart. Repeat steps 27 to
add any additional products to the cart. When inished go to Step 8.
8. Press the Cart icon in the top-right corner of the screen.
You can make changes to the sale here before submitting the products for payment. Swipe the
product to the left to access the Edit and Delete buttons.
9. Go to New Sale - Payment.

10
New Sale - Payment
1. On the TD Mobile app: Select the payment method for your sale: (Debit/Credit or Cash).
Debit/Credit
Selecting Debit/Credit will allow you to accept a Debit or Credit payment by having a customer Insert
/ Tap / Swipe their card or Tap their digital wallet.
If tips are enabled on your card reader, the customer will be prompted to optionally enter a tip
(percentage or dollar amount) before presenting their card.
Cash
Selecting Cash will allow you to record your payment. You will be responsible for collecting cash and
dispensing the correct change. The screen allows you to type in the amount tendered by the customer
and it will display the change due.
The application oers four pre-populated quick amounts. If the customer happens to give one of these
four quick amounts, you can press the appropriate.
2. A summary page will display. From here you can choose to send a receipt to the customer via email
and/or a mobile number or complete the transaction without sending a receipt.
Discounts
You can apply a discount to all or a selection of items for purchase. The TD Mobile Pay app supports percentage
(%) and dollar amount ($) based discounts.
Add a discount:
1. On the TD Mobile app: Select your item(s) for sale and press Cart.
2. Press ADD next to discount.
3. Press the checkbox next to the item(s) that you want to discount. All quantities for the selected item(s)
will be discounted.
4. Press Next.
5. Select the discount option: Amount ($) or Percentage (%).
6. Enter the discount amount and press Apply.
Discounts entered as a dollar amount will be applied across all selected products based on a unit
price. For example if you selected 2 items of $50 and $100 each. Applying a $9 discount would result
in the irst item being discounted $3 and the second item being discounted $6.
7. If you are happy with the discounted amount, go to New Sale - Payment. If you entered a discount in
error, go to Edit a discount below.
Edit a discount:
1. On the TD Mobile app: Go to the Cart screen.
2. Press Edit next to discount from the cart screen.
3. Press the checkbox next to the item(s) that you want to discount. All quantities for the selected item(s)
will be discounted.
4. Press Next.
5. Select the discount option: Amount ($) or Percentage (%).
6. Update the discount amount and press Apply to apply the new discount.

11
Voids and refunds
You can manage voids and refunds within the TD Mobile Pay app by accessing your Sales History. Find the
speciic transaction and view your options below.
Voids
You would void a transaction that was performed on the current day. When you void a transaction all monies
(sale amount, tips and taxes) will be returned to the customer; there are no partial voids. To perform a void:
1. On the TD Mobile app: Press Menu Sales History.
On the Merchant Portal: Click Sales History.
2. Select the transaction to be voided.
3. Press Void.
4. Review the summary and press Void.
5. Follow the on-screen prompts based on the payment method available for void.
Refunds
You would refund a transaction if a partial amount is required or if the transaction took place on a prior day.
Refunds should always be performed to the same payment method and card number whenever possible. To
perform a refund:
1. On the TD Mobile app: Press Menu Sales History.
On the Merchant Portal: Click Sales History.
2. Select the transaction to be refunded.
3. Press the Refund button.
4. Select the items for refund by pressing the +/-buttons next to the appropriate products. The tip can
also be selected for refund by selecting the Refund Tip checkbox. By default it is not selected.
5. Once all items are added, tap the Subtotal button to go to the Refund Summary screen.
6. Review your selections and tap the Refund button.
7. Follow the on-screen prompts based on the payment method available for refund.
You will not see a void option if:
• a partial refund has already been performed on the transaction
OR
• the transaction was performed on a prior day and has been submitted for settlement.

12
Receipts
Receipt example
Each transaction has a receipt and most of the information is purely for record keeping. There are some points of
important information you need to be aware of to ensure that your transactions have completed correctly.
Order #: The order number associated with the transaction which is generated by the solution.
Transaction Type: This shows what type of transaction was done (Sale, Void, etc.).
Card Type: This shows what kind of card was used for the transaction (Interac, Visa, Mastercard, American
Express). Cash transactions will not have this information.
Card Number: The masked number of the card used for the transaction. Cash transactions will not have
this information.
Auth Number: The authorization number associated with the transaction. Cash transactions will not have
this information.
Entry Method: This is how the card was used (contactless, chip, etc.). Cash transactions will not have this information.
Approved: Always ensure that debit and credit sales are approved before completing the transaction as it
could be Declined.
Credit/Debit Receipt
Card Number: ************5041
Auth Number: 001675 B
Entry Method: Contactless
Terminal ID: MPOSNBS00042
RRN: 001001445
17:44:35
TRANSACTION RECORD
TorontoMerchant
77 King St W
Toronto, ON M5K1A2
(+1) 437-882-3466
20003871
Order #: 0000004422
2021/05/12
SALE
1 Items
Product/Service $0.98
$0.98 x 1
Subtotal $0.98
Tax 0.00
Total $0.98
Interac | Default
(001) Approved
AID: A0000002771010
Application Label: Interac
TVR: 8000008000
TSI: 2800
ARQC: 2DC0CA71A27781AF
Payment services provided by TD
Cash Receipt
18:25:50
TorontoMerchant
77 King St W
Toronto, ON M5K1A2
(+1) 437-882-3466
Order #: 0000000340
2021/02/10
SALE
1 Items
Product/Service $1.00
$1.00 x 1
Subtotal $1.00
Tax 0.00
Total $1.00
Cash
Approved
Custom Message Here
Because Tech Writers Rule
Payment services provided by TD

13
Resend a receipt
If a customer requests that you send them a receipt from a past transaction, you can resend the PDF receipt to a
their email address or mobile number.
To resend a receipt:
1. On the TD Mobile Pay app: Press Menu Sales History.
On the Merchant Portal: Click Sales History.
2. Select the transaction.
3. Select Send Receipt.
4. Enter the customer’s email address and/or mobile number and click Send Receipt.
Download a receipt
If you wish to save a copy of a transaction receipt, you can download a PDF copy on the Sales Details screen.
To download a receipt:
1. On the Merchant Portal: Click Sales History.
2. Select the transaction to view the details.
3. Click View Receipt to download the receipt.
Reviewing sales
With TD Mobile Pay, you can track daily sales statistics performed by you or your sta.
The Dashboard provides a real-time summary of your sales, including total sales, refunds, taxes and tips. You
can view the information by payment type or by the sta member that conducted the transaction.
The Sales History allows you to review a list of your previous sales. You may click on the row of a transaction to
see more detail and resend a receipt. When you need to ind a speciic transaction, you are able to browse by
payment type, date range or sta member that conducted that transaction.
Dashboard
To view the Dashboard:
1. On the TD Mobile Pay app: Press Menu Dashboard.
On the Merchant Portal: Click Dashboard.
2. The following information will be displayed for the speciied speciied date range.
• Total Sales: This is the total sales dollar igure that your business has transacted in the last
month. It will also display the percentage change over the selected time periods.
• Number of Sales: This is the total number of sales that your business has transacted in the
last month. It will also display the change over the selected time periods.
• Total Refunds: This is the total refund dollar igure that your business has transacted in the
last month. It will also display the change over the selected time periods.
The receipt is attached when sending to an email address. A secure link is provided to download the receipt
when sending to a mobile number.
Need to ind a past transaction? You can track your historical transactions from the past 18 months.

14
• Number of Refunds: This is the total number of refunds that your business has transacted in
the last month. It will also display the change over the selected time periods.
• Total Tips: This is the total tip dollar igure that your business has collected in the last month.
It will also display the change over the selected time.
• Total Tax Collected: This is the total tax dollar igure that your business has collected in the
last month. It will also display the change over the selected time periods.
• Last Transaction: This is the time stamp of the last transaction that your business has
performed. This information will not change until a new transaction takes place. It will not
change by selecting a new ilter.
3. You can ilter your results by selecting them from the drop down menus on the Merchant Portal or by
pressing the Filter icon in the bottom-right corner of the TD Mobile Pay app. The following ilters can
be applied:
• User View: All Users/Business (default) or an Individual.
• Payment Method: Credit, Debit or Cash.
• Date Range: Today, Yesterday, Last 7 Days, Last 30 Days, This Month, Last Month, or Custom
Range. Whatever date range you select, it will compare your current transactions against
historical transactions of the same time range. For example, if your date range is Last 7 Days,
then it will use the 7 Days prior for comparison.
4. Click Apply / Apply Filters.
Sales history
To view the Sales History:
1. On the TD Mobile Pay app: Press Menu Sales History.
On the Merchant Portal: Click Sales History.
2. The following information will be displayed for each transaciton that took place between speciied
date range.
• Date: This is the transaction date.
• Time: This is the time that the transaction took place.
• Order Number: This is the invoice number.
• Items Sold: This is the number of items in the transaction.
• Users: This is the user who performed the transaction.
• Transaction Type: This is the type of transaction performed. There are three possibilities:
Sale, Refund, Void.
• Payment Type: This is the payment type used to pay for the transaction. There are three
possibilities: Credit, Debit, or Cash.
• Card Type: This is the type of card used to pay for the transaction. The possibilities are: Visa,
MC, AE, and Interac.
• Total: This is the total amount of the transaction including tax and tip.
• Status: This is the status of the transaction. There are three possibilities: Approved, Declined,
or Not Completed.
3. You can ilter your results by selecting them from the drop down menus on the Merchant Portal or by
pressing the Filter icon in the bottom-right corner of the TD Mobile Pay app. The following ilters can
be applied:
• User View: All Users/Business (default) or an Individual.

15
• Payment Method: Credit, Debit or Cash.
• Date Range: Today, Yesterday, Last 7 Days, Last 30 Days, This Month, Last Month, or Custom
Range. Whatever date range you select, it will compare your current transactions against
historical transactions of the same time range. For example, if your date range is Last 7 Days,
then it will use the 7 Days prior for comparison.
4. Click Apply / Apply Filters.
Settlement
The TD Mobile Pay solution automatically performs a daily settlement each night at 23:59 EST.
A settlement must be performed on each terminal in order to maintain accurate records and balance your
accounts. This is important as it closes all open batches and starts a new batch on the terminal.
Coniguration
Manage your product catalog
You can manage your commonly sold products and services within TD Mobile Pay app by accessing your
Product Catalog.
Add a new product
To add a new product:
1. On the TD Mobile Pay app: Press Menu Product Catalog.
2. Press the +button. Refer to the following sections below for more details:
Applying a Tax
You can add a tax to your new product. You are responsible for all required taxes to be applied to
your products or services.
a) Select the product or service you would like to apply tax to.
b) Select Applicable Tax to display a list of taxes pre-conigured for your business. See
Managing Taxes for more information.
c) Select the applicable tax(es) and tap Done.
Assigning a Product to Categories
To help organize your catalog, you can assign products to categories.
a) Select the product or service you would like to assign a category to.
b) Select Categories to display a list of categories conigured for your merchant account. See
Managing Categories for more information.
• If your business has staff users, they will be able to access and sell products from your catalog but will not
be able to make changes to it.
• The products in the catalog are sorted by name in alphabetical order. If you are having trouble inding a
product, you can press the search [magnifying glass ICON] icon to reveal the search bar.
It is your responsibility to ensure that the correct tax is charged for your products and services.

16
c) Select the applicable categories, and press Save to apply it to the product.
Adding an Image
You can add an image to your new product. The image will appear in your Product Catalog.
a) Select the product or service you would like to add an image to.
b) Press the Price Tag icon or the current product image. You will see 2 options:
Capture Image: Use your mobile device’s camera to take a picture of the product.
Choose Image: Select an image from the gallery on your mobile device.
Note: Remove Image will be displayed, only if an image is present.
3. Once you have deined the values for your product press Save. Your product is now saved to your
Product Catalog.
Disable or enable a product
You can disable/enable a product to remove it from the catalog when performing a catalog sale. This allows
you to re-enable it in the future for things like seasonal products or when you have run out of the product in
question. To disable/enable a product:
1. On the TD Mobile Pay app: Press Menu Product Catalog.
2. Swipe the product to the left.
3. Press Disable/Enable.
Delete a product
You can delete a product to permanently remove it from the catalog. To delete a product:
1. On the TD Mobile Pay app: Press Menu Product Catalog.
2. Press or swipe the product to the left.
3. Press Delete.
4. Press Delete again to conirm.
Manage your product categories
Categories allow you to organize your catalog more eiciently. For example, if your business sells clothing you
could create categories like skirts, pants, socks, to better help you navigate the catalog when performing a
sale. You can manage your categories from the Product Catalog page.
Add a category
You can add a new category to help group and organize your products. To add a category:
1. On the TD Mobile Pay app: Press Menu Product Catalog.
2. Press +.
3. Enter a Category Name, choose the applicable product(s) and press Save.
Table of contents
Other TD Touch Terminal manuals
