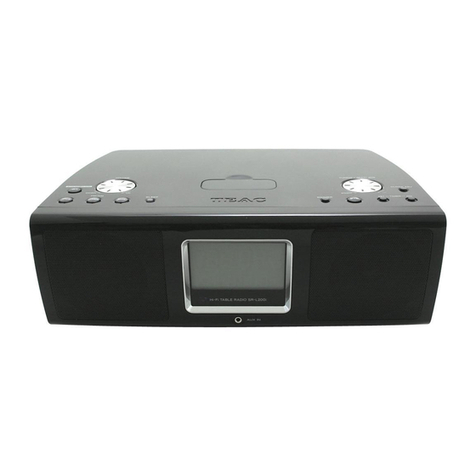
Teac R-X1 User manual

Z9A10497600
AM/FM Stereo Receiver
OWNER’S MANUAL
MANUEL DU PROPRIÉTAIRE
MANUAL DEL USUARIO
R-X1
FRANÇAISENGLISH ESPAÑOL

11)Only use attachments/accessories
specified by the manufacturer.
12) Use only with the cart, stand,
tripod, bracket, or table
specified by the manufacturer,
or sold with the apparatus.
When a cart is used, use caution when
moving the cart/apparatus combination
to avoid injury from tip-over.
13) Unplug this apparatus during lightning
storms or when unused for long periods
of time.
14)Refer all servicing to qualified service
personnel. Servicing is required when
the apparatus has been damaged in any
way, such as power-supply cord or plug
is damaged, liquid has been spilled or
objects have fallen into the apparatus,
the apparatus has been exposed to rain
or moisture, does not operate normally,
or has been dropped.
ENGLISH
3
CAUTION: TO REDUCE THE RISK OF
ELECTRIC SHOCK, DO NOT REMOVE
COVER (OR BACK). NO USER-
SERVICEABLE PARTS INSIDE. REFER
SERVICING TO QUALIFIED SERVICE
PERSONNEL.
The lightning flash with
arrowhead symbol, within an
equilateral triangle, is intended to
alert the user to the presence of uninsulated
“dangerous voltage” within the product’s
enclosure that may be of sufficient
magnitude to constitute a risk of electric
shock to persons.
The exclamation point within an
equilateral triangle is intended to
alert the user to the presence of
important operating and maintenance
(servicing) instructions in the literature
accompanying the appliance.
1) Read these instructions.
2) Keep these instructions.
3) Heed all warnings.
4) Follow all instructions.
5) Do not use this apparatus near water.
6) Clean only with dry cloth.
7) Do not block any ventilation openings.
Install in accordance with the
manufacturer’s instructions.
8) Do not install near any heat sources such
as radiators, heat registers, stoves, or
other apparatus (including amplifiers)
that produce heat.
9) Do not defeat the safety purpose of the
polarized or grounding-type plug. A
polarized plug has two blades with one
wider than the other. A grounding type
plug has two blades and a third
grounding prong. The wide blade or the
third prong are provided for your safety.
If the provided plug does not fit into
your outlet, consult an electrician for
replacement of the obsolete outlet.
10)Protect the power cord from being
walked on or pinched particularly at
plugs, convenience receptacles, and the
point where they exit from the
apparatus.
IMPORTANT SAFETY
INSTRUCTIONS
CAUTION
<DO NOT REMOVE THE EXTERNAL CASES
OR CABINETS TO EXPOSE THE
ELECTRONICS. NO USER SERVICEABLE
PARTS ARE WITHIN!
<IF YOU ARE EXPERIENCING PROBLEMS
WITH THIS PRODUCT, CONTACT TEAC
FOR A SERVICE REFERRAL. DO NOT USE
THE PRODUCT UNTIL IT HAS BEEN
REPAIRED.
WARNING: TO PREVENT FIRE
OR SHOCK HAZARD, DO NOT
EXPOSE THIS APPLIANCE TO
RAIN OR MOISTURE.
<Do not expose this apparatus to drips or
splashes.
<Do not place any objects filled with
liquids, such as vases, on the apparatus.
<Do not install this apparatus in a
confined space such as a book case or
similar unit.
<The apparatus draws nominal non-
operating power from the AC outlet with
its STANDBY/ON switch in the standby
position.
<The apparatus should be located close
enough to the AC outlet so that you can
easily grasp the power cord plug at any
time.
<Batteries (battery pack or batteries
installed) shall not be exposed to
excessive heat such as sunshine, fire or
the like.
2

ENGLISH
4 5
Read this before attempting any
operations
<As the unit may become warm during
operation, always leave sufficient space
around the unit for ventilation.
<The voltage supplied to the unit should
match the voltage as printed on the rear
panel. If you are in any doubt regarding
this matter, consult an electrician.
<Choose the installation location of your
unit carefully. Avoid placing it in direct
sunlight or close to a source of heat. Also
avoid locations subject to vibrations and
excessive dust, heat, cold or moisture.
<Do not place the unit on any other
electronic components.
<Do not open the cabinet as this might
result in damage to the circuitry or
electrical shock. If a foreign object should
get into the unit, contact your dealer or
service company.
<When removing the power plug from a
wall outlet, always pull directly on the
plug. Do not pull on the line cord.
<Do not attempt to clean the unit with
chemical solvents as this might damage
the finish. Use a clean, dry, lint-free
cloth.
<Keep this manual in a safe place for
future reference.
Before Using the Unit
Maintenance
If the surface of the unit gets dirty, wipe
with a soft lint-free cloth or use diluted
neutral cleaning liquid. Be sure to remove
any fluid completely. Do not use thinner,
benzine or alcohol as they may damage
the surface of the unit. Allow the surface
of the unit to dry completely before
using.
Contents
Thank you for choosing TEAC. Read this manual carefully
to get the best performance from this unit.
Important Safety Instructions . . . . . . . . . . . . . . . . . . . . . . . . . . 2
Before Using the Unit . . . . . . . . . . . . . . . . . . . . . . . . . . . . . . . . 5
Connections . . . . . . . . . . . . . . . . . . . . . . . . . . . . . . . . . . . . . . . 6
Wall Mounting . . . . . . . . . . . . . . . . . . . . . . . . . . . . . . . . . . . . . 8
Remote Control Unit . . . . . . . . . . . . . . . . . . . . . . . . . . . . . . . . 9
Unit Functions . . . . . . . . . . . . . . . . . . . . . . . . . . . . . . . . . . . . 10
Display . . . . . . . . . . . . . . . . . . . . . . . . . . . . . . . . . . . . . . . . . . 12
Memory Backup . . . . . . . . . . . . . . . . . . . . . . . . . . . . . . . . . . . 12
Setting the Clock . . . . . . . . . . . . . . . . . . . . . . . . . . . . . . . . . . 13
Listening to the Radio. . . . . . . . . . . . . . . . . . . . . . . . . . . . . . . 14
Preset Tuning . . . . . . . . . . . . . . . . . . . . . . . . . . . . . . . . . . . . . 16
RDS . . . . . . . . . . . . . . . . . . . . . . . . . . . . . . . . . . . . . . . . . . . . 17
Listening to an External Source . . . . . . . . . . . . . . . . . . . . . . . . 18
Muting . . . . . . . . . . . . . . . . . . . . . . . . . . . . . . . . . . . . . . . . . . 19
Tone Control . . . . . . . . . . . . . . . . . . . . . . . . . . . . . . . . . . . . . 19
Dimmer . . . . . . . . . . . . . . . . . . . . . . . . . . . . . . . . . . . . . . . . . 20
Sleep Timer . . . . . . . . . . . . . . . . . . . . . . . . . . . . . . . . . . . . . . 20
Timer . . . . . . . . . . . . . . . . . . . . . . . . . . . . . . . . . . . . . . . . . . . 21
Troubleshooting . . . . . . . . . . . . . . . . . . . . . . . . . . . . . . . . . . . 24
Specifications . . . . . . . . . . . . . . . . . . . . . . . . . . . . . . . . . . . . . 25
NXT is a trademark of New Transducers Ltd.
Disposal of your old appliance
1.When this crossed-out
wheeled bin symbol is
attached to a product it
means the product is
covered by the European
Directive 2002/96/EC.
2. All electrical and electronic products
should be disposed of separately from
the municipal waste stream via
designated collection facilities
appointed by the government or the
local authorities.
3.The correct disposal of your old
appliance will help prevent potential
negative consequences for the
environment and human health.
4. For more detailed information about
disposal of your old appliance, please
contact your city office, waste disposal
service or the shop where you
purchased the product.

6 7
ENGLISH
Connections
CAUTION:
<Switch off the power before making connections.
<Read the instructions of each component you intend to use with this unit.
<Be sure to insert each plug securely. To prevent hum and noise, do not bundle the
connection cords.
FM Telescopic Antenna
Stretch the telescopic antenna to its
fullest length and rotate it to the
direction that gives the best reception.
DC IN
Connect the provided AC adaptor to
the DC IN jack. Then connect the AC
adaptor’s plug to the AC wall socket.
<Do not use any AC adaptors other than
the one included with this unit to avoid
fire, electric shock, etc. Be sure to
connect the adaptor to an AC outlet
that supplies the correct voltage.
PHONES
For private listening, insert the
headphone plug into this jack, and
adjust the volume using the VOLUME
buttons.
CAUTION
Always lower the volume level prior to
plugging in your headphones. TO
AVOID DAMAGING YOUR HEARING -
Do not place your headphones on your
head until after you have plugged them
in.
C
B
A
AUX IN jack
You can connect a portable audio
player to this jack.
Connect the LINE OUT or PHONES jack
(audio output jack) of the player using
the supplied stereo mini plug cable.
When using the PHONES jack of your
mini player, you must adjust the volume
of the mini-player or you may hear no
sound from your R-X1.
<Turning the volume of the mini player
up too high may cause the sound from
your R-X1 to be distorted. If this is the
case, reduce the volume of the mini
player until the distortion stops and
then adjust the volume level of the R-
X1 to a comfortable listening level.
DC OUT 5V
An optional TEAC product for the R-X1
can be connected in the future.
Do not connect anything other than the
TEAC product especially made for the
R-X1.
E
D
C
A
B
D
E
Side
Side
AC Adaptor
AC wall socket

ENGLISH
98
You can mount the R-X1 on a wall.
Precautions
<Be aware of the best possible direction
for receiving AM broadcasts (this unit has
no AM anntena you can turn around).
<Leave sufficient space above the unit to
extend the FM telescopic antenna.
<Pay attention to the length of the AC
adaptor.
<Drill holes into solid wall support, such as
wooden frame or concrete wall.
<TEAC supplies these brackets as a
convenience to the product owner.
Consult your local building codes and
exercise all necessary caution when
mounting these brackets. If you are
unsure how to use the supplied brackets,
consult with a local tradesmen or
building supply expert.
To hook on the wall
1. Fix the brackets on the rear panel of
the R-X1 using the supplied short
screws.
2. If the AC adapter has not been
connected, connect it to the DC IN
jack of the R-X1.
The provided Remote Control Unit allows
the unit to be operated from a distance.
When operating the remote control unit,
point it towards the remote sensor on the
front panel of the unit.
<Even if the remote control unit is
operated within the effective range,
remote control operation may be
impossible if there are any obstacles
between the unit and the remote control.
<If the remote control unit is operated near
other products which generate infrared
rays, or if other remote control devices
using infrared rays are used near the unit,
it may operate incorrectly. Conversely, the
other products may also operate
incorrectly.
1
2
3
1. Remove the battery compartment cover.
2. Put in the lithium battery (CR2032, 3V).
3. Close the cover.
Battery Replacement
If the distance required between the
remote control unit and main unit
decreases, the battery is exhausted. In this
case, replace the battery with a new one.
Precautions concerning batteries
Do not heat or disassemble batteries and
never dispose of old batteries by throwing
them in a fire.
Remote Control Unit
Battery Installation
Wall Mounting
3. Use the supplied guide sheet to mark
the exact drilling points on the wall.
4. Drill holes in the wall at the marked
points.
5. Screw the supplied long screws into
the wall.
Leave about 5 mm space between the
screw’s head and the wall.
<As a convenience, a set of tapered plastic
anchors is supplied. If you chose to use
these anchors, drill a pilot hole using a 6
mm drill bit then tap the anchor into the
pilot hole.
Only use these anchors if they are
appropriate for the materials onto which
the unit is to be mounted. Consult your
local hardware store if you are uncertain.
6. Carefully hang the R-X1 onto the
screws.
Note:
<Ensure that the unit locks onto the hooks
and that the hooks are strong enough to
support the weight before removing your
hands.

ENGLISH
1110
Unit Functions
A
J
E
I
C
H
L
M
N
O
Q
P
IK J
A B C
G
D
H
E
F
STANDBY/ON
Use this button to turn the unit on or
standby.
Remote Sensor
When operating the remote control unit,
point it towards here.
DIMMER
Use this button to dim the display.
Display
MULTI JOG/TUNING
In AM or FM mode, turn this knob to
tune in a station.
This knob is also used to adjust the time,
change timer settings, etc.
TIMER
Use this button to turn on or off the
timer function.
TIMER SET/CLOCK ADJ
Use this button together with the MULTI
JOG knob to set the timer or to adjust
the clock.
VOLUME
Use these buttons to adjust the volume
level.
SLEEP
Use this button to set sleep timer.
I
H
G
F
E
D
C
B
The equipment draws a nominal
amount of power from the AC outlet
even with its STANDBY/ON switch in the
STANDBY position.
AFUNCTION
Use this button to select FM, AM or AUX
mode.
When a component is connected to the
AUX IN jack, select AUX to listen to the
external source.
Speakers (stereo)
The speakers are very fragile.
Do not press the surface. Do not hold the
R-X1 by the speakers.
FM MODE
In FM TUNER mode, use this button to
select stereo or monaural.
Numeric buttons
Use these buttons to select a preset
channel.
RDS MODE
In FM TUNER mode, use this button to
select an RDS mode.
MEMORY
Use this button to store preset channels
into memory.
MUTING
Use this button to mute the sound.
TONE
Use this button and the VOLUME buttons
to adjust the level of high and low
frequency information.
Q
P
O
N
M
L
K
J
Note:
To simplify explanations, instructions in
this manual refer to the names of the
buttons and controls on the front panel
only. Associated controls on the remote
control will also operate similarly.

ENGLISH
12 13
Press and hold the CLOCK ADJUST
button for more than 3 seconds and
release it when “24 HOUR” or “12
HOUR” appears on the display.
1
<If you leave the unit idle for 20 seconds,
the time setting mode will be cancelled.
Press the CLOCK ADJUST button.
7
If you want to change the hour
mode, turn the MULTI JOG knob to
select 24 or 12 hour mode.
The default setting is 24-hour.
2
Press the CLOCK ADJUST button.
3
Turn the MULTI JOG knob to set the
current hour.
4
Press the CLOCK ADJUST button.
The “minute” value blinks.
5
Turn the MULTI JOG knob to set the
current minute.
6
Setting the Clock
CLOCK ADJ
MULTI JOG
“CLOCK OK” briefly appears on the
display, and t
he clock starts from 00
second.
Display
Lights when RDS function is active
(European models only).
Lights when an FM stereo broadcast is
tuned.
Blinks when the MEMORY button is
pressed.
Digital clock
Lights when the timer is on.
Lights when the sleep timer is active.
Shows frequency, volume, etc.
G
F
E
D
C
B
A
E
D
F
G
BA C
If the unit is disconnected from the power
supply for more than 40 minutes, the
clock and the timer setting will be erased.
If the unit is disconnected from the power
supply for more than 24 hours, preset
stations will be erased.
Memory Backup

ENGLISH
14 15
Select the station you want to listen
to (auto selection).
3
Hold down the TUNING button (up or
down) of the remote control unit until
the frequency display begins to change.
When a station is tuned in, the tuning
process will stop automatically.
<To stop the auto selection, lightly press
the TUNING button.
Listening to the Radio
Selecting stations which cannot be
tuned automatically (manual selection)
When the TUNING rotary knob is turned,
the frequency changes by a fixed step.
Turn the TUNING rotary knob repeatedly
until the station you want to listen to is
found.
<When using the remote control unit,
repeatedly press the TUNING button (up
or down).
Press the STANDBY/ON switch to
turn the unit on.
1
<The unit turns on with the source that
was last selected.
Press the FUNCTION button to select
FM or AM.
2
If the AM reception is poor
Turn the unit around to find the best
position for AM stations. The AM
antenna is built in within the cabinet so
rotating the cabinet may improve the
reception.
If the FM reception is poor
For the best reception, rotate the
extendable antenna until you receive
stations clearly.
FM MODE button
Pressing this button alternates between
STEREO mode and MONO mode.
STEREO
FM stereo broadcasts are received in
stereo and the “STEREO” indicator lights
in the display.
<If the sound is distorted and the
“STEREO” indicator flashes, the signal is
not strong enough for good stereo
reception. In this case, change to MONO
mode.
MONO
To compensate for weak FM stereo
reception, select this mode. Reception
will now be forced to monaural, reducing
unwanted noise.
The volume is adjustable from MIN (00)
to MAX (22). You can hold down the
VOLUME button (+ or –) to reduce or
bring up the volume continuously.
Adjust the volume using the
VOLUME buttons
4
2 41 3

ENGLISH
16 17
Preset Tuning
You can store 30 FM and 10 AM stations.
Tune in a station you want to listen
to (see steps to of page 14).
Press the MEMORY button.
2
31
1
Within 5 seconds, press the MEMORY
button.
4
Within 5 seconds, select a preset
channel to store the station using the
numeric buttons.
3
To store more stations, repeat steps to
.
4
1
The PRESET indicator and “SET” blinks
on the display.
Press the numeric buttons.
2
How to select preset stations
Select FM or AM using the FUNCTION
button.
1
To select channel No.16 for example,
press “1”, and within 5 seconds press
“6”.
To select channel No.1 through 9, press
“0” and then the number. As an
example, to select number 3, press “0”
and “3”.
“P-” and the preset number will blink on
the display.
RDS
The Radio Data System (RDS) is a
broadcasting service which allows stations
to send additional information along with
the regular radio programme signal.
RDS works on the FM waveband in
Europe only.
Tune in an FM RDS station (see steps
to of page 14).
Press the RDS MODE button.
Each time the RDS MODE button is
pressed, the RDS mode is changed as
follows:
PS (Programme Service name)
When you select PS, PS or a station’s
name will be displayed. If there is no PS
data, “NO PS” will be displayed.
PTY (Programme Type)
When you select PTY, the programme
type will be displayed. If there is no PTY
data, “NO PTY” will be displayed.
RT (Radio Text)
When you select RT, the news of
stations composed of up to 64 symbols
will be displayed. If there is no RT data,
“NO RT” will be displayed.
2
31
1

ENGLISH
1918
Listening to an External Source
Connect the PHONES jack (audio
output jack) of a portable audio
player to the AUX IN jack of the R-X1
using the supplied stereo mini plug
cable.
1Play the source, and adjust the
volume using the VOLUME button of
the R-X1 and the audio player.
4
Select AUX using the FUNCTION
button.
3
When using the PHONES jack of your
mini player, you must adjust the volume
of the mini-player or you may hear no
sound from your R-X1.
To mute the sound temporarily, press the
MUTING button. Press the MUTING
button again to restore the sound.
<While muting is engaged, “MUTE” blinks
on the display.
<If you change the volume during the
muting, the muting will be canceled.
1. Press the TONE button once or twice
to select “BASS” or “TREBLE”.
To adjust the level of low frequency
sound range, select “BASS”.
To adjust the level of high frequency
sound range, select “TREBLE”.
2. Within 5 seconds, press the VOLUME
buttons to change the setting.
The level can be adjusted from –5 to +5.
Tone ControlMuting
Press the STANDBY/ON switch to
turn the unit on.
2
3 42 1

ENGLISH
2120
Sleep Timer
SLEEP 90, 60, 30, 20 or 10:
The power will be switched off 90, 60,
30, 20 or 10 minutes later.
OFF:
The sleep timer is off.
<If you want to check the remaining time,
press the SLEEP button once. The
remaining time will be displayed for 5
seconds, and then return to the normal
display.
The power can be switched off after a
specified amount of time.
Press the SLEEP button repeatedly until
desired time appears on the display.
TIMER SET
MULTI JOGSTANDBY/ON
<The unit can be programmed to turn on
and off at a specified time.
<Adjust the clock before setting the timer
(see page 13).
<To turn the unit on with an FM or AM
staion, preset a station (and remember
the preset channel number) before
setting the timer (see page 16).
Press the TIMER SET button.
1
“ON TIME” appears on the display, and
the “hour” value starts blinking.
<When no button is pressed for 20
seconds, the timer setting mode will be
cancelled.
Turn the MULTI JOG knob to set the
start time (minute), and then press
the TIMER SET button.
3
“OFF TIME” appears on the display, and
the “hour” value starts blinking.
Turn the MULTI JOG knob to set the
start time (hour), and then press the
TIMER SET button.
2
The “minutes” value starts blinking.
Timer 1
You can dim the front panel’s display.
Use the DIMMER button to cycle between
these settings.
FL Dimmer1:
Medium brightness
FL Dimmer2:
Minimum brightness
DIM OFF (default):
Full brightness
<This function will be cancelled when the
STANDBY/ON switch is pressed.
Dimmer

ENGLISH
22 23
Timer 2
Turn the MULTI JOG knob to select a
source (TUNER FM, TUNER AM or
AUX), and then press the TIMER SET
button.
6Turn the MULTI JOG knob to set the
volume, and then press the TIMER
SET button.
8
“ALARM ON” briefly appears on the
display.
Setting the timer is now completed and
the timer is turned on.
The TIMER indicator ( ) lights on the
display.
If you select FM or AM in step ,
turn the MULTI JOG knob to select a
preset channel, and then press the
TIMER SET button.
67
If the unit is ON, press the
STANDBY/ON button to turn the unit
off (standby).
9
The clock and the TIMER indicator ( )
are displayed.
The unit will turn on and off at the
specified time every day.
<The TIMER indicator blinks during timer
playback.
Don’t forget to turn the unit off
(standby), or the timer won’t work.
<If you select AUX, proceed to step .
8
To turn on or off the timer
When you don’t use the timer, press the
TIMER button to turn it off. (The TIMER
indicator disappears from the display.)
Press the TIMER button again to turn it
on.
Turn the MULTI JOG knob to set the
stop time (minute), and then press
the TIMER SET button.
5
Turn the MULTI JOG knob to set the
stop time (hour), and then press the
TIMER SET button.
4
The “minutes” value starts blinking.
To check the timer setting
Press the TIMER SET button repeatedly to
check your timer setting.
<To exit the checking mode, leave the unit
idle for 20 seconds.

ENGLISH
2524
If you have problems with your system, look through this chart and see if
you can solve the problem yourself before calling your dealer or TEAC
service center.
No power
eCheck the connection to the AC power supply. Check and make
sure the AC source is not a switched outlet and that, if it is, the
switch is turned on. Make sure there is power to the AC outlet by
plugging another item such as a lamp or fan into the outlet.
No sound from speakers.
eSelect the source by pressing the FUNCTION button.
eAdjust the volume.
ePull out the headphone’s plug from the PHONES jack.
eIf “MUTE” is blinking, press the MUTING button.
The sound is noisy.
eThe unit is too close to a TV or similar appliances. Install the unit
apart from them, or turn them off.
Remote control doesn’t work.
ePress the STANDBY/ON switch to turn the unit on.
eIf the battery is exhausted, replace it with a new one.
eUse remote control unit within the range (5 m) and point at the
remote sensor on the front panel.
eClear obstacles between the remote control unit and the main unit.
eIf a strong light is near the unit, turn it off.
Cannot listen to any station, or signal is too weak.
eTune in the station properly.
eRotate the FM antenna (or the main unit) for the best reception
position.
If normal operation cannot be recovered, unplug the power cord
from the outlet and plug it again.
Troubleshooting Specifications
Frequency Range . . . . . FM: 87.50 MHz to 108.00 MHz (50 kHz steps)
AM: 522 kHz to 1,629 kHz (9 kHz steps)
Speaker Type . . . . . . . . . . . . . . . . . . . . . . . . . . . . . . . . . . . NXT system
NXT exciter . . . . . . . . . . . . . . . . . . . . . . . . . . . . . . . . . . . 2 pcs + 2 pcs
Output Power. . . . . . . . . . . . . . . . . . . . . . . . . . . . . . . . 7.5 W + 7.5 W
Power Requirement (AC adaptor) . . . . . . . . . . . . . . . 230 V AC, 50 Hz
Power Consumption . . . . . . . . . . . . . . . . . . . . . . . . . . . . . . . . . . 20 W
Dimension (W x H x D). . . . . . . . . . . . . . . . . . . . . . 150 x 358 x 70 mm
Weight (net) . . . . . . . . . . . . . . . . . . . . . . . . . . . . . . . . . . . . . . . 1.5 kg
Standard Accessories
AC adaptor x 1
Remote control unit (RC-1110) x 1
Battery for remote control unit x 1
Stereo mini plug cable x 1
Bracket x 2
Screw (short) x 4
Screw (long) x 2
Tapered plastic wall anchor x 2
Guide sheet for wall mounting x 1
Owner’s manual x 1
Warranty card x 1
• Design and specifications are subject to change without notice.
• Illustrations may differ slightly from production models.

27
FRANÇAIS
ATTENTION
<N’exposez pas l’appareil à des
éclaboussures ou à des gouttes d’eau.
<Ne posez pas d’objet contenant du
liquide, tel qu’un vase, sur l’appareil.
<N’installez pas cet appareil dans un
espace confiné, dépourvu de
ventilation, comme par exemple une
bibliothèque ou similaire.
<L’appareil tire un courant nominal de
veille de la prise secteur, avec son
interrupteur FUNCTION en position
OFF.
<L’appareil doit être placé suffisamment
près de la prise secteur pour que vous
puissiez à tout moment saisir la fiche
du cordon d’alimentation.
<Les batteries (ou le pack de batteries
ou les batteries chargées) ne devront
pas être exposées à la chaleur
excessive telle que le soleil, le feu ou
analogues.
Mise au rebut de votre ancien appareil
1.Quand ce symbole de
poubelle sur roues barrée
d’une croix est joint à un
produit, cela signifie que
ce produit est couvert par
la Directive Européenne
2002/96/EC.
2.Tous les produits électriques et
électroniques doivent être jetés
séparément des ordures ménagères via
des collecteurs désignés agréés par le
gouvernement ou les autorités locales.
3. La gestion correcte de l’élimination de
votre ancien appareil aide à prévenir les
conséquences potentiellement
négatives pour l’environnement et la
santé humaine.
4.Pour des informations plus détaillées
sur la mise au rebut de votre ancien
appareil, veuillez contacter votre mairie,
le service de traitement des ordures ou
le magasin dans lequel vous avez
acheté le produit.
Maintenance
Si la surface de l’appareil est sale,
essuyez-la avec un chiffon doux non
pelucheux ou employez un liquide de
nettoyage neutre dilué. Veillez à bien
essuyer toute trace de liquide. N’utilisez
pas de diluant, d’essence ou d’alcool car
ces substances peuvent endommager la
surface de l’appareil. Laissez
complètement sécher la surface de
l’appareil avant emploi.
NXT est une marque commerciale de New
Transducers Ltd.
26
Sommaire
Nous vous remercions pour l’achat d’un
appareil TEAC. Lire ce manuel avec
attention pour obtenir les meilleures
performances possibles de cet appareil.
Avant d’utiliser l’appareil. . . . . . . . . . . . . 26
Connexions. . . . . . . . . . . . . . . . . . . . . . . 28
Montage mural. . . . . . . . . . . . . . . . . . . . 30
Télécommande . . . . . . . . . . . . . . . . . . . . 31
Fonctions de l’unité. . . . . . . . . . . . . . . . . 32
Ecran . . . . . . . . . . . . . . . . . . . . . . . . . . . 34
Conservation de la mémoire . . . . . . . . . . 34
Réglage de l’horloge. . . . . . . . . . . . . . . . 35
Ecoute de la radio. . . . . . . . . . . . . . . . . . 36
Mémorisation de stations (Presets) . . . . . 38
RDS . . . . . . . . . . . . . . . . . . . . . . . . . . . . 39
Ecoute d’une source externe. . . . . . . . . . 40
Coupure du son (Muting) . . . . . . . . . . . . 41
Commande de tonalité . . . . . . . . . . . . . . 41
Atténuateur . . . . . . . . . . . . . . . . . . . . . . 42
Minuterie d’extinction. . . . . . . . . . . . . . . 42
Minuterie . . . . . . . . . . . . . . . . . . . . . . . . 43
Guide de dépannage . . . . . . . . . . . . . . . 46
Caractéristiques . . . . . . . . . . . . . . . . . . . 47
A lire avant l’emploi
<Comme l’appareil peut chauffer en cours
de fonctionnement, laissez toujours assez
d’espace autour de lui pour sa
ventilation.
<La tension électrique fournie à l’appareil
doit correspondre à celle imprimée sur sa
face arrière. En cas de doute à ce sujet,
consultez un électricien.
<Choisissez soigneusement le lieu
d’installation de votre appareil. Evitez de
l’exposer directement au soleil ou de le
placer près d’une source de chaleur.
Evitez les lieux soumis à des vibrations et
à une poussière excessives, à la chaleur,
au froid et à l’humidité.
<Ne placez l’appareil sur aucun autre
élément électronique.
<N’ouvrez pas l’appareil car cela pourrait
entraîner des dommages pour le circuit
ou une électrocution. Si un objet
étranger venait à pénétrer dans
l’appareil, contactez dès que possible
votre revendeur ou le service après-vente.
<Lorsque vous débranchez le cordon
d’alimentation de la prise secteur, tirez
toujours sur la fiche, jamais sur le cordon.
<N’essayez pas de nettoyer l’appareil avec
des solvants chimiques car cela pourrait
endommager sa finition. Utilisez un
chiffon doux et sec, non pelucheux.
<Gardez ce manuel en lieu sûr pour vous y
référer ultérieurement.
Avant d’utiliser l’appareil

FRANÇAIS
29
Antenne FM télescopique
Etirez l’antenne télescopique au
maximum de sa longueur et tournez-la
dans la direction qui donne la meilleure
réception.
DC IN (Entrée CC)
Reliez l’adaptateur secteur fourni à la
prise DC IN. Puis branchez l’adaptateur
dans une prise secteur.
<N’utilisez aucun autre adaptateur que
celui fourni avec l’appareil pour éviter
les risques d’incendie, d’électrocution
etc. Veillez à brancher l’adaptateur
secteur dans une prise secteur délivrant
une tension correcte.
PHONES (Casque)
Pour écouter en privé, réduisez d’abord
le niveau de volume au minimum. Puis
insérez la fiche de votre casque dans la
prise PHONES, et réglez le volume à
l’aide des touches VOLUME.
ATTENTION
Baissez toujours le niveau de volume
avant de brancher votre casque. POUR
EVITER D’ENDOMMAGER VOTRE
AUDITION - Ne placez pas le casque sur
votre tête avant de l’avoir branché.
C
B
A
Prise AUX IN
Vous pouvez brancher un lecteur audio
portable à cette prise.
Branchez à cette dernière la prise LINE
OUT ou PHONES (prise de sortie audio
de niveau ligne ou pour casque) du
lecteur à l’aide du câble à mini-fiche
stéréo fourni.
Si vous utilisez la prise casque (PHONES)
de votre mini-lecteur, vous devez régler
le volume du mini-lecteur ou vous
risquerez de ne rien entendre dans le R-
X1.
<Trop monter le volume du mini-lecteur
peut amener le son de votre R-X1 à
saturer. Si c’est le cas, réduisez le
volume du mini-lecteur jusqu’à ce que
cette distorsion s’arrête puis réglez le
volume du R-X1 à un niveau d’écoute
confortable.
DC OUT 5V (Sortie CC)
Un produit TEAC optionnel pour le R-
X1 pourra être branché dans le futur.
Ne connectez rien d’autre à cette prise
que le produit TEAC spécialement
conçu pour le R-X1.
E
D
28
Connexions
ATTENTION :
<Coupez l’alimentation avant de faire des connexions.
<Lisez les instructions de chaque élément que vous désirez employer avec cet appareil.
<Veillez à bien enfoncer chaque fiche de connexion. Pour éviter les bruits et les
ronflements, ne regroupez pas les câbles de connexion.
C
A
B
D
E
Côté
Côté
Adaptateur secteur
Prise secteur

31
FRANÇAIS
1
2
3
La télécommande fournie permet de
contrôler l’appareil à distance.
Quand vous utilisez la télécommande,
pointez-la vers le capteur situé en face avant
de l’appareil.
<Même si la télécommande est employée
dans la zone de portée efficace, son
utilisation peut être impossible s’il y a des
obstacles entre elle et l’appareil.
<Si la télécommande est employée près
d’autres produits émetteurs de rayons
infrarouges, ou si d’autres
télécommandes à infrarouges sont
employées près de l’appareil, le
fonctionnement peut être incorrect. De
même, les autres produits peuvent du
coup aussi mal fonctionner.
1. Retirez le couvercle du compartiment de
pile.
2. Placez la pile au lithium (CR2032, 3V).
3. Refermez le couvercle.
Remplacement de la pile
Si la portée de la télécommande vis-à-vis
de l’appareil diminue, la pile est
déchargée. Dans ce cas, remplacez-la par
une neuve.
Précautions concernant les piles
Ne chauffez pas et ne démontez pas les
piles et ne jetez jamais les vieilles piles
dans un feu.
Télécommande
Installation de la pile
30
Vous pouvez monter le R-X1 au mur.
Précautions
<Tenez compte de la meilleure direction
possible pour recevoir les émissions AM
(cet appareil n’a pas d’antenne AM
orientable).
<Laissez assez d’espace au-dessus de
l’appareil pour étendre l’antenne FM
télescopique.
<Faites attention à la longueur de
l’adaptateur secteur.
<Percez des trous dans un mur solide,
comme une charpente en bois ou un mur
en béton.
<TEAC fournit ces supports au propriétaire
du produit pour plus de commodités.
Consultez le code de construction local
et prenez toutes les précautions
nécessaires pour monter ces supports. Si
vous n’êtes pas sûr de la façon de les
utiliser, consultez un artisan qualifié ou
un expert en matériaux de construction.
Pour l’accrocher au mur
1. Fixez les supports sur la face arrière
du R-X1 à l’aide des vis (courte)
fournies.
2. Si l’adaptateur secteur n’a pas été
connecté, branchez-le à la prise DC IN
du R-X1.
Montage mural
3. Utilisez la feuille de gabarit fournie
pour marquer les points de perçage
exacts sur le mur.
4. Percez les trous dans le mur aux
endroits marqués.
5. Vissez les vis (longue) fournies dans
le mur.
Laissez environ 5 mm d’espace entre la
tête des vis et le mur.
<Pour plus de commodités, un jeu de
crochets coniques en plastique est fourni.
Si vous choisissez d’utiliser ces crochets,
percez un avant-trou à l’aide d’un foret
de 6 mm puis enfoncez le crochet dans
l’avant-trou.
N’utilisez ces crochets que s’ils
conviennent aux matériaux sur lesquels
l’appareil doit être monté. Consultez
votre magasin de bricolage local si vous
n’êtes pas sûr.
6. Accrochez délicatement le R-X1 sur
les vis.
Note :
Vérifiez que l’appareil se bloque bien sur
les crochets et que ceux-ci sont
suffisamment solides pour supporter ce
poids avant de lâcher l’appareil.

33
FRANÇAIS
STANDBY/ON
Utilisez cette touche pour mettre
l’appareil en service ou en veille
(standby).
Capteur de télécommande
Quand vous utilisez la télécommande,
pointez-la vers ce capteur.
DIMMER
Utilisez cette touche pour atténuer
l’affichage.
Ecran
Molette MULTI JOG/TUNING
En mode AM ou FM, tournez cette
molette pour régler une station.
Cette molette sert aussi à régler l’heure,
à changer les réglages de minuterie, etc.
TIMER
Utilisez cette touche pour activer ou
désactiver la fonction minuterie.
TIMER SET/CLOCK ADJ
Utilisez cette touche conjointement à la
molette MULTI JOG pour régler la
minuterie ou l’horloge.
VOLUME
Utilisez ces touches pour régler le niveau
de volume.
H
G
F
E
D
C
B
Cet équipement tire un courant nominal
de la prise secteur même avec son
commutateur STANDBY/ON en position
STANDBY.
ASLEEP
Utilisez cette touche pour régler la
minuterie d’extinction.
FUNCTION
Utilisez cette touche pour sélectionner les
modes FM, AM ou AUX.
Si un élément est branché à la prise AUX
IN, sélectionnez AUX pour écouter cette
source externe.
Haut-parleurs (stéréo)
Les haut-parleurs sont très fragiles.
N’appuyez pas sur leur surface. Ne tenez
pas le R-X1 par les haut-parleurs.
FM MODE
En mode TUNER FM, utilisez cette touche
pour sélectionner stéréo ou mono.
Touches numériques
Utilisez ces touches pour sélectionner
une mémoire préréglée (preset).
RDS MODE
En mode TUNER FM, utilisez cette touche
pour sélectionner un mode RDS.
MEMORY
Utilisez cette touche pour mémoriser les
préréglages (presets) de station.
MUTING
Utilisez cette touche pour couper le son.
TONE
Utilisez cette touche et les touches
VOLUME pour régler le niveau des aigus
(hautes fréquences) et des graves (basses
fréquences).
Q
P
O
N
M
L
K
J
I
32
Fonctions de l’unité
A
J
E
I
C
H
L
M
N
O
Q
P
IK J
A B C
G
D
H
E
F
Note :
Pour simplifier les explications, les
instructions de ce manuel se réfèrent
exclusivement aux noms des touches et
commandes de la face avant. Les
commandes qui y sont associées sur la
télécommande fonctionneront de façon
similaire.

35
FRANÇAIS
Appuyez sur la touche CLOCK
ADJUST et maintenez-la plus de 3
secondes puis relâchez-la quand « 24
HOUR » ou « 12 HOUR » s’affiche.
1
<Sans action dans les 20 secondes, le
mode de réglage d’horloge est annulé.
Appuyez sur la touche CLOCK
ADJUST.
7
Si vous voulez changez le mode
d’affichage horaire, tournez la
molette MULTI JOG pour sélectionner
le mode 24 ou 12 heures.
Le réglage par défaut est 24 heures.
2
Appuyez sur la touche CLOCK
ADJUST.
3
Tournez la molette MULTI JOG pour
régler les heures.
4
Appuyez sur la touche CLOCK
ADJUST.
La valeur des « minutes » clignote.
5
Tournez la molette MULTI JOG pour
régler les minutes.
6
Réglage de l’horloge
CLOCK ADJ
MULTI JOG
« CLOCK OK » s’affiche brièvement, et
l’horloge démarre à 00 secondes.
34
Ecran
S’allume quand la fonction RDS est
activée (modèles européens seulement).
S’allume quand une station FM stéréo est
trouvée.
Clignote quand la touche MEMORY est
enfoncée.
Horloge numérique
S’allume quand la minuterie est en
service.
S’allume quand la minuterie d’extinction
est activée.
Affiche la fréquence, le volume, etc.
G
F
E
D
C
B
A
E
D
F
G
BA C
Si l’appareil est débranché du secteur
durant plus 40 minutes, les réglages
d’horloge et de la minuterie sont effacés.
Si l’appareil est débranché du secteur
durant plus 24 heures, des stations
préréglées ou « presets » sont effacés.
Conservation de la mémoire

37
FRANÇAIS
Touche FM MODE
Appuyer sur cette touche fait alterner
entre les modes STEREO et MONO.
STEREO
Les émissions FM stéréo sont reçues en
stéréo et le témoin « STEREO » s’allume
à l’écran.
<Si le son souffre de distorsion et si le
témoin « STEREO » clignote, c’est que le
signal n’est pas assez fort pour une
bonne réception stéréo. Dans ce cas,
passez en mode MONO.
MONO
Pour compenser une faible réception FM
stéréo, sélectionnez ce mode. La
réception sera forcée en mono, réduisant
les parasites indésirables.
Le volume est réglable de MIN (00) à
MAX (22). Vous pouvez maintenir la
touche VOLUME (+ ou –) enfoncée pour
faire varier le volume en continu.
Si la réception AM est mauvaise
Tournez l’appareil pour trouver la
meilleure position de réception des
stations AM. L’antenne AM est intégrée
au boîtier donc tourner ce dernier peut
améliorer la réception.
Si la réception FM est mauvaise
Pour la meilleure réception, tournez
l’antenne extensible jusqu’à ce que les
stations soient clairement reçues.
Réglez le volume à l’aide des touches
VOLUME.
4
36
Sélectionnez la station que vous
voulez entendre (sélection
automatique).
3
Maintenez enfoncée la touche TUNING
(Haut ou Bas) de la télécommande
jusqu’à ce que l’affichage de fréquence
commence à changer. Quand une station
est trouvée, le processus de syntonisation
s’arrête automatiquement.
<Appuyez fugitivement sur la touche
TUNING pour arrêter la sélection
automatique.
Sélection des stations qui ne peuvent
pas être trouvées automatiquement
(sélection manuelle)
Quand on tourne la molette TUNING, la
fréquence change par paliers fixes.
Tournez continuellement la molette
TUNING jusqu’à ce que la station que
vous voulez écouter soit trouvée.
Ecoute de la radio
<Si vous utilisez la télécommande,
appuyez répétitivement sur la touche
TUNING (Haut ou Bas).
Appuyez sur le commutateur
STANDBY/ON pour mettre l’appareil
en service.
1
<L’appareil s’allume sur la dernière source
sélectionnée avant son extinction.
Appuyez sur la touche FUNCTION
pour sélectionner FM ou AM.
2
2 41 3

39
FRANÇAIS
Appuyez sur les touches numériques.
2
Comment rappeler les
stations préréglées (presets)
Appuyez sur la touche FUNCTION
pour sélectionner une bande de
fréquences (FM ou AM).
1
RDS
Le Radio Data System (système de données
radio RDS) est un service de diffusion qui
permet aux stations d’émettre des
informations supplémentaires en même
temps que le signal normal du programme
radio.
Le RDS ne fonctionne que sur la bande
FM en Europe.
Réglez-vous sur une station FM RDS
(voir pour cela les étapes à en
page 36).
Appuyez sur la touche RDS MODE.
Chaque fois que l’on appuie sur la
touche RDS MODE, le mode RDS change
comme suit:
PS (Nom du programme de service)
Quand vous sélectionnez PS, le nom de
la station (PS) est affiché. S’il n’y a pas
de données PS, « NO PS » s’affiche.
PTY (Type de programme)
Quand vous sélectionnez PTY, le type
de programme s’affiche. S’il n’y a pas
de données PTY, « NO PTY » s’affiche.
RT (Radio Texte)
Quand vous sélectionnez RT, les
actualités des stations, composées de
jusqu’à 64 symboles, sont affichées. S’il
n’y a pas de données RT, « NO RT »
s’affiche.
2
31
1
38
Mémorisation de stations (Presets)
Vous pouvez mémoriser 30 stations FM et
10 stations AM.
Réglez-vous sur une station que vous
désirez écouter (voir pour cela les
étapes à en page 36).
Appuyez sur la touche MEMORY.
2
31
1
Dans les 5 secondes, appuyez sur la
touche MEMORY.
4
Dans les 5 secondes, sélectionnez à
l’aide des touches numériques une
mémoire preset où conserver la
station.
3
Pour mémoriser d’autres stations, répétez
les étapes à .
41
Le témoin PRESET et « SET » clignotent à
l’écran.
Pour sélectionner par exemple la
mémoire N°16, appuyez sur « 1 », et
dans les 5 secondes suivantes sur « 6 ».
Pour sélectionner la mémoire N°1 à 9,
appuyez sur « 0 » puis sur le numéro (1 à
9). A titre d’exemple, pour sélectionner le
numéro 3, appuyez sur “0” puis sur
«3».
« P- » et le numéro de preset
clignoteront à l’écran.
Table of contents
Languages:
Other Teac Stereo Receiver manuals