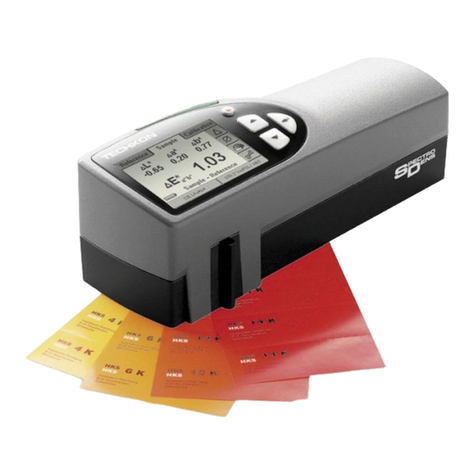
Techkon DENS User manual

Manual
Color-Densitometer
DENS

TECHKON manuals, technical documentation and programs are
copyrighted. Reproduction, translation or transfer to an electronic
medium – in whole or in parts – is prohibited.
TECHKON software is the intellectual property of TECHKON GmbH.
Purchase of the software grants the user a license for the use on one
computer only. Programs may only be copied for back-up purposes.
TECHKON can not be held liable for any damages that may occur by
the use of TECHKON products.
The TECHKON team takes great care in producing this manual. Nev-
ertheless, we can not fully guarantee the complete absence of errors.
TECHKON GmbH and the authors can not be held liable neither for
any possibly incorrect statements nor their consequences.
Products that are not made by TECHKON GmbH are mentioned for
information purposes only and such statements do not represent
trademark infringement. All registered trademarks are recognized.
TECHKON products and product names are registered internationally
under several intellectual patents and trademarks.
Specications can be subject to change without notice.
Version 1.1, May 2016
You can reach us at the following address:
TECHKON GmbH
Wiesbadener Str. 27 • D-61462 Königstein/Germany
T +49 (0) 6174 / 92 44 50 • F +49 (0) 6174 / 92 44 99
info@techkon.com • www.techkon.com

Welcome
We welcome you among the worldwide community of users of TECHKON products.
We are happy that you have selected this high-quality measurement instrument. It will
be a valuable tool for your day-to-day quality control tasks. With this manual we invite
you to learn how to use DENS.
The manual is divided into two chapters:
CHAPTER 1: How to use TECHKON DENS
CHAPTER 2: Description of the measurement functions
For the rst steps we recommend to read chapter 1, in particular paragraph 1.4.
You will be fascinated that after only 5 minutes you will know how to work with DENS.
The second chapter will show you detailed insight into the measurement functions.
Please get the device registered by using the registration card, which you will nd in
the appendix of this manual. That way we can keep you updated about product news.
Please visit us as well on internet at www.techkon.com. You will nd useful information
about the complete product range and a glossary.
Do you have any suggestions for improvements or do you require information that
goes beyond the contents of this manual? We will be glad to hear from you. Your sug-
gestions or questions make an important contribution to the continuous optimization
of our documentation and products.
Your TECHKON Team

Content
CHAPTER 1: How to use TECHKON DENS
1.1 Product description ............................................................................................................................ 5
1.2 Packing list ................................................................................................................................................ 7
1.3 Design of DENS ...................................................................................................................................... 8
1.4 Working with DENS ............................................................................................................................. 9
1.5 Care and maintenance ....................................................................................................................11
CHAPTER 2: Description of the measurement functions
2.1 Measurement function D ..............................................................................................................14
2.2 Measurement function D % .........................................................................................................15
2.3 Measurement function T ...............................................................................................................16
2.4 Measurement function T % ..........................................................................................................16
APPENDIX:
Specications
Manufacturer certicate
EC-Declaration of Conformity
Registration card

5
CHAPTER 1 – How to use TECHKON DENS
Chapter 1
How to use TECHKON DENS
1.1 Product description
DENS is an all-purpose, modern measurement device and the result of 30 years of
experience we have as a long-established company in the development and manu-
facture of high-quality spectral measurement technology.
DENS was designed by applying our four powerful principles for perfect measurement
devices:
Easy and fast to use
High measurement accuracy
Solid and reliable
Functional and attractive design
The new TECHKON DENS unies three devices in one. It is a color reection densi-
tometer for CMYK color prints, a lm transmission densitometer and a high-precision
illuminated magnifying glass for the visual control of printing results.
This cost eective entry-level instrument allows everyone to perform a fundamental
densitometric quality control on the basis of the reliable high accuracy well-known
from all TECHKON instruments.
The DENS indicates densities, dot area and gray balance clearly legible on a large color
display. Automatic color and gray balance detection speeds up the measuring. In ad-
dition the device is easily operated by only three buttons. The whole measurement is
provided in a split of a second.
LED technology, durable and energy-saving, is used as light source. A multi-channel
color sensor evaluates the measuring signal guaranteeing inter-instrument agreement
with high-class spectrophotometers.
The integrated Li-Ion battery can be recharged very fast via the USB cable on any USB
port and delivers energy for a few thousand measurements.
To meet the demands of a printing rooms harsh environment, the compact casing of
the DENS is made of solid aluminum and is therefore very robust. Despite its solidity,
the device weights only 330 g and due to its ergonomic and elegant design it is easy
to handle.

6
Manual TECHKON DENS
High-quality multi-channel color
sensor
Patented measurement head for
exact and direct positioning
Fast measurement (approx. 0.5 sec.)
LED technology
Polarization lter (in version DENS
Status ISO E / Pol)
Rechargeable, high-capacity battery
with quick recharge power manage-
ment for up to 10.000 measurements
per battery charge
The advantages of TECHKON DENS at a glance
USB-port for easy battery charging
Large color display
Self-explanatory operation
Automatic measurement function dis-
plays always the relevant values
Ergonomically positioned, user-friendly
measurement button
Durable precision
Handy and compact, low weight
Well-designed
Two dierent versions
We supply TECHKON DENS in two device versions:
DENS Status ISO E / Pol
Density lter according ISO Status E with polarization lter (European standard)
Polarization lters compensate for measurement dierences between freshly printed
and dried sheets. The technical standards in Europe recommend the use of such a
lter for densitometric measurements.
DENS Status ISO T / no Pol
Density lter according ISO Status T without polarization lter (North American stan-
dard)
Functions
Automatic density measurement in reection and transmission Gray balance Dot
area in reection and transmission High-precision, lit magnier with 4 x magnica-
tion.

7
CHAPTER 1 – How to use TECHKON DENS
1.2 Packing list
Contents of delivery
Measurement device DENS
Package with foam insert
USB cable for battery charging
Short manual
A comprehensive DENS manual can be downloaded under:
www.techkon.com/index.php/dens.html
Optional accessories
Print Control Strip TECHKON TCS
(the Digital Print Control Strips TECHKON TCS can be downloaded
free of charge at www.techkon.com
Replacement parts
Rechargeable battery
You will nd the technical specications in the appendix of this manual.

8
Manual TECHKON DENS
1.3 Design of DENS
DENS is a solidly designed measurement device which is very functional and easy to
use. It is compact in size; the buttons can be reached with the index nger when the
device is held. The display is clearly legible and a great advantage of DENS is, that it can
be easily positioned on the measurement sample.
The USB-connector is for battery charging. The mini-USB plug, which ts into the con-
nector at the side of the device, is part of the package.
KCMY 80%40% 0KCMY K CMY80% 40% 0KCKCKCMY K CMYK CMY
BAL BAL
C+M
BAL BAL
C+Y
MY BAL
M+Y
BAL 0 BAL K
5%
4%
3%
2%
80% 40% 80% 40% 80% 40% 80% 40% 80% 40%
MODE
D = Density and gray balance in reection
D % = Dot % in reection
T = Density in transmission
T % = Dot % in transmission
CAL
Paper- or absolute
white calibration
DENS
On
Measurement
DENS turns automatically o
after one minute of inactivity
Battery charge condition
Measurement head with 2.5 mm aperture
Display of the measured color
USB port for chargings
Magnier
Device label with
serial number
Light button LENS
of the magnier

9
CHAPTER 1 – How to use TECHKON DENS
1.4 Working with DENS
Switching on and o
The device is switched on by pressing the DENS button and is immediately ready to
measure. DENS will display the last measurement done before turning-o.
If no button is pressed within one minute, the device will switch o automatically.
Switching it on again is easily done with the DENS button. There is no button to turn
the device o.
The precision magnier is used by placing it on the spot to be checked and pressing
the LENS button to activate the light. As long as the LENS button is pressed the magni-
er will be lit. This functionality is independent from the DENS being turned on or o.
Charging
The battery status is displayed as a battery symbol with three segments in the lower
right corner of the display, when the device is turned on.
When the battery turns empty, the last remaining segment of the battery symbol
starts to ash. In this state several measurements still can be obtained, but it is time to
recharge the battery.
Charging starts automatically by connecting the DENS to a PC or another USB power
source. When the three segments of the battery symbol are indicated statically, the
charging is completed and the battery is fully charged. Up to 10.000 measurements
can be carried out with one battery charge.
Completely charging an empty battery will take approximately four hours. DENS has a
regulated charging management. This means it will power-charge an empty battery,
so the device can be used again after a few minutes. On the other hand, there is no
overcharging of full batteries.

10
Manual TECHKON DENS
How to measure
After switching DENS on, it is instantly ready to measure. Just position the measure-
ment aperture on top of the measurement sample and press shortly with the index
nger the DENS button. Within less than one second the resulting measurement value
will appear on the display of the device.
Please ensure that the device always has a rm stand on a at surface. There must not
be a distance between the measurement head and the sample where light could pass
through, because this can inuence the measurement.
The color of the background material underneath the measurement sample can have
an inuence on the measurement result. Dierent technical standards describe which
backing material to use. In the printing industry the following procedure is widely used:
white backing for proofs and
black backing for prints.
Calibration
Prior to every series of measurements a calibration should be carried out. After a cali-
bration the device is long term stable, however it is recommended to perform a cali-
bration before starting a new measurement task just to be sure the device is working
properly.
For density measurements according to Status ISO E / Pol the calibration is carried out
on paper white. This will ensure that the density values are in direct ratio to the ink
thickness which is applied on the paper. When there is a change in the paper type, a
new calibration has to be done.
When a calibration according to Status ISO T / no Pol is carried out an absolute white
standard is used (see enclosed reference card).
For dot % measurements in transmission a calibration is done on a unexposed spot of
the lm to be sure, that no “veil” on the lm will falsify the dot % value.
A calibration is as easy to carry out as a measurement: Place the measurement head
on top of a blank area of the paper sheet or the absolute white standard. The calibra-
tion can be started now by pressing the CAL button. A successful calibration will be
indicated be three horizontal lines. The device is now ready for measurements.
During the calibration process always take care that the instrument is on a at, stable
surface and that the material backing the paper is the same as for the following mea-
surements (white, gray or black). When the paper sample is printed on both sides, it
is recommended to use a black backing material in order to avoid mismeasurements
due to color shining through the back of the opaque paper.

11
CHAPTER 1 – How to use TECHKON DENS
1.5 Care and maintenance
DENS is a highly-precise optical instrument. It is designed to work in harsh, industrial
environments. However, it should be handled with care. Avoid mechanical shocks,
heat, dusty or humid environments.
Cleaning
The measurement head with the optical system is sealed against dust and dirt. Take
nevertheless care that the visible, open measurement aperture is always free of dust.
You can clean the measurement aperture with oil-free, clean compressed air and a
brush used for cleaning photographic equipment.
Clean the device casing and the display window only with a soft cloth and a non-
aggressive plastic cleaner. Never use alcohol or chemically aggressive solvent-based
cleaners which can destroy the surfaces.
Please do not stick any labels at the bottom of the device. This could lead to faulty
measurements, because the direct contact – which is important for the correct optical
eld of depth – might not be maintained
Warranty
The warranty for TECHKON products is 24 months starting with the date of purchase.
The invoice is the certicate of warranty. The warranty is invalid if the damage is caused
by inadequate use of the device.
Should a TECHKON product do not work according to the specication, please contact
us before sending us the device. In most cases we can solve the problem over the
phone or via E-mail.
Inspection intervals
TECHKON DENS is maintenance free. We recommend to validate the complete func-
tionality of the devices in a 24 months time interval in the TECHKON service cen-
ter.
Please send the device always securely in the original packing. For a at fee the device
will be cleaned, checked and recalibrated. In case a repair or exchange of components
should be necessary we will inform you in advance.

12
Manual TECHKON DENS
1. Unscrew the three TORX™ screws on the
device bottom and remove the upper device
case.
2. Unscrew the two TORX™ screws of the bat-
tery holder and remove the holder.
3. When exchanging the battery take care of
the correct position of the battery contacts.
Ret the battery holder to the circuit board
and nally x the device case.
4. When reassembling do not tighten the
screws too much otherwise they might break.
Replacement of the rechargeable battery
The rechargeable Li-Ion battery has a high lifespan. However, after a certain time it will
loose its capacity and it will make sense to replace it.
Only use original TECHKON DENS replacement batteries. The use of other batteries is
hazardous.
For opening the battery case you will need a TORX™ screwdriver type 6.
Place the instrument upside down and put a soft cloth underneath the display to
avoid any scratches.

13
CHAPTER 1 – How to use TECHKON DENS
Device adjustment
Should DENS show deviations to other devices, rst check, if the instrument settings
are correct. Especially the settings of the Density adjustment (SLOPE) inuence the
measurement result.
Setting of the Density adjustment (SLOPE)
With the SLOPE correction values it is possible to adjust DENS to the density values
of other devices.
1. Press the CAL button for 5 seconds. The de-
vice switches into the Slope calibration mode.
2. Place the measurement head on the white
patch of the reference and press the CAL but-
ton.
3. Place the measurement head on the Cyan
solid density patch of the reference and press
the DENS button.
4. The desired value can be set respectively
by pressing the DENS button = + or MODE
button = - and be stored by pressing the CAL
button.
Only values from 0.80 to 2.50 are selectable.
The increment is 0.01. When exceeding 2.50
you get to the lowest possible value of 0.80.
When undercutting 0.80 you get to the high-
est possible value of 2.50.
5. Repeat the steps 2 to 4 analog for the Ma-
genta, Yellow and Black solid density patch.
When all colors are captured the device cal-
culates the SLOPE correction values, quits the
SLOPE calibration and switches automatically
into the D-mode.

14
Manual TECHKON DENS
Measurement on solid density patches:
In this example the measurement has been
taken on a Yellow solid density patch.
DENS recognizes the type of process color
and displays it as a color patch symbol.
The density value is a value without a unit.
It corresponds to the amount of ink applied
on the paper surface. The higher the density
value the higher the thickness of the ink layer.
The correct density value is dependent on
the printing parameters (paper, ink, printing
process). Usually, density values are between
1.00 and 2.00.
Chapter 2
Description of the measurement functions
The current measurement function is indicated on the right side of the display. A
switch to the next mode is done by pressing the MODE button. Thus the measure-
ment functions D, D %, T and T % can be selected.
2.1 Measurement function D: Automatic density and gray
balance measurement in reection
TECHKON DENS comprises the essential functions related to density measurement. A
very practical feature is the Automatic Density mode. By a push of the DENS button
the relevant measurement values are displayed. Depending on the type of measure-
ment patch this can be:
Solid density D with automatic color detection Gray balance
KCMYSLUR C+M KCMY
1
80%40% BAL
2

15
CHAPTER 2 – Measurement functions
When making a measurement on a gray bal-
ance patch, the referring density values for all
four process colors are shown. The values for
Cyan, Magenta and Yellow should be in close
range to each other to ensure a neutral gray
balance without a color hue.
It is important that the gray balance patch, on
which the measurement is taken, comprises
the right %-values to achieve a neutral gray
when printed correctly. The process standard
ISO 12647 for oset print denes the values as:
C = 50 %,
M = 40 % and
Y = 40 %.
The value for Black indicates how dark the
gray color is. The higher the value for Black
(= K) the darker the sample.
Measurement on a gray balance patch:
Rolling display of the single CMYK values one
step every second.
A gray balance patch is composed of dierent
portions of Cyan, Magenta and Yellow. It does
not include black ink.
1. Measurement 2. Measurement
2.2 Measurement function D %: Dot area measurement
in reection
For the function Dot Area (= dot percentage) two measurements have to be carried
out. First a measurement on a solid patch and then a measurement on a %-patch
(= screen patch). The dot area value is calculated with the Murray-Davies formula.
To capture the dot area in %, rst the solid
density patch of the color has to be measured.
1. Place the measurement head above a solid
patch and start the measurement by pressing
the DENS button. The solid density value will
be displayed.
2. Now make a second measurement on a %
patch and the dot area in % will be shown.
In this case a measurement has been taken on
solid density and a 80 %-patch of Cyan. The
eective dot area is 93.4 %.
The resulting dot gain can be easily calcu-
lated: 93.4 % - 80 % = 13.4 %
KCMYSLUR C+M KCMY
1
80%40% BAL
2
C
MY K CMY80% 40% 0BAL C+M BALS/D

16
Manual TECHKON DENS
2.3 Measurement function T: Density measurement
in transmission
T mode measures the densities in transmission.
Density measurement in T mode:
1. Select the T mode with the MODE button.
2. If necessary do a calibration without lm by
pressing the CAL button.
3. Position the device on the measurement
patch selected.
4. Start the measurement with the DENS but-
ton.
The measurable density in transmission de-
pends on the luminosity of the light table. Av-
erage bright light tables allow you to measure
densities up to D = 4.00 and over.
Please note: The emulsion side of the lm has
to be always on the upper side.
2.4 Measurement function T %: Dot % measurement
in transmission
T % mode measures the screen densities in transmission.
Measurement of dot percentage values:
1. Select the T % mode with the MODE but-
ton.
2. If necessary do a calibration on lm (0 %)
with the CAL button.
3. Position the device on the measurement
patch selected.
4. Start the measurement by pressing the
DENS button.
Please note: The emulsion side of the lm has
to be always on the upper side.

Specications may be subject to change without notice. All mentioned trademarks and copyrights are recognized.
SpectroPlate, SpectroDens, SpectroJet, SpectroDrive, SpectroCheck, InkCheck, DENS and TECHKON are registered trade-
marks of TECHKON GmbH.
Specications
Measurement technology Multi-channel color sensor, color density
determination to ISO 5-3
Measurement geometry 45°: 0° optics
Measurement aperture 2.5 mm
Light source LED
Polarization lter Twice linear crossed (ISO E)
optional no polarization lter (ISO T)
Measurement time 0.5 seconds per measurement
White reference Relative (ISO E) or absolute (ISO T)
Density lter ISO E (with polarization lter) optional
ISO T (without polarization lter)
Density measurement range 0.00 – 2.50 D in reection,
0.00 – 4.00 D in transmission
Repeatability 0.01 D
Inter-instrument agreement 0.01 D
Display Backlight color display
Magnier 4 x magnication, lit
Power supply Rechargeable Li-Ion battery, regulated recharge
via USB cable, up to 10.000 measurements per
battery charge, battery level control
Weight 330 grams
Dimensions 32 x 68 x 175 mm (approx. 1.3 x 2.7 x 6.9 inches)
Versions DENS Status ISO E / Pol and DENS Status ISO T / no Pol: see page 6
Contents of delivery and spare parts: see page 7
Appendix

Manufacturer certicate
applicable for ISO 9000 documentation
DEVICE: Densitometer TECHKON DENS
SERIAL NUMBER:
MANUFACTURER: TECHKON GmbH • Wiesbadener Str. 27 • D-61462 Königstein
Telephone: +49 (0)6174 9244 50 • Telefax: +49 (0)6174 9244 99
[email protected] • www.techkon.com
CERTIFICATION: The device is compliant with EU directive 89/336/EWG con-
cerning the electromagnetic compatibility EMC and is pro-
vided with the CE label. The device is RoHS compliant.
MAINTENANCE: The device is maintenance free. The measurement aperture
has to be kept clean from dust. It can be cleaned with clean,
compressed air and an optics brush.
We recommend a functionality check-up every 24 months at
the TECHKON service center, which includes the issue of a new
Manufacturer certicate.
WARRANTY: The warranty for TECHKON products is 24 months starting
with the date of purchase. The warranty is invalid if the damage
is caused by improper use of the device. Only original
TECHKON spare parts and accessories are to be used.
RECYCLING: The device is according to §14 ElektroG registered under the
EAP no.: DE 98280049. Devices for disposal can be sent directly
to the manufacturer.

CALIBRATION: The integrated multi-channel color sensor is calibrated by a
white calibration. After performing a white calibration the
device is long term stable. We recommend to make a white
calibration before every measurement series, to ensure the
device is calibrated correctly.
STANDARDS: The measurement device is manufactured according to the
recommendations of the technical standards DIN 5033 part
1-9, CIE and ISO 5-3.
The accuracy of the device is checked during the manufactur-
ing by spectral measurements on color samples which were
measured and certied by the German Institute for Material
Testing (Bundesanstalt für Materialprüfung, BAM).
The calculation of densitometric values is according to the for-
mulas and tables of ISO 5-3 and the handbook of standardiza-
tion of the German Printing and Media Industries Federation
(Bundesverband Druck und Medien e. V.) and Fogra (For-
schungsgemeinschaft Druck e. V.).
Place Date Signature
D-61462 Königstein

EU-Konformitätserklärung
EC Declaration of Conformity
Déclaration de Conformité de la CE
Dichiarazione di conformità CE
Hersteller: TECHKON GmbH
Manufacturer / constructeur / costruttore
Adresse: Wiesbadener Str. 27
Address / adresse / indirizzo
erklärt, dass die Produkte:
Declares that the products / déclare, que le produits / si dichiara che il prodotto
Typ: DENS
Type / tipo
Verwendungszweck: Farbmessungen
Intended use / utilisation prévue / Color measurements / mesure de la
uso previsto couleur / misurazione del colore
bei bestimmungsgemäßer Anwendung den grundlegenden Anforderungen
gemäß EU-Richtlinie 2004/108/EC entspricht und dass die folgenden Normen
angewandt wurden:
complies with the essential requirements of the 2004/108/EC Directive, if used for its intended
use and that the following standards has been applied: / répond aux exigences essentielles de
l'article 3 de la directive 2004/108/EC, prévu qu’il soit utilisé selon sa destination, et qu’il répond
aux standards suivants: / soddisfa tutti i requisiti della direttiva 2004/108/EC qualora venga utiliz-
zato per l’uso previsto e che le seguenti norme siano applicate:
angewendete Norm: EN 55022:2006
Applied standard / standard appliqué /
norma applicata issue / édition pubblicato
D-61462 Königstein
Ausgabe: 2008-05
+A1: 200
EN 55024
Ausgabe: 2003-01
1998+A1:2001
+A2:2003
Table of contents
Other Techkon Measuring Instrument manuals
Popular Measuring Instrument manuals by other brands

AVTECH ELECTROSYSTEMS LTD.
AVTECH ELECTROSYSTEMS LTD. AVO-9W-B-P-P2D instructions
Blue Technix
Blue Technix Argos3D - P22X Series quick start guide

AirPro
AirPro AP500 Operation user's manual
Long-run
Long-run LRF-3000H user manual
B+K precision
B+K precision CP62 user manual
protech
protech TD2082 user manual
