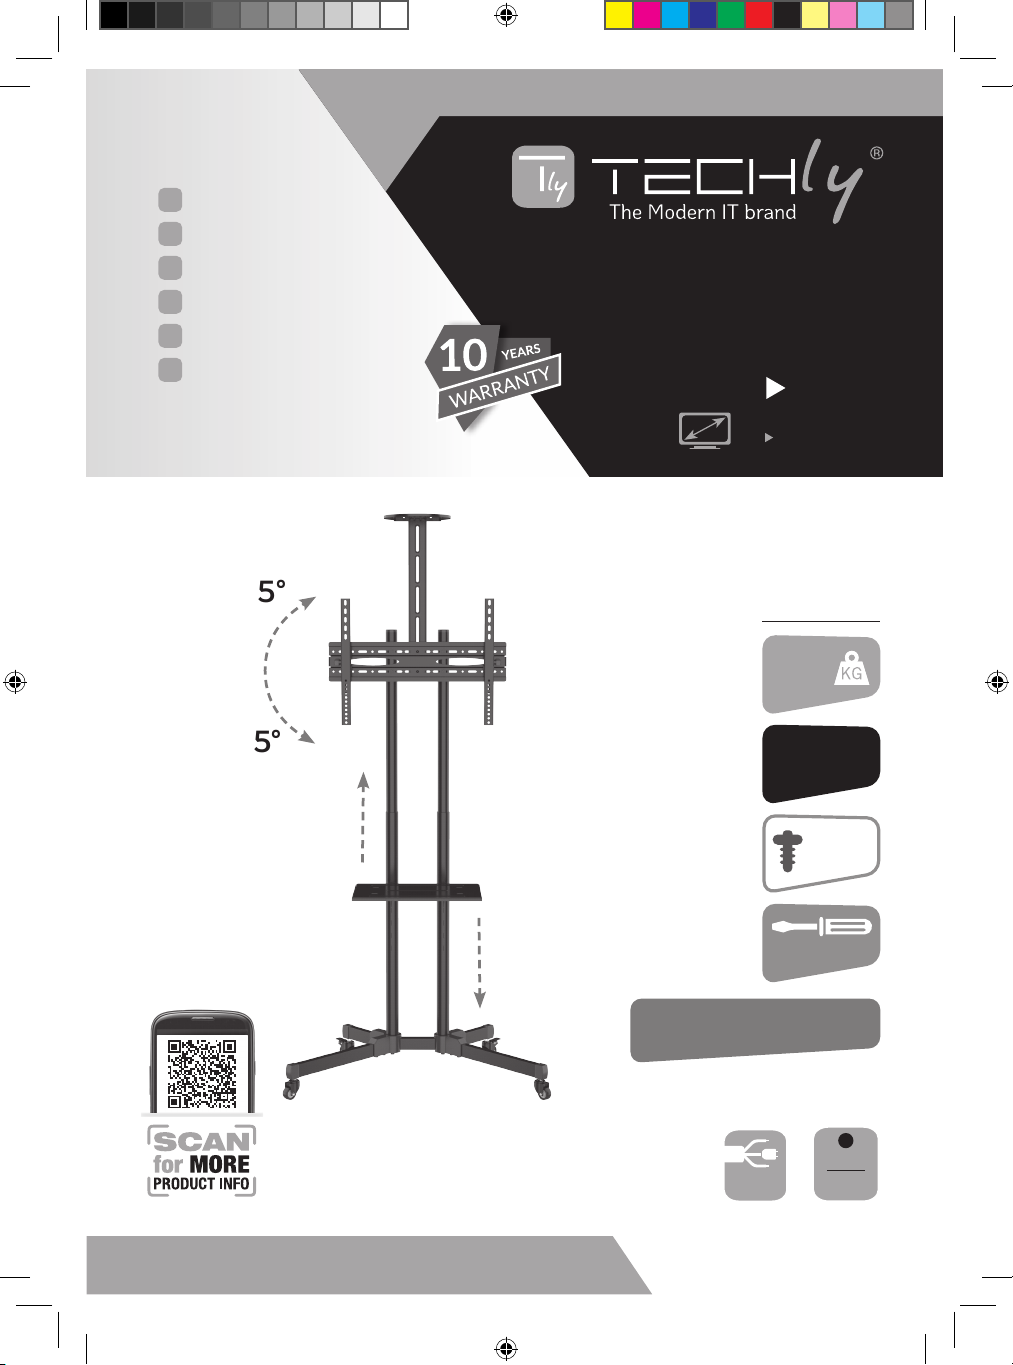
Techly ICA-TR216T User manual

P/N: ICA-TR216T
8059018364477
50
110 lb
CART 100
standard vesa
600x400 MAX
Technical features
hardware
included
easy installation
32” 70”
81 178 cm
BLACK
Color
MOBILE TV CART
Cable
Management
WWW.TECHLY.COM
EN User's Manual
IT Manuale d’istruzione
DE Bedienungsanleitung
FR Mode d’emploi
ES Manual de instrucciones
PL Instrukcja użytkownika
-15°
+15°
ICA-TR216T manuale 148x210 mm bn 09_2022.indd 1ICA-TR216T manuale 148x210 mm bn 09_2022.indd 1 06/09/22 15:4006/09/22 15:40

CAUTION:
Be very careful
during the assembly. If the
mount is not properly installed
it may fall, resulting in possible
injury and/or damage. Respect
the maximum weight limitation printed on the box.
ATTENZIONE:
Prestate molta
attenzione durante la fase di
montaggio. Se il montaggio non è
stato effettuato in modo corretto
e stabile ciò potrebbe causare la
caduta della staffa, determinando lesioni o danni a
cose e persone. Rispettare tassativamente il peso
massimo dell’apparecchiatura supportata indicato
sulla confezione.
ACHTUNG:
Seien Sie sehr
vorsichtig bei der Montage.
Wird die Montage nicht auf
korrekte und stabile Weise
durchgeführt, könnte dies zum
Herunterfallen der Halterung und dadurch zu
Sach- oder Personenschaden führen.
Beachten Sie unbedingt das auf der Verpackung
angegebene Höchstgewicht des Geräts.
MOBILE TV CART
IT
Gentile Cliente,
grazie per aver scelto un prodotto
Techly.
Istruzioni disimballaggio
• Aprire il cartone con cura, rimuovere il
contenuto e distenderlo su un cartone o altro
materiale protettivo per evitare danni.
• Vericare che il contenuto della confezione
corrisponda alla lista delle parti nella
pagina successiva per assicurarsi che tutti
i componenti siano presenti e non siano
danneggiati. Non utilizzare parti difettose o
danneggiate.
• Leggere attentamente le istruzioni riportate
nel presente manuale prima di procedere
all’installazione.
• Tenere sempre questo manuale per future
consultazioni.
Importanti informazioni sulla sicurezza
Leggere cortesemente le istruzioni prima
di cominciare l’installazione e seguire
scrupolosamente tutte le indicazioni contenute
qui. Utilizzare adeguati dispositivi di sicurezza
durante l’intallazione.
Contattare del personale qualicato per effettuare
l’installazione:
• Se non avete compreso le indicazioni
contenute in questo manuale o avete dei dubbi
in merito alla sicurezza dell’installazione.
Non utilizzate il prodotto per uno scopo o in una
congurazione non espressamente specicata
in queste istruzioni. Si declina qualsiasi
responsabilità per danni derivanti da un errato
assemblaggio, errato montaggio o uso non
corretto del prodotto.
Al termine delle operazioni di montaggio
assicurarsi che il tutto sia stato effettuato a regola
d'arte.
EN
Dear Customer,
thanks for choosing a Techly product.
Unpacking Instructions
• Carefully open the carton, remove contents
and lay out on cardboard or other protective
surface to avoid damage.
• Check package contents against the Supplied
Parts List in the next page to assure that all
components were received undamaged. Do
not use damaged or defective parts.
• Carefully read all instructions before attempting
installation.
• Please keep this user's manual for future
consultations.
Important Safety Information
Please read this instruction before beginning
the installation, and carefully follow all herein
contained recommendations. Use proper safety
equipment during installation.
Please call a qualied installation contractor for
help if you:
• Don't understand these directions or have any
doubts about the safety of the installation.
Do not use this product for any purpose or in
any conguration not explicitly specied in this
instruction. We hereby disclaim any and all
liability for injury or damage arising from incorrect
assembly, incorrect mounting, or incorrect use of
this product.
At the end of the installation make sure the
procedure was correctly observed.
DE
Sehr geehrter Kunde,
danke, dass Sie sich für ein Produkt
von Techly entschieden haben.
Anweisungen zum Auspacken
• Öffnen Sie den Karton vorsichtig, entnehmen
Sie den Inhalt und breiten Sie ihn auf einem
Karton oder anderem schützenden Material
aus, um Schäden zu vermeiden.
• Überprüfen Sie, ob der Inhalt der Verpackung
der Teileliste auf der nächsten Seite
entspricht, um sicherzustellen, dass alle
Bauteile vorhanden und nicht beschädigt
sind. Verwenden Sie keine defekten oder
schadhaften Teile.
• Lesen Sie, bevor Sie mit der Installation
beginnen, die Anweisungen in dieser Anleitung
aufmerksam durch.
• Bewahren Sie diese Anleitung zum späteren
Nachschlagen stets auf.
Wichtige Informationen zur Sicherheit
Lesen Sie vor der Installation bitte alle Anweisungen
und befolgen Sie alle hier enthaltenen Angaben
genau. Verwenden Sie bei der Installation
geeignete Sicherheitsvorrichtungen.
Wenden Sie sich in den folgenden Fällen zum
Ausführen der Installation an Fachleute:
• Wenn Sie die in dieser Anleitung enthaltenen
Angaben nicht verstanden haben oder Zweifel
hinsichtlich der Sicherheit der Installation
haben.
Verwenden Sie das Produkt nicht für Zwecke
oder in einer Konguration, die in dieser Anleitung
nicht ausdrücklich genannt werden. Jegliche
Haftung aufgrund von Schäden durch fehlerhaften
Zusammenbau, falsche Montage oder unkorrekte
Verwendung des Produkts ist ausgeschlossen.
Nach den Montagevorgängen sicherstellen, dass
alle Schritte fachgerecht ausgeführt wurden.
2
WWW.TECHLY.COM
ICA-TR216T manuale 148x210 mm bn 09_2022.indd 2ICA-TR216T manuale 148x210 mm bn 09_2022.indd 2 06/09/22 15:4006/09/22 15:40

ATENCIÓN:
Tenga mucho
cuidado durante el montaje.
Si el montaje no ha sido
realizado de manera correcta y
estable, esto podría provocar la
caída del estribo, provocando lesiones o daños a
cosa y personas.
Respeten imperativamente el peso máximo del
aparato suportado que se indica en la caja.
UWAGA:
Należy być bardzo
ostrożnym podczas montażu.
Niewłaściwie zamontowany
może spaść powodując
uszkodzenia oraz zagrożenie.
Przed rozpoczęciem montażu upewnij się, że
ściana jest do tego odpowiednia. Przestrzegaj
informacji o maksymalnym obciążeniu uchwytu
podanym na opakowaniu produktu.
ATTENTION:
Soyez très
prudent lors du montage.
Si le montage n'a pas été
effectué correctement et n'est
pas stable le support pourrait tomber et provoquer
des lésions ou des dégâts à des choses ou à des
personnes.
Respecter le poids maximum de l'appareil
supporté mentionné sur l'emballage.
MOBILE TV CART
FR
Cher Client,
nous vous remercions d'avoir choisi un
produit Techly.
Instructions de désemballage
• Ouvrir l'emballage avec soin, vider le carton et
poser le contenu sur un carton ou tout autre
matériel de protection pour éviter des dégâts.
• Vérier que le contenu du carton correspond
à la liste des pièces de la page suivante,
s'assurer que toutes les pièces sont présentes
et ne sont pas endommagées. Ne pas utiliser
de pièces défectueuses ou endommagées.
• Lire attentivement les instructions du présent
manuel avant d'effectuer l'installation.
• Conserver le manuel pour une consultation
future.
Informations importantes sur la sécurité
Installer et utiliser ce produit avec soin.
Lire les instructions avant de commencer
l'installation et suivre scrupuleusement les
indications mentionnées. Utiliser des dispositifs
de sécurité adéquats pendant l'installation.
Contacter du personnel qualié pour effectuer
l'installation:
• Si vous n'avez pas compris les indications
présentes dans ce manuel ou si vous avez
des doutes en ce qui concerne la sécurité de
l'installation.
Ne pas utiliser le produit pour un usage ou
une conguration non spéciée dans ces
instructions. Nous déclinons toute responsabilité
pour des dégâts qui seraient dus à une erreur
d'assemblage, une erreur de montage ou une
utilisation incorrecte du produit.
Au terme des opérations de montage s'assurer
que tout a été fait dans les règles de l'art.
ES
Estimado Cliente,
gracias por haber elegido un producto
Techly.
Instrucciones desembalaje
• Abrir el cartón prestando mucha atención,
quitar el contenido y apoyarlo en un cartón
u otro material de protección para evitar
perjuicios.
• Controlar que el contenido del suministro
corresponda a la lista de las partes en la
página siguiente para asegurarse que todos
los componentes estén presentes y no
dañados. No utilizar partes defectuosas o
dañadas.
• Leer detenidamente las instrucciones que se
encuentran en este manual antes de seguir
con la instalación.
• Guardar este manual para consultas futuras.
Importantes informaciones de seguridad
Instalar y utilizar este producto con cura.
Leer detenidamente las instrucciones antes
de empezar con la instalación y seguir
escrupulosamente todas las indicaciones que se
encuentran aquí. Utilizar dispositivos de seguridad
adecuados durante la instalación.
Contactar el personal calicado para efectuar la
instalación:
• Si no han entendido las indicaciones que se
encuentran en este manual o tienen dudas
acerca de la seguridad de la instalación.
No utilicen el producto para un objetivo o en una
conguración
no especicada expresamente en estas
instrucciones. Se rehúsa todo tipo de
responsabilidad por daños procedentes de un
ensamblaje equivocado, un montaje equivocado
o un uso no correcto del producto.
Na vez terminadas las operaciones de montaje
asegurarse que todo haya sido realizado
perfectamente.
PL
Szanowny Kliencie,
dziękujemy za wybór produktów
Techly.
Rozpakowywanie
• Ostrożnie otwórz opakowanie, wyjmij jego
zawartość i rozłóż na kartonie lub innej
powierzchni, która zapobiegnie uszkodzeniu
elementów oraz podłoża.
• Sprawdź zawartość opakowania z załączoną
na następnej stronie listą elementów
upewniając się, że żaden z nich nie jest
uszkodzony. Nie należy używać wadliwych
elementów.
• Przed rozpoczęciem montażu przeczytaj
uważnie instrukcję.
• Zachowaj niniejszą instrukcję na przyszłość.
Ważne informacje dotyczące bezpieczeństwa
Przeczytaj niniejszą instrukcję przed rozpoczęciem
montażu oraz stosuj się do zawartych w niej
wskazówek. Używaj narzędzi zapewniających
bezpiecze
ń
stwo
.
Zasięgnij porady u autoryzowanego źródła jeśli:
•
Nie rozumiesz niniejszej instrukcji lub masz
wątpliwości dotyczące bezpieczeństwa
podczas montażu.
Nie używaj tego produktu do jakichkolwiek innych
celów niż jest przeznaczony. Producent nie ponosi
żadnej odpowiedzialności za szkody powstałe w
wyniku niewłaściwego montażu oraz za szkody
powstałe w wyniku wykorzystania produktu
niezgodnie z przeznaczeniem.
Na koniec upewnij się, że podczas montażu
postępowałeś zgodnie z instrukcją.
3
WWW.TECHLY.COM
ICA-TR216T manuale 148x210 mm bn 09_2022.indd 3ICA-TR216T manuale 148x210 mm bn 09_2022.indd 3 06/09/22 15:4006/09/22 15:40

M8 x 16 mm M6x12mm M6 M8 x 60 mm M10 x 35 mm ø 30 x ø 10 mm
A x2 B x4 C x12 D x2 E x2
ø 20 x ø 8 mm ø 20 x ø 10 mm M14~M17 M6 Metal clip
F x12 F1 x4 G x4 H x1 I x1 J x1
Metal
clip
DVD shelf Support bracket Mounting frame Mounting bracket
(Left)
Mounting bracket
(Right)
K x1 L x1 M x1 N x1
O
x1
O1
x1
Base poles Poles M8 Allen key Cart Base (Rear) Cart Base (Front) Wheels (Locking)
P1
x2
P2
x2 Q x1 R x2 S x2 T x2
Wheels
(Common)
M8 Nut Plugs Streaming box
tray
Base Plastic cover
T1
x2
U
x12
U1
x2 V x1 W x1 X x2
M8 x 25 mm M6 x 25 mm M5 x 20 mm M4 x 20 mm
Aa
x4
Ab
x4
Ac
x4
Ad
x4
Spacer (10 mm) Spacer (12 mm) ø 22 x ø 8x ø 1,5 mm ø 18 x ø 6x ø 1,5 mm
Ae
x4
Af
x4
Ag
x4
Ah
x4
www.techly.comwww.techly.com
D8 PLASTIC
D8 Washer
MOBILE TV CART
4
WWW.TECHLY.COM
ICA-TR216T manuale 148x210 mm bn 09_2022.indd 4ICA-TR216T manuale 148x210 mm bn 09_2022.indd 4 06/09/22 15:4006/09/22 15:40

MOBILE TV CART
1
EN
ASSEMBLY OF THE BASE
Attach the R (rear x2 ) and S (front x2 ) to frame W (center), as shown below. Use screws C (x8), washers F (x8) and U (x8)
nuts. Use the H (x1) and I (x1) keys to assemble, and tighten with wrenches I (x1) and H (x1). Make sure that the assembly
is rmly locked. Then Fasten casters T and T1 to legs
IT
MONTAGGIO DELLA BASE
Attaccare la R (posteriore x2) e la S (anteriore x2) al telaio W (centro), come mostrato di seguito. Utilizzare viti C
(x8), rondelle F (x8) e dadi U (x8). Utilizzare le chiavi H (x1) e I (x1) per il montaggio e serrare con le chiavi I (x1) e H
(x1). Assicurarsi che il gruppo sia saldamente bloccato. Quindi ssare le rotelle T e T1 alle gambe.
DE
MONTAGE DER BASIS
Befestigen Sie R (hinten x2) und S (vorne x2) am Rahmen W (Mitte), wie unten gezeigt. Verwenden Sie Schrauben
C (x8), Unterlegscheiben F (x8) und U-Muttern (x8). Verwenden Sie zum Zusammenbauen die Schlüssel H (x1) und
I (x1) und ziehen Sie sie mit den Schraubenschlüsseln I (x1) und H (x1) fest. Achten Sie darauf, dass die Baugruppe
fest verriegelt ist. Befestigen Sie dann die Laufrollen T und T1 an den Beinen.
FR
ASSEMBLAGE DE LA BASE
Fixez R (arrière x2) et S (avant x2) au cadre W (centre), comme illustré ci-dessous. Utiliser les vis C (x8), les
rondelles F (x8) et les écrous U (x8). Utilisez les clés H (x1) et I (x1) pour assembler, et serrez avec les clés I (x1) et
H (x1). Assurez-vous que l'ensemble est bien verrouillé. Fixez ensuite les roulettes T et T1 aux pieds.
ES
MONTAJE DE LA BASE
Fije la R (parte trasera x2) y la S (parte delantera x2) al marco W (centro), como se muestra a continuación. Utilice
tornillos C (x8), arandelas F (x8) y tuercas U (x8). Utilice las llaves H (x1) e I (x1) para ensamblar y apriete con las
llaves I (x1) y H (x1). Asegúrese de que el conjunto esté rmemente bloqueado. Luego je las ruedas T y T1 a las
patas.
PL
MONTAŻ PODSTAWY
Przymocuj R (tył x2 ) i S (przód x2 ) do ramy W (środek), jak pokazano poniżej. Użyj śrub C (x8), podkładek F (x8)
i nakrętek U (x8). Do montażu użyj kluczy H (x1) i I (x1) i dokręć kluczami I (x1) i H (x1). Upewnij się, że zespół jest
mocno zablokowany. Następnie przymocuj kółka T i T1 do nóg.
5
WWW.TECHLY.COM
Cx8
Ux8
Fx8
H
T1
S
R
T
T1
S
R
T
I
W
ICA-TR216T manuale 148x210 mm bn 09_2022.indd 5ICA-TR216T manuale 148x210 mm bn 09_2022.indd 5 06/09/22 15:4006/09/22 15:40

MOBILE TV CART
2
EN
ASSEMBLY OF THE VERTICAL STRUCTURE
Before installing the poles (P1) in the structure of the base, attach the covers (X) plastics to cover the screws and provide
a better visual nish. Then align and snap the poles (P1), so that the cutouts for shelf facing forward of the assembly.
Then insert poles (P2) into base pole (P1) ,Please make sure holes align with each other until spring pins pop up.
IT
MONTAGGIO DELLA STRUTTURA VERTICALE
Prima di installare i pali (P1) nella struttura della base, applicare i coperchi (X) in plastica per coprire le viti e fornire
una migliore nitura visiva. Quindi allineare e far scattare i poli (P1), in modo che i ritagli per il ripiano siano rivolti
in avanti rispetto al gruppo.
Quindi inserire i poli (P2) nel palo di base (P1), assicurarsi che i fori siano allineati tra loro no a quando i perni a
molla non si aprono.
DE
MONTAGE DER VERTIKALEN STRUKTUR
Bringen Sie vor der Installation der Stangen (P1) in der Basisstruktur die Kunststoffabdeckungen (X) an, um die
Schrauben abzudecken und einen besseren optischen Abschluss zu erzielen. Richten Sie dann die Stangen (P1)
aus und lassen Sie sie einrasten, sodass die Ausschnitte für das Regal nach vorne zeigen.
Setzen Sie dann die Stangen (P2) in die Basisstange (P1) ein. Bitte stellen Sie sicher, dass die Löcher aufeinander
ausgerichtet sind, bis die Federstifte herausspringen.
FR
MONTAGE DE LA STRUCTURE VERTICALE
Avant d'installer les poteaux (P1) dans la structure de la base, xez les couvercles (X) en plastique pour couvrir
les vis et fournir une meilleure nition visuelle. Ensuite, alignez et encliquetez les poteaux (P1), de sorte que les
découpes pour l'étagère soient tournées vers l'avant de l'assemblage.
Insérez ensuite les poteaux (P2) dans le poteau de base (P1). Assurez-vous que les trous s'alignent les uns avec
les autres jusqu'à ce que les goupilles à ressort apparaissent.
ES
MONTAJE DE LA ESTRUCTURA VERTICAL
Antes de instalar los postes (P1) en la estructura de la base, colocar las tapas (X) plásticas para tapar los tornillos
y brindar un mejor acabado visual. Luego alinee y encaje los postes (P1), de modo que los cortes para el estante
queden hacia adelante del conjunto.
Luego inserte los postes (P2) en el poste base (P1), asegúrese de que los oricios se alineen entre sí hasta que
salten los pasadores de resorte.
PL
MONTAŻ KONSTRUKCJI PIONOWEJ
Przed zamontowaniem słupków (P1) w konstrukcji podstawy, załóż zaślepki (X) z tworzywa sztucznego, aby zakryć
śruby i zapewnić lepsze wykończenie wizualne. Następnie wyrównaj i zatrzaśnij słupki (P1), tak aby wycięcia na
półkę były skierowane do przodu zespołu.
Następnie włóż słupki (P2) do słupka podstawy (P1). Upewnij się, że otwory są wyrównane ze sobą, aż wyskoczą
kołki sprężynujące.
6
WWW.TECHLY.COM
Ex2
Dx2
P1
P2
XX
Q
ICA-TR216T manuale 148x210 mm bn 09_2022.indd 6ICA-TR216T manuale 148x210 mm bn 09_2022.indd 6 06/09/22 15:4006/09/22 15:40

MOBILE TV CART
3
EN
ASSEMBLY OF THE TV MOUNTING BASE PLATE
Assemble TV mounting plate (N) to one of three possible positions on poles.
Use bolt C (x4) ,washers F (x4), rubber washer G (x4), nut U (x4), and tighten with wrenches I and H.
IT
MONTAGGIO DELLA BASE DI MONTAGGIO TV
Montare la piastra di montaggio TV (N) in una delle tre possibili posizioni sui pali.
Utilizzare il bullone C (x4), le rondelle F (x4), la rondella di gomma G (x4), il dado U (x4) e serrare con le chiavi I e
H.
DE
MONTAGE DER TV-MONTAGE-GRUNDPLATTE
Montieren Sie die TV-Montageplatte (N) an einer von drei möglichen Positionen an den Stangen.
Verwenden Sie Schraube C (x4), Unterlegscheiben F (x4), Gummischeibe G (x4), Mutter U (x4) und ziehen Sie sie
mit den Schraubenschlüsseln I und H fest.
FR
ASSEMBLAGE DE LA PLAQUE DE MONTAGE TV
Assemblez la plaque de montage du téléviseur (N) dans l'une des trois positions possibles sur les poteaux.
Utilisez le boulon C (x4), les rondelles F (x4), la rondelle en caoutchouc G (x4), l'écrou U (x4) et serrez avec les
clés I et H.
ES
MONTAJE DE LA BASE DE SOPORTE DE TV
Ensamble la placa de montaje del televisor (N) en una de las tres posiciones posibles en los postes.
Utilice el perno C (x4), las arandelas F (x4), la arandela de goma G (x4), la tuerca U (x4) y apriete con las llaves I
y H.
PL
MONTAŻ PŁYTY MONTAŻOWEJ TELEWIZORA
Zamontuj płytkę montażową telewizora (N) w jednej z trzech możliwych pozycji na słupach.
Użyj śruby C (x4), podkładek F (x4), podkładki gumowej G (x4), nakrętki U (x4) i dokręć kluczami I i H.
7
WWW.TECHLY.COM
Gx4
Fx4
Cx4
I
Ux4
H
N
ICA-TR216T manuale 148x210 mm bn 09_2022.indd 7ICA-TR216T manuale 148x210 mm bn 09_2022.indd 7 06/09/22 15:4006/09/22 15:40

MOBILE TV CART
4
EN
DVD SHELF ASSEMBLY
Slide and lock brackets K and J to table L.
CAUTION:
The shelf max loading capacity is 7 kg (15 lbs).
IT
MONTAGGIO SCAFFALE DVD
Far scorrere e bloccare le staffe K e J sul tavolo L.
ATTENZIONE:
La capacità di carico massima dello scaffale è di 7 kg (15 libbre).
DE
DVD-REGALMONTAGE
Schieben und verriegeln Sie die Halterungen K und J am Tisch L.
VORSICHT:
Die maximale Ladekapazität des Regals beträgt 7 kg (15 lbs).
FR
ASSEMBLAGE DE L'ETAGERE DVD
Faites glisser et verrouillez les supports K et J sur la table L.
MISE EN GARDE:
La capacité de charge maximale de l'étagère est de 7 kg (15 lb).
ES
MONTAJE DEL ESTANTE DE DVD
Deslice y bloquee los soportes K y J a la mesa L.
PRECAUCIÓN:
La capacidad de carga máxima del estante es de 7 kg (15 lb).
PL
MONTAŻ PÓŁKI DVD
Przesuń i zablokuj wsporniki K i J do stołu L.
OSTROŻNOŚĆ:
Maksymalna ładowność półki to 7 kg (15 funtów).
WWW.TECHLY.COM
L
KJ
ICA-TR216T manuale 148x210 mm bn 09_2022.indd 8ICA-TR216T manuale 148x210 mm bn 09_2022.indd 8 06/09/22 15:4006/09/22 15:40

MOBILE TV CART
5
FR
MONTAGE DU SUPPORT POUR WEBCAM
Assemblez la plate-forme V au support M, à l'aide de la vis B (x2).
Accrochez l'assemblage de la table aux fentes à la hauteur désirée. Fixez ensuite la partie supérieure de la
plate-forme à la plaque de montage du téléviseur avec les vis A (x2).
MISE EN GARDE:
La capacité de charge maximale de l'étagère est de 5 kg (10 lbs).
ES
MONTAJE DEL SOPORTE PARA WEBCAM
Ensamble la plataforma V al soporte M, usando el tornillo B (x2).
Enganche el ensamblaje de la mesa a las ranuras a la altura deseada. Luego je la parte superior del conjunto
de la plataforma a la placa de montaje del televisor con los tornillos A (x2).
PRECAUCIÓN:
La capacidad de carga máxima del estante es de 5 kg (10 lbs).
PL
MONTAŻ WSPARCIA DO KAMERY INTERNETOWEJ
Zamontuj platformę V do wspornika M, używając śruby B (x2).
Zaczep zespół stołu do szczelin na żądanej wysokości. Następnie przymocuj górną część zespołu platformy do
płyty montażowej telewizora za pomocą śrub A (x2).
OSTROŻNOŚĆ:
Maksymalna ładowność półki to 5 kg (10 funtów).
EN
ASSEMBLING THE SUPPORT FOR VIDEO
CAMERA CONFERENCE
Assemble platform V to bracket M, using
screw B (x2).
Hook table assembly to slots at desired
height. Then attach upper platform assembly
to TV mounting plate with screws A (x2).
CAUTION:
The shelf max loading capacity is 5 kg (10
lbs).
IT
MONTAGGIO DEL SUPPORTO PER WEBCAM
Assemblare la piattaforma V alla staffa M,
utilizzando la vite B (x2).
Agganciare l'assieme del tavolo alle
fessure all'altezza desiderata. Quindi
ssare la parte superiore del gruppo
piattaforma alla piastra di montaggio TV
con le viti A (x2).
ATTENZIONE:
La capacità di carico massima della
mensola è di 5 kg (10 libbre).
DE
MONTAGE DER UNTERSTÜTZUNG FÜR
WEBCAM
Montieren Sie die Plattform V mit der
Schraube B (x2) an der Halterung M.
Haken Sie die Tischbaugruppe in die
Schlitze in der gewünschten Höhe ein.
Befestigen Sie dann den oberen Teil der
Plattformbaugruppe mit den Schrauben
A (x2) an der TV-Montageplatte.
VORSICHT:
Die maximale Ladekapazität des Regals
beträgt 5 kg (10 lbs).
9
WWW.TECHLY.COM
U1
x2
Ax2
F1 x4
I
Bx2
V
M
Bx2
ICA-TR216T manuale 148x210 mm bn 09_2022.indd 9ICA-TR216T manuale 148x210 mm bn 09_2022.indd 9 06/09/22 15:4006/09/22 15:40

MOBILE TV CART
1
6a
1
EN
M
OUNTING THE VERTICAL BRACKETS ON THE TELEVISION
Carefully lay your TV face down on a rug or at carton.
Then use assembling TV accessories (Aa-Ah) attach mounting brackets to the back of TV, with included screws
and tighten.
(
NOTE:
Spacers are included in case provided screws are too long for screw holes. Check hardware list of spacers
and screws included in page 4)
IT
MONTAGGIO DELLE STAFFE VERTICALI SULLA TELEVISIONE
Appoggia con cura la TV a faccia in giù su un tappeto o su un cartone piatto.
Quindi utilizzare gli accessori di montaggio TV (Aa-Ah) collegare le staffe di montaggio sul retro del televisore,
con le viti incluse e serrare.
(
NOTA:
Nel caso in cui le viti fornite fossero troppo lunghe, inclusi nella confezione sono forniti anche dei
distanziali per adattare le viti alle dimensioni dei fori della TV. Vericare l'elenco dei distanziali e di viti incluse a
pagina 4).
DE
MONTAGE DER VERTIKALEN HALTERUNGEN AM FERNSEHER
Legen Sie Ihren Fernseher vorsichtig mit der Vorderseite nach unten auf einen Teppich oder achen Karton.
Verwenden Sie dann Montagezubehör für das Fernsehgerät (Aa-Ah), befestigen Sie die Montagehalterungen mit
den mitgelieferten Schrauben an der Rückseite des Fernsehgeräts und ziehen Sie sie fest.
(
HINWEIS:
Abstandshalter sind enthalten, falls die Schrauben zu lang für die Schraubenlöcher sind. Überprüfen
Sie die Hardwareliste der Abstandshalter und Schrauben auf Seite 4).
FR
MONTAGE DES SUPPORTS VERTICAUX SUR LE TÉLÉVISEUR
Posez soigneusement votre téléviseur face vers le bas sur un tapis ou un carton plat,
Ensuite, utilisez les accessoires d'assemblage du téléviseur (Aa-Ah), xez les supports de montage à l'arrière du
téléviseur à l'aide des vis fournies et serrez.
(
REMARQUE:
les entretoises sont incluses dans le cas où les vis fournies sont trop longues pour les trous de vis.
Vériez la liste du matériel des entretoises et des vis incluses à la page 4).
ES
MONTAJE DE LOS SOPORTES VERTICALES EN LA TELEVISIÓN
Coloque con cuidado su televisor boca abajo sobre una alfombra o una caja plana.
Luego use los accesorios de montaje de TV (Aa-Ah) je los soportes de montaje a la parte posterior de la TV,
con los tornillos incluidos y apriete.
(
NOTA:
Se incluyen espaciadores en caso de que los tornillos sean demasiado largos para los oricios de los
tornillos. Consulte la lista de espaciadores y tornillos incluidos en la página 4).
PL
MONTAŻ WSPORNIKÓW PIONOWYCH NA TELEWIZORZE
Ostrożnie połóż telewizor ekranem do dołu na dywanie lub płaskim kartonie.
Następnie za pomocą montażu akcesoriów do telewizora (Aa-Ah) przymocuj wsporniki montażowe z tyłu
telewizora za pomocą dołączonych śrub i dokręć.
(
UWAGA:
przekładki są dołączone w przypadku, gdy dostarczone śruby są zbyt długie dla otworów na śruby.
Sprawdź listę sprzętową przekładek i śrub na stronie 4).
10
WWW.TECHLY.COM
Aa
x4
Ag
x4
Ae
x4
O1
O
ICA-TR216T manuale 148x210 mm bn 09_2022.indd 10ICA-TR216T manuale 148x210 mm bn 09_2022.indd 10 06/09/22 15:4006/09/22 15:40

MOBILE TV CART
6b
EN
Tilt angle can be adjusted using knobs on sides (TILTING RANGE: +/-15°)
IT L'angolo di inclinazione può essere regolato tramite le manopole sui lati (GAMMA DI INCLINAZIONE: +/-15°
)
DE Der Neigungswinkel kann mit Knöpfen an den Seiten eingestellt werden (NEIGUNGSBEREICH: +/-15°
)
FR L'angle d'inclinaison peut être ajusté à l'aide de boutons sur les côtés (GAMME D'INCLINAISON: +/-15°
)
ES El ángulo de inclinación se puede ajustar con perillas en los lados (RANGO DE INCLINACIÓN: +/-15°
)
PL Kąt nachylenia można regulować za pomocą pokręteł po bokach (ZAKRES PRZECHYLENIA: +/-15°
)
11
WWW.TECHLY.COM
O1
O
ICA-TR216T manuale 148x210 mm bn 09_2022.indd 11ICA-TR216T manuale 148x210 mm bn 09_2022.indd 11 06/09/22 15:4006/09/22 15:40

All rights reserved. All trademarks and trade names are those of their respective owners.
TECHLY® - Viale Europa 33 - 33077 Sacile (PN) - Italy
MOBILE TV CART
WWW.TECHLY.COM
ICA-TR216T manuale 148x210 mm bn 09_2022.indd 12ICA-TR216T manuale 148x210 mm bn 09_2022.indd 12 06/09/22 15:4006/09/22 15:40
This manual suits for next models
1
Table of contents
Other Techly Outdoor Cart manuals

Techly
Techly ICA-TR33 User manual

Techly
Techly ICA-TR45 User manual

Techly
Techly ICA-TR31 User manual

Techly
Techly ICA-TR16T User manual

Techly
Techly ICA-TR53MB User manual

Techly
Techly iCa-Tr7 User manual

Techly
Techly ICA-TR54 User manual

Techly
Techly ICA-TR53LB User manual

Techly
Techly ICA-TR3390 User manual

Techly
Techly ICA-TR3 User manual