Tenda A9 User manual


Copyright Statement
© 2016 Shenzhen Tenda Technology Co., Ltd. All rights reserved.
Tenda is a registered trademark legally held by Shenzhen Tenda Technology Co., Ltd. Other
brand and product names mentioned herein are trademarks or registered trademarks of their
respective holders. Copyright of the whole product as integration, including its accessories
and software, belongs to Shenzhen Tenda Technology Co., Ltd. No part of this publication
can be reproduced, transmitted, transcribed, stored in a retrieval system, or translated into any
language in any form or by any means without the prior written permission of Shenzhen
Tenda Technology Co., Ltd.
Disclaimer
Pictures, images and product specifications herein are for references only. To improve
internal design, operational function, and/or reliability, Tenda reserves the right to make
changes to the products without obligation to notify any person or organization of such
revisions or changes. Tenda does not assume any liability that may occur due to the use or
application of the product described herein. Every effort has been made in the preparation of
this document to ensure accuracy of the contents, but all statements, information and
recommendations in this document do not constitute the warranty of any kind, express or
implied.

Table of Contents
Table of Contents
I Get to Know Your Extender............................................................................1
Package Contents ........................................................................................................1
Features .......................................................................................................................1
LED Indicator..............................................................................................................2
Buttons ........................................................................................................................3
Product Label ..............................................................................................................4
II Extend WiFi Network.....................................................................................5
Method 1: Use Web UI to Extend your WiFi.............................................................5
Method 2: Use WPS Button to Extend your WiFi......................................................5
Position the antennas for Better WiFi Performance....................................................8
III Web UI Features............................................................................................9
Configure the Extender Using a Smartphone .............................................................9
Extend the WiFi Network Using a Smartphone.................................................................9
Status of the Extender.......................................................................................................13
Extend another WiFi Network..........................................................................................14
Change the Extender’s WiFi Settings...............................................................................15
Administration..................................................................................................................16
Configure the Extender Using a Computer...............................................................21
Extend the WiFi Network Using a Computer ..................................................................21
Status of the Extender.......................................................................................................25
Extend another WiFi Network..........................................................................................27
Change the Extender’s WiFi Settings...............................................................................28
Administration..................................................................................................................29
IV Appendix.......................................................................................................34
Troubleshooting ........................................................................................................34
Technical Support .....................................................................................................35
Configure your Computer .........................................................................................36
Windows 8........................................................................................................................36
Windows 7........................................................................................................................38
Windows XP.....................................................................................................................40
Safety and Emission Statement.................................................................................43

1
Get to Know Your Extender
Ⅰ Get to Know Your Extender
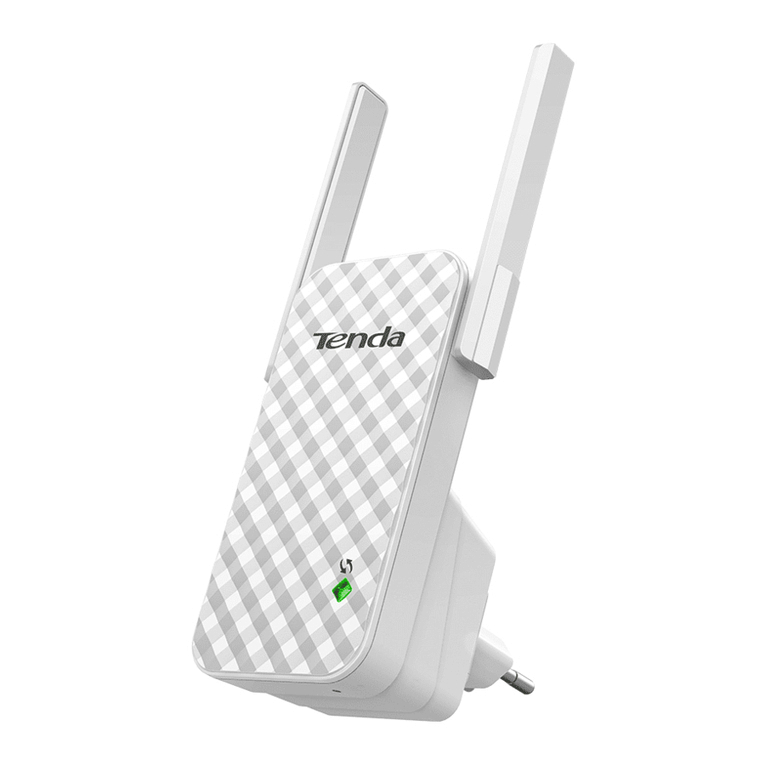
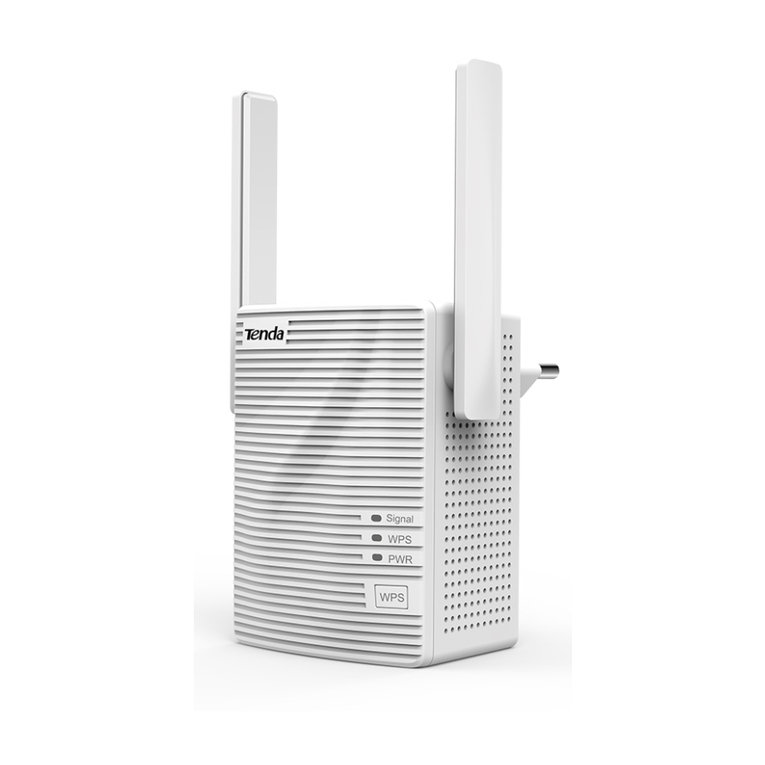
Tenda A9 is a wireless extender designed for large houses. It provides full WiFi coverage to
200m2houses and wireless transmission speed up to 300Mbps. A9 is an optimum choice to
create a strong signal in hard-to-reach area. This chapter includes:
Package Contents
Features
LED Indicator
Buttons
Product Label
Pay close attention to the LEDs on the front panel.
Package Contents
Unpack the package. Your box should contain the following items:
Wireless N300 Universal Range Extender * 1
Install Guide * 1
If any item is incorrect, missing or damaged, please keep the original package and contact the
vendor for replacement immediately.
Features
Works at 2.4G band.
Adopt 802.11n technology and the wireless speed can be up to 300Mbps.
Provide 2 external 3dBi smart Omni-Directional antennas.
Adopt Mixed WPA/WPA2-PSK, AES to encrypt the WiFi network that ensures the
security.
Be compatible with the uplink device’s WiFi encryption type: None, WPA-PSK, WPA2-
PSK and Mixed WPA/WPA2-PSK.
Support extending WiFi signal with WPS button.

2
Get to Know Your Extender
LED Indicator
Color
Status
Description
Red
Solid
The device is booting.
Blinking
•The device is extending a WiFi network or
•The device fails to extend a WiFi network.
Green
Solid
Extended successfully and the WiFi signal is strong.
Orange
Solid
Extended successfully and the WiFi signal is poor.
Blinking
Extended successfully and the WiFi signal is very poor.
LED Indicator

3
Get to Know Your Extender
Buttons
WPS Button
The LED indicator and WPS button are on the same place. As a button, it is used to establish
a WPS connection with a router or AP.
You can press WPS button on a router or AP first, and within 2 minutes press this button to
establish a WPS connection.
Reset Button
It is used to restore the extender to factory default.
You can use a needle-shaped object to press and hold this button for about 8 seconds until the
LED indicator turns to solid red. When the LED indicator turns to blinking red, it indicates
that the extender has been restored to factory default successfully.
WPS button
Reset button

4
Get to Know Your Extender
Product Label
The label on the rear panel:
The label on the side panel:
1 Default Access: re.tenda.cn
It’s the default login domain name of the extender. After you connect to the extender
wirelessly, you can log in to the extender’s web UI with re.tenda.cn.
2 SSID: Tenda_XXXXXX
It’s the default WiFi name of the extender. You can connect to this SSID to access the internet
or to configure the extender.

5
Extend WiFi Network
Ⅱ Extend WiFi Network
This chapter describes two methods to extend your WiFi network by using the extender, and
how to position the antennas.
Method 1: Use Web UI to Extend your WiFi
Method 2: Use WPS Button to Extend your WiFi
Position the Antennas for Better WiFi Performance
Method 1: Use Web UI to Extend your WiFi
Please refer to
ⅢWeb UI Features > Configure the Extender Using a Smartphone > Extend the WiFi
Network Using a Smartphone
Or
ⅢWeb UI Features > Configure the Extender Using a Computer > Extend the WiFi Network
Using a Computer
for details.
Method 2: Use WPS Button to Extend your WiFi
①Plug the extender (A9) into an electrical outlet near your WiFi router that supports WPS
function.

6
Extend WiFi Network
②Press the WPS button on your router, and within 2 minutes press the button on the
extender.
③Unplug the extender and move it to a new location that is about halfway between your
router and the area with a poor router WiFi signal. Observe the LED indicator on the
extender to choose an optimum extending location.
When the LED indicator turns to solid green, solid
orange or blinking orange, it indicates that the WPS
connection is successful.

7
Extend WiFi Network
Tips
You can also log in to the extender’s web UI to check the WiFi signal strength
(40%~79% is the optimum extending location).
To minimize signal interference, keep the extender away from Bluetooth devices,
microwaves, refrigerators, and so on.
The steps are complete! Enjoy your WiFi! Your extender’s WiFi name and password may be
one of the following.
If you have not extended a WiFi network before:
The extender’s WiFi name and password are the same as those of your router. For
example, if your router’s WiFi name is Tenda_666666 and WiFi password is 00000000,
as a result, your extender’s WiFi name and password are Tenda_666666 and 00000000
respectively.
If you have extended a WiFi network before:
The extender’s WiFi name and password are the previous ones. For example, yesterday
you extended a WiFi network and the extender’s WiFi name and password were xxxxx
and ******** respectively. Today you extend another WiFi network with the WPS
button, as a result, your extender’s WiFi name and password are still xxxxx and ********
respectively.

8
Extend WiFi Network
Position the Antennas for Better WiFi Performance
For better WiFi performance, make the antennas vertical to the ground no matter you plug the
extender to a wall outlet or to a power strip.

9
Web UI Features
Ⅲ Web UI Features
The extender provides two types of web UI for smartphones and computers respectively. This
chapter helps you:
Configure the Extender Using a Smartphone
Configure the Extender Using a Computer
Configure the Extender Using a Smartphone
Extend the WiFi Network Using a Smartphone
①Plug the extender (A9) into an electrical outlet near your WiFi router.
②Use your smartphone to search and connect to the extender’s WiFi name. The default
WiFi name (SSID: Tenda_XXXXXX) is on both the label of the extender’s rear panel and
the label of the extender’s side panel, shown as below.

10
Web UI Features
③Open a browser on your smartphone (take Safari as an example here), type the default
login domain name re.tenda.cn or default login IP address 192.168.0.254 into the address
bar, and click Go.
④When the extender’s web UI appears, select the WiFi name (SSID) you want to extend,
and click Next.
⑤Enter the WiFi password of the selected WiFi name (if any), and click Finish.
Tips
If you don’t want to set up the extender’s
WiFi name and password to the same as
those of the base station, uncheck the
option before Set up the extender’s
WiFi name and password to the same
as those of the Base Station, customize
the extender’s WiFi name and password,
and then click Finish.

11
Web UI Features
Wait until the extending progress is complete. It will take a few seconds.
⑥Unplug the extender and move it to a new location that is about halfway between your
router and the area with a poor router WiFi signal. Observe the LED indicator on the
extender to choose an optimum extending location.
Tips
You can also log in to the extender’s web UI to check the WiFi signal strength
(40%~79% is the optimum extending location).
To minimize signal interference, keep the extender away from Bluetooth devices,
microwaves, refrigerators, and so on.

12
Web UI Features
The steps are complete! Enjoy your WiFi! Your extender’s WiFi name and password may be
one of the following.
Be default
The extender’s WiFi name and password are the same as those of your router. For
example, if your router’s WiFi name is Tenda_666666 and WiFi password is 00000000,
as a result, your extender’s WiFi name and password are Tenda_666666 and 00000000
respectively.
If you have customized the extender’s WiFi name and password, please connect to the
new WiFi name with the new password to access the internet.

13
Web UI Features
Status of the Extender
After the extender extends successfully, you can log in to the extender’s web UI for more
settings by using the domain name re.tenda.cn.
After login, you will be directed to Status page, as shown below. In this page, you can see
Attached Devices, Blacklist, and WiFi name (SSID) of the WiFi router and the extender.

14
Web UI Features
Extend another WiFi Network
On the Status page, click Attached
Device
and the attached devices’ info
pops up. If there is an unknown
device, you can click Add
to add it
to Blacklist (Devices in Blacklist
cannot access the internet via the
extender).
On the Status page, click Blacklist,
and you can see the devices in
Blacklist. Clicking Remove can
remove a device from Blacklist. A
removed device can connect to the
extender again.
If you don’t extend the WiFi network
successfully by following the quick
setup wizard (Refer to Extend the WiFi
Network Using a Smartphone), or want
to extend another WiFi network, you
can click on the upper right corner
and click .

15
Web UI Features
Change the Extender’s WiFi Settings
Here you can see the base station WiFi
name, connection status, and connection
time.
Select a WiFi name below to start to
extend a WiFi network again. (You can
refer to steps in Extend the WiFi
Network Using a Smartphone for
details.)
By default, the WiFi name and password
of the extender are changed to the same
as that of the WiFi router (the base
station). If you want to customize them,
please do as follows.
①Click on the upper right corner and
click .

16
Web UI Features
Administration
②Type a WiFi name for your extender.
③Type a WiFi password for your extender.
④
Click OK to save your settings.
Hide
If the Hide
option is checked, no wireless
clients can search the WiFi name of the
extender. You need to know the WiFi name
in advance and enter the WiFi name on each
wireless client manually.
No Password
If the No Password
option is checked, all
wireless clients can join the extender’s WiFi
network without a WiFi password.
Click on the upper right corner and
click to enter
Administration configuration page.

17
Web UI Features
In Administration page, you can set up
a login password, reboot or reset the
extender.
Other manuals for A9
1
Table of contents
Other Tenda Extender manuals