Tendercare Snappi Pushchair User manual

Snappi System User Manual
Document No: 053-05 v38 Page 1 of 76 June 2022
Snappi System User Manual.doc
Snappi Pushchair
USER MANUAL (ALL SIZES)
IMPORTANT
Please read these instructions carefully before using the Snappi
System. In addition, we have a YouTube channel with a series of
‘How to guides’ to provide a visual demonstration. Please note that
these videos are not a substitute for reading your manual.
QR code link to video guides:

Snappi System User Manual
Document No: 053-05 v38 Page 2 of 76 June 2022
Snappi System User Manual.doc
Fig 0.1 Complete Pushchair (size 1 shown)
Snappi
Seat Unit
Snappi
Chassis

Snappi System User Manual
Document No: 053-05 v38 Page 3 of 76 June 2022
Snappi System User Manual.doc
Fig 0.2 Chassis (size 1 shown)
Fig 0.3 Seat Unit (Size 1 shown)
Brake Bar
Push Handle
Adjustor
Tilt Lever
Spring Loaded
Locking Slider
Adjustable
Back
Hip
Guides
Side Pads
Interface
Playtray
Mountings
Footrest
Adjustable
Base
Knee Angle
Adjustors
Hip Belt

Snappi System User Manual
Document No: 053-05 v38 Page 4 of 76 June 2022
Snappi System User Manual.doc
Fig 0.4 Folded System - Complete (size 1 only)
Fig 0.5 Folded System - 2 part fold (all models)

Snappi System User Manual
Document No: 053-05 v38 Page 5 of 76 June 2022
Snappi System User Manual.doc
Item
Description
Page
1
Who to contact if you have difficulty
7
2
Introduction
7 - 9
3
Unpacking
9 - 10
3.1 Serial Numbers
9 - 10
4
Preparing the wheelbase for use
10
4.1.1 Unfolding the Frame (Original Locks)
10 - 11
4.1.2 Unfolding the Frame (Spring Loaded Locks)
11 - 13
4.2A Original Brakes (pushchairs supplied before June 2015)
131
4.2B Pin Brakes (pushchairs supplied after June 2015)
14
4.2C Tyres
15
4.2D Push Handle Mounted Attendant Brakes –Hub (Optional
Upgrade)
15 –16
4.2E Front Locking Castors (Optional)
16 - 17
4.3 Fitting the seat to the chassis
17 –20
4.4 Using the Tilt In Space facility
21
4.5 Folding as a complete system (size 1 only)
22
4.6 Folding as a 2 part system (all models)
22
5
Setting up the seat unit
23 - 24
5.1 Adjusting the seat unit
24
5.1.1 Seat Depth and Hip Guides
24 - 25
5.1.2 Footrest Depth and Knee Angle Adjustment
25
5.1.3 Back height and recline angle adjustment
26
5.1.4 Lateral Supports (Optional)
27 - 28
5.2 Fitting and Removing the Covers
28 –29
5.3 Fitting a Headrest Pad or Lateral Head Supports (optional)
29 –30
5.4 Fitting the Pelvic Strap
31 –32
5.5 Fitting a Groin Adaptation Strap
32
5.6 Fitting a Butterfly/Chest Harness or H-Belt Harness
34 –37
5.7 Final Checks
37
6
Accessories
38
6.1 Shopping Basket
38
6.2 Equipment Carrying Tray
39
6.3 Sun Canopy
40 –41
6.4a Sunhood and Transparent Rainshield
41 –48
6.4b Removing the Cover For Washing
48 –50
6.5 Rain Cover
51 - 52
6.6 Frame Padding
52

Snappi System User Manual
Document No: 053-05 v38 Page 6 of 76 June 2022
Snappi System User Manual.doc
6.7 Grip Rail
52 - 53
6.8 Playtray
53 - 55
6.9 Pommel
56
6.10 Ramped Seat Pad
57
6.11 Ankle Cuffs
57 –58
6.12 Toe and Heel Straps
58 –60
6.13 Vertical Cylinder Carrier
60 –62
6.14 Foot Muff
62 –65
7
User Instructions
65
7.1 Getting into the Snappi Pushchair
65
7.2 Getting out of the Snappi Pushchair
65
8
Attendant pushing
65 –66
8.1 Pushing
69 –70
8.2 Brakes
67
8.3 Comfort
67
8.4 Lifting and general safety
67
9
Cleaning
67
9.1 Buggy and seat unit
67 - 68
9.2 Seat Cover
68
9.3 Pelvic strap & harnessing
68
10
Maintenance
68
10.1 Routine maintenance
68 - 69
10.2 Six-monthly maintenance
69
10.3 Additional / workshop maintenance
69 - 70
11
Oxygen Cylinder
70
12
Warranty, Product Life, Service Life & Reuse
70
12.1 Warranty
70 - 71
12.2 Product Lifetime / Period of Use
71
12.3 Service Life
71
12.4 Reuse
72
13
Transporting the Wheelbase
72
13.1 Preparing the system for transport
72 –74
13.2 Attaching wheelbase to vehicle
74 –76
14
Repairs
76

Snappi System User Manual
Document No: 053-05 v38 Page 7 of 76 June 2022
Snappi System User Manual.doc
15
Storage
76
1: Who to contact in difficulty
Tendercare Ltd.
PO BOX 3091, Littlehampton, BN16 2WF
Tel: (01903) 726161 Fax: (01903) 734083
Email: [email protected]
Web: www.tendercareltd.com
2: Introduction
The Snappi is a highly adjustable pushchair designed to accommodate a wide variety of
seating needs. The Snappi pushchair is a Class 1 medical device designed for regular
use. The pushchair system comprises a wheelbase and a seating unit which is easily
removable for storage. This pushchair is designed to be used as a mobility aid and not as
a static seating system; as such, the occupant should not be left in the chair without an
attendant holding the push handles. The product can be used at a walking pace both
indoors and outdoors. The Snappi pushchair (forward facing pushchairs ONLY) can be
used for transport in a wheelchair adapted vehicle in accordance with ISO 7176-19 (please
see section 13 ‘Transporting the Wheelbase’ for full instructions). The pushchair is
available in 3 sizes: size 1 with minimiser, size 1 and size 2. A wide range of accessories
are available for the Snappi pushchair to enable customisation to an individual’s specific
requirements.
Risks Associated with Use and Contraindications
If used properly, risks can be eliminated during use. There are no known contraindications.
Seat adjustments (please see table below for details of adjustment ranges): Seat depth
adjustment, depth and length adjustable Hip Guides, Back Height adjustment, I
independent back recline (using an easy to operate gas strut mechanism) and depth &
angle adjustable Footrest. The seat also includes an interface allowing it to be quickly
fitted and removed from the wheelbase, and like the entire Snappi range, includes all the
latest safety mechanisms (including an innovative 2 stage release to prevent little fingers
causing accidents).
These instructions apply to all sizes.
A child’s safety is your responsibility. As such we recommend that you read the
complete user manual prior to using your pushchair.

Snappi System User Manual
Document No: 053-05 v38 Page 8 of 76 June 2022
Snappi System User Manual.doc
Snappi Seat Adjustments
Support
Size 1 with
Minimiser
Size 1
Size 2
Seat Depth
140-310mm
195-310mm
290-390mm
Seat Width
170-290mm
190-290mm
250-350mm
Backrest Height
475-675mm
500-675mm
590-760mm
Footrest Height
120-280mm
150-280mm
215-360mm
Back Recline Angle
90°- 135°
90°- 135°
90°- 135°
Knee Angle*
-15°- 90°
-15°- 90°
-15°- 90°
Seat Weight
8kg
7.5kg
12.5kg
Maximum Carry
Weight**
40 –55kg
40 –55kg
40 –55kg
IMPORTANT:
* Knee angle adjustable in 15° increments
** Maximum carry weight is defined as the user weight, plus any accessories /
equipment which may be fitted or carried on the chassis. The weight of the Snappi
seat has been taken into account with these weights and you do not need to make
any deduction for the Snappi Seat. Warning: Never exceed the maximum stated
carry weight.
Dimensions (mm)
Snappi Pushchair
Size 1 with Minimiser & Size
1
Size 2
A
940mm (865mm - 920mm
folded)
1030mm (930mm - 1045mm
folded)
B
600mm (600mm folded)
675mm (675mm folded)
C
1010mm (400mm folded)
1040mm (400mm folded)

Snappi System User Manual
Document No: 053-05 v38 Page 9 of 76 June 2022
Snappi System User Manual.doc
Please note, the exact length of your pushchair when folded will depend upon what back
height your seat is set to. We have taken the measurements both when the seat is set to
its minimum and maximum back height. The size of your folded Snappi pushchair will be
within this range.
All sizes and weights are given as a guide. Tendercare ltd reserves the right to amend
specifications at any time as part of their product development programme.
3: Unpacking
The wheelbases and seat unit are delivered together in a cardboard carton.
WARNING:
The transit carton is quite bulky so moving and unpacking must be done with care.
Observe all lifting and handling regulations.
Stand the carton upright making sure it is supported and cannot fall over. Open the carton
and remove any packages or packing, which could obstruct the removal of the seat and
wheelbase. Remove the seat first, then the wheelbase. Do not attempt to lift both parts out
together.
The carton should contain the following items:
Item
Component
QTY.
Yes
No
1
Wheelbase
1
2
Seat Unit
1
3
User Manual
1
4
5mm Alan key
1
Please note accessories, such as lateral supports or harnessing that were ordered at the
same time as the pushchair, will be included in either the main package or a separate
carton.
IMPORTANT:
❖If any items are damaged or missing, then please contact Tendercare, preferably by email at
delivery.
After unpacking and checking you have all components and they are in good condition
dispose of the packaging at your local recycling centre. Alternatively retain and reuse.
3.1: Serial Numbers
It may be a good idea, at this point, to make a note of your Snappi serial numbers on the
front of your user manual as you will require these if you wish to purchase any accessories
from Tendercare. On your pushchair there will be two serial numbers. Depending upon
your particular Snappi, there are two options as to what the serial numbers may look like /
where they may be.

Snappi System User Manual
Document No: 053-05 v38 Page 10 of 76 June 2022
Snappi System User Manual.doc
Option 1 (see example below of what the label looks like):
The first serial number will be on the brake bar between the
two rear wheels. The label is a large white label with lots of
information on including what the product actually is e.g. size
1 Snappi chassis. On the label will be the letters SN (short
for serial number) and then some numbers after this. Please
kindly advise what this number is. The second white label is
underneath the seat so you will need to look underneath the
buggy. Again, this will have lots of information on and you want the numbers after the
letters SN.
Option 2:
There are two serial numbers. TEN/SC and then four numbers and TEN/SS and then four
numbers. The SC one is located on the chassis itself (on the bar between the two rear
wheels and will start with TEN/SC followed by four numbers e.g. TEN/SC1234) and the SS
one is located on the seat (when the seat is in the buggy, where the back of the seat joins
the base of the seat and will start with TEN/SS followed by four numbers e.g.
TEN/SS1234).
4: Preparing the wheelbase for use
WARNING:
When opening or folding the wheelbase, ensure that you hold the frame so that you
avoid any danger of catching your fingers in moving parts.
Keep children clear of the wheelbase during opening and folding.
4.1.1 Unfolding the Frame (original locks)
Standing at back of the wheelbase,
place your foot on the rear cross
member X (see Fig 4.1.1.1) and lift
handle labelled Y as far as it will move.
This will open the frame.
Fig 4.1.1.1

Snappi System User Manual
Document No: 053-05 v38 Page 11 of 76 June 2022
Snappi System User Manual.doc
Fig 4.1.1.2
Next locate the 2 plastic locking sliders (See
Fig 4.1.1.2). These will be stowed in the
“open” position and are held in place by 2
small spring clips.
Press the 2 silver “Spring pins” in and
slide the 2 locking pieces down over the
lower tube sections. (See Fig 4.1.1.3)
Fig 4.1.1.3
Fig 4.1.1.4
The pins will spring through the holes in the
sliders and hold them in place (see Fig
4.1.1.4).
WARNING:
If the locking sliders are not in the correct position, or the spring pins do not
protrude thereby allowing the locking clips to move back up the frame, then the
frame may collapse in use.
Folding the wheelbase: To unlock the frame and fold the wheelbase, reverse the above
instructions.

Snappi System User Manual
Document No: 053-05 v38 Page 12 of 76 June 2022
Snappi System User Manual.doc
4.1.2 Unfolding the Frame (Spring loaded locks)
Standing at back of the wheelbase, place
your foot on the rear cross member X
(see Fig 4.1.2.1) and lift handle labelled
Y as far as it will move.
This will open the frame.
Fig 4.1.2.1
Fig 4.1.2.2
Once the frame is almost open, the 2 plastic
frame locks will engage with the angled
sections of the lower frame.
Continue to unfold the frame; this will force
the locks up the tubes. There will be some
resistance, as you will be working against the
locking springs.
Once fully open, the frame locks will snap
shut over the front frame, securing the
frame in the open position.
Always check that both locks are fully
closed. In the locked position the guide
bolt ‘B’ will be sat in the top of the slot ‘A’
on the side of the slider as shown (see
Fig 4.1.2.3). If there is any slot visible
above the guide bolt, push the lock down
by hand until it will not move any further.
Fig 4.1.2.3
Fig 4.1.2.4
To fold the frame:
Standing beside the frame, pull up the 2
locking sliders as shown (see Fig 4.1.2.4).
Whilst holding the locks open, push down
with your arm on the upper frame or push
handle, so that the frame starts to fold.
Release the locking sliders, and fold down
the frame by moving the push handle down
as far as it will move.

Snappi System User Manual
Document No: 053-05 v38 Page 13 of 76 June 2022
Snappi System User Manual.doc
IMPORTANT:
Always check that BOTH frame locks are fully closed before using the frame. If they
are not properly engaged, the frame could collapse during use.
4.2A Original Brakes (pushchairs supplied before June 2015)
Fig 4.2.1
To apply the brake, put your foot on the top
of brake bar (labelled X) and push down as
shown. The brake will flip down onto the
wheels and lock them.
To release the brake, hook your foot
between the middle raised portion of the
brake bar, and the frame cross bar. Then,
lift the brake bar with your foot until it flips
back and stops against the brake stop pins.
We recommend always using solid footwear
when operating the brake. Please note you
may find it easier to use your hand to
release the brake. If operating the brake by
hand always hold the brake by the raised
section in the middle of the bar.
Important:
Always put the brake on when placing the
child in, or taking them out of the pushchair.
Do not leave the brake on when the
pushchair is not in use as this will damage
the rear wheels.
Fig 4.2.2
WARNING:
The brake mechanism is spring loaded so care must be taken when operating it.
When operating the brake mechanism ensure that you always keep a firm hold of
the pushchair, keeping your hands well away from the brake mechanism.
Do not leave the pushchair on a slope, even with the brake on. Always ensure that
the pushchair is on level ground to prevent risk of injury to the occupant and help
prevent tipping.
Do not operate the brake when the pushchair is moving. The brake is not designed
to slow the pushchair down or stop a moving pushchair; such use may damage the
brake.

Snappi System User Manual
Document No: 053-05 v38 Page 14 of 76 June 2022
Snappi System User Manual.doc
4.2B Pin Brake (pushchairs supplied after June 2015)
Fig 4.2.3
Snappi Pushchairs supplied after June 2015
will be fitted with the new Pin Brake
mechanism.
To set the pin brake, first securely hold the
push handle. Place your foot on the top of
the push bar as shown (see Fig 4.2.3, left)
then press the bar down as far as it will go.
If the brake pin will not engage, try rolling
the pushchair forward slightly to help line up
the pins with the locking rings on the
wheels.
Fig 4.2.4 Right: The brake in the fully locked
position.
Fig 4.2.4
Fig 4.2.5
To release the pin brake, hold the pushchair
and place your foot underneath the brake
bar as shown (see Fig 4.2.5, left). Lift the
bar as far as it will move to ensure the pins
are clear of the locking rings.
Warning:
When operating the brake mechanism ensure that you always keep a firm hold of
the pushchair and keep your hands well away from the brake mechanism.
Do not leave the pushchair on a slope, even with the brake on. Always ensure that
the pushchair is on level ground to prevent risk of injury to the occupant and help
prevent tipping.
Do not operate the brake when the pushchair is moving. The brake is not designed
to slow the pushchair down or stop a moving pushchair; such use may damage the
brake.

Snappi System User Manual
Document No: 053-05 v38 Page 15 of 76 June 2022
Snappi System User Manual.doc
4.2C Tyres:
As standard the Snappi pushchair is supplied with solid tyres, however pneumatic tyres
are also available as an option. If your pushchair is supplied with pneumatic tyres these
need to be regularly checked and inflated if necessary using a hand or foot pump. The
operating pressure for the tyres is 36 PSI (note: do not inflate the tyres above 36 PSI). Do
not use high pressure air lines or mechanical pumps as used in garages, to inflate the
tyres.
4.2D Push Handle Mounted Attendant Brakes –Hub (optional upgrade):
Hub brakes are available only as a factory fitted option. The following instructions detail
how to operate the hub brakes.
NOTE: The hub brake upgrade means the standard foot operated brake is removed and is
not available on pushchairs fitted with hub brakes. The hub brakes include a locking
function that provides the same functionality as the standard parking pin lock brake.
Fig 4.2.6
Above: The Snappi Chassis fitted with hub brakes.
Note that there is no longer a brake bar between the rear wheels. The hub brakes are
operated by the pair of locking levers positioned on the push handle.
To set the brakes, squeeze the brake levers
on both sides as shown (see Fig 4.2.7,
right).

Snappi System User Manual
Document No: 053-05 v38 Page 16 of 76 June 2022
Snappi System User Manual.doc
Fig 4.2.7
Fig 4.2.8
The brake leavers feature an automatic lock
mechanism and will lock with the brakes on.
The system features 3 locking positions with
different levels of braking force. We
recommend to always use the 3rd
(strongest) position to ensure occupant
safety.
To release the brake lift the smaller release
catches on the handles to release the
automatic lock as shown (see Fig 4.2.9,
right).
Fig 4.2.9
Note:
Do not leave the pushchair on a slope, even with the brake on. Always ensure that
the pushchair is on level ground to prevent risk of injury to the occupant and help
prevent tipping .
Do not attempt to push the pushchair when the brake is locked off. Doing so may
damage the brake mechanism. If you need to slow down the momentum of your
pushchair (i.e. when on a hill), you must not lock off the brake; rather, you must
keep your finger pressed on the automatic lock as shown in Fig 4.2. 9, above, to
ensure the lock does not engage.
4.2E Front Locking Castors (Optional)
Front locking castors are available as option upgrade to the wheelbase. These are a
factory fitted option, so should be included on the order at time of purchase. Alternatively,
the pushchair can be returned to the Tendercare factory for fitting if ordering for an existing
pushchair.

Snappi System User Manual
Document No: 053-05 v38 Page 17 of 76 June 2022
Snappi System User Manual.doc
How to lock the front castors:
Fig 4.2E.1
First lift the head of castor locking pin
turning it until the head engages with the
slot in the body of the castor locking pin
(see Fig 4.2E.1). Note Fig 4.2E.1 shows
the castor locking pin in an open
position to ensure the head and body
are clearly visible for labelling.
Then rotate the front castor until the pin
engages with the hole. The castor should
now be locked in a forward position (see Fig
4.2E.2). Note: front locking castors are
generally used on uneven/rough terrain
so for day-to-day use, when the castors
are locked, it may be more difficult to
change direction.
Fig 4.2E.2
How to unlock the castors:
Pull the head of the castor locking pin up and turn it half a turn and release so the head is
supported by the castor locking pin body (see dig 4.2E.1).
4.3 Fitting the seat to the chassis
The seat incorporates an Interface system, and includes a 2-stage latch that comprises a
main latch and a second safety latch that prevents accidental release of the seat from the
chassis.
The safety catch must be correctly set before the main catch can be operated:
Castor Locking
Pin (in a locked
position)
Head of Castor
Locking Pin
Body of Castor
Locking Pin
Castor Locking
Pin (in an open
position)

Snappi System User Manual
Document No: 053-05 v38 Page 18 of 76 June 2022
Snappi System User Manual.doc
How to operate the safety catch:
Fig 4.3.1
Safety Catch Locked
The safety catch clip is located under the
front right corner of the seat near to the
release lever.
Definition of components:
X: Pull handle
Y: Locking Pin
To release it, pull the handle “X”, and turn it
90 degrees so that the pin “Y” is fully
retracted.
To lock it, pull “X” and turn 90 degrees in
the opposite direction, so that pin “Y” is fully
protruded and sits behind the interface main
catch “B” (see fig 4.3.3 on next page).
Fig 4.3.2
Safety Catch unlocked
Important:
When fitting or removing the seat, the carer / parent must first ensure that the safety
catch pin is set in the “unlocked” position. It will not be possible to fit or remove the
seat if the latch is “locked”, and attempting to do so may cause damage to the
chassis or the seat.
Once the seat has been fitted, the carer / parent must always lock the safety catch.
Note:
A warning label is positioned on the front right hand portion of the tilt frame on the
chassis, to remind carers to lock the safety catch.

Snappi System User Manual
Document No: 053-05 v38 Page 19 of 76 June 2022
Snappi System User Manual.doc
To fit the seat to the frame:
Fig 4.3.3
Fig 4.3.4
Definition of interface mounting points:
A: Seat Interface Rear Hooks
B: Seat Interface Main Clips
C: Seat Interface Safety Catch
D: Seat Interface Release Handle
E: Frame interface rear bushings
F: Frame interface front bushings
Ensure that the safety catch “C” has been
unlocked (see instructions on previous
page).
Holding the seat as shown, tilt it back and
locate the 2 rear hooks “A” on the back of
the interface, over the stainless steel
bushings on the back of the frame interface
“E”.
Fig 4.3.5

Snappi System User Manual
Document No: 053-05 v38 Page 20 of 76 June 2022
Snappi System User Manual.doc
Fig 4.3.6
Next, rotate the seat forward and down so
that the main clips “B” snap over the front
stainless steel bushes on the frame
interface “F”.
Note that due to the design of the frame
interface, it is not possible to fit the seat
backwards. If fitted the wrong way around
the clips will not close and it will not sit down
into the frame.
Next, push down firmly on the release lever
“D” to ensure that the clips are fully closed.
Note the lever is positioned under the front
right corner of the seat (see Fig 4.3.7).
Set the safety catch “C” to the “Locked”
position (so that the pin sits behind the
interface clip).
Fig 4.3.7
Fig 4.3.8
To remove the seat, first unlock the safety
catch “C” as detailed above.
Lift the release lever “D” up, whilst holding
the top of the seat with your other hand.
This will open the main clips “B”. Rotate the
seat back so that the main clips are clear
from the frame, and lift the seat away from
the buggy.
IMPORTANT:
❖Always ensure that the seat interface clips are fully closed. To test this, press down on the
release lever when fitted and make sure the clips will not move (see fig 4.3.5).
❖Always lock the safety catch before using the buggy.
❖Always unlock the safety catch before fitting or removing the seat. Attempting to fit or
remove the seat with the catch locked could cause damage to the seat or the chassis.
Other manuals for Snappi Pushchair
1
Table of contents
Other Tendercare Stroller manuals

Tendercare
Tendercare Snazzi Instruction manual
Tendercare
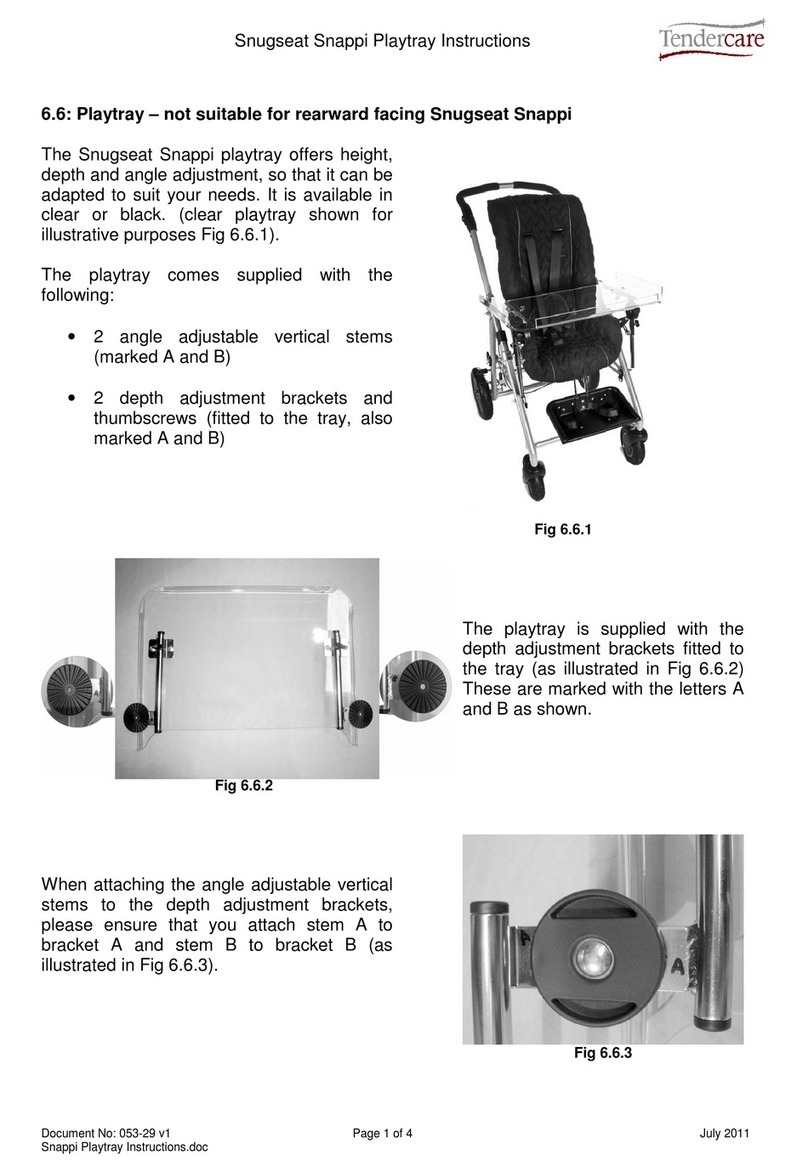
Tendercare Snugseat Snappi User manual

Tendercare
Tendercare Snugseat Snappi User manual

Tendercare
Tendercare Nursery Snugseat Spring User manual

Tendercare
Tendercare Snappi User manual

Tendercare
Tendercare Snappi Pushchair Instruction manual
Tendercare
Tendercare Snazzi User manual

Tendercare
Tendercare Swirl User manual

Tendercare
Tendercare Snapi Pushchair User manual

Tendercare
Tendercare Snazzi Pushchair User manual

