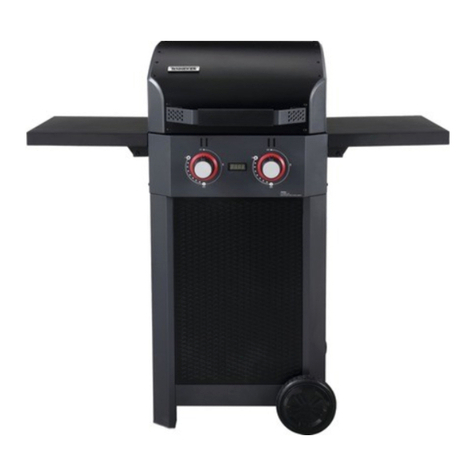
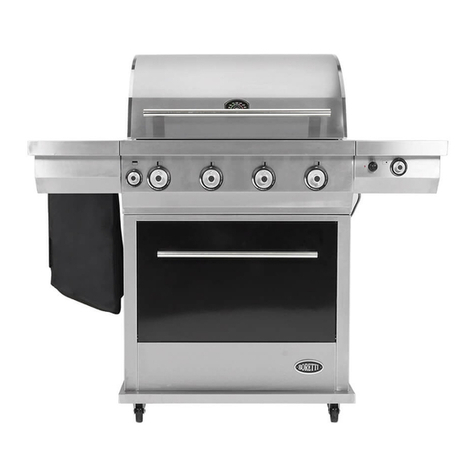
Tenneker TGP-2 Plancha User manual

GAS GRILL
TGP-2 Plancha
1008 CP 2805
1008-14
Gasbarbecue | Gebruiksaanwijzing
Plynový gril | Návod k použití
Plynový gril | Návod na použitie
Grătar cu gaz | Manual de utilizare
62 x 45.5 cm
TGP-2_Plancha_30mbar_V0.7_14-09-24.indd 1 25.09.14 15:19

2| ENGLISH
Thank you!
We are convinced that this gas grill will exceed your expecta-
tions and wish you joy while using it.
Read the instructions before using the appliance, keep it for
further reference and observe the safety instructions.
DANGER
If you smell gas:
1. Shut o gas to the appliance.
2. Extinguish any open flames.
3. If gas odour continues, keep away from the appli-
ance and immediately call your gas supplier or your
fire department.
Leaking gas may cause a fire or explosion which can
cause serious bodily injury, death or damage to prop-
erty.
WARNING
1. Do not store or use gasoline or other flammable
liquids or vapours in the vicinity of this or any other
appliance.
2. A gas cylinder not connected for use shall not be
stored in the vicinity of this or any other appliance.
Required accessories
1x Leak Detector Spray
WARNING
Never attempt to perform repairs yourself on gas com-
ponents. For repairs please contact your local Horn-
bach store or your gas dealer.
Failure to follow this warning may cause a fire or ex-
plosion which can cause serious bodily injury, death or
damage to property.
Intended use
This appliance is a mobile gas grill for outdoor use. It is in-
tended for grilling, frying, roasting and baking food in private
environments.
The appliance is not intended for commercial use.
Any other use or modification to the appliance is considered
as improper use and could cause considerable dangers.
Symbols
Safety warning Visible location
Hidden location
Table of content
Intended use 2
Symbols 2
Required tool & accessories 2
Safety instructions 3
Parts 4
Control knobs 5
Ignitor lighting 5
Gas cylinder replacement 6
Leak test 6
Gas cylinder information 6
Gas hose information 6
Storing the appliance 7
Troubleshooting 7
Cleaning and care 8
Warranty 9
Technical data 9
Components 10
A s se mbly 11
Service
In case of service requests or spare parts, please contact
your local Hornbach store or write an email to:
TGP-2_Plancha_30mbar_V0.7_14-09-24.indd 2 25.09.14 15:19

ENGLISH | 3
SAFETY INSTRUCTIONS
Failure to follow the safety instructions in this user manual may result in serious bodily injury or death or in a fire or
an explosion causing damage to property.
∙USE OUTDOORS ONLY. NEVER USE INDOORS.
∙Only use the appliance in a well ventilated area. Do not
use it in a garage, porch, covered patio or under an over-
head structure of any kind.
∙The appliance is not intended to be installed in or on rec-
reational vehicles and/or boats.
∙WARNING: Accessible parts may be very hot. Keep young
children away.
∙The appliance should never be used by children.
∙Do not store a spare or disconnected gas cylinder under
or near the appliance.
∙Improper assembly may be dangerous. Please follow the
assembly instructions carefully.
∙Do not connect the appliance to the natural gas network
(city gas network)! The valves and the nozzles are de-
signed exclusively for liquid propane gas.
∙Liquid propane is not natural gas. The conversion or
attempted use of natural gas in a liquid propane unit or
liquid gas in a natural gas unit is dangerous and will void
the warranty.
∙When the wind speed is above 2 m/s, do not use the gas
grill facing to the wind.
∙Never cook frozen food. Only cook foot of room tempera-
ture.
∙Only use the gas grill on a stable, level and non-flamma-
ble surface.
∙The appliance should be protected from direct draughts
and should be protected against direct penetration by any
trickling water e.g. rain.
∙After a period of storage and/or non-use, the appliance
should be checked for gas leaks and burner obstructions
before use.
∙Do not operate the appliance if there is a gas leak present.
∙Turn o the gas supply at the gas cylinder after use.
∙Do not use a flame to detect gas leaks.
∙This appliance must be kept away from flammable mate-
rials during use.
∙Combustible materials should never be within 1 meter of
the back or sides of the appliance.
∙Keep the cooking area (3 meters around the appliance)
clear of sources of ignition such as pilot lights on water
heaters, live electrical appliances, etc. and flammable
vapours/liquids such as gasoline, alcohol, etc.
∙Exercise reasonable care when operating the appliance.
It will be hot during cooking or cleaning and should never
be left unattended while in operation.
∙Do not move the appliance during use.
∙Should the burners go out while in operation, turn all gas
valves o. Wait five minutes before attempting to relight.
Follow the igniting instructions.
∙Use long-handled barbecue utensils and oven mitts to
avoid burns and splatters. Use protective gloves when
handling hot components.
∙Always turn o gas at the gas cylinder and disconnect the
pressure regulator before moving the gas cylinder form
its specified operating position.
∙Never operate the appliance with gas cylinder out of the
correct position specified.
∙Keep any electrical supply cord, gas and fuel supply hose
away from any heated surfaces.
∙Do not use the appliance unless all parts are in place. The
appliance must be properly assembled according to the
assembly instructions.
∙Do not modify the appliance. Any sort of modification is
strictly prohibited. Sealed parts are not to be manipulated
by the user. Do not disassemble injectors.
∙Do not use charcoal, ceramic briquets or lava rocks in the
appliance.
∙Never lean over the open grill or place hands or fingers
on the front edge of the housing.
∙Keep ventilation openings free and clear of debris.
∙Do not enlarge or block valve orifices or burner ports
when cleaning the valves or burners.
∙Check burner flames regularly.
∙The appliance should be thoroughly cleaned on a regular
basis.
∙The grease box must be installed prior to each use and
cleaned afterwards, but do not remove grease box until
the appliance has cooled down.
∙Be careful when children, elderly or pets are nearby.
∙If you notice grease or other hot material dripping from
the appliance onto the pressure regulator, valve or gas
hose assembly, close the gas valve at the gas container
immediately. Let appliance cool down, detect the cause,
correct it, clean it and inspect the valve, hose and regula-
tor and perform a leak test before continuing.
∙Do not store objects or materials under the appliance,
that would block the flow of combustion air to the under-
side of the control panel and the firebox.
∙Do not disconnect the or change the gas cylinder within 3
meters of an open flame or other ignition source.
∙Only use the pressure regulator and hose assembly that
is supplied with the appliance.
∙The hose of the gas hose assembly must not be bend and
must not be longer than 1.5 meter.
∙Only use gas cylinders of a diameter up to 310 mm and
maximum height of 600 mm with 5 - 13 kg of liquid pro-
pane gas.
∙Do not attempt to disconnect the pressure regulator and
hose assembly or any gas fitting while the appliance is in
operation or still hot.
∙Do not use a damaged gas cylinder. A dented or rusty gas
cylinder or a gas cylinder with a damaged valve may be
hazardous and should be replaced with a new one im-
mediately.
∙Although the gas cylinder may appear to be empty, gas
may still be present and the cylinder should be transport-
ed and stored accordingly.
TGP-2_Plancha_30mbar_V0.7_14-09-24.indd 3 25.09.14 15:19

4| ENGLISH
Overview
1
3
4
2
6
5
8
9
1. Cooking Grate
2. Adjustable Feet
3. Gas hose connector
4. Gas Hose
5. Pressure Regulator
6. Gas Cylinder Valve
Parts
7. Gas Cylinder
8. Grease Box
9. Control Panel
10. Suitable Table
7
10
TGP-2_Plancha_30mbar_V0.7_14-09-24.indd 4 25.09.14 15:19

ENGLISH | 5
Ignitor lighting
The appliance features an electric igniter system that allows
easy lighting of the gass grill:
Do not lean over the appliance while lighting.
To light the grill:
1. Set all control knobs to 0/o.
2. Open the gas valve of the gas cylinder.
3. Push the left knob in and turn it to /ignite and /high
temperature. The burner should ignite automatically.
4. Ignite the right burner by pushing the knob in and turning
it to /ignite and /high temperature.
If the burners do not ignite after the second try, set all control
knobs to 0/o and wait for 5 minutes. Repeat the above
procedure.
Control knobs
Grilling
Each tube burner is controlled by a control knob. Each con-
trol knob has an to apply dierent settings:
0
O Ignition High Low
temp. temp.
The /ignition setting is found on both control knobs. Use
the control knobs to ignite the grill with the electric igniter.
Once a burner is lit, the temperature can be set as required
by setting the control knob between /high temperature
and /low temperature.
Before cooking for the first time, operate the appliance for
about 15 minutes without any food. This will heat clean the
internal parts and dissipate odour from the cooking grate.
WARNING
Follow all leak test procedures carefully in this manual
prior to operation.
TGP-2_Plancha_30mbar_V0.7_14-09-24.indd 5 25.09.14 15:19

6| ENGLISH
Gas hose & regulator information
Before each use, check if hoses are cut or worn. Make sure
it is not bent or kinked. Make sure the hose does not contact
any warm surface while the appliance is in use. Replace
damaged hoses immediately.
∙Only use EN certified hose assemblies and pressure regu-
lators with this appliance. The length must not exceed 1.5
meters.
∙If the pressure regulator is not supplied with the appliance,
use only certified pressure regulators that comply with
EN12864 (flow rate of max. 1.5 kg/h) and wich are ap-
proved for your country and gas as specified in the techni-
cal data.
Gas cylinder information
∙Liquid propane gas is a gas at regular temperatures and
pressures. Inside the gas cylinder, propane gas is a liquid.
As the pressure is released, the liquid readily vaporizes and
becomes gas.
∙Liquid propane gas has an odour similar to natural gas. You
should be aware of this odour.
∙Liquid propane gas is heavier than air. Leaking liquid pro-
pane gas may collect in low areas and prevent dispersion.
∙The gas cylinder must be installed, transported, and stored
in an upright position and out of the reach of children. Gas
cylinders should not be dropped or handled roughly.
∙Never store or transport a gas cylinder where tempera-
tures can reach 50° C, so e.g. do not leave the gas cylinder
in a car on a hot day.
∙Treat empty gas cylinders with the same care as when full.
Even when the gas cylinder is empty of liquid, there still
may be gas pressure in the gas cylinder. Always close the
cylinder valve before disconnecting.
∙If you see, smell or hear the hiss of escaping gas from the
gas cylinder while its valve is tightly closed:
1. Move away from the liquid propane cylinder.
2. Do not attempt to correct the problem yourself.
3. Call your fire department.
Gas cylinder replacement
If the gas cylinder is empty and must be replaced or a full
gas cylinder must be relocated, make sure to follow these
instructions:
∙Do not use a damaged gas cylinder. A dented or rusty gas
cylinder or a gas cylinder with a damaged valve may be
hazardous and should be replaced with a new one immedi-
ately.
∙The gas cylinder cannot be placed inside or under the ap-
pliance! Always place the gas cylinder on the side or rear of
the appliance.
∙Be sure the pressure regulator is mounted with the small
vent hole pointed downward so that it will not collect water.
This vent should be free of dirt, grease, bugs, etc.
∙The joint where the hose connects to the gas cylinder must
be leak tested every time the gas cylinder is changed or
reconnected.
WARNING
It is recommended to replace the pressure regulator
and hose assembly every 5 years. In some countries
it is prescribed that the pressure regulator and hose
assembly must be replaced in less than 5 years. These
national regulations prevail.
Contact your Hornbach store for a replacement pressure
regulator and hose assembly.
Leak test
Leak test the appliance before first use and every time the
gas cylinder is changed or reconnected:
1. Set all control knobs to 0/o.
2. Make sure the pressure regulator is tightly connected to
the gas cylinder and the gas hose is tightly connected to
the appliance and the pressure regulator.
3. Open the gas valve of the gas cylinder. If you see, smell
or hear the hiss of escaping gas from the gas cylinder,
close the gas valve of the gas cylinder immediately. There
is a major leak at the connection. Check all connections
before proceeding.
4. If you cannot see, smell or hear gas escaping, apply leak
detector spray on all connections of the gas system.
5. If growing bubbles appear, there is a leaking connection.
Close the gas valve of the gas cylinder immediately and
check the tightness of this connection. Repeat the above
procedure.
If the leak cannot be stopped do not try to repair. Visit
your Hornbach store and ask for assitance.
6. If no bubbles appear the gas system is ready for use.
Make sure to always close the gas valve of the gas cylin-
der after each use or leak test.
Maintenance
TGP-2_Plancha_30mbar_V0.7_14-09-24.indd 6 25.09.14 15:19

ENGLISH | 7
PROBLEM CAUSE SOLUTION
Flames on the burners burn in yel-
low or organge flames combined
with the smell of gas
Check the tube burners for spiders and
insects or other obstructions.
Clean the burners as described in clean-
ing and care.
Flame is low while control knob is
on /high temperature setting or
burner does not ignite.
Check if the gas cylinder is empty. Install a full gas cylinder and check for
leakes.
Check if the gas hose is bent or kinked. Straighten the gas hose.
The burner does not ignite auto-
matically while setting it to /ig-
nite and /high temperature.
Check if the electrodes are covered by
cooking residue.
Clean the burners as described in clean-
ing and care. Additionally clean the
electrode tip with alcohol.
Flame pattern on the burners is
inhomogeneous or do not run the
whole length of the burner.
Are the burners clean? Clean the burners as described in clean-
ing and care.
Troubleshooting
Storing the appliance
If the appliance needs to be stored for a prolonged period of
time (e.g. over winter):
WITH gas cylinder attached:
1. Set control knobs to 0/o and close valve at the gas
cylinder.
2. Carefully clean the appliance.
3. Store outdoors in a dry and well ventilated location and
out of reach of children.
4. Cover the appliance.
WITHOUT gas cylinder attached:
5. Set control knobs to 0/o and close valve at the gas
cylinder.
6. Carefully clean the appliance.
7. The appliance can be stored in a dry location indoors (e.g.
garage or cellar)
8. The gas cylinder needs to be stored outdoors in a dry and
well ventilated location and out of reach of children!
9. Cover the appliance.
When removing the appliance from storage check for tube
burner obstructions.
CAUTION
SPIDER/INSECT ALERT
If the appliance is getting hard to light or the flame is
weak, check and clean the venturis and tube burners.
Spiders or small insects are known to create flashback
problems by building nests and laying eggs in the ap-
pliance’s venturi or tube burner obstructing the flow of
gas.
The backed-up gas can ignite behind the control panel.
This flashback can damage the appliance and cause se-
rious injury or death. To prevent flashbacks and ensure
good performance, the burner and venturi tube as-
sembly should be removed and cleaned whenever the
appliance has been idle for an extended period of time.
TGP-2_Plancha_30mbar_V0.7_14-09-24.indd 7 25.09.14 15:19

8| ENGLISH
Appliance interior and exterior
∙Clean appliance often, preferably after each cookout.
∙Appliance should be cleaned at least once a year.
∙Cooking surfaces: If a bristle brush is used to clean any of
the appliance cooking surfaces, ensure no loose bristles
remain on cooking surfaces prior to grilling. It is not recom-
mended to clean cooking surfaces while appliance is hot.
∙Plastic surfaces: Wash with warm soapy water and wipe
dry. Do not use citrisol, abrasive cleaners, degreasers or a
concentrated appliance cleaner on plastic parts, as this can
result in damage and/or failure of the parts.
∙Porcelain surfaces: Because of glass-like composition,
most residue can be wiped away with baking soda/water
solution or specially formulated cleaner. Use nonabrasive
scouring powder for stubborn stains.
∙Painted surfaces: Wash with mild detergent or nonabrasive
cleaner and warm soapy water. Wipe dry with a soft nona-
brasive cloth. Do not apply caustic appliance/oven cleaner
to painted surfaces.
∙Stainless steel surfaces: To maintain your appliance’s high
quality appearance, wash with mild detergent and warm
soapy water and wipe dry with a soft cloth after each use.
Baked-on grease deposits may require the use of an abra-
sive plastic cleaning pad. Use only in direction of brushed
finish to avoid damage. Do not use abrasive pad on areas
with graphics.
Cleaning and care
Cooking grate
1. Burn o the cooking grate after every use for approx. 15
minutes. This will keep food residues to a minimum.
2. Wait for the appliance to cool down completely.
3. Remove stubborn stains with mild soapy water or a nona-
brasive scouring powder.
4. Rinse with fresh water afterwards and dry with a soft lint
free cloth.
WARNING
Always set the control knobs to o position and close the gas cylinder valve when appliance is not in use.
Make sure the appliance has cooled down.
Burners
1. Remove cooking grate.
2. Brush entire outer surface of the burner to remove food
residue and dirt.
3. Clean any blocked port carefully with a wire e.g. a paper
clip.
4. Check each burner for damage, corrosion or enlarged
holes. If any damage is found the burner must be re-
placed.
Grease box
1. After every use, clean the grease box with mild soapy
water. Do not remove the grease box during use.
2. Rinse with fresh water afterwards and dry with a soft lint
free cloth.
TGP-2_Plancha_30mbar_V0.7_14-09-24.indd 8 25.09.14 15:19

ENGLISH | 9
Technical data
Warranty
This Tenneker item has been produced according to the most
up-to-date production methods and is subject to permanent,
strict quality assurance.
HORNBACH-Baumarkt-AG, Hornbachstraße 11, 76879 Born-
heim/Germany (hereinafter referred to as Issuer) guarantees
the quality of the Tenneker charcoal and gas barbeques ac-
cording to the following terms and conditions.
1. Warranty period
The warranty period is 10 years. The warranty period starts
on the purchasing date. Please keep the original receipt or
original invoice safe to verify the purchasing date.
2. Warranty scope
The warranty applies exclusively to production or mate-
rial faults as well as covers and fire bowls that have rusted
through.
The warranty shall not apply to defects that are a conse-
quence of
• incorrectassemblyorconnection
• improperhandlingoruse
• improperorinsucientmaintenanceorrepairs
• violentdamage
• useofsparepartsthatarenotgenuineparts
• unintendedchemical,electricalorelectronicinuences
Furthermore, the warranty shall not include damage to wear-
ing parts caused by normal wear. The warranty shall also
exclude associated or consequential damage.
3. Warranty services
During the warranty period the Issuer shall test the faulty
item to determine whether or not it qualifies for warranty. In
the event that the item qualifies for warranty, the Issuer shall
repair the item or replace it free of charge for the warrantee.
If the item is no longer available for delivery at the time of the
warranty case, the Issuer shall be permitted to replace the
item with a similar product. The Issuer shall assume owner-
ship of the replaced item or parts thereof.
Warranty services (repairs or replacements) shall not extend
the warranty period. The warranty period shall also not re-
start upon providing warranty services.
4. Warranty claims
Please contact the nearest HORNBACH-Baumarkt branch to
claim the warranty. Find your nearest branch at www.horn-
bach.de or use the following Email address
“service@hornbach.com” to contact the Issuer.
Warranty claims shall be accepted upon presenting the origi-
nal receipt or original invoice only.
5. Legal rights
The warranty does not restrict your legal rights regarding
warranty and product liability.
Description Gas Grill
Model No. TGP-2 Plancha 30 mbar
Version 5588010 NL,
5588011 RO, CZ, SK
Total Heat Output 5 kW (350 g/h)
Gas Category I3B/P(30)
Gas Type Butane, Propane or their
mixtures
Gas Pressure 30 mbar
Injector size ø 2x 0,82 mm
Destination countries BE, BG, CY, CZ, DK, EE, FI,
FR, GB, GR, HR, HU, IT, LT,
MT, NL, NO, RO, SE, SK, TR
TGP-2_Plancha_30mbar_V0.7_14-09-24.indd 9 25.09.14 15:19

10 | ENGLISH
Gas Grill Assembly 1x Cooking Grate 1x
Gas Hose 1xGrease Box 1x
Feet 4x
Components
Pressure Regulator 1x
TGP-2_Plancha_30mbar_V0.7_14-09-24.indd 10 25.09.14 15:19

ENGLISH | 11
1
2
3
Assembly
Cooking Grate 1x
Place the gas grill assembly on its
feet on a clean and level surface.
Attach the cooking grate to the gas
grill by setting it into the 4 openings.
Gas Grill Assembly 1x
Feet 4x
Place the gas grill assembly upside
down on a clean and level surface.
Attach the 4 feet to the gas grill as-
sembly as shown.
Grease Box 1x
Slide in the grease box on the right
side of the gas grill assembly.
TGP-2_Plancha_30mbar_V0.7_14-09-24.indd 11 25.09.14 15:19

12 | ENGLISH
4
5
6
Make sure all control knobs of the
appliance are in 0/o position!
Attach the pressure regulator to the
valve of the gas cylinder.
The gas cylinder in your country
might look dierent from the one
shown!
The gas cylinder cannot be placed
under the appliance! Always place
the gas cylinder on the side or rear
of the appliance.
Gas Hose 1x
Pressure Regulator 1x
Connect the gas hose to the gas
inlet on the gas grill assembly and
to the pressure regulator.
The gas hose and pressure regu-
lator in your country might look
dierent from the one shown!
Check all connections of the gas
hose assembly for leaks by use of a
leak detector spray.
Test the appliance as described
in the chapter LEAK TEST at least
once a year and every time the gas
cylinder is moved, disconnected or
changed!
TGP-2_Plancha_30mbar_V0.7_14-09-24.indd 12 25.09.14 15:19

ENGLISH | 13
Notes
TGP-2_Plancha_30mbar_V0.7_14-09-24.indd 13 25.09.14 15:19

Manufactured for Hornbach Baumarkt AG,
Hornbachstraße 11, 76879 Bornheim / Germany
www.hornbach.com
TGP-2_Plancha_30mbar_2014/09_V0.7
TGP-2_Plancha_30mbar_V0.7_14-09-24.indd 14 25.09.14 15:19
This manual suits for next models
2
Table of contents
Other Tenneker Grill manuals
Popular Grill manuals by other brands
BRAYER
BRAYER BR2002 instruction manual
weasy
weasy GBE42 instruction manual
Germatic
Germatic BULL BURNER Splus-800G.561.3 instruction manual

Outdoor Gourmet
Outdoor Gourmet 157872 Assembly instructions & user manual

oklahoma joes
oklahoma joes Longhorn Smoker 06201348 Assembly instructions
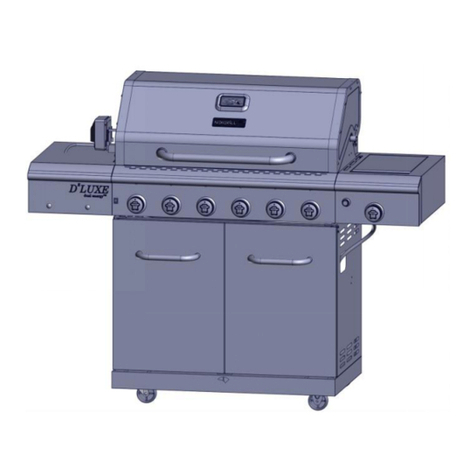
Nexgrill
Nexgrill 730-0896B Assembly & instruction manual
