TERMOSCUD R244 PRO User manual

ISTRUZIONI DI MONTAGGIO
Instruction manual
Yamaha Xmax > 2023
R244 PRO
M
A
X
I
M
U
M
P
R
E
S
S
U
R
E
0
,
1
B
A
R
/
1
,
3
P
S
I
M
A
X
I
M
U
M
P
R
E
S
S
U
R
E
0
,
1
B
A
R
/
1
,
3
P
S
I
GB
I
VISTA RIEPILOGATIVA
Summary view
Le foto e i disegni sono puramente indicativi. Tucano Urbano si riserva il diritto di modificare
o migliorare il prodotto in qualsiasi momento, senza preavviso esenza obblighi di dover
applicare tali modifiche su prodotti già venduti.
Photos and drawings are purely indicative. Tucano Urbano reserves the right to modify or
improve the product at any time, without prior notification and with no obligation to apply
such modifications to products already sold.
Per una protezione ulteriore si consiglia l’acquisto del kit salvavernice 346 o 347.
For further protection we recommend purchasing the kit paint-saver 346 or 347.
M
A
X
I
M
U
M
P
R
E
S
S
U
R
E
0
,
1
B
A
R
/
1
,
3
P
S
I
M
A
X
I
M
U
M
P
R
E
S
S
U
R
E
0
,
1
B
A
R
/
1
,
3
P
S
I
STEP C
STEP B
STEP A
1
3
STEP D
Y
3bis
2bis
STEP E
X
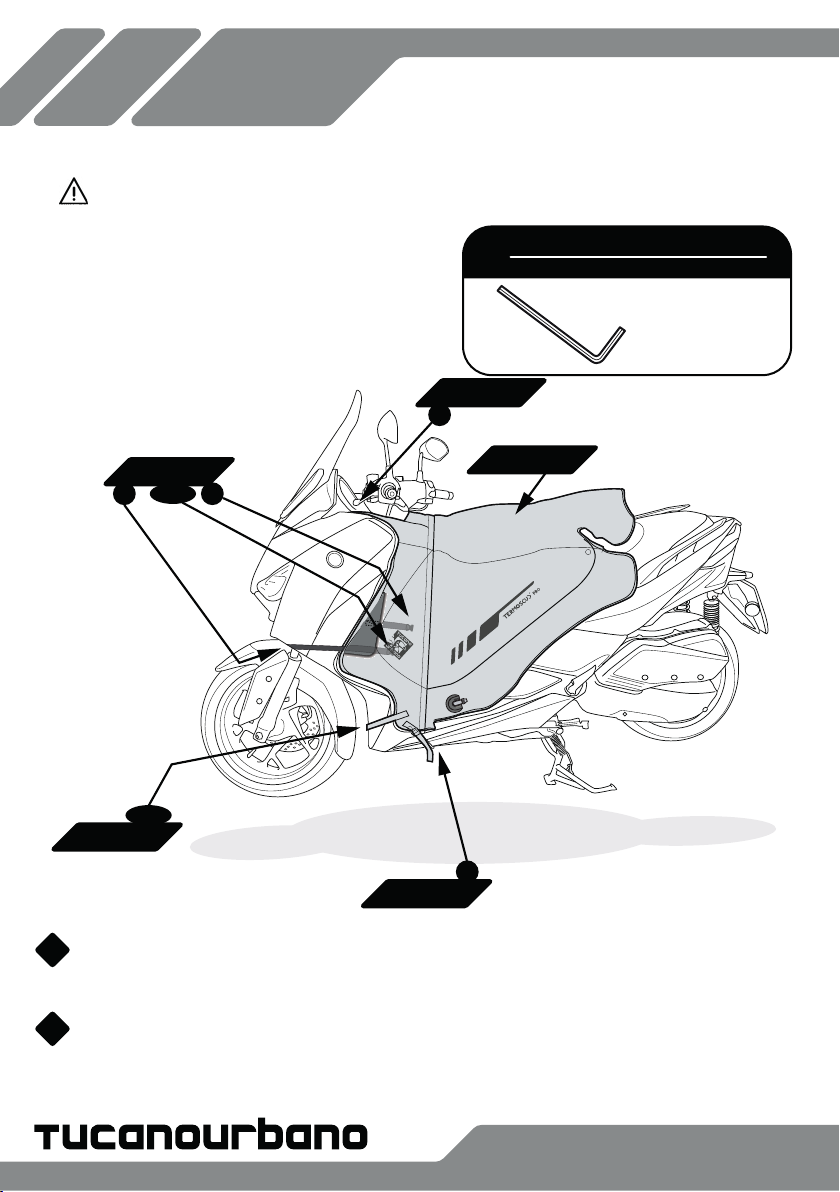
KIT DI ASSEMBLAGGIO
ASSEMBLY KIT
Allen N.4 x 1

R244 PRO
Stendere Termoscud® sulla sella con i nastri 2 e 3 in avanti.
Unfold Termoscud® on the scooter’s seat with straps 2 and 3 forward.
GB
I
STEP A
Y
1
11
3
3
162bis
2bis
X
X3bis
3bis
22
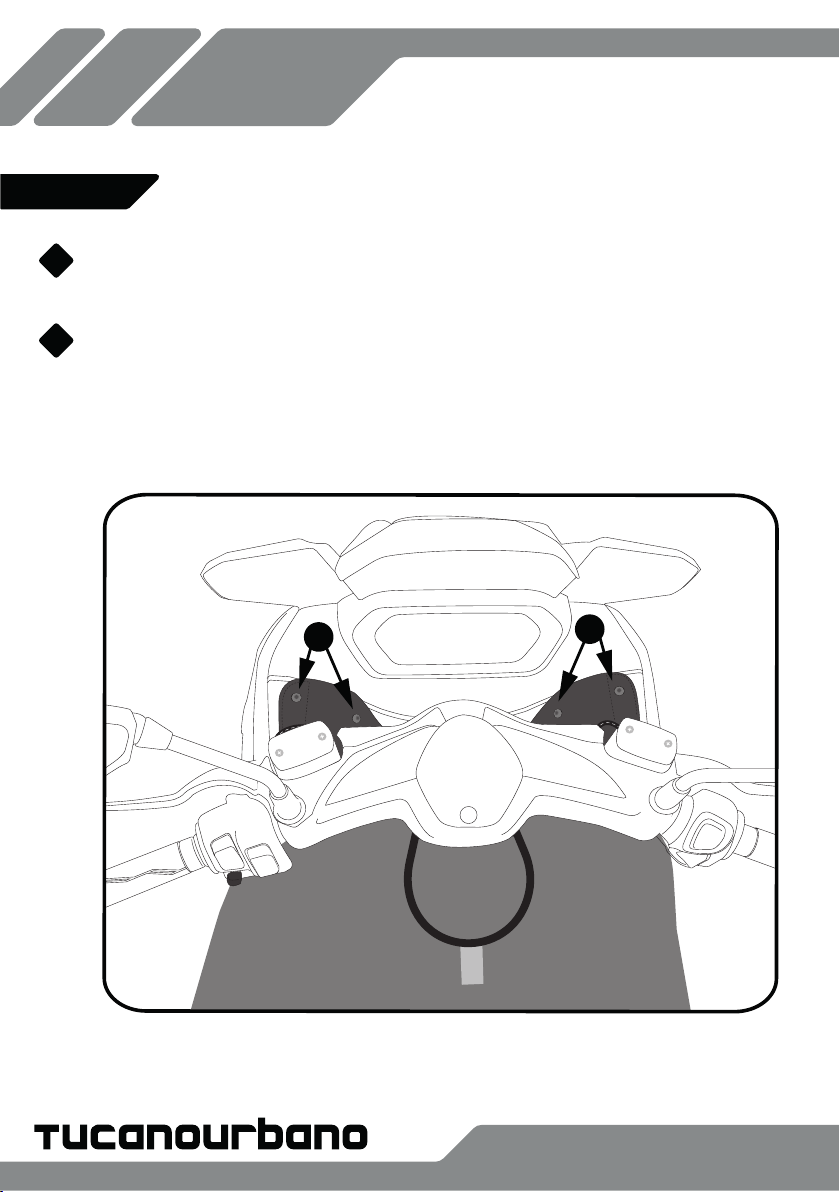
STEP B
GB
IFissare Termoscud® da entrambi i lati, utilizzando le viti originali dello scooter, facendole
passare attraverso i fori sui punti 1.
Fasten Termoscud® on both sides, using the scooter’s original screws, threading them
through the holes at the end of points 1.
11
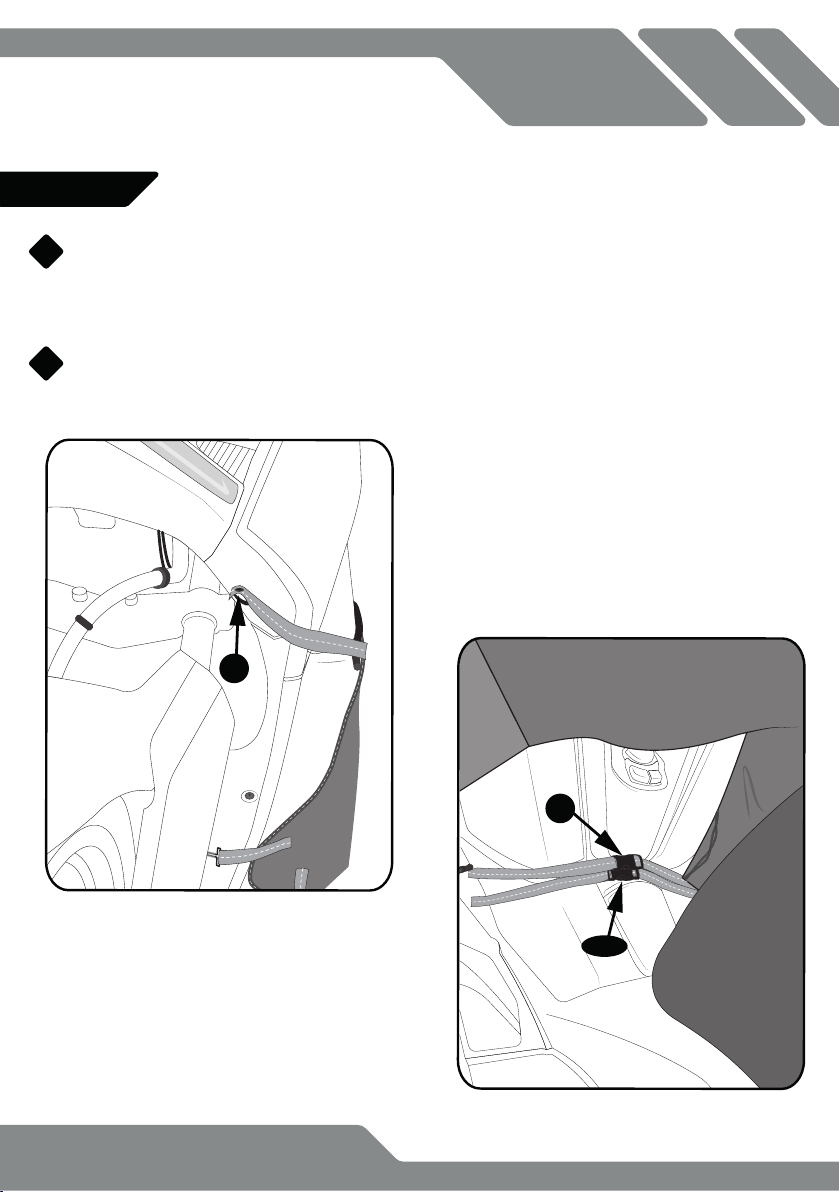
I
GB
R244 PRO
Fissare il coprigambe da entrambi i lati, utilizzando le viti dello scooter, facendoli
passare attraverso i nastri 3.
Fissare Termoscud® da entrambi i lati, utilizzando le viti originali dello scooter, facendole
passare attraverso i fori sul punto 3bis sotto il portellino di plastica.
Fasten Termoscud® on both sides, using the scooter’s original screws, threading
them through the holes at the end of straps 3.
Close the buckles of straps 3bis and X under the leg cover, behind the bodywork.
STEP C
3
3bis
X
Table of contents
Other TERMOSCUD Motorcycle Accessories manuals


