Terra MMH3000 User manual

QPSK/8PSK(DVB-S/S2) to COFDM (DVB-T) transmodulator with CA module slot tdx311c
1. Product description
The tdx311c is DVB-S/S2 receiver with DVB-T modulator, CA module slot and transport stream remultiplexer. It is intended
to receive DVB-S/S2 signal from satellite, descramble requested services by inserted CA module and card, lter services or
modify parameters of transport stream, and convert it into DVB-T.
Transmodulator is intended to use in the MMH3000 headend.
tdx311c is designed in accordance with standard EN50083-5 class 2.
The unit is intended for indoor usage only.
RoHS compliant.
2. Safety instructions
Any repairs must be performed by a qualied personnel.
Module shall not be exposed to dripping or splashing water and no objects lled with liquids, such as vases, shall be
placed on it.
Avoid placing module next to central heating components and in areas of high humidity.
No naked ame sources, such as lighted candles, should be placed on module.
If the module has been kept in cold conditions for a long time, keep it in a warm room no less than 2 hours before plugging
into the mains.
The ventilation should not be impeded by covering with items, such as newspapers, table-cloths, curtains.
This product complies with the relevant clauses of the European Directive 2002/96/EC. The unit must be recycled
or discarded according to applicable local and national regulations.
3. Electrostatic discharge caution
Caution: The module contain electrostatic sensitive components. To minimize electrostatic discharge, observe the
following precautions:
- Do not remove module from their antistatic plastic bag until you are ready to install it into the basic unit.
- Hold the module only by the front panel of module.
- Do not place the module on an unprotected surface. Immediately after you remove a module from the
basic unit, you must insert it into its antistatic plastic bag.
- When the module is not in use, keep it in their antistatic plastic bag.
- Do not ship or store module near strong electrostatic, electromagnetic or radioactive elds.
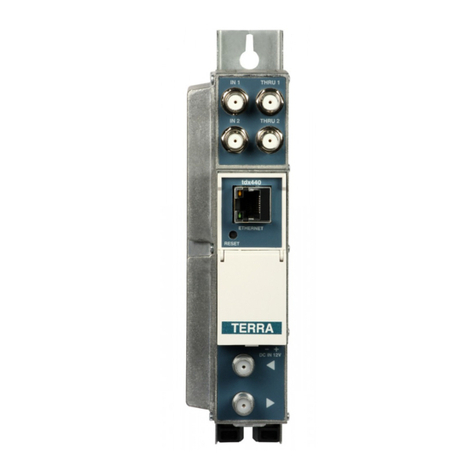
4. External view
[1] - indicator of addressing
[2] - indicator of module's status
[3] - MPEG2 TS output connector
[4] - RF input of DVB-S/S2 signal, DC output for LNB powering
[5] - RF loop through output
[6] - xing screws
Figure 1. External view of module
5. Installation instructions
Read the instruction rst.
Disconnect base unit from the mains before insertion/changing the module.
Before pushing the module into the direction of bus bar, carefully put the edges of module PCB into grooved guides,
stamped in the base unit. Fasten the module by supplied xing screws.
Place serrated lock washer with external teeth on module and nut on adapters as described in the user manuals of base
units UC360, UC380.
After 7-10 seconds of powering the module will run in normal operation mode.
It's recommended to use QUATRO LNB.
Mini modular headend MMH3000
www.terraelectronics.com
OFDM Params => Out. Frequency
Allows to setup output frequency of modulator.
OFDM Params => RF Offset
Allows to setup RF offset of modulator. ±166 kHz for 8 MHz bandwidth, and ±125 kHz for 7 MHz channel.
OFDM Params => Attenuator
Allows to setup RF attenuation in a range of 0..15.5 dB.
Network Params => Stream ID
Stream ID value. Requires to execute "Save & Run" command from "Input Stream" menu.
Network Params => Network ID
Network ID value. Requires to execute "Save & Run" command from "Input Stream" menu.
System Status => List of Errors
Shows all errors of the systems. Use "Up" and "Down" buttons to review all of them.
System status => Input status
Shows input bitrate and C/N. It also shows RF level if tuner is unlocked.
System status => Output status
Shows output bitrate and the usage of available bandwidth.
System Info => Product
Shows the name of the device.
System Info => Serial Number
Shows serial number of the device.
System Info => Soft. Version
Shows software version of the device.
System Info => System time
Shows system time of the device. NOTE: timing zone and date/time source must be setup correctly. These settings
available only with PC control software.
System Info => Temperature
Shows internal temperature °C of the device.
RF output parameters
Modulation DVB-T QPSK, QAM16, QAM64
Bandwidth 7 MHz, 8 MHz
Guard interval 1/4, 1/8, 1/16, 1/32
Code rate 1/2, 2/3, 3/4, 5/6, 7/8
Mode 2k
RF output frequency 110...860 MHz by 0.5 MHz step
RF offset (7 MHz) -125 kHz, 0, +125 kHz
RF offset (8 MHz) -166 kHz, 0, +166 kHz
Attenuation 0...15.5 dB by 0.5 dB step
Nominal output level 90 dBμV ±1.5 dB
Carrier stability ± 500 Hz
MER ≥ 35.0 dB
Output impedance 75 Ω
RF input parameters
Modulation DVB-S/S2 QPSK, 8PSK
Input frequency 950 ... 2150 MHz
Input level -65 dBm ... -25 dBm
Input impedance 75 Ω
Loop through gain -5 ... +5 dB
Max. symbol rate 45000 kSymb/s
Multiplexing parameters
Input bit rate ≤ 80 MBit/s
Output bit rate 31.5 MBit/s (modulator bandwidth limited)
Input services ≤ 256
PID lter ≤ 256
Version
monitoring
PMT Yes
PAT No
SDT No
PCR restamping Yes
EPG (EIT) multiplexing Yes
Other parameters
Supply voltage 5.5 ± 0.1 V
Current consumption 2 A
Supply voltage for LNB 18 ± 1 V
Current for LNB, max. 400 mA
Operating temperature range see UC360, UC380 manuals technical characteristics
Dimensions /Weight 47.5 x 117 x 220.5 mm / 0.7 kg
9. Technical specications

2
RF input signal can be connected directly to [4] connector or via loop through outputs of other modules.
Any other module's DVB-S/S2 RF input can be connected to tdx311c loop through output [5].
Comments of the front panel indicators:
[ 1 ] - Address indicator. It lights on green when the module is addressed on Terra Bus bus. Blinking indicator indicates
addressing error.
[ 2 ] - Status indicator. It lights on red when any error occurs. It will start blinking at power on to indicate a starting up status.
6. Default settings
DVB-S/S2 parameters:
- LNB Power: Off
- LNB Frequency, MHz: 9750
- Input Frequency, MHz: 10832
- Symbol rate, kSym/s: 22000
OFDM Modulator parameters:
- Modulation QAM64
- Bandwidth: 8 MHz
- Guard interval: 1/32
- Code rate: 7/8
- Cell ID: 0
- RF: Off
- Saw lter: Off
- RF Frequency: 474 MHz
- RF Offset: 0 kHz
- Attenuator: 0.0 dB
OFDM Output stream parameters:
- Transport Stream ID: 1
- Network ID: 1
- Network Name: none
- Date/Time source: DVB-S/S2 input
- Timing zone: 0 GMT
- NIT: disabled
- EPG Multiplexing: enabled
7. Operating
Device receives DVB-S/S2 signal from satellite and outputs transport stream to connector [3] transparently (without any
modication). This signal can be connected to other devices of MMH headend, which accepts TS.
System processes incoming transport stream (measures bitrate, generates PSI, lters services, restamples PCR,
multiplexes EPG) and passes to modulator.
System monitors PMT tables (up to 32) and updates the output of multiplexer if any changes detected (for ex., new stream
detected, new descriptors added or removed).
All parameters can be setup via user friendly graphic interface, which supports Terra Link, CMH Master software, PCS200
server. "Home" tab of tdx311c control panel will appear when device was selected (see corresponding software user manual).
See Figure 2.
Figure 2. "Home" tab of tdx311c control panel
Three sectionsexist on thispage. "Inputchannel" tableshows parameters ofincoming transportstream (QPSK/8PSKdemodulator).
"Signal status" shows transport stream detection status. "Bit Rate" shows bit rate of incoming transport stream.
"Output channel" table shows parameters of outgoing transport stream. "Max. Bitrate" - this is the maximum available
output bit rate according to OFDM modulation parameters (code rate, guard interval, etc). "Current Bitrate" shows bit rate
of outgoing transport stream. "Used bandwidth" value calculated from previous two values and indicates the percentage of
used bandwidth.
NOTE: Ensure that used bandwidth would not exceed 95%. Otherwise bit rate overow would occurs. In case of bit rate
overow error, indicated bit rate values will be inaccurate because a device can not measure bit rate in such error condition.
"System status" table indicates main information about the device (device name, serial number, software and hardware
version, internal temperature, system time). This table also will show all errors of device operation.
Device has internal clock and a value 1970.01.01 00:00:00 will be assigned after system startup. The clock will be updated
automatically from transport stream TDT table (if enabled at "OFDM Output" tab).
Information on this page is updated automatically in real time.
8. Handheld control unit
Handheld unit allows to control the most important parameters of the device.
Select the tdx311c device (see user manual of handheld unit). "Control" menu item will appear. Menu tree will appear on
the screen. The rst character ">" marks currently selected menu item. Some menu items has "^" character in the second
position of the line. It means that current menu item is checked.
Use "Up" and "Down" buttons to surf through the menu. Use "Enter" key to enter into deeper submenu or execute the
command associated with it. "Esc" key will exit to upper menu or cancel the execution of a command.
tdx311c has the following menu tree:
Input streams
Input params
OFDM params
Network params
System status
System info
Rescan...
List of services
SAVE & RUN
Input frequency LNB frequency
Symbol rate LNB power
Modulation
Cell ID Out.frequency
Bandwidth
RF RF offset
Guard interval
Code rate Saw lter Attenuator
Stream ID
Network ID
List of errors
Input status
Output status
Product
Serial number System time
Soft. version Temperature
Input stream =><List of services>
"Enter" key will toggle selection of the service. If the second character has "^" sign, it means that the service is
selected. Otherwise it is disabled.
Input stream => Save & Run
Will save all information, generate all SI tables and run with new settings.
Input Params => Input Freq.
QPSK / 8PSK input frequency, MHz.
Input Params => Symbol Rate
QPSK / 8PSK input symbol rate.
Input Params => LNB Frequency
Frequency of LNB, MHz
Input Params => LNB Voltage
LNB Voltage 18V turn On/Off.
OFDM Params => Modulation
Allows to select the modulation (constellation) between QPSK, QAM16 and QAM64.
OFDM Params => Bandwidth
Allows to select the bandwidth of the RF output between 7 and 8 MHz.
OFDM Params => Guard Interval
Allows to select guard interval between 1/4, 1/8, 1/16 and 1/32.
OFDM Params => Code Rate
Allows to select code rate between 1/2, 2/3, 3/4, 5/6 and 7/8.
OFDM Params => Cell ID
Allows to enter Cell ID value 0..65535.
OFDM Params => RF
Allows to turn On / Off RF of modulator.
OFDM Params => Saw lter
Allows to turn On / Off saw lter of intermedium frequency. Parameter can be actual if analog TV channel is
adjacent to OFDM channel. 8

3
Figure 3. "QPSK Params" section of tdx311c control panel
QPSK Params section (see gure 3) allows to setup RF reception parameters, displays status of demodulator.
"LNB Power" parameter allows to switch On/Off 18 V power supply to LNB (default value is Off).
"LNB Frequency" - frequency of LNB. Usually are 9750, 10600 MHz.
"Input Frequency" - The frequency of RF input signal.
"Symbol rate" - The symbol rate of transponder.
"QPSK receiver status" shows the status of demodulator. Device measures signal level, VBER (BER after Viterbi), PER
(Packet Error Ratio), carrier/noise ratio and shows other information of transponder (modulation standard, FEC, frequency).
Device recognizes any packet loss in demodulator and calculates the ratio between valid and invalid packets. If PER value
has a sign "<", it means, that no any packet has been lost in demodulator section. In case of error, a sign "<" will disappear,
and an error record will appear in Logs section.
Parameters of demodulator on this page are updated in real time.
QPSK Input section
Figure 4. QPSK Input section of tdx311c control panel
This is a transport stream multiplexer section of device. Valid transport stream must exists (QPSK/8PSK demodulator must
be locked) to start working with this section. "Load streams" button will load information of the stream. All found services will
be listed below the button. Lock symbol at the beginning of service name indicates that a service is scrambled. Next icon
represents the type of service. Following icons are possible:
- High denition television;
- Standard denition television;
- Radio
Unidentied service types will not have any icon.
NOTE: Lock sign only identies a ag of SDT table and does not check the content itself.
Check "Enable" checkbox and press "Enable services" to pass that service to modulator. After few seconds a service will
be activated and passed to modulator.
Check "Decrypt" checkbox and press "Enable services" to request CAmodule to descramble that service. After few seconds
CA module will start to descramble requested service(s).
NOTE: Press "Home" tab to see used bandwidth of selected services. Ensure that it takes not more than 90-95% of
available bandwidth, and no any bitrate overow errors are there. Usually CA modules can descramble up to two services.
More services can descramble only professional modules. Please consult the manufacturer of the module about its capabilities.
Press sign if you want to see or change more details about the service. New area with information about the service
will be expanded. See Figure 5.
Output stream parameters can be congured in this section. The most important parameters are Stream ID and Network
ID. User must ensure that Network ID number is identical in all broadcasting equipments and Transport stream ID must be
unique for every modulator or other streaming equipment.
“Private Data Specier” eld optionally can be used to identify the broadcaster or country. It should be assigned according to EN
101 162 specication. All allocated values can be nd here: http://www.dvbservices.com/identiers/private_data_spec_id.
Hexadecimal value should be entered here. The descriptor will be used together with LCN descriptor. If unsure - enter
zero. In that case the Private_Data_Specier will not be used at all.
"Network Name" used in NIT (Network Identication Table) and it represents broadcaster.
"Date/Time source" selects the source of the clock. TDT (Time and Date Table) will be passed to the output from selected
source. Also a system clock will capture current time values from this source.
"Timing zone" selection used for system clock only and does not affect the output stream. TOT (Time Offset Table) is
passed transparently to the output from selected source, which carry timing zone information to the end-user.
"NIT Enable" parameter allows to turn On/Off NIT generation.
"EPG Multiplexing" parameter allows to turn On/Off multiplexing of EPG (Electronic Program Guide). The system will
multiplex EPG (EIT) if this parameter is turned on. EPG multiplexing part takes original EIT (Event Information Table),
modies StreamID, NetworkID values and sends the stream to the output of multiplexer. EIT will be passed (multiplexed)
for enabled services only.
New button "Save and RUN" will appear if any value of this section was changed. Press it to save all changes and run
the system with modied values.
Next important part of this section is NIT conguration. Broadcaster can describe whole network there, so receivers (TV,
set-top-boxes) will be able to scan all channels automatically. The most important note to remember - Network ID number
must be identical in all broadcasting equipments and Transport stream ID must be unique for every modulator or other
streaming equipment.
Enter NetworkID and StreamID values in "New Stream Description" table to start describing a stream (the output of each
modulator in the system). New empty record for that stream will appear above that table. Press sign to expand a description
and add all necessary descriptors for that stream. Select a descriptor (probably only "terrestrial_delivery_system_descriptor"
will need) from the list and press "Create new descriptor" button. New empty descriptor will be added. Press onto again
to expand stream description. New inserted descriptor will be found. Press onto to edit it's values. See Figure 8.
Figure 9. Terrestrial descriptor
Exact broadcasting parameters must be written for selected stream.
All streams (modulators) must be described here and all other modulators must have the same description table.
NOTE: Only terrestrial descriptor has user-friendly editor. All the rest descriptors can be added in hex format only. Values
must be added according to EN 300 468 standard, starting after descriptor_length eld. descriptor_tag and descriptor_length
will be added/calculated automatically.
NOTE: This descriptor for current modulator (current transport stream) is generated automatically according to modulation
parameters.
Spaces between hex values can be added, but it is not necessary.
Press "Save and RUN" when all NIT modications are done.
Logical Channel Descriptors can be added into the 1st section of NIT, which represents services of current stream only.
"Selected channels" table has a list of all currently enabled services. If "Log. channel" eld is other than zero, a LCD (Logical
Channel Descriptor) will be added for that channel.
LOGs section
Figure 10. LOGs section of tdx311c
All errors or most important events will be logged in this section. "Erase log" button allows to clear all logs.
20 records per page can be displayed. Page selector will appear on the screen if more than 20 records are in the system.
This page will be refreshed automatically when a new event occurs in the system.
"Download log" link allows to download all log records from the system as a text le.
NOTE: This feature works with Terra Link starting from 1.6.0 version or CMH Master starting from 1.0.3.0.
7

Figure 5. Service details
List of all streams and other parameters will appear. Some streams will have icons, which indicates the type of the stream.
Following icons are possible:
- Sound stream;
- DVB Subtitles;
- Teletext;
- Video;
- Stream is descrambled by CAM;
- Stream is not descrambled by CAM;
A language code will be visible in round brackets if presented in the stream.
A lock sign identiers conditional access streams, which affects a stream or a whole service (like in example above).
Most of the streams of the service can be disabled (ltered) by unchecking "Enabled" check box.
"Decrypt" checkbox allows to decrypt selected streams.
For all streams, that are requested to decrypt, scrambled ag is checked and result displayed as a lock icon. Green open
lock icon means successfully descrambled stream, red closed lock icon means the stream is not descrambled.
A service name and service provider name can be changed there. "Scrambled" ag can be switched on/off. Press "Update
program information" button to modify details the service.
NOTE: "Enable services" button will need to be pressed to save all the changes and for them to take effect.
"CAM" section
Figure 6. CAM parameters of tdx311c control panel
4
There are two tables in this section – CAM information and CAM control.
CAM information table shows CA module manufacturer name, product name, version number, description and supported
CA systems. The button with CAM title allows start CAM control session. This session menu, received from CAM, is dis-
played bellow. Last row of the CAM information table, the ‘Automatic CAM reset’ checkbox and ‘Reset NOW’ button exists.
When ‘Automatic CAM reset’ checkbox is checked, CA module will be restarted automatically in case of descrambling error.
Descrambling error is detected when any of requested stream scrambled ag is not reset by CAM.
NOTE: Uncheck ‘Automatic CAM reset’ checkbox when card in the CA module is not yet activated. Automatic CAM reset
not allows the module to activate the card.
‘Reset NOW’ button can be used to restart CA module manually.
"OFDM Params" section
Figure 7. OFDM parameters of tdx311c control panel
There are two tables in this section - modulator parameters and RF parameters.
Modulator parameters:
Modulation - modulation type. Possible values: QPSK, QAM16, QAM64
Bandwidth - 7 or 8 MHz.
Guard interval - 1/4, 1/8, 1/16, 1/32
Code rate - 1/2, 2/3, 3/4, 5/6, 7/8
Cell ID: - any value 0..65535 can be entered.
Mode: - 2k only
RF parameters:
RF On/Off - Allows to switch RF On or Off at the output
Saw lter - Enable or disable 8 (or 7) MHz saw lter at intermediate (36 MHz) frequency. If the frequency offset
±166/125 kHz is used, a lter will be switched off automatically.
RF Frequency - Output frequency of modulated COFDM signal. Step - 0.5 MHz.
RF Offset - Output frequency offset ±166 kHz, or ±125 kHz in 7 MHz bandwidth case.
Attenuator - RF Output attenuation in 0.0 .. 15.5 dB range.
NOTE: terrestrial_delivery_system_descriptor in NIT will be changed automatically after a change of any modulation
parameters. Open "OFDM Output" tab and press "Save & Run" to save new values of descriptor.
"OFDM Output" section
Figure 8. OFDM output parameters of tdx311c 5
Other manuals for MMH3000
2
Other Terra Modulator manuals
Popular Modulator manuals by other brands
Security-Center
Security-Center Profiline TV8682 installation guide
Tefi Vintage Lab
Tefi Vintage Lab GOLDEN ERA operating manual
Kathrein
Kathrein UFO 331/TP manual
Patching Panda
Patching Panda PUNCH MG quick start guide

Hamamatsu
Hamamatsu LCOS-SLM X15213 Series Operation manual
Fracarro
Fracarro KM operating instructions

