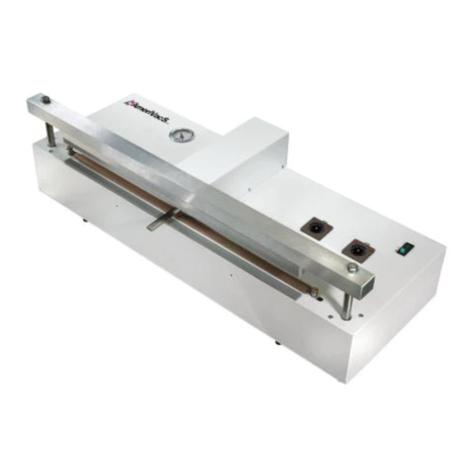
TEXWRAP 2219 Series User manual

Confidential and Proprietary 2.3
Rev. 10.06
Texwrap
“Built-Better/Backed-Better Warranty”
All Texwrap manufactured components are warranted against defects in design, material and
workmanship for a period of three (3) years- unlimited cycles. All purchased components are
warranted for a period of one year. Warranty is transferrable for the life of the Warranty
beginning with date of shipment to the original purchaser's facility. Warranty does not cover
the replacement of consumable/wear items (sealing blades, sealing pads, tape, belts, etc),
routine maintenance, or alignments.
Texwrap will, at their discretion, repair or replace a defective component at no charge
including UPS ground transportation. Field technician labor is typically handled on
warranted items by local Texwrap distributors on a billable basis. Contact your local
Texwrap distributor for their warranty claim procedure and policies.
This warranty will become null and void if it is determined by Texwrap that:
- the equipment is misused, abused or neglected in any way.
- the equipment is altered or modified without prior written approval from Texwrap.
Texwrap does not warrant that the equipment conforms to any insurance regulation, electrical
or safety code (with the exception of panels containing UL stickers, which meet UL codes).
The purchaser assumes liability for compliance with all applicable statutes, codes and
regulations whether federal, state or local.
This limited warranty applies only to the repair or replacement of defective parts. Warranty
does not cover replacement parts not purchased from Texwrap.
For any replacement part shipped under warranty, the defective part must be returned to
Texwrap by a Texwrap distributor within 30 days for examination. If determined to be
defective, a credit will be issued. If the part is determined not to be defective, the part will be
returned to shipper and no credit issued. Credits will not be issued for parts after 30 days.
Please note: A Return Authorization (RA) number must be obtained from the Parts
Department prior to shipment of a defective part to Texwrap.

This page intentionally left BLANK
2

Introduction
Welcome to the TEXWRAP 2219 series L-Sealer Wrapper!
This manual covers the operations and parts labeling of the 2219 L-Sealer machine.
The majority of the TEXWRAP 2219 machine controls are located in the machine’s swivel touch-pad
interface. TEXWRAP recommends you read this manual and familiarize yourself with the controls,
terminology and operations of this machine before attempting any of the following procedures including
the basic installation of this equipment.
The TEXWRAP model 2219 is a horizontal form, fill and seal. The L-Sealer seal head is pneumatically
operated, with all other functions performed with VFD AC motors. All moving parts have been covered
with safety interlocked guards so as to keep the user safe.
NOTE: If your machine is the Enhanced Version, all time based
screens will show distance based items, i.e. Rear Bag Timer will
now be Rear Bag Distance.
The distance based feature means that as the belt speed changes, settings
such as front and rear bag will not have to be changed to accommodate the
new speed setting.
3

INSTALLATION REQUIREMENTS
1) Wrapper must have dedicated, hard wire drop circuit 240 VAC single phase, 20 Amp, with local
disconnect capabilities.
2) All connections must be properly grounded from circuit box, with earth ground origin.
3) Compressed air line capable of 80PSI, 2CFM – clean, dry air.
4) There should be a minimum clearance of 6ft. on each side of machine.
5) Floor should be level concrete, or similar structure.
MACHINE SET-UP PROCEDURE
1) Uncrate, unpack and level machine. Check that all ORANGE shipping straps and ties have been
removed. Assemble scrap winder, feet and any other components in shipping box.
2) Assure that proper electric and air has been supplied to machine, and turn on main disconnect.
3) After boot up, press the red RESET button. If button is not lit, troubleshoot E-stop circuit.
4) Turn on cross seal and side seal heaters.
5) Load film through the machine using the film thread diagram and following pictures.
6) Slide infeed conveyor/inverter heads to accommodate product width plus 1.5x product height.
(Unlock slider with handle under deck).
7) Raise or lower inverting heads to accommodate product height plus 1/4in.
8) Adjust sealing mechanism height to accommodate the product being run. This is done by the
handle located on the lower left hand out feed leg. When jaws close, the center-line should be
roughly half the height of the package.
9) Check Front and Rear Bag settings, these should be about 1.5x the product height. These settings
can be adjusted as machine runs to fine tune the position. Adjust Seal Time as needed.
10) Set main belt speed to the lowest pot. setting (20FPM) and press the green RUN button.
11) Any adjustments can be made while the machine is running, both mechanical and touch pad
values.
4

FILM ROUTING
1. Align roll of film so that edge is slightly in front of inverter point, follow thread diagram. Set
tracking roller so that equal tension is applied to top and bottom inverters.
2. Thread film over inverting heads, note conveyor removed to show process; red back with white interior.
Separate laps of film with anti-static tinsel bar.
5

SCRAP ROUTING
1. Place film between puller chains to begin scrap tail. Use manual jog and seal to create tail. Route around
rollers and tie onto spooler.
NOTICE:
Machine ships with spool assembly removed. Use above picture for assembly aid.
6

TABLE OF CONTENTS
Control Panel Layout.................................................................................................10
Touch-pad quick access buttons ................................................................................11
Home Screen.....................................................................................................12
Front and Rear Bag Settings.............................................................................13
User Level.........................................................................................................14
Heater Settings/ Seal Time................................................................................15
Machine Menus..........................................................................................................17
Motion Trims....................................................................................................18
Tail Remover ....................................................................................................19
Scrap Alarm......................................................................................................20
Hole Skip ..........................................................................................................21
Hole Punch........................................................................................................22
Front Edge Trip.................................................................................................23
Seal Compensation............................................................................................24
Multi-Pack.........................................................................................................25
Closure Conveyor .............................................................................................25
Print Registration..............................................................................................26
Upstream Conveyor..........................................................................................27
Constant Run Conveyor....................................................................................27
Belt Reversing...................................................................................................28
Pass Thru Mode ................................................................................................28
Service...............................................................................................................29
Tune Heater...........................................................................................30
PLC Inputs/Outputs ..............................................................................31
Counters................................................................................................32
Set Time, Date & View.........................................................................32
Texwrap ................................................................................................33
Test Mode ..............................................................................33
Program Library...............................................................................................................34
Machine Alarms/Error Correction...................................................................................38
Maintenance.....................................................................................................................39
Conveyor Belt Tracking...................................................................................................40
Film Clamp Safety...........................................................................................................41
7

This page intentionally left BLANK
8

TEXWRAP
2219
OPERATIONS MANUAL
9

Machine Interface
This Texwrap model features a swivel user interface with touch-pad control. All controls and electrical
settings can be modified by the user through this interface.
** With the seal area door open, a manual seal can be made by pressing BOTH Manual Seal buttons on
the control panel. When the door is closed, only the touch pad Manual Seal button will be active.
NOTICE: To reset the machine to factory defaults, press and hold the Stop and Reset button for 5
seconds. Display will acknowledge when procedure is done.
Door Open Manual Seal
Ove
r
-ride**
Touch-pad Interface
Conveyor Speed
Control
Run Button Stop Button
E-stop Button
Machine Reset Button Selectable seal eyes switch
10

TOUCH PAD PANEL QUICK ACCESS BUTTONS
Manual Jog and Manual Seal – Press and hold these buttons to activate. Manual Seal will only work
with the seal area door closed, otherwise use the two hand seal buttons.
Reset Counter – Press this button once, and the product counter will reset.
Bag Settings ..............................................................................................................Page 13
User Level.................................................................................................................Page 14
Heat Settings.............................................................................................................Page 15
Seal Time...................................................................................................................Page 15
Program Library (Save Set-ups) ............................................................................Page 34
Change Security
Level
Product Counter Reset
Front & Rear
BagTimers
Seal Time
Manual Jog
(Press and Hold)
Manual Seal
(Press and Hold)
Access Heater
Settings
Set-ups Library
11

HOME SCREEN
Press this button at any
time to return to this
screen (Home).
Press to display Menus.
Press to go back in
p
revious screens.
Silence Alarms
View active and
histor
y
of alarms
Display of
tem
p
erature settin
g
s
Display of current
securit
y
level
Products per
minute dis
p
la
y
Product count
dis
p
la
y
12

Front and Rear Bag Settings
Front Bag Timer
Front bag is the amount of bag in front of the package. When the Run button is pressed, or after each seal
cycle, this will be the amount of film pulled.
Press the PREV (UP) or NEXT (DOWN) button to highlight the setting to change. The user may press
the RAISE or LOWER button to adjust the value, or type in a desired setting. When done press ENTER.
Rear Bag Timer
Rear Bag is the amount of bag at the rear of the package. After the product clears the staging eye, this
counter begins. This will be the amount of film pulled after the staging eye is cleared.
Press the PREV or NEXT button to highlight the setting to change. The user may press the RAISE or
LOWER button to adjust the value, or type in a desired setting. When done press ENTER.
(NOTE: Since these are time values, the bag size will change if the conveyor speed is adjusted.
Therefore be sure to adjust these values if conveyor speed is increased or decreased).
To return to the previous screen press the EXIT button. To return HOME, press the button directly below
the label HOME.
13

User Levels
Texwrap offers 3 levels of security for the customer.
OPERATOR – This level gives the least amount of access, only allowing a program to be loaded, manual
jog and seal, and alarm clearing.
SETUP – Allows access to every setting accept the service screen.
SERVICE – Has access to all features.
To change to a different user, type in the appropriate code and press ENTER. If the correct code is
entered, one of the above level names will be displayed. To log out, press the button directly below the
Logout label. This will automatically put the user level back to Operator.
To return to the previous screen press the EXIT button. To return HOME, press the button directly below
the label HOME.
If the touch pad is in level that does not allow access to certain screens, the following screen will be
displayed when the secured button is pressed. At this point the user has the option to login.
14

Heater Settings
Press the PREV (UP) or NEXT (DOWN) button to highlight the setting to change. The user may press
the RAISE or LOWER button to adjust the value or to ENABLE/DISABLE a desired setting. When done
press ENTER.
To return to the previous screen press the EXIT button. To return HOME, press the center button directly
below the display screen.
Seal Time
Seal Time is the amount of time the seal bar stays in contact with the lower seal pad.
Press the RAISE or LOWER button to adjust the value, or type in a desired setting. When done press
ENTER.
To return to the previous screen press the EXIT button. To return HOME, press the button directly below
the label HOME.
15

This page intentionally left BLANK
16

MENUS
When the MENU button is pressed, Menu #1 screen will be displayed. To access the screen of the item
desired, press the number on the keypad corresponding to the label. To access the next menu, press the
number 7 on the keypad. Pressing the MENU button repeatedly will also scroll through the Menu screens.
MENU #1
MENU#2 MENU#3
Press the corresponding button to access the desired screen.
17

Motion Trims
TEXWRAP MOTION TRIMS The purpose of this feature is to increase the throughput of any certain
product. This is accomplished by starting the opening or closing action of the seal bar before the staging
eyes tell the machine to do so.
FRONT BAG TRIM In a normal seal cycle, the product does not begin the transfer into the seal area
until the seal bar is completely open. Front Bag Trim uses a number from 0 to 100 to determine when the
product should start moving into the seal area, even if the seal bar is not completely open. A number of 50
would mean that the seal bar will be 50% open when the transfer will begin. Depending on the product
height and speed, a low number could allow the product to run into the seal bar. To turn this feature off,
set Front Bag Trim to 100.
REAR BAG TRIM In a normal seal cycle, the Rear Bag timer must finish before the seal bar is allowed
to close. Rear Bag Trim uses a number from 0 to 100 to determine when the seal bar should start the
closing process, even if the Rear bag timer is not done. A number of 50 would mean that when 50% of
the Rear Bag timer is left, the seal bar will begin to close. To turn this feature off, set Rear Bag Trim to
100.
Press the PREV (UP) or NEXT (DOWN) button to highlight the setting to change. The user may press
the RAISE or LOWER button to adjust the value, or type in a desired setting. When done press ENTER.
To return to the previous screen press the EXIT button. To return HOME, press the button directly below
the label HOME.
18

Tail Remover
The purpose of this feature is to help remove the corner strip of film that sometimes develops in the corner
of the ‘L’ seal. This is accomplished by stopping the film pull chains and keep the outfeed conveyor
running (for the specified amount of time) to turn the product slightly. This will allow the seal bar to cut a
clean corner away from the scrap section. This works best with heavier products. For proper machine
operation, this number should be kept to a minimum.
NOTE: This timer will add to the Rear Bag setting slightly.
Press the RAISE or LOWER button to adjust the value, or type in a desired setting. When done press
ENTER.
To return to the previous screen press the EXIT button. To return HOME, press the button directly below
the label HOME.
19

Scrap Alarm
As the machine runs, the scrap spool cycles on and off rolling up the scrap stream. This is done by
running the spool until the dancer arm hits the switch, which stops the spool allowing the arm to drop
again. If the switch is not made in the time allowed in this screen then the machine will alarm and stop.
This is so that any break in the scrap stream will not continue for an extended amount of time causing bad
packaging and a mess.
Press the RAISE or LOWER button to adjust the value, or type in a desired setting. When done press
ENTER.
To return to the previous screen press the EXIT button. To return HOME, press the button directly below
the label HOME.
20
Table of contents


