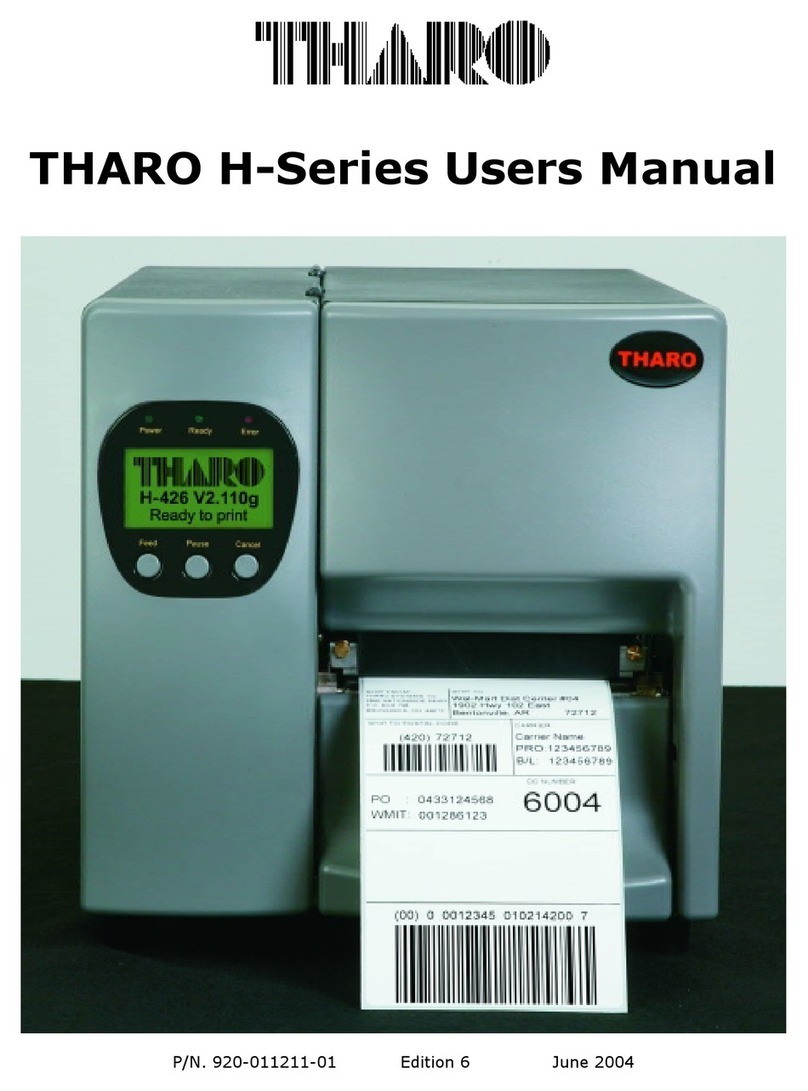
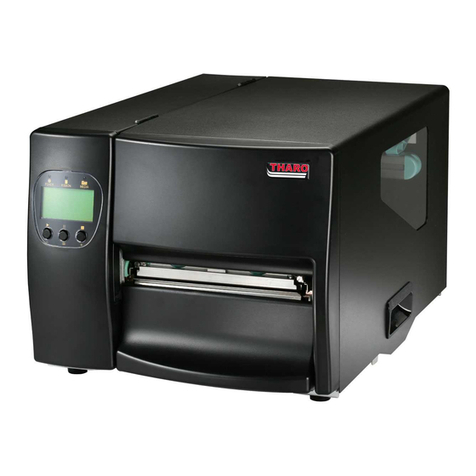
Tharo Systems H-400 Series User manual

H-400/H-600
Series
Users Manual
P/N. 920-011211-01 Edition 12 February 2008

- 1 -
FCC COMPLIANCE STATEMENT
FOR AMERICAN USERS
This equipment has been tested and found to omply with the limits for a CLASS A digital devi e,
pursuant to FCC 47 CFR Part 15 SUBPART B and ANSI C63.4(2003) IC ICES-003. These limits are
designed to provide reasonable prote tion against harmful interferen e when the equipment is
operated in a ommer ial environment. This equipment generates, uses, and an radiate radio
frequen y energy and, if not installed and used in a ordan e with the instru tions, may ause
harmful interferen e to radio ommuni ations. Operation of this equipment in a residential area is
likely to ause harmful interferen e in whi h ase the user will be required to orre t the interferen e
at his expense.
EMS AND EMI COMPLIANCE STATEMENT
FOR EUROPEAN USERS
This equipment has been tested and passed with the requirements relating to ele tromagneti
ompatibility. The equipment was also tested and passed in a ordan e with the European
Standards for both the Radiated and Condu ted emissions limits.
Te hni al Standard:
EMC DIRECTIVE 89/336/EEC (EN 55022 / EN 55024)
Measurement Standards:
EN 55022:1998+A1:2000+A2:2003
EN 61000-3-2:2000
EN 61000-3-3:1995+A1:2001
EN 55024:1998+A1:2001+A2:2003
IEC 61000-4-2:1995+A1:1998+A2:2000 IEC 61000-4-3:2002+A1:2002
IEC 61000-4-4:1995+A1:2000+A2:2001 IEC 61000-4-5:1995+A1:2000
IEC 61000-4-6:1996+A1:2000 IEC 61000-4-11:1994+A1:2000
CAUTION
Danger of explosion if battery is repla ed in orre tly.
Only repla e battery with an equivalent type as re ommended by the manufa turer.
Dispose of used batteries a ording to the manufa turer’s instru tions.
Co yright and Trademark Notice
© 2008 by Tharo Systems, Inc.
It is illegal to hotoco y or electronically transmit a facsimile of this manual or any ortion
of its contents for any means or ur ose without the ublisher’s ermission. Fines of u
to $10,000.00 may be im osed for violation.
All brand or produ t names are trademarks or registered trademarks of their respe tive ompanies.

- 2 -
TABLE OF CONTENTS
1. P
RODUCT
D
ESCRIPTION
......................................................................................... 5
General Information......................................................................................................................... 5
Printer Options.................................................................................................................................... 6
Te hni al Spe ifi ations .................................................................................................................. 7
2. G
ENERAL
S
AFETY
T
IPS
........................................................................................... 9
3. U
NPACKING THE
P
RINTER AND
A
CCESSORIES
.................................................. 9
4. I
DENTIFYING
C
OMPONENTS
................................................................................ 10
5. P
RINTER
S
ETUP
...................................................................................................... 13
USB Installation ............................................................................................................................... 14
6.
C
ONTROL
P
ANEL
..................................................................................................... 15
General Des ription and Operation .......................................................................................... 15
Setting Mode ..................................................................................................................................... 16
Menu items and available options in Setting Mode ........................................................... 17
Diagram of the Setting Mode Menu ......................................................................................... 20
7. L
OADING
M
EDIA
.................................................................................................... 21
Ribbon Installation .......................................................................................................................... 21
Label Installation ............................................................................................................................. 22
A tivating the Stripper Sensor................................................................................................... 24
8. I
NSTALLING THE
P
RINTER
’
S
O
PTIONAL
A
CCESSORIES
................................ 25
H-400 Internal Rewind Module .................................................................................................. 25
H-400 Series Strip-and-Peel Setup .......................................................................................... 27
H-600 Series Stripper Module Installation ............................................................................ 29
Rewind Bra ket Installation and Use ....................................................................................... 32
Cutter Installation ........................................................................................................................... 33
9. U
SING THE
P
RINTER WITH A
PS/2 K
EYBOARD
............................................ 35
Entering/Exiting Keyboard Mode............................................................................................... 35
Menu Items and Options available in Keyboard Mode...................................................... 36
Downloading to the Flash Memory using EASYLABEL....................................................... 37
A
PPENDIX
A. C
OMMUNICATION
I
NTERFACES
......................................................... 38

- 3 -
Parallel Interfa e.............................................................................................................................. 38
Serial Interfa e................................................................................................................................. 38
USB Interfa e.................................................................................................................................... 39
PS/2 Interfa e................................................................................................................................... 39
Optional Appli ator Interfa e...................................................................................................... 39
A
PPENDIX
B. E
RROR
M
ESSAGES
/ T
ROUBLESHOOTING
...................................... 40
Self-Test.............................................................................................................................................. 40
Dump Mode........................................................................................................................................ 40
LCD Error Messages and Des riptions..................................................................................... 41
Problems and Re ommended Solutions ................................................................................. 42
A
PPENDIX
C. M
AINTENANCE AND
A
DJUSTMENT
.................................................... 43
Thermal Printhead Cleaning........................................................................................................ 43
Printhead Module Installation / Removal Instru tions...................................................... 44
Printhead Print Line Adjustment................................................................................................ 45
Thermal Printhead Balan e Adjustment ................................................................................. 46
Ribbon Tension Adjustment ........................................................................................................ 46
Ribbon Shield Adjustment............................................................................................................ 47
Auto Sensing ..................................................................................................................................... 48
Upgrading the Printer’s Firmware ............................................................................................. 48
Downloading True Type Fonts to the Printer’s Flash Memory ....................................... 49
Clearing Cutter Jams on the H-400 Series Cutter.............................................................. 51
Cleaning Adhesive from the H-400 Series Cutter Blade .................................................. 51

- 4 -
Warranty Information
The THARO H-400/H-600 Printers are warranted against defe ts in material or workmanship for 12
months (365 days) from the date of original shipment by THARO SYSTEMS, INCORPORATED. This
warranty does not over normal wear and tear and shall be null and void if the equipment is modified,
improperly installed or used, damaged by a ident or negle t, or in the event any parts are improperly
installed or repla ed by the user.
Sin e Printhead wear is part of normal operations, a Printhead warranty of 3 months (90 days) from the
date of original shipment by THARO SYSTEMS, or 25,000 linear meters of use, whi hever omes first. To
qualify for this warranty, the Printhead must be returned to THARO or another authorized servi e enter.
Although the user is not required to pur hase THARO brand supplies (media and/or ribbons), to the
extent it is determined that the use of other supplies (media and/or ribbons) shall have aused any
defe t in the thermal Printhead for whi h a warranty laim is made, the user shall be responsible for
THARO's ustomary harges for labor and materials to repair su h defe t. To the extent that it is
determined that failure to follow the preventive maintenan e s hedule and pro edures listed in the User
Manual shall have aused any defe t in the thermal Printhead for whi h a warranty laim is made, this
limited warranty shall be void. Any Printhead returned to THARO with s rat hes or abrasions on the
Printhead at the point of failure will be deemed abused and no warranty repla ement will be provided.
THARO SYSTEMS' SOLE OBLIGATION UNDER THIS WARRANTY SHALL BE TO FURNISH PARTS AND
LABOR FOR THE REPAIR OR REPLACEMENT OF PRODUCTS FOUND TO BE DEFECTIVE IN MATERIAL
OR WORKMANSHIP DURING THE WARRANTY PERIOD.
As a ondition of this warranty, the user must: (a) obtain a THARO Return Authorization for the Printer,
or subassembly(s); (b) ship the Printer or subassembly(s), transportation prepaid to the authorized
servi e lo ation; and ( ) in lude with the Produ t or subassembly(s) a written des ription of the laimed
defe t. Unless THARO SYSTEMS authorizes return of the entire Produ t, the user shall return only the
subassembly(s). Produ ts returned shall be pa kaged in the original pa king and shipping ontainer or
omparable ontainer. In the event equipment is not so pa kaged or if shipping damage is evident, it will
not be a epted for servi e under warranty. Surfa e transportation harges for the return of the Printer
to the ustomer shall be paid by THARO SYSTEMS within the 48 ontiguous states and the Distri t of
Columbia. Customer shall pay shipping osts, ustoms learan e, and other related harges outside the
designated area. If THARO SYSTEMS determines that the Produ t returned to it for warranty servi e or
repla ement is not defe tive as herein defined, BUYER shall be subje t to a minimal labor harge and all
osts of handling and transportation.
Warranty Exclusions and Conditions
The above warranties are in lieu of all other warranties, expressed or implied, oral or written, statutory
or otherwise, in luding any im lied warranty of merchant-ability or fitness for a articular
ur ose.
THARO SYSTEMS shall not be responsible for the spe ifi appli ation to whi h any Produ ts are applied,
in luding but not limited to ompatibility with other equipment.
All statements, te hni al information and re ommendations relating to THARO Produ ts are based upon
tests believed to be reliable but do not onstitute a guarantee or warranty.
THARO SYSTEMS SHALL NOT, UNDER ANY CIRCUMSTANCES WHATSOEVER, BE LIABLE TO
BUYER OR ANY OTHER PARTY FOR LOST PROFITS, DIMINUTION OF GOODWILL OR ANY OTHER
SPECIAL OR CONSEQUENTIAL DAMAGES WHATSOEVER WITH RESPECT TO ANY CLAIM
HEREUNDER. IN ADDITION, THARO SYSTEMS' LIABILITY FOR WARRANTY CLAIMS SHALL NOT,
IN ANY EVENT, EXCEED THE INVOICE PRICE OF THE PRODUCT CLAIMED DEFECTIVE, NOR
SHALL THARO SYSTEMS BE LIABLE FOR DELAYS IN REPLACEMENT OR REPAIR OF PRODUCTS.
No salesperson, representative or agent of THARO SYSTEMS is authorized to make any guarantee,
warranty, or representation in addition to the foregoing warranty.
NO WAIVER, ALTERATION, ADDITION, OR MODIFICATION OF THE FOREGOING WARRANTIES
SHALL BE VALID UNLESS MADE IN WRITING AND SIGNED BY AN EXECUTIVE OFFICER OF
THARO SYSTEMS.
- 5 -
1. Product Descri tion
General Information
The THARO H-400 Series and H-600 Series Printers are heavy duty, high performan e, thermal
transfer/dire t thermal label Printers, suitable for large volume printing requirements in industrial
appli ations. With robust metal outer asing and inner me hanism, the Printers are designed to be
durable, tough and reliable, even in the harshest environments.
The THARO H-427 features a Printhead density of 8 dots/mm (203 dots/in) and a maximum print
length of 4572mm (180”). The THARO H-436 features a Printhead density of 12 dots/mm (300
dots/in) and a maximum print length of 2159mm (85”).
The H-400 Series Printers provide high-speed performan e of up to 7 in hes per se ond with an 8”
outside diameter label roll and 450 meter length ribbon apa ities for large volume throughput. The
THARO H-427 and H-436 feature a large, ba klit LCD that is easy to read and is apable of displaying
either text or graphi s, making operation easy. A Real-Time Clo k for time and date stamping of
labels is standard on the H-427 and H-436. Also standard on the THARO H-427 and H-436 Printers
is a Stripper Sensor to sense the presen e of printed labels. With the Stripper Sensor a tivated,
appli ation software su h as Tharo’s EASYLABEL
®
an operate the Printers in Peel-Off mode.
The THARO H-626 features a Printhead density of 8 dots/mm (203 dots/in) and a maximum print
length of 2997.2mm (118”). The THARO H-634 features a Printhead density of 12 dots/mm (300
dots/in) and a maximum print length of 1371.6mm (54”).
The H-600 Series Printers provide high-speed performan e of up to 6 in hes per se ond with an 8”
outside diameter label roll and 450 meter length ribbon apa ities for large volume throughput. The
THARO H-626 and H-634 feature a large, ba klit LCD that is easy to read and is apable of displaying
either text or graphi s, making operation easy. A Real-Time Clo k for time and date stamping of
labels is standard on the H-626 and H-634.
All THARO H-400 Series and H-600 Series Printers support the use of internal Flash or the use of
Compa tFlash memory ards for storing downloaded label formats, graphi s, and fonts. Using this
memory the Printers an be operated without being onne ted to a omputer, whi h represents a
great advantage regarding their flexibility.

- 6 -
Printer O tions
Internal Rewind (H-400 Series)
The Internal Rewind an be used with the Stripper Sensor to rewind the label liner when the Printer is
operating in strip-and-peel mode. It an also be used to wind a partial roll of labels as they are
printed.
Internal Rewind and Stri er Sensor (H-600 Series)
The Internal Rewind and Stripper Sensor an be used to rewind the label liner when the Printer is
operating in strip-and-peel mode. It an also be used to wind a partial roll of labels as they are
printed.
Cutter (H-400 Series)
The optional Cutter an be used to ut labels or tag sto k. Cutter options in lude a hoi e of: ut
after ea h label, ut after a spe ifi quantity of labels or ut at the end of a print job.
Heavy Duty Cutter (H-600 Series)
The optional Cutter an be used to ut labels, tag sto k or foil. Cutter options in lude a hoi e of:
ut after ea h label, ut after a spe ifi quantity of labels or ut at the end of a print job.
External Keyboard
The PS/2 Keyboard onne tor allows you to onne t your Printer to any standard PS/2 Keyboard.
This will allow you to input variable data to a label format stored in Flash memory or on the
Compa tFlash memory ard.
Ethernet Ada ter
The Internal Ethernet Adapter Card provides networking apability to the H-400 Series and H-600
Series Printers.
A licator Interface
The appli ator interfa e provides a means of ommuni ations between an appli ator and the H-400
Series and H-600 Series Printers.
EASYLABEL
®
- Label Design Software for Windows
EASYLABEL
®
labeling software allows you to drive your Printer and reate a full range of label formats
with a minimum of effort. EASYLABEL an be installed under Mi rosoft Windows® on IBM PCs and
ompatibles. For further information about EASYLABEL, please onta t your THARO Reseller.
PA500w A licator
The ompa t PA500w is fast and simple to operate. You an qui kly setup and hangeover the
PA500w for top apply or side apply. The PA500w also integrates easily into existing produ tion lines
and pa kaging systems.
PA1200 A licator
The PA1200 is available in front apply, dual tamp and orner wrap onfigurations. The PA1200
requires only minimal adjustments for applying labels to either the top or side of the produ t making
it easy to use.
PA2000 A licator
The PA2000 is qui k and a urate, applying up to 58 labels per minute, depending on label size,
printer used, and height of the produ ts. The PA2000 has a small footprint and is available in Tamp
or Tamp/Blow onfigurations. The PA2000 features a remote front panel for easy a ess regardless of
the Printer orientation. A Spe ialty Tamp Option is also available for very small, deli ate, high
pre ision print and apply appli ations.

- 7 -
Technical S ecifications
- Spe ifi ations are subje t to hange without noti e.
Model H - 427 H - 436
Resolution 203 dpi (8 dot/mm) 300 dpi (12 dot/mm)
Print Mode Thermal Transfer / Dire t Thermal
CPU 32 Bit
Memory 4MB Flash, 16MB SDRAM
Print S eed 50.8mm (2”) ~ 177.8mm (7”)/se 50.8mm (2”) ~ 152.4mm (6”)/se
Print Length 5mm (0.20”) ~ 4572mm (180”) 5mm (0.20”) ~ 2159mm (85”)
Print Width 13mm (0.51”) ~ 104mm (4.09”) 13mm (0.51”) ~ 105.7mm (4.16”)
Sensor Ty e Moveable transmissive sensor and refle tive sensor; left aligned
Sensor Detection Type: Label gap and bla k mark sensing
Dete tion: Label length auto sensing and/or program ommand setting
Media
Label Roll: Max. 203mm (8.0”)
Core Diameter: 38.1mm (1.5”) ~ 76.2mm (3”)
Width: 25.4mm (1”) ~ 118.00mm (4.64”)
Thi kness: 0.06mm (0.002”) ~ 0.25mm (0.009”)
Ribbon
Length: 450m (1471’)
Type: Ink inside or ink outside thermal transfer ribbons (wax, resin and
wax/resin) in widths of 30 to 110mm (1.18” to 4.33”). Core inner diameter
25.4mm (1”). Maximum ribbon roll diameter 76mm (2.99”).
Printer Language
TPL (Tharo Programming Language)
Software EASYLABEL
®
Start
Mi rosoft Windows Drivers, CUPS (Common UNIX Printing System) Driver
Resident Fonts
11 resident alphanumeri fonts (in luding OCR A & B), are expandable eight
times horizontally and verti ally.
S alable Font (Code Page 850 & 852)
Downloadable
Fonts Windows Bit-map fonts, TrueType fonts and Asian fonts
Image Handling BMP and PCX
Bar Codes
Code 39, Code 93, Code 128 (subsets A, B, C), UCC/EAN-128, UPC-A, UPC-E,
UPC and EAN 2 or 5 digit extensions, I 2 of 5, EAN-8, EAN-13, Codabar,
Postnet, DUN 14, MaxiCode, Plessey, Telepen, FIM, China Postal Code, RPS
128, PDF417, Data Matrix & QR Code
Interfaces
RS-232 Serial (Baud rate 4800 ~ 115200, XON/XOFF, DSR/DTR)
USB (2.0)
Compa tFlash ard slot
Parallel
PS/2 Keyboard Port
Control Panel
Ba klit LCD Display: 128 dot x 64 dot Graphi al LCD
Three single- olor LEDs: Power, Ready, Error
Three Control Keys: Feed, Pause, Can el
Power Auto Swit hing 110/240VAC, 50/60 Hz
Real Time Clock Standard
Environment Operation: 32° F to 104° F (0° C to 40° C)
Storage: -40° F to 122° F (-20° C to 50° C)
Humidity Operation: 30-85%, non- ondensing. Free air.
Storage: 10-90%, non- ondensing. Free air.
Printer Dimensions
Length: 512mm (20.15”)
Height: 291mm (11.45”)
Width: 274mm (10.78”)
Weight: about 15Kg (33.1 lbs)
O tions
Cutter
Internal Rewind
Ethernet Adapter
Appli ator Interfa e
PA2000, PA1200 or PA500w Appli ator
EASYLABEL Silver, Gold, Platinum or Multi-User

- 8 -
Model H - 626 H - 634
Resolution 203 dpi (8 dot/mm) 300 dpi (12 dot/mm)
Print Mode Thermal Transfer / Dire t Thermal
CPU 32 Bit
Memory 4MB Flash, 16MB SDRAM
Print S eed 50.8mm (2”) ~ 152.4mm (6”)/se 50.8mm (2”) ~ 101.6mm (4”)/se
Print Length 13mm (0.51”) ~ 2997.2mm (118”) 13mm (0.51”) ~ 1371.6mm (54”)
Print Width 50.8mm (2”) ~ 168mm (6.61”)
Sensor Ty e Moveable transmissive sensor and refle tive sensor; left aligned
Sensor Detection Type: Label gap and bla k mark sensing.
Dete tion: Label length auto sensing and/or program ommand setting
Media
Label Roll: Max. 203mm (8.0”)
Core Diameter: 38.1mm (1.5”) ~ 76.2mm (3”)
Width: 50.8mm (2”) ~ 178.00mm (7”)
Thi kness: 0.06mm (0.002”) ~ 0.25mm (0.009”)
Ribbon
Length: 450m (1471’)
Type: Ink inside or ink outside thermal transfer ribbons (wax, resin and
wax/resin) in widths of 60 to 174mm (2.36” to 6.85”). Core inner diameter
25.4mm (1”). Maximum ribbon roll diameter 76mm (2.99”).
Printer Language TPL (Tharo Programming Language)
Software EASYLABEL
®
Start
Mi rosoft Windows Drivers, CUPS (Common UNIX Printing System) Driver
Resident Fonts
11 resident alphanumeri fonts (in luding OCR A & B), are expandable eight
times horizontally and verti ally.
S alable Font (Code Page 850 & 852)
Downloadable
Fonts Windows Bit-map fonts, TrueType fonts and Asian fonts
Image Handling BMP and PCX
Bar Codes
Code 39, Code 93, Code 128 (subsets A, B, C), UCC/EAN-128, UPC-A, UPC-E,
UPC and EAN 2 or 5 digit extensions, I 2 of 5, EAN-8, EAN-13, Codabar,
Postnet, DUN 14, MaxiCode, Plessey, Telepen, FIM, China Postal Code, RPS
128, PDF417, Data Matrix & QR Code
Interfaces
RS-232 Serial (Baud rate 4800 ~ 115200, XON/XOFF, DSR/DTR)
USB(2.0)
Compa tFlash ard slot
Parallel
PS/2 Keyboard Port
Control Panel
Ba klit LCD Display: 128 dot x 64 dot Graphi al LCD
Three single- olor LEDs: Power, Ready, Error
Three Control Keys: Feed, Pause, Can el
Power Auto Swit hing 110/240VAC, 50/60 Hz
Real Time Clock Standard
Environment Operation: 32° F to 104° F (0° C to 40° C)
Storage: -40° F to 122° F (-20° C to 50° C)
Humidity Operation: 30-85%, non- ondensing. Free air.
Storage: 10-90%, non- ondensing. Free air.
Printer Dimensions
Length: 516mm (20.31”)
Height: 285mm (11.22”)
Width: 345mm (13.58”)
Weight: about 16.6Kg (36.6 lbs)
O tions
Heavy-Duty Cutter
Internal Rewind
Stripper Sensor (requires Internal Rewind)
Ethernet Adapter
Appli ator Interfa e
PA2000 Appli ator
EASYLABEL Silver, Gold, Platinum or Multi-User

- 9 -
2. General Safety Ti s
CAUTION!
During the print pro ess the Printhead will be ome hot. Do NOT attempt to lean the
Printhead until it has had time to ool.
The Printhead is the Most Fragile part of your Printer. Do NOT use sharp or hard obje ts to
lean the Printhead. Do NOT tou h the glass surfa e of the Printhead with your hand.
This Printer is built ex lusively to print labels, ti kets and tags, ontinuous paper, et . Only
use media that is re ommended for a dire t thermal or thermal transfer Printer.
The Printer is onfigured for input voltages of 110 to 240 V. Conne t only to a power outlet
with a grounded onta t. Always ensure the Printer is swit hed OFF before onne ting the
power ord to an ele tri al outlet.
Do not expose the Printer to moisture or operate it in wet or damp areas.
The Printer will operate with the over open if ne essary. This is not re ommended, as the
Printer’s moving or rotating parts an ause injury. Keep long hair, jewelry and loose lothing
away from any moving parts.
Remove the power ord from the rear of the Printer when dis onne ting or atta hing
a essories su h as rewind units, utters, et .
3. Un acking the Printer and Accessories
Che k the ondition of the pa kaging and ontents for possible damage during transit.
NOTICE: Please retain original boxes and all original acking materials in
case the Printer must be returned.
In addition to this manual the following items should be in luded:
Bar Code Printer
Power Cord (110V or 230V)
Empty Ribbon Roll
Qui k Start Guide
A essories CD: In ludes Label Software, Manuals, Windows Drivers and CUPS Driver.
The following additional items are ne essary for generating labels from your Printer:
Serial, Parallel, or USB able
Appli able media (label sto k/ribbon)

- 10 -
4. Identifying Com onents
4
3
1
2
1.
Control panel
2.
Bottom Front Cover
3.
Media Window
4.
Top Cover
1.
Fan-Fold Label Slot
2.
CF Card Slot
3.
Parallel Port
4.
Serial Port
5.
PS/2 Port
6.
USB Port
7.
Power Swit h
8.
Power So ket
9.
Fan-Fold Label Slot

- 11 -
1
2
3
4
5
6
7
12
11
10
9
8
1.
Ribbon Rewind Shaft
2.
Ribbon Supply Shaft
3.
Printer Me hanism
4.
Platen
5.
Tear off Bar
6.
Printhead Lever
7.
Sensor Knob
8.
Label Guide
9.
Label Tension Plate
10.
Label Roll Bar
11.
Label Supply Guide
12.
Label Alignment Guide
1
1.
Movable sensor

- 12 -
1.
MEDIA LED
2.
RIBBON LED
3.
POWER LED
4.
LCD
5.
CANCEL Key
6.
PAUSE Key
7.
FEED Key
8.
MINUS (-) Key (Setting Mode)
9.
MENU Key (Setting Mode)
10.
PLUS (+) Key (Setting Mode)

- 13 -
5. Printer Setu
CAUTION!
When choosing a location for the Printer, ensure that the Printer and
o erator remain dry. If the Printer or the o erator get wet, serious
injury to the o erator or damage to the Printer may occur.
CAUTION!
Make sure that the Printer’s ower switch is in the “O” or “Off”
osition before roceeding with the installation.
1. Plug the supplied power ord into the Printer’s power so ket.
2. Plug the other end of the power ord into a grounded outlet.
3. Sele t the orre t able for the hosen interfa e. The Printer an be dire tly onne ted to the PC
in one of 3 ways: USB, parallel, or serial. For the onne tion to the USB port use a suitable USB
able. For the onne tion to the PC’s parallel port use a suitable parallel interfa e able. If the
serial interfa e is used make sure the proper serial able is used. You an find pin assignments
and des riptions for all three interfa es onne tors in Appendix A.
NOTICE!
For Serial communications make sure that the “COM Port Setu O tions” in
the Printer’s front anel are configured the same as the software you will
be using with the Printer.
4. Conne t the Printer to the omputer with the sele ted able. Then se ure the able using any
s rews or lips atta hed to the onne tors. These prevent the onne tion from working loose.
5. Turn the Printer on, the LCD will show the Printer model and firmware version.

- 14 -
USB Installation
1. USB is a Plug & Play
facility. Once the USB
cable is connected
from PC to the printer,
the PC will
automatically detect
the new device and
begin the installation
process.
2. Select ‘Specify a
location’ and specify
the path of the printer
driver.
3. Follow the instructions
in the Wizard to
complete the
installation.
Note: These instructions are
only for use when using
Windows Drivers. When
using label software such as
EASYLABEL® you can
disable the prompting for
Windows Drivers. Consult
the knowledgebase on our
website at www.tharo.com
for detailed instructions.

- 15 -
6.
Control Panel
General Descri tion and O eration
Control keys
FEED
PAUSE
CANCEL
LED indicators
POWER Power on or ‘Ready’
indi ator
RIBBON Ribbon status indi ator
MEDIA Media status indi ator
FEED Key
After pressing the FEED Key, the printer will feed the media (a ording to media type) to the
spe ified stop position. When printing with ontinuous media, pressing the FEED Key will feed
media out to a ertain length. When printing labels with gaps, pressing the FEED Key will feed
one label at a time; if the label is not fed out to the orre t position, please pro eed with the
Auto Sensing.
PAUSE Key
When pressing the PAUSE Key in standby mode, the printer will go into the Pause Mode, and the
Display will indi ate “<Printer Model> Pause.” In this mode, the printer will not be able to
re eive any ommands. Pressing the PAUSE Key again, will swit h the printer ba k to standby.
Pressing the PAUSE Key while printing, will pause the print job. When the PAUSE Key is pressed
again, the printer will resume printing, for example, if the print job ontains 10 labels, and the
PAUSE Key is pressed after 2 labels are printed to pause printing; when pressing the PAUSE Key
again, the printer will finish printing the remaining 8 labels.
CANCEL Key
When pressing the CANCEL Key while printing, the LCD Display will show “xxxxxxxx Can el,” this
means the printer has an elled the urrent print job. For example, if the print job ontains 10
labels and the CANCEL Key is pressed after 2 labels are printed, the remaining 8 labels will not
be printed, and the printer will return to standby.

- 16 -
Using combinations of FEED, PAUSE, and CANCEL Keys, the rinter can erform various
functions as follows:
Item Key Beep LCD Message Description
Self Test + Power on 3
beeps Wait for Self-Test
Press and hold the FEED Key
while turning on the printer
until the printer beeps 3
times. The printer will
perform a Self Test.
Dump Mode + Power on 4
beeps Dump Mode
Press and hold the FEED Key
while turning on the printer
until the printer beeps 4
times. The printer will enter
Dump Mode.
Auto Sensing + Power on
3
beeps Auto Sensing
Press and hold the PAUSE
Key while turning on the
printer until the printer
beeps 3 times. The printer
will perform an Auto
Sensing.
Go to Default + +
Power on
2
beeps
twi e
Go to Default
Press and hold the FEED and
the CANCEL Keys while
turning on the printer until
the printer beeps 2 times.
The printer settings will go to
fa tory defaults.
Setting Mode 3
beeps Setting Mode
Press and hold the PAUSE
Key about 3 to 4 se onds
until the printer beeps 3
times. The Printer will enter
Setting Mode.
Setting Mode
In Setting Mode you are able to hange the various settings that ontrol the operation of the Printer
su h as: printing mode, options, media type, interfa e options, and language display.
1. To enter Setting Mode: Press and hold the PAUSE Key for about 3 to 4 se onds until the
printer beeps 3 times. The LCD will flash”Setting Mode”.
2. You are now in “Setting Mode”. The first Menu Item will be displayed on the LCD.
After entering the Setting mode, the
first highlight on the Display indi ates
the urrent sele ted Menu Item.
Press the FEED/ENTER Key to
hange this Menu Item.
Press the PAUSE/NEXT Key to
move to the next Menu Item.
Press CANCEL/EXIT to leave
Setting Mode.

- 17 -
For Menu Items that are a list of
sele table options, the first line
indi ates the urrent item and the
se ond line indi ates urrent setting.
Press the FEED/ENTER Key to
sele t the displayed value for
this Menu Item.
Press the PAUSE/NEXT Key to
move to the next available
sele tion for this Menu Item.
Press CANCEL/EXIT to go ba k
to the Setting Mode Menu.
For Menu Items that are adjustment
settings, the first line indi ates the
urrent item and the se ond line
indi ates urrent value.
Press the /CANCEL Key to
in rease the value.
Press the /FEED Key to
de rease the value.
Press the /PAUSE Key to go
to next Menu Item.
3. Before exiting Setting Mode, the Printer will prompt the user if the settings should be saved or
not.
4. After user’s response, on whether or not to save the settings, the Printer will return to
Standby Mode.
Menu items and available o tions in Setting Mode
NOTICE!
“Default Setting” is the value of the setting as delivered from the factory.
Any changes made in Setu Mode are saved after the Printer is turned off.
Darkness Default: 2
Sets the print darkness. Range is 0 to 19.
S eed Sets the print speed. Range varies based on the printer.
Adjust Sto Position
Default: 4
Adjusts the final stop position and is used to help make up for
me hani al differen es between two printers. This value is added to
the value sent with the ^Ex ommand to adjust the stop position of
printing. The range is from 0 to 10.
Printhead
Position
Default: 0
Defines the lo ation of the print image on the label.
Range is –100 to +100 (hundredths of in hes) (-.254mm - .254mm).
Positive values ause the print image to be moved to the trailing edge of the
label.
Printing Mode
Default: Thermal Transfer
Thermal Transfer: When printing, a ribbon must be installed to
transfer the image onto the media.
Direct Thermal: When printing, no ribbon is ne essary; requires
dire t thermal media.

- 18 -
O tion Setu
Default: O tion OFF
Stri Mode: turns the Stripper Sensor on.
Cutter Mode: turns the Cutter on.
A licator: Sets printer to be used with an appli ator or foot swit h.
None: no options are atta hed.
Sensor Setu
Default: Ga a er
Ga : for labels with liner and gap, or hang tags.
Black Mark: for label or plain paper with bla k mark on the ba k.
Continuous: ontinuous media without gaps or sensing marks.
Baud Rate: Default: 9600 bits
4800 bits
9600 bits
19200 bits
38400 bits
57600 bits
115200 bits
Parity: Default: None
None Parity
Odd Parity
Even Parity
Data Bits: Default: 8 bits
7 bits
8 bits
COM Port Setu
Sto Bits: Default: 1 bit
1 bit
2 bits
Auto Sensor
Default: Auto mode
Auto Mode: automati ally senses and sets the label type (bla k
mark, gap or plain paper) and length.
Ga Mode: dete ts label sto k with gaps.
Black Mark Mode: dete ts label sto k with bla k marks.
LCD Language
Default: English
English
Simplified Chinese
Traditional Chinese
Spanish
Italian
Dut h
Fren h
Turkish
German
Code Page Setu
Default: Code Page 850
Code Page 850
Code Page 852
Keyboard Setu
Default: US
US
UK
Fren h
German
Spanish
Italian
Finnish
Dut h
Belgian
Keyboard Mode
Pressing the FEED Key allows the user to use a keyboard onne ted
to the Printer for stand-alone printing. (This is the same as
onne ting the keyboard to the Printer and then pressing the ‘Y’ key.)

- 19 -
Buzzer Setu
Default: ON
ON: The printer will sound the buzzer (beep) as a onfirmation of
most events.
OFF: The printer will only sound the buzzer (beep) when there is a
ondition that requires the operator’s attention.
Smart BackFeed
Default: OFF
When in stripper, appli ator, or utter mode, a label is printed and moved
forward to be peeled off, taken by appli ator or ut. If Smart Ba kfeed is
ON, the next label will be partially printed so the printer does not have to
ba kfeed to find the original starting point when printing ontinues.
ON: Turns smart ba kfeed on.
OFF: Turns smart ba kfeed off.
Password
Default: OFF
ON: Allows user to set a password to restri t setup hanges. The Printer
will prompt for a pa
ssword message before entering Setting Mode when
password prote tion is enabled.
OFF: Allows any user to hange setup sele tions.
To Of Form
Default: ON
Enables or disables the top of form feature in the printer. This feature
tells the printer to either feed a blank label (ON) or immediately start
to print without first feeding a blank label (OFF) upon power up or
after opening and losing the Printhead.
ON: Printer will
feed a blank label.
OFF: Printer will
immediately start to print without first feeding a
blank label
.
Ethernet
‘Go to Default’ is the only option. (Other options may be added in the future.
)
Pressing the FEED Key will reset the optional Ethernet Module to fa tory
default settings.
Preview
Press Enter to sele t the Preview option. Press the Next Key to s roll
through the list of onfiguration options.
This manual suits for next models
1
Table of contents
Other Tharo Systems Printer manuals

Tharo Systems
Tharo Systems H-426 User manual

Tharo Systems
Tharo Systems H-427 Quick start guide

Tharo Systems
Tharo Systems Gemini 2 User manual

Tharo Systems
Tharo Systems V-Series User manual

Tharo Systems
Tharo Systems Apollo Operating instructions

Tharo Systems
Tharo Systems T-4210 Operating instructions

Tharo Systems
Tharo Systems Gemini User manual