manuals.online logo
Brands
  1. Home
  2. •
  3. Brands
  4. •
  5. The Handy
  6. •
  7. Lawn And Garden Equipment
  8. •
  9. The Handy THSGR User manual

The Handy THSGR User manual

THSGR - 193898001
26/04/2016
INSTRUCTION
MANUAL
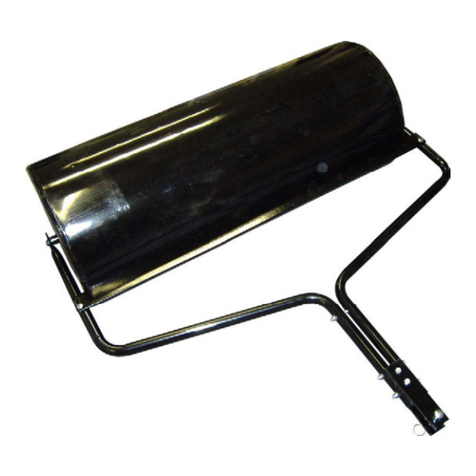
SMALL GARDEN ROLLER
SPARES & SUPPORT: 01793 333212
Please read & understand this manual, payingparticular attention to the safety instructions, before
use.
The manufacturer reserves the right to change the product specification and livery according to
continued product improvements.
CONTENTS
SPECIFICATIONS
IMPORTANT INFORMATION
GENERAL SAFETY INSTRUCTIONS
COMPONENTS
ASSEMBLY
OPERATION
CLEANING
STORAGE & TRANSPORT
PARTS DIAGRAM & LIST
WARRANTY
Assembly Is Required
This product requires assembly before use. See the “Assembly” section for instructions.
Please check that all parts required for the assembly of this spreader are included. If for any
reason you believe a part for the assembly is missing or damaged, please contact us.
If you require any assistance with regards to the contents or operation of
your machine, please contact us:
TEL: 01793 333212
(MON –FRI 8.00AM TO 5.30PM EXCL. BANK HOLIDAYS)
EMAIL: [email protected]
SPECIFICATIONS
The manufacturer reserves the right to change the product specification and livery according to
continued product improvements.
Model Number
THSGR
Product Number
193898001
Working Width
420mm
Drum Diameter
300mm
Weight
G.W 8kg - N.W 7kg
Weight (Filled with Water) (kg)
37kg
Weight (Filled with Sand) (kg)
50kg
IMPORTANT INFORMATION
INTENDED USE
The device is intended for the rolling soil, grass or and garden. It may not be filled with stones, glass,
metal, bones, plastics or material scraps.
This product is not intended for commercial use. Generally acknowledged accident prevention
regulations and enclosed safety instructions must be observed.
Only perform work described in these instructions for use. Any other use is incorrect. The
manufacturer will not assume responsibility for damage resulting from such use.
GENERAL SAFETY INSTRUCTIONS
It is important that you read and understand the owner’s manual and labels affixed to the
machine. Learn its application and limitations as well as the specific potential hazards. Retain
these instructions for future reference. The operator is responsible for following the warnings &
instructions in this manual and on the product.
Read & understand operator’s manual
before using the machine. Failure to
follow instructions could result in death
or serious injury.
Risk of Slicing.
Keep hands out of the way of all
moving parts.
Wear gloves to protect your hands
Wear foot protection
Safety alert symbol. Used to alert you to potential personal injury hazards. Obey all safety messages that
follow this symbol to avoid possible injury.
DANGER
Indicates an imminently hazardous situation which, if not avoided, will result in serious injury.
WARNING
Indicates a potentially hazardous situation which, if not avoided, could result in serious injury
CAUTION
Indicates a potentially hazardous situation which, if not avoided, may result in minor or moderate injury.
CAUTION
Used without the safety alert symbol indicates a potentially hazardous situation which, if not avoided,
may result in property damage.
STAY ALERT
Do not operate the machine while under the influence of drugs, alcohol, or any medication that
could affect your ability to use it properly. Do not use this machine when you are tired or distracted
from the job at hand. Be aware of what you are doing at all times. Use common sense.
AVOID DANGEROUS CONDITIONS
Make sure there is adequate surrounding workspace. Cluttered areas invite injuries. Keep your work
area clean with sufficient light. Keep the area around the machine clear of obstructions, grease, oil,
rubbish and other debris which could cause persons to fall onto moving parts.
INSPECT YOUR MACHINE
Check all bolts, nuts, and screws for tightness before each use, especially those securing guards and
drive mechanisms. Vibration during use, may cause these to loosen. Form a habit of checking to see
that all other tools/equipment are removed from the working area before using. Replace damaged,
missing or failed parts before using it. Warning labels carry important information. Replace any
missing or damaged warning labels.
DRESS PROPERLY
Do not wear loose clothing, gloves, scarfs, neckties or jewelry (rings, wrist watches), which can be
caught in moving parts. Protective electrically non-conductive gloves and non-skid heavy duty
footwear are highly recommended when working. Wear protective hair covering to contain long
hair, preventing it from getting caught in machinery.
KEEP BYSTANDERS AND CHILDREN AWAY
Keep unauthorised persons away from the machine. If approached, stop the machine immediately.
Do not allow children to handle or climb on the machine.
DO NOT OVERREACH
Keep proper footing and balance at all times when using the machine. Never stand on the
machine. Serious injury could occur if the machine is tipped or if the moving parts are
unintentionally contacted. Do not store anything above or near the machine, where anyone might
stand on the machine to reach them.
AVOID INJURY FROM UNEXPECTED ACCIDENT
Keep hands & feet out of the way of all moving parts. Do not place any part of your body or any
tool e.g. in the machine during operation.
DO NOT FORCE TOOL
Always work within the rated capacity. Do not use for a purpose for which it was not intended.
NEVER LEAVE MACHINE UNATTENDED
Do not leave the machine unattended until it has come to a complete stop.
FILLING THE DRUM - WATER
When filling the drum with water, do not connect a hose pipe via a fixed coupling, which could cause
a build-up of pressure within the drum. Always empty the roller drum after you have finished using
it, in order to prevent it from rusting and also protect from sub-zero temperatures. Anti-freeze can
be used for further protection.
FILLING THE DRUM –SAND
When filling the drum with sand, it is recommended a large funnel is used to ease the filling method.
MAINTAIN YOUR MACHINE WITH CARE
Clean the machine immediately after use. Keep the machine clean to ensure it operates to its full &
safest performance. When maintaining this machine, only the manufacturer’s original replacement
parts should be used. The use of non-original manufacturer parts may invalidate your warranty.
PROTECT THE ENVIRONMENT
Take left over materials to an authorised collection point or follow the stipulations in the country
where the mixer is used. Do not discharge into drains, soil or water.
STORE IDLE EQUIPMENT
When not in use, the machine should be stored in a dry location. Keep the machine away from
children and others not qualified to use it.
COMPONENTS
SUPPLIED AS STANDARD
Instructions, Drum, Top Handle, Lower Handles, Scraper Bar, Fixing Kit.
1. Top Handle
2. Lower Handles
3. Scrapper Bar
4. Drum
1
2
3
4
ASSEMBLY
Attach the Upper Handle (1) to the two Lower Handles (2), using the 2x Bolt M6x70mm (7), Flat
Washer (5) & Nut (6). Do not fully tighten.
Attach the Scraper Bar (3) to the Handle assembly using 2x Bolt M6x30mm (11), Flat Washer (5)
& Nut (6). Do not fully tighten.
Place the Handle assembly over the Drum (4) spindles and secure with the 2x Circlips (9), using
the groove within the spindle.
Now fully tighten the previously assembled Handle and Scraper Bar Nuts & Bolts.
Your Roller should now be ready to use.
OPERATION
DANGER
The product must only be put into operation if no defects are found. It is crucial that an
defective parts are replaced before the product is used again.
Check the safety equipment and the safe condition of the product:
–
Check whether the drum is secure in it’s fixings.
–
Check all parts to make sure that they fit tightly.
–
Check whether there are any visible defects: broken parts, cracks, etc.
Never use the roller up and down slopes. Always work across a slope, ensuring you have a stable
footing.
The Roller may be filled with water or sand by removing the Fill/Drain plug, filling with the required
amount and replacing the plug. If using water in the Roller you may want to add anti-freeze during
cold weather, however the roller still needs to be drained before winter storage, in order to avoid
frost damage, even if you have used anti-freeze
CLEANING
–
Careful handling and regular cleaning ensure that the device will remain functional and powerful
for a long time.
–
Brush off coarse dirt.
–
Wipe down the device with a slightly damp cloth.
STORAGE & TRANSPORT
STORAGE
WARNING
Make sure that unauthorised persons do not have access to the device!
–
Store the machine is a dry place
–
Store away from direct sunlight
–
Do not store anything above or near the machine, where anyone might stand on the machine to
reach them.
–
Keep the machine away from children and others not qualified to use it.
TRANSPORT
–
Secure the device against slipping.
–
When shipping, use the original packaging if possible.
PARTS DIAGRAM –THSGR (193898001)
PARTS LIST –THSGR (193898001)
Item No
Part No
Description
Qty
1
TH223-1
Top Handle (Gun Metal)
1
2
TH223-2
Lower Handle (Gun Metal)
2
3
TH223-3
Scraper Bar (Gun Metal)
1
4
TH223-4
Drum
1
5
TH223-5
Flat Washer
4
6
TH223-6
Nut
4
7
TH223-7
Bolt M6x70mm
2
8
TH223-8
Drain Plug
1
9
TH223-9
Circlip
2
10
TH223-10
Sealing Ring
1
11
TH223-11
Bolt M6x30mm
2
12
TH223-12
Fixing Kit (Incl. 5, 6, 7, 9, 11)
NOTE: Parts Lists are supplied for information
purposes only, not all parts are stocked
individually & we recommend you contact our
Spares Team on 01793 333212 for expert advice.
GJ HANDY & CO LTD USER WARRANTY POLICY
Users Statement of Warranty
Each new machine is warranted against defective material or assembly of material under normal
usage. The warranty applies to the original purchaser and covers faulty parts and the labour involved
in replacing and repairing those parts, which are of original manufacture.
Period of Warranty
All Webb, Handy Pro (Brushcutter & Long Handle Hedgecutter only) and Sanli domestic products.
2 years from the original date of sale to the first domestic user.
90 days from the original date of sale to the professional/commercial user.
90 days from the original date of sale when used for hire.
A reduced warranty period of 90 days applies to those items which are subject to normal wear and
tear (e.g. wheels, tyres, cutter bars, cylinders, bottom blades, belts, cables, grass bags, spark plugs).
Engines as per the manufacturer’s warranty statement which will be supplied with the machine.
90 days from the original date of purchase for Replacement Spare Parts (unless normal wear & tear
component, which are covered for 30 days).
All machines’ must be serviced within the first 12 months from the original date of purchase to
comply with the warranty, failure to do so will invalidate the 2nd year of the warranty.
All Handy, Handy Pro (All others), Mowerland and Q-Garden domestic products.
1 year from the original date of sale to the first domestic user.
90 days from the original date of sale to the professional/commercial user.
90 days from the original date of sale when used for hire.
A reduced warranty period of 90 days applies to those items which are subject to normal wear and
tear (e.g. wheels, tyres, cutter bars, cylinders, bottom blades, belts, cables, collection bags, spark
plugs).
Engines as per the manufacturer’s warranty statement which will be supplied with the machine.
90 days from the original date of purchase for Replacement Spare Parts (unless normal wear & tear
component, which are covered for 30 days).
All warranty repairs must be undertaken by an authorised service dealer. These dealers have been
accredited by GJ Handy & Co Ltd and agree to only use genuine parts and follow our repair
procedures.
Version 3 05-16
GJ HANDY & CO LTD USER WARRANTY POLICY
Not covered by this warranty
a) The warranty policy does not cover any depreciation or damages caused by ordinary wear,
rusting or corrosion, lack of correct maintenance or operation, misuse, abuse, lack of
transportation or accident.
b) The warranty policy does not cover any costs necessary for the standard periodic maintenance
services instructed by the operators manual, or service parts replacement which would include
oil, filters, tyres, belts, brake linings, fuses, blades, seals and other service parts unless it can be
proven that the item has evidence of faulty manufacture.
c) The warranty policy will not cover failure or damage caused as a result of parts or accessories
being modified without the written approval of GJ Handy & Co Ltd.
d) The warranty policy will not cover the unit if non-genuine parts have been fitted and as a result
damage has occurred to the unit.
e) The warranty policy is non-transferable and is only applicable to the original purchaser.
Disclaimer
a) This warranty is only a remedy for defect of products. GJ Handy & Co Ltd will never warranty in
terms of the merchantability or the fitness for a particular purpose.
b) No person is authorised to make any warranties, representations or promises, expressed or
implied, on behalf of GJ Handy & Co Ltd, or to modify the terms conditions or limitation of this
warranty policy in any way.
c) Neither GJ Handy & Co Ltd nor any company affiliated with GJ Handy & Co Ltd shall be liable in
any event or manner whatsoever for incidental or consequential damages or injuries, including,
but not limited to, loss of crops, loss of profit, out of pocket expenses or profits, rental of
substitute equipment or other commercial losses.
General
a) Most warrantable failures show up within the first few weeks of use. These failures are usually
straightforward and warranty assessment is relatively easy.
b) Failures relating to cutter decks and belts need careful investigation, as the cause may not
always be straightforward. Look for damage to blades and pulleys especially when the cutter
belt or blade boss have snapped or cracked as this could be due to impact damage.
c) Customers should always refer to the operator/instruction manual when any disputed problem
arises, you will find most areas covered within the manual.
Version 3 05-16
NOTES
_____________________________________________
_____________________________________________
_____________________________________________
_____________________________________________
_____________________________________________
_____________________________________________
_____________________________________________
_____________________________________________
_____________________________________________
_____________________________________________
_____________________________________________
_____________________________________________
_____________________________________________
_____________________________________________
_____________________________________________
_____________________________________________
_____________________________________________
_____________________________________________
_____________________________________________
_____________________________________________
_____________________________________________
_____________________________________________
_____________________________________________
_____________________________________________
_____________________________________________
_____________________________________________
_____________________________________________
FOR SPARES OR SUPPORT OF YOUR HANDY PRODUCT,
PLEASE CONTACT US:
TEL: 01793 333212
(MON –FRI 8.00AM TO 5.30PM EXCL. BANK HOLIDAYS)
EMAIL: [email protected]
Tosee our complete range of garden machinery and equipment
visit:
www.thehandy.co.uk
Distributed by Handy Distribution, Murdock Road, Dorcan, Swindon, SN3 5HY

Other The Handy Lawn And Garden Equipment manuals

The Handy THTD Series User manual

The Handy

The Handy THTD Series User manual

The Handy THDLGT User manual

The Handy

The Handy THDLGT User manual

The Handy THLGT User manual

The Handy

The Handy THLGT User manual

The Handy 90705014GP User manual

The Handy

The Handy 90705014GP User manual

The Handy 909050H User manual

The Handy

The Handy 909050H User manual

The Handy THTGR Installation and maintenance instructions

The Handy

The Handy THTGR Installation and maintenance instructions

The Handy 905040G User manual

The Handy

The Handy 905040G User manual

The Handy THGTL-A User manual

The Handy

The Handy THGTL-A User manual

The Handy THDM User manual

The Handy

The Handy THDM User manual

The Handy THMT26EXT User manual

The Handy

The Handy THMT26EXT User manual

The Handy THSR User manual

The Handy

The Handy THSR User manual

The Handy THHTA User manual

The Handy

The Handy THHTA User manual

The Handy THTILL6.5 User manual

The Handy

The Handy THTILL6.5 User manual

The Handy 901050H User manual

The Handy

The Handy 901050H User manual

The Handy THWB90 Installation and maintenance instructions

The Handy

The Handy THWB90 Installation and maintenance instructions

The Handy THLS-6G Manual

The Handy

The Handy THLS-6G Manual

The Handy 905040 User manual

The Handy

The Handy 905040 User manual

The Handy THGT500-A User manual

The Handy

The Handy THGT500-A User manual

The Handy THLGT User manual

The Handy

The Handy THLGT User manual

The Handy THGT User manual

The Handy

The Handy THGT User manual

The Handy THLGT User manual

The Handy

The Handy THLGT User manual

Popular Lawn And Garden Equipment manuals by other brands

Cedarshed 8x8 MABEL Assembly instructions

Cedarshed

Cedarshed 8x8 MABEL Assembly instructions

FLORABEST FLV 1200 A1 translation of original operation manual

FLORABEST

FLORABEST FLV 1200 A1 translation of original operation manual

Toro Dingo 322 Operator's manual

Toro

Toro Dingo 322 Operator's manual

Powermat PM-AEW-2600T user manual

Powermat

Powermat PM-AEW-2600T user manual

Toro Greensmaster 3150 installation instructions

Toro

Toro Greensmaster 3150 installation instructions

Simplicity 1690821 Operator's manual

Simplicity

Simplicity 1690821 Operator's manual

Jacobsen Eclipse 2 Technical manual

Jacobsen

Jacobsen Eclipse 2 Technical manual

INSECT-O-CUTOR PRISM instructions

INSECT-O-CUTOR

INSECT-O-CUTOR PRISM instructions

COSMO Bully TSS Series User Maintenance Manual and Spare parts

COSMO Bully

COSMO Bully TSS Series User Maintenance Manual and Spare parts

Greencut GE200XE instruction manual

Greencut

Greencut GE200XE instruction manual

Ryobi R36PPS114 manual

Ryobi

Ryobi R36PPS114 manual

Mega Catch Premier MCP800 Operation manual

Mega Catch

Mega Catch Premier MCP800 Operation manual

Simplicity 4564 Illustrated parts list

Simplicity

Simplicity 4564 Illustrated parts list

Stiga Kitchen installation guide

Stiga

Stiga Kitchen installation guide

Toro TR-34D Operator's manual

Toro

Toro TR-34D Operator's manual

Toro 39521 Operator's manual

Toro

Toro 39521 Operator's manual

Toro 100 Series Z Master installation instructions

Toro

Toro 100 Series Z Master installation instructions

HOMEBIOGAS HBG 2.0 owner's manual

HOMEBIOGAS

HOMEBIOGAS HBG 2.0 owner's manual

manuals.online logo
manuals.online logoBrands
  • About & Mission
  • Contact us
  • Privacy Policy
  • Terms and Conditions

Copyright 2025 Manuals.Online. All Rights Reserved.