1
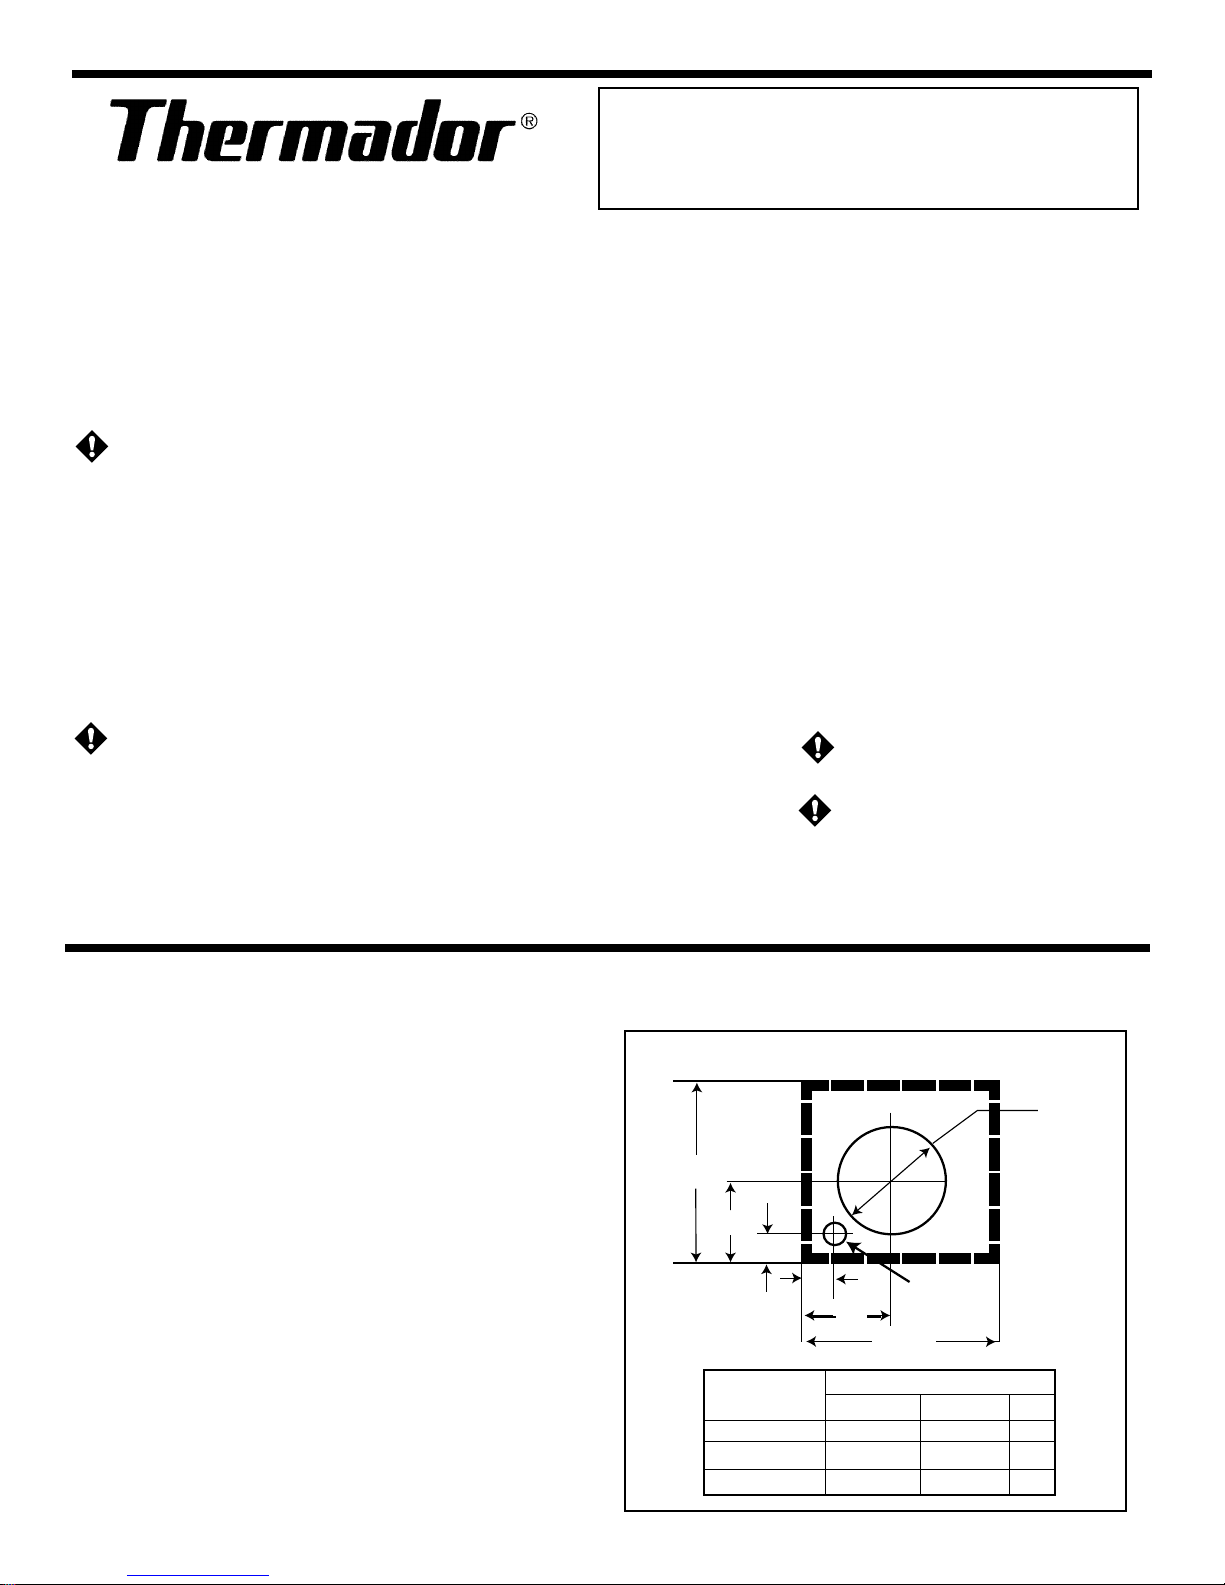
Dim.
Model A B C
VTR600R 5-11/16" 6-1/8" 9"
VTR1000Q 7-1/4" 6-15/16" 11"
VTR1400Q 7-1/4" 6-15/16" 11"
INSTALLATION INSTRUCTIONS
ROOF ORWALLVENTILATOR
MODELVTR1400Q,VTR1000Q & VTR600R
IMPORTANT SAFETY INSTRUCTIONS
WARNING - TO REDUCE
THERISKOFFIRE,ELECTRIC
SHOCK,ORINJURY TOPER-
SONS, OBSERVE THE FOL-
LOWING:
A. Installationworkandelectricalwir-
ing must be done by qualified
person(s) in accordance with all
applicable codes & standards, in-
cluding fire-rated construction.
B. Sufficient air is needed for proper
combustionandexhaustingofgases
through the flue (chimney) of fuel
burningequipmenttopreventback
drafting. Followtheheatingequip-
ment manufacturers guideline and
safetystandardssuchasthosepub-
lished by the National Fire Protec-
tion Association (NFPA), and the
American Society for Heating, Re-
frigerationandAirConditioningEn-
gineers (ASHRAE), and the local
code authorities.
C. Whencuttingordrillingintowallor
ceiling, do not damage electrical
wiring and other hidden utilities.
D. To properly exhaust air, be sure to
duct air out side. Do not vent
exhaustairintospaceswithinwalls,
ceilings, attics, crawl spaces, or ga-
rages.
WARNING: To reduce the risk of
fire, use only metal ductwork.
CAUTION - For General Ventilat-
ing Use Only. Do Not Use To
Exhaust Hazardous Or Explosive
Materials And Vapors.
Fig. 1 TOP VIEW Down Slope of Roof or Wall
I. INSTALLATION:
1. Remove and discard shipping bracket (attached to mo-
tor mounts and inlet collar). Check to see if blower
wheel turns freely. Do not replace top until installation
is complete.
2. Provide a square cutout through the roof (or wall) as
shownbythedashedlines,orcutaroundholetofitduct
with a separate hole for electrical conduit as shown by
solid lines in Fig. 1.
3. Install the remote ventilator with the discharge pointing
downslopeasshowninFigures3and4. Followstandard
roofing procedures. Install the ventilator so the dis-
charge edge is on top of the shingles and the rear edge
is underneath the shingles.
B
14"
1"
C Dia.
A
1"
1-1/4 "
Hole
14"
PLEASE READ ENTIRE INSTRUCTIONS BEFORE PROCEEDING.
IMPORTANT: Save these instructions for the Local Electrical Inspector’s use.
INSTALLER: Please leave these Installation Instructions with this unit for the owner.
OWNER: Please retain these instructions for future reference.
Recommended for use only over conventional domestic gas and electric ranges, and
use with an approved Thermador Hood.
READ AND SAVE THESE INSTRUCTIONS
SAFETY WARNING: Before ser-
vicing or cleaning unit, switch
power off at the service panel and
lockservicedisconnectingmeansto
preventpowerfrombeingswitched
on accidentally. When the service
disconnecting means cannot be
locked, attach a tag to the service
panel to indicate power has been
switched off for maintenance.


