Setting the Measurement Mode
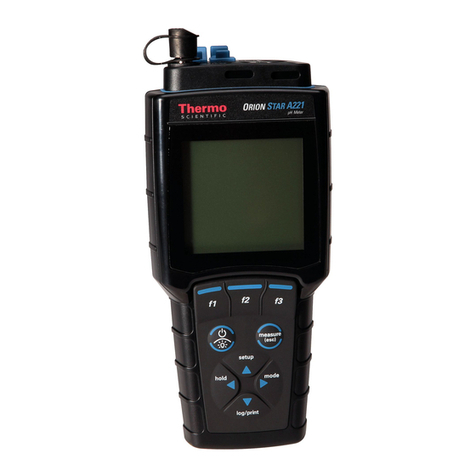
The measurement mode (displayed to the right of the
measurement value) determines the type of calibration
that the meter will perform on each channel.
1. In the measurement mode, press the mode key.
2. Dual channel display only: Press the ▲/ ▼keys
to highlight Channel 1 or Channel 2 and press the
f2 (accept) key.
3. Press the ▲/ ▼keys to set the mode as pH, ISE,
mV, RmV or ORP and press the f2 (accept) key.
4. If the ISE mode is selected, the meter will prompt the
user to select the ISE units. Press the ▲/ ▼keys
to set the units as ppm, mg/L, %, M or unitless and
press the f2 (accept) key.
5. The meter will return to the measurement mode.
Setting the Electrode ID
The electrode ID (displayed below the channel number)
does not influence the calibration function, but it is
used for ISE incremental techniques and included with
the datalog and calibration log entries. Some of the
electrode ID options may not be accessible, depending on
the selected measurement mode for the channel.
1. In the measurement mode, press the setup key.
2. Press the ▲/ ▼keys to highlight Channel 1 or
Channel 2 and press the f2 (select) key.
3. Press the ▲/ ▼keys to highlight Electrode ID and
press the f2 (select) key.
4. Press the ▲/ ▼keys to highlight the type of
electrode as pH, ORP, fluoride (F¯), ammonia (NH3),
ammonium (NH4
+), nitrate (NO3¯), nitrite (NO2¯), sulfide
(S-2), chloride (Cl¯), chlorine (Cl2), bromide (Br¯), iodide
(I¯), cyanide (CN¯), sodium (Na+), potassium (K+),
calcium (Ca+2), silver (Ag+), copper (Cu+2), lead (Pb+2),
cadmium (Cd+2), perchlorate (ClO4¯), fluoroborate (BF4¯),
thiocyanate (SCN¯), nitrogen oxide (NOX), carbon
dioxide (CO2), oxygen (O2), monovalent cation (X+),
monovalent anion (X¯), divalent cation (X+2) or divalent
anion (X-2) and press the f2 (accept) key.
5. Press the measure key to return to the
measurement mode.
pH Calibration with Two Buffers
1. Prepare and condition the pH electrode according to
the instructions in the electrode user guide. Select
two pH buffers that bracket the expected sample pH
and are one to four pH units apart.
2. Connect the pH electrode, ATC probe and reference
electrode (if applicable) to the channel 1 or channel 2
meter inputs and note which channel was selected.
If the stirrer probe will be used, connect the stirrer
probe to the meter input.
3. In the measurement mode, press the f2 (cal) key.
4. Dual channel display only: Press the ▲/ ▼keys
to select the channel to calibrate and press the
f2 (accept) key.
5. Rinse the pH electrode (ATC probe, stirrer probe and
reference electrode, if applicable) with distilled water
and place into the first buffer.
6. When the electrode and standard are ready, press the
f3 (start) key to begin the calibration.
7. Wait for the pH value to stop flashing. If the pH value
is correct, press the f2 (accept) key. If the pH value
is incorrect, press the f3 (clear) key, use the numeric
keypad and decimal key to manually enter the pH of
the first buffer and press the f2 (accept) key.
8. Press the f2 (next) key to proceed to the next buffer.
9. Rinse the pH electrode (ATC probe, stirrer probe and
reference electrode, if applicable) with distilled water
and place into the second buffer.
10. When the electrode and standard are ready, press
the f3 (start).
11. Wait for the pH value to stop flashing. If the pH value
is correct, press the f2 (accept) key. If the pH value
is incorrect, press the f3 (clear) key, use the numeric
keypad and decimal key to manually enter the pH of
the second buffer and press the f2 (accept) key.
12. Press the f3 (cal done) key. The meter will display a
summary of the calibration. Press the f2 (log/print)
key to save and end the calibration, export the
calibration data to the calibration log and export the
calibration data to a printer or computer, if a printer
or computer is connected to the meter and enabled
in the setup menu. The meter will automatically
proceed to the measurement mode.
ISE Calibration with Two Standards
1. Prepare and condition the ion selective electrode
(ISE) according to the instructions in the electrode
user guide. Prepare two calibration standards that
bracket the expected sample concentration and differ
in concentration by a factor of ten.
2. Connect the ion selective electrode and reference
electrode (if applicable) to the channel 1 or channel 2
meter inputs and note which channel was selected.
If the stirrer probe will be used, connect the stirrer
probe to the meter input.
3. In the measurement mode, press the f2 (cal) key.
4. Dual channel display only: Press the ▲/ ▼keys
to select the channel to calibrate and press the
f2 (accept) key.
5. Rinse the electrode (stirrer probe and reference
electrode, if applicable) with distilled water and place
into the lower concentration standard.
6. When the electrode and standard are ready, press the
f3 (start) key to begin the calibration.
7. Wait for the concentration value to stop flashing and
then press the f3 (clear) key, use the numeric keypad
and the decimal key to enter the concentration of the
first standard and press the f2 (accept) key.
8. Press the f2 (next) key to proceed to the next
calibration standard.
9. Rinse the electrode (stirrer probe and reference
electrode, if applicable) with distilled water and place
into the higher concentration standard.
10. When the electrode and standard are ready, press
the f3 (start).
11. Wait for the concentration value to stop flashing and
then press the f3 (clear) key, use the numeric keypad
and the decimal key to enter the concentration of the
second standard and press the f2 (accept) key.
12. Press the f3 (cal done) key. The meter will display a
summary of the calibration. Press the f2 (log/print)
key to save and end the calibration, export the
calibration data to the calibration log and export the
calibration data to a printer or computer, if a printer
or computer is connected to the meter and enabled
in the setup menu. The meter will automatically
proceed to the measurement mode.
Setting the Read Type
1. In the measurement mode, press the setup key.
2. Press the ▲/ ▼keys to highlight Channel 1 or
Channel 2 and press the f2 (select) key.
3. Press the ▲/ ▼keys to highlight Read Type and
press the f2 (select) key.
4. Press the ▲/ ▼keys to select the read type and
press the f2 (accept) key.
• Auto-Read – The meter will display the measurement as
it stabilizes and lock and hold the measurement when it
is stable. Press the measure key to take a new reading.
• On Ready – The display will show stabilizing until
the measurement is stable. When the measurement is
stable, the display will show ready. The display will
automatically update if the measurement changes.
• At Time Intervals – The meter will display a measurement
at a set time interval (operator programmed).
• Continuous – The meter will continuously measure and
update the display. No indicator is shown on the display.
• Value Change In Measurement – The meter will display a
measurement when the measurement reaches or exceeds
a set high or low value (operator programmed).
• Timed Reading – The meter will display a measurement
after a set time delay (operator programmed) and lock
and hold the measurement after the time delay is
reached. To start another time delay cycle, press the
measure key.
5. Press the measure key to return to the
measurement mode.
pH and ISE Measurements
1. Rinse the electrode (ATC probe, stirrer probe and
reference electrode, if applicable) with distilled water,
blot dry and place into the sample.
2. Record the pH or concentration and temperature
of the sample when the meter indicates that the
measurement is stable. The read type will determine
how the measurements are displayed by the meter.
3. Remove the electrode (ATC probe, stirrer probe and
reference electrode, if applicable) from the sample,
rinse with distilled water, blot dry, place into the next
sample and repeat step 2.
4. When all of the samples have been measured, store
the electrode according to the instructions in the
electrode user guide.
