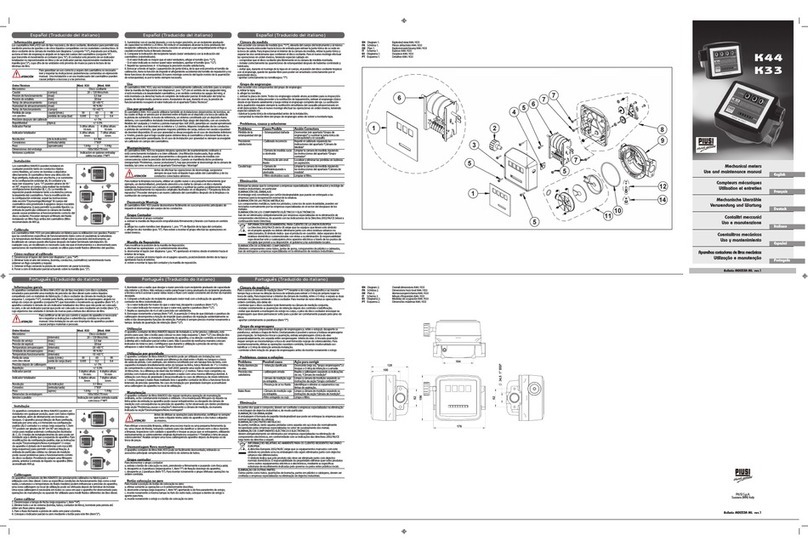
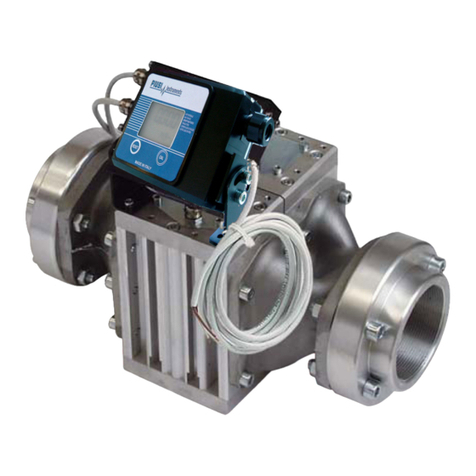
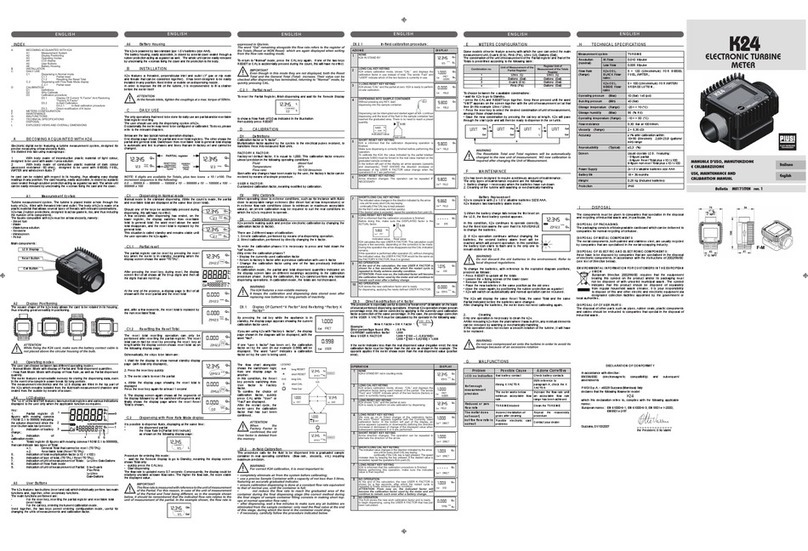
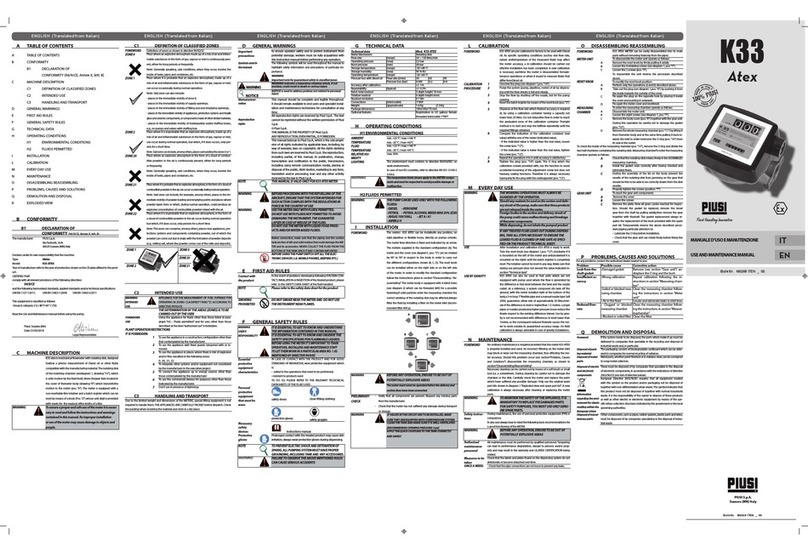
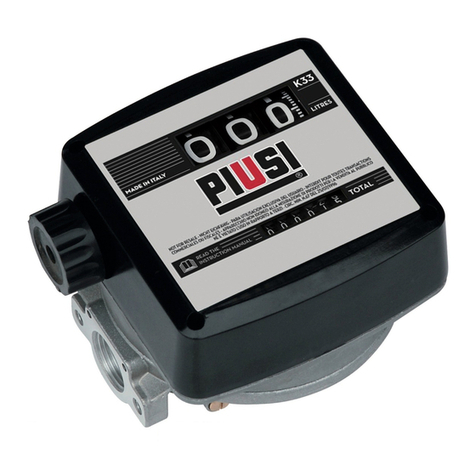
Piusi K900 Instruction manual

Installation, use and calibration manual EN
Manuale di Installazione, uso e calibrazione IT
K900
Bulletin M0158b ITEN _03

29/124
29 /56
EN
This manual is the property of PIUSI S.p.A. Any reproduction, even partial, is forbidden.
Translated from Italian
INDEX
1 FACSIMILE COPY OF EU DECLARATION OF CONFORMITY 30
2 GENERAL WARNINGS 30
3 SAFETY INSTRUCTIONS 31
3.1 SAFETY WARNINGS 31
3.2 FIRST AID RULES 32
3.3 GENERAL SAFETY RULES 33
3.4 PACKAGING 33
3.5 PACKAGE CONTENTS/PRE-INSPECTION 33
4 BECOMING AQUANINTED WITH K900 34
4.1 LCD DISPLAY (ONLY METER VERSION) 34
4.2 USERS BUTTONS 35
5 INSTALLATION 36
6 DAILY USE 38
6.1 DISPENSING IN NORMAL MODE 38
6.1.1 PARTIAL RESET (NORMAL MODE) 39
6.2 RESETTING THE RESET TOTAL 39
7 ERROR INDICATIONS 40
8 CALIBRATION 41
8.1 DEFINITIONS 41
8.2 CALIBRATION PROCEDURE 41
8.2.1 DISPLAY OF CURRENT CALIBRATION FACTOR AND 42
RESTORING FACTORY FACTOR 42
8.2.2 IN FIELD CALIBRATION 43
8.2.2.1 IN-FIELD CALIBRATION PROCEDURE 43
8.2.3 DIRECT MODIFICATION OF K FACTOR 45
9 CONFIGURATION 46
9.1 CONFIGURATION OF THE UNITS OF MEASUREMENT 47
9.2 (OPTIONAL) PULSE TRANSMITTER (PULS OUT) 48
10 ALARM OUTPUT (ALARM OUT) 48
11 MAINTENANCE 49
11.1 CHANGE BATTERY 49
11.2 CLEANING THE MEASUREMENT CHAMBERS 50
11.3 CLEANING THE FILTER 50
12 DISPOSAL 51
13 MALFUNCTIONS 51
14 TECHNICAL SPECIFICATIONS 52
15 EXPLODED VIEW 52

M0158B ITEN
30 /56
Installation, use and maintenance
1 FACSIMILE COPY OF EU DECLARATION OF CONFORMITY
The undersigned: PIUSI S.p.A.
Via Pacinotti 16/A z.i. Rangavino - 46029 Suzzara - Mantova - Italy
HEREBY STATES under its own responsibility that the equipment described below:
Description :
METER
Model: K900
Serial number: refer to Lot Number shown on CE plate affixed to product
Year of manufacture: refer to the year of production shown on the CE plate affixed to the product
complies with the following legislation:
- Electromagnetic compatibility
The technical file is at the disposal of the competent authority following motivated request at PIUSI S.p.A. or fol-
THE ORIGINAL DECLARATION OF CONFORMITY IS PROVIDED SEPARATELY WITH THE PRODUCT
2 GENERAL WARNINGS
Important
precautions To ensure operator safety and to protect the pump from potential damage, workers
must be fully acquainted with this instruction manual before performing any operation.
Symbols used in
the manual The following symbols will be used throughout the manual to highlight safety informa-
tion and precautions of particular importance:
ATTENTION
This symbol indicates safe working practices for operators and/or potentially ex-
posed persons.
WARNING
This symbol indicates that there is risk of damage to the equipment and/or its com-
ponents.
NOTE
This symbol indicates useful information.
Manual
preservation his manual should be complete and legible throughout. It should remain available to
end users and specialist installation and maintenance technicians for consultation at
any time.
Reproduction
rights This manual belongs to Piusi S.p.A., which is the sole proprietor of all rights indicated by ap-
plicable laws, including, by way of example, laws on copyrights. All the rights deriving from
such laws are reserved to Piusi S.p.A.: the reproduction, including partial, of this manual, its
publication, change, transcription and notification to the public, transmission, including us-
ing remote communication media, placing at disposal of the public, distri¬bution, marketing
in any form, translation and/or processing, loan and any other activity reserved by the law
to Piusi S.p.A..

31/124
31 /56
EN
This manual is the property of PIUSI S.p.A. Any reproduction, even partial, is forbidden.
Translated from Italian
3 SAFETY INSTRUCTIONS
3.1 SAFETY WARNINGS
Mains - prelimi-
nary checks be-
fore installation
ATTENTION
You must avoid any contact between the electrical power supply and the fluid that
needs to be FILTERED.
Maintenance
control Before any checks or maintenance work are carried out, disconnect the power source.
FIRE AND
EXPLOSION
When flammable
fluids are present
in the work area,
such as gasoline
and windshield
wiper fluid, be
aware that flam-
mable fumes can
ignite or explode.
To help prevent fire and explosion:
Use equipment only in will ventilated area.
Keep work area free of debris, including rags and spilled or open containers of solvent
and gasoline.
Do not plug or unplug power cords or turn lights on or off when flammable fumes are
present.
Ground all equipment in the work area.
Stop operation immediately if static sparking occurs or if you feel a shock. Do not use
equipment until you identify and correct the problem.
Keep a working fire extinguisher in the work area.
ELECTRIC
SHOCK
Electrocution or
death
F
This device must be grounded. Improper grounding setup or usage of the system can
cause electric shock.
Turn off and disconnect power cord before servicing equipment.
Connect only to a grounded electrical outlets.
Ensure ground prongs are intact on power and extension cords.
Outdoors, use only extensions suitable for the specific use, in accordance with the regula-
tions in force.
The connection between plug and socket must remain away from water.
Never touch the electric plug of socket with wet hands.
Do not turn the device on if the power connection cord or other important parts of the
apparatus are damaged, such as the inlet outlet plumbing, dispensing nozzle or safety
devices. Replace damaged components before operation.
For safety reasons, we recommend that, in principle, the equipment be used only with a
earth-leakage circuit breaker (max 30 mA).
Electrical connections must use ground fault circuit interrupter (GFCI).
Installation operations are carried out with the box open and accessible electrical
contacts. All these operations have to be done with the unit isolated from the power
supply to prevent electrical shock!

M0158B ITEN
32 /56
Installation, use and maintenance
EQUIPMENT
MISUSE
Misuse can cause
death or serious
injury
!
Do not operate the device when fatigued or under the influence of drugs or alcohol.
Do not leave the work area while device is energized or under pressure.
Turn off all device when is not in use.
Do not alter or modify thr device. Alterations or modifications may void agency ap-
provals and create safety hazards.
Route hoses and cables away from traffic areas, sharp edges, moving parts, and hot
surfaces.
Do not kink or over bend hoses or use hoses to pull device.
Keep children and animals away from work area.
Comply with all applicable safety regulations.
Do not exceed the maximum operating pressure or the temperature of the part with
lower nominal value of the system. See Technical Data in all equipment manuals.
Use fluids and solvents that are compatible with the wetted part of the system. See
Technical Data in all equipment manuals. Read the manufacturer’s instructions of the
fluids and solvents. For more information on the material, request the safety data
sheet (MSDS) from the distributor or dealer.
Check the device every day. Immediately repair or replace worn or damaged parts
only with original spare parts of the manufacturer.
Make sure the equipment is classified and approved compliant with the standards of
the environment where it is used.
Use the equipment only for the intended use. Contact your distributor for more in-
formation.
Keep hoses and cables far from traffic areas, sharp edges, moving parts and hot sur-
faces.
Do not bend or overbend the hoses or use the hose to pull the
device
.
TOXIC FLUID OR
FUMES HAZARD
Read MSDS’s to know the specific hazards of the fluids you are using.
Store hazardous fluid in approved containers, and dispose of it according to appli-
cable guidelines.
Prolonged contact with the treated product may cause skin irritation: always wear
protective gloves during dispensing.
3.2 FIRST AID RULES
Contact with the
product In the event of problems developing following EYE/SKIN CONTACT, INHALATION
or INGESTION of the treated product, please refer to the SAFETY DATA SHEET of
the fluid handled.
NOTE Please refer to the safety data sheet for the product
SMOKING PRO-
HIBITED When operating the dispensing system and in particular during refuelling, do not
smoke and do not use open flame.

33/124
33 /56
EN
This manual is the property of PIUSI S.p.A. Any reproduction, even partial, is forbidden.
Translated from Italian
3.3 GENERAL SAFETY RULES
Essential
protective
equipment
characteristics
Wear protective equipment that is:
suited to the operations that need to be performed;
resistant to cleaning products.
Personal
protective
equipment that
must be worn
Wear the following personal protective equipment during handling and installation:
safety shoes;
close-fitting clothing;
protective gloves;
safety goggles;
Protective
equipment instruction manual
3.4 PACKAGING
FOREWORD K900 COMES PACKED IN A CARDBOARD BOX WITH A LABEL INDICATING
THE FOLLOWING DATA:
1 - contents of the package
ACCESS 85
F00702000
ACCESS 85
F00702000
F00702000
F00702000
2 - weight of the contents
3 - description of the
product
3.5
PACKAGE CONTENTS/PRE-INSPECTION
FOREWORD To open the packaging, use a pair of scissors or a cutter, being careful not to damage the
dispensing system or its components.
WARNING Check that the data on the plate correspond to the desired specifications. In the
event of any anomaly, contact the supplier immediately, indicating the nature of the
defects. Do not use equipment which you suspect might not be safe.

M0158B ITEN
34 /56
Installation, use and maintenance
4 BECOMING AQUANINTED WITH K900
FOREWORD METER is an electronic digital meter featuring an oval-gear measurement system, de-
signed for easy and precise measuring of oils, diesel, rapsoil and antifreeze.
FUNCTIONING
PRINCIPLE The fluid, by flowing through the appliance, rotates the gears which, during their rota-
tion, transfer, “volume units” of fluid. The exact measurement of the dispensed fluid is
done by counting the number of rotations made by the gears and consequently the
number of transferred “volume units”. The magnetic coupling, between the magnets
installed in the gears and a magnetic switch outside the measurement chamber, en-
sures measurement chamber sealing and ensures transmission of the pulses gener-
ated by gear rotation to the electronic board microprocessor.
OPERATIONAL
MODE In the dispensing mode (Normal Mode), the partial and the total amounts are shown in
two different registers of the LCD.
The METER features a non-volatile memory for storing the dispensing data, even in
the event of a complete power break for long periods.
4.1 LCD DISPLAY (ONLY METER VERSION)
FOREWORD The “LCD” of the METER features two numerical registers and various indications displayed to
the user only when the applicable function so requires.
1Partial register (5 figures with moving comma FROM
0.1 to 99999) indicating the volume dispensed since
the reset button was last pressed
6Indication of type of total, (TOTAL / Reset
TOTAL);
2Indication of battery charge 7Indication of unit of measurement of Totals:
L=Litres Gal=Gallons
3Indication of calibration mode 8Indication of Flow Rate mode
4Totals register (6 figures with moving comma FROM
0.1 to 999999), that can indicate two types of Total:
4.1.
General Total that cannot be reset (TOTAL)
4.2. Resettable total (Reset TOTAL)
9Indication of unit of measurement of Partial:
Qts=Quarts Pts=Pints
L=Litres Gal=Gallons
5Indication of total multiplication factor (x10 / x100)
456
9
7
1
2
3
8
Measurement
Chamber The measurement chamber of K900 consists of two chambers held together by the
manifold.
Inside the measurement chamber are the oval gears which, on turning, generate elec-
trical pulses which are processed by the microprocessor-controlled electronic board.
By applying a suitable calibration factor (meaning a “weight” associated with each
pulse), the microprocessor translates the pulses generated by the “fluid volume” ro-
tation expressed in the set units of measurement, displayed on the partial and total
registers of the LCD.
All the meters are factory set with a calibration factor called FACTORY K FACTOR
equal to 1,000. For best meter performance the instrument can be “calibrated”.
It is possible to return to factory calibration at any time.
Baery Housing K900 is powered by two standard type 1.5 V batteries (size 1N) .
The battery housing is closed by a threaded watertight cap that can be easily
removed for quick battery change.

35/124
35 /56
EN
This manual is the property of PIUSI S.p.A. Any reproduction, even partial, is forbidden.
Translated from Italian
K900 components
1LCD display
2
4
3
1
5
2RESET button
3Measurement
chamber
4CAL button
5Battery housing
4.2 USERS BUTTONS
FOREWORD The METER features two buttons (RESET and CAL) which individually perform two
main functions and, together, other secondary functions.
MAIN FUNCTIONS
PERFORMED - for the RESET key, resetting the partial register and Reset Total
- for the CAL key, entering instrument calibration mode
SECONDARY
FUNCTIONS Used together, the two keys permit entering configuration mode where the desired
unit of measurement can be set.
LEGEND CALIBRATE MEANS PERFORMING ACTIONS ON THE METER KEYS. BELOW
IS THE LEGEND OF THE SYMBOLS USED TO DESCRIBE THE ACTIONS TO BE
PERFORMED
SHORT
PRESSURE
OF CAL
KEY
CAL
LONG
PRESSURE
OF CAL
KEY
CALCAL
CAL
SHORT
PRESSURE
OF RESET
KEY
RESET
LONG
PRESSURE
OF RESET
KEY
RESET
RESET
RESET

M0158B ITEN
36 /56
Installation, use and maintenance
5 INSTALLATION
FOREWORD K900 has a 3 inch inlet and outlet. It was designed for permanent installation on a dis-
tribution line and to this purpose, the measurement chamber is fitted with a threaded
inlet and outlet.
The two cables (each one consisting of two wires) sticking out from the cover of the
measurement chamber are to be connected to K900 remote display.
WARNING The position of the filter determines the input direction of the flow.
The pulser must be connected by two wires observing the electrical specifications
shown in the diagram
Make sure a filter with adequate filtering capacity is always fied either at meter
inlet or at the entrance of the line on which the meter is fied. If solid particles enter
the measurement chamber, the gears could seize.
On installations, place the meter in a position that will enable an easy access to the
baeries compartment
Nota bene:
prima di effettuare
un collegamento
con
ALIMENTAZIONE
ESTERNA occorre
RIMUOVERE LE
BATTERIE dal
portabatteria
ATTENTION:
Before the external
power connection,
remove the battery
from battery
housing
Vcc rosso \ red
Puls OUT blu \ blue
GND nero \ black
PULSER 2 - giallo \ yellow
Sync Reset Verde / Green
GND - Nero / Black
PULSER 01
Pulse OUT
Vcc
GND
GND
Optional
external
Power
Vcc input:
4-12 Vdc
+
-
+
+
SYNC RESET
K900 con PULS OUT /
K900 with PULSE OUT
Display Remoto con PULS IN /
Remote Display with PULSE IN
Vcc rosso \ red
Sync Reset Verde / Green
GND nero \ black
Puls IN
bianco \ white
GND
Nero / Black
Vcc
+
+
SCHEMA COLLEGAMENTI ELETTRICI / ELECTRICAL CONNECTION
PULSER 02
SEGNALAZIONE
DI ALLARME \
ALARM
(OPTIONAL)
Vcc
(MAX 24 Vdc)
GND
PULSER 1- bianco \ white
GND - Nero / Black
CAMERA DI MISURA /
MEASURE BOX
ALLARM OUT marrone \ brown
ALARM
OUT
RELE'

37/124
37 /56
EN
This manual is the property of PIUSI S.p.A. Any reproduction, even partial, is forbidden.
Translated from Italian
Nota bene:
prima di effettuare un
collegamento con
ALIMENTAZIONE
ESTERNA occorre
RIMUOVERE LE
BATTERIE dal
portabatteria
ATTENTION:
Before the external
power connection,
remove the battery from
battery housing
Vcc rosso \ red GND nero \ black
PULSER 2
giallo \ yellow
GND
Nero / Black
PULSER 01
Vcc
GND
Optional external
Power Vcc
input: 4-12 Vdc
+
-
+
+
K900 SENZA PULS OUT /
K900 without PULSE OUT
SCHEMA COLLEGAMENTI ELETTRICI / ELECTRICAL CONNECTION
PULSER 02
PULSER 1
bianco \ white
GND
Nero / Black
CAMERA DI MISURA /
MEASURES BOX

M0158B ITEN
38 /56
Installation, use and maintenance
6 DAILY USE
FOREWORD The only operations that need to be done for daily use are partial and/or resettable total reg-
ister resetting. The user should use only the dispensing system of K900. Occasionally the
meter may need to be configured or calibrated. To do so, please refer to the relevant chapters.
Below are the two typical normal operation displays. One display page shows the partial and reset total reg-
isters. The other shows the partial and general total. Switchover from resettable total to general total display is
automatic and tied to phases and times that are in factory set and cannot be changed.
• The Partial register positioned in the top part of the display indicates the quantity
dispensed since the RESET key was last pressed
• The RESET Total register, positioned in the lower part of the display, indicates the
quantity dispensed since the last RESET Total resetting. The RESET Total cannot be
reset until the Partial has been reset, while vice versa, the Partial can always be reset
without resetting the RESET Total. The unit of measurement of the two Totals can
be the same as the Partial or else different according to the factory or user settings.
• The General TOTAL register (Total) can never be reset by the user. It continues to rise
for the entire operating life of the meter.
• The register of the two totals (Reset Total and Total) share the same area and digits of
the display. For this reason, the two totals will never be visible at the same time, but will
always be displayed alternately.
• The General Total (Total ) is shown during Meter standby
• The Reset Total is shown:
- At the end of a Partial reset for a certain time (a few seconds)
- During the entire dispensing stage
- For a few seconds after the end of dispensing. Once this short time has expired. Meter
switches to standby and lower register display switches to General Total
NOTE 6 digits are available for Totals, plus two icons x 10 / x100. The increment se-
quence is the following:
0.0 -> 99999.9 -> 999999 -> 100000 x 10 -> 999999 x 10 ->100000 x 100 -> 999999 x 100
6.1 DISPENSING IN NORMAL MODE
FOREWORD
Normal mode is the standard dispensing.While the count is made, the partial and resettable total are
displayed at the same time (reset total).
WARNING
Should one of the keys be accidentally pressed during dispensing, this will have no ef-
fect.
stand by
A few seconds after dispensing has ended, on the lower register, the display switches from reset-
table total to general total: the word reset above the word total disappears, and the reset total is
replaced by the general total.
This situation is called standby and remains stable until the user operates the K400 again.

39/124
39 /56
EN
This manual is the property of PIUSI S.p.A. Any reproduction, even partial, is forbidden.
Translated from Italian
6.1.1 PARTIAL RESET (NORMAL MODE)
The partial register can be reset by pressing the reset key when the meter is in
standby, meaning when the display screen shows the word “TOTAL”.
After pressing the reset key, during reset, the display screen first of all shows all the
lit-up digits and then all the digits that are not lit up.
At the end of the process, a display page is first of all shown with the reset partial
and the reset total
and, after a few moments, the reset total is replaced by the non resettableTotal.
6.2 RESETTING THE RESET TOTAL
The reset total resetting operation can only be performed after resetting the
partial register. The reset total can in fact be reset by pressing the reset key at
length while the display screen shows reset total as on the following display
page:
Schematically, the steps to be taken are:
1Wait for the display to show normal standby display page (with total only
displayed)
2Press the reset key quickly
3The meter starts to reset the partial
4While the display page showing the reset total is displayed
Press the reset key again for at least 1 second
The display screen again shows all the segments of the display followed by all
the switched-off segments and finally shows the display page where the reset
Reset Total is shown.

M0158B ITEN
40 /56
Installation, use and maintenance
7 ERROR INDICATIONS
FOREWORD During the normal meter operation, unusual conditions may occur and compromise
its proper functioning. K900 electronics was designed to recognize one of these con-
ditions and inform the operator by means of a display message. In these cases, an
error indication will be displayed instead of the total; the partial indication continues
to increase while blinking.
The unusual working conditions recognized by the meter are the following:
Exceeding of the
maximum meter
flow rate
he flow rate of the fluid dispensed may exceed the max. allowed flow rate, thus dam-
aging the meter gears. Should this condition occur, “HI FLO” will be displayed:
From one of the
measurement
chambers no
pulses are found
The meter consists of two adjacent measurement chambers, held together by a
manifold. The fluid, by flowing through the appliance, rotates the gears in the two
chambers which, during their rotation, transfer, “volume units” of fluid. The exact mea-
surement of the dispensed fluid is done by counting the number of rotations made by
the gears in both chambers and consequently counting the transferred “volume units”.
Each chamber is associated with a transmission channel of “volume units”.
- chamber 1 channel 1 (CH1 WHITE wire)
- chamber 2 channel 2 (CH2 YELLOW wire).
Should the gears of one of the two chambers block or the counting electronics of one
of the two chambers break down, counting of the dispensed quantity would not be
correct.
To make the user aware of this fault, “E1” is displayed:
“E1 CH1” means that “channel 1 has stopped”: in chamber 1 no fluid is passing because
the gears are blocked or the electronics is faulty;
“E1 CH2” means that “channel 2 has stopped”: in chamber 2 no fluid is passing be-
cause the gears are blocked or the electronics is faulty.
In one measuring
chamber more
fluid is passing
than in the other
If the gears of one chamber are slightly obstructed, they slow down the transfer of fluid
which, in the other chamber, will flow more quickly. In this conditions it will be displayed:
“E2 CH1”: fluid in chamber 1 is slower than fluid in chamber 2 CHECK GEARS OF
CHAMBER 1.
“E2 CH2”: fluid in chamber 2 is slower than fluid in chamber 1 CHECK GEARS OF
CHAMBER 2.

41/124
41 /56
EN
This manual is the property of PIUSI S.p.A. Any reproduction, even partial, is forbidden.
Translated from Italian
8 CALIBRATION
FOREWORD K900 is supplied with a factory calibration that ensures precise measuring in most
operating conditions. Nevertheless, when operating close to extreme conditions, such
as for instance:
*
with fluids close to acceptable range extremes (such as low-viscosity antifreeze)
*
in extreme flow rate conditions (close to minimum or maximum acceptable values)
8.1 DEFINITIONS
Calibration fac-
tor or “K Factor” this is the multiplication factor applied by the system to the electrical pulses received,
to transform these into measured fluid units
Factory K Factor: Factory-set default factor. It is equal to 1,000.
This calibration factor ensures utmost precision in the following operating conditions:
Fluid DIESEL (EN590)
Temperature: 20°C
Flow rate: 50-255 litres/min
Even after any changes have been made by the user, the factory K factor can be
restored by means of a simple procedure.
K900 is also compatible with HVO / XTL paraffinic: EN 15940
User K Factor Customized calibration factor, meaning modified by calibration.
8.2 CALIBRATION PROCEDURE
Why calibrate? 1Display the currently used calibration factor:
2Return to factory calibration (Factory K Factor) after a previous calibration by the user
3Change the calibration factor using one of the two previously indicated procedures
FOREWORD Two procedures are available for changing the Calibration Factor:
1In-Field Calibration, performed by means of a dispensing operation
2Direct Calibration, performed by directly changing the calibration factor
In calibration mode, the partial and total dispensed quantities indicated on the display screen take on different
meanings according to the calibration procedure phase. In calibration mode, the meter cannot be used for normal
dispensing operations. In “Calibration” mode, the totals are not increased
ATTENTION The meter features a non-volatile memory that keeps the data concerning calibra-
tion and total dispensed quantity stored for an indefinite time, even in the case of
a long power break; aer changing the baeries, calibration need not be repeated.

M0158B ITEN
42 /56
Installation, use and maintenance
8.2.1DISPLAY OF CURRENT CALIBRATION FACTOR AND
RESTORING FACTORY FACTOR
CALCAL
CAL
By pressing the CAL key while the appliance is in Standby, the
display page appears showing the current calibration factor used.
If no calibration has ever been performed, or the factory setting
has been restored after previous calibrations, the following display
page will appear:
The word “Fact” abbreviation for “factory” shows that the factory
calibration factor is being used
If, on the other hand, calibrations have been made by the user, the
display page will appear showing the currently used calibration
factor ( in our example 0,998) .
The word “user” indicates a calibration factor set by the user is be-
ing used..
CAL
The flow chart alongside
shows the switchover logic
from one display page to
another
In this condition, the Reset
key permits switching from
User factor to Factory
factor.
To confirm the choice of
calibration factor, quickly
press CAL while “User” or
“Fact” are displayed.
After the restart cycle, the
K400 uses the calibration
factor that has just been
confirmed
CAL
CALCAL
CAL
RESET
RESET
TIME OUT
ATTENTION When the Factory Factor is confirmed, the old User factor is deleted from the mem-
ory

43/124
43 /56
EN
This manual is the property of PIUSI S.p.A. Any reproduction, even partial, is forbidden.
Translated from Italian
8.2.2 IN FIELD CALIBRATION
FOREWORD This procedure calls for the fluid to be dispensed into a graduated sample container
in real operating conditions ( flow rate, viscosity, etc.) requiring maximum precision.
ATTENTION For correct K400 calibration, it is most important to:
1When the Factory Factor is confirmed, the old User factor is deleted from the memory
2use a precise Sample Container with a capacity of not less than 5 litres, featuring an ac-
curate graduated indicator.
3ensure calibration dispensing is done at a constant flow rate equivalent to that of normal
use, until the container is full;
4Not reduce the flow rate to reach the graduated area of the container during the final dis-
pensing stage (the correct method during the final stages of sample container filling consists
in making short top-ups at normal operation flow rate) ;
5after dispensing, wait a few minutes to make sure any air bubbles are eliminated from the
sample container; only read the Real value at the end of this stage, during which the level in
the container could drop.
6Carefully follow the procedure indicated below.
8.2.2.1 IN-FIELD CALIBRATION PROCEDURE
OPERATION Display
1
NONE
K900 in normal mode, not in counting mode.
2
LONG CAL KEY KEYING
K900 enters calibration mode, shows «CAL” and displays the calibration factor
in use instead of total. The words “Fact” and “USER” indicate which of the two
factors (factory or user) is currently in use
3
LONG RESET KEY KEYING
K900 shows “CAL” and the partial at zero. The meter is ready to perform in-field
calibration.
4
DISPENSING INTO SAMPLE CONTAINER
Without pressing any buon,
start dispensing into the sample container.
Dispensing can be interrupted and started again
at will. Continue dispensing until the level of
the fluid in the sample container has reached
the graduated area. There is no need to reach
a preset quantity.
Indicated value Real value

M0158B ITEN
44 /56
Installation, use and maintenance
5
5 SHORT RESET KEY KEYING
K900 is informed that the calibration dispensing operation is finished.
Make sure dispensing is correctly finished before performing this operation.
To calibrate K900, the value indicated by the partial totaliser (example 155.20)
must be forced to the real value marked on the graduated sample container. In the
boom le part of the display an arrow appears (upwards and downwards), that
shows the direction (increase or decrease) of the USER K FACTOR value change
when the operations 6 or 7 are performed.
6
SHORT RESET KEY KEYING
Changes the direction of the arrow. The operation can be repeated as many times
as you wish
7
SHORT/LONG CAL KEY KEYING
The indicated value changes in the direction indicated by the arrow
- one unit for every short CAL key keying
- continually if the CAL key is kept pressed.
(for the first 5 units slowly and then quickly).
If the desired value is exceeded, repeat the operations from point (6).
8
LONG RESET KEY KEYING
K900 is informed that the calibration procedure is finished. Before doing this,
make sure the DISPLAYED factor is the ACTUAL factor
Indicated value Real value
K900 calculates the new USER K FACTOR ; this calculation could require a few
seconds, depending on the correction to be made.
During this operation the arrow disappears but the CAL indication remains.
If this operation is performed aer operation (5), without changing the indicated
value, the USER K FACTOR would be the same as the FACTORY K FACTOR,
thus it is ignored.
9
NO OPERATION
At the end of the calculation, the new USER K FACTOR is shown for a few
seconds, aer which the restart cycle is repeated to finally achieve standby
condition.
IMPORTANT: From now on, the indicated factor will become the calibration factor
used by the meter and will continue to remain such even aer a baery change
10
NO OPERATION
K900 stores the new calibration factor and is ready
for dispensing, applying the newly defined USER K FACTOR.

45/124
45 /56
EN
This manual is the property of PIUSI S.p.A. Any reproduction, even partial, is forbidden.
Translated from Italian
8.2.3 DIRECT MODIFICATION OF K FACTOR
This procedure is especially useful to correct a “mean error” obtainable on the basis of several performed dispens-
ing operations. If normal K900 operation shows a mean percentage error, this can be corrected by applying to the
currently used calibration factor a correction of the same percentage. In this case, the percentage correction of the
USER K FACTOR must be calculated by the operator in the following way:
New cal. factor = Old cal. factor * (
100 - E%
100
)
Example Error percentage found E% - 0.9 %
CURRENT calibration factor 1,000
New USER K FACTOR 1,000 * [(100 – ( - 0,9))/100]=
1,000 * [(100 + 0,9)/100] =
1.009
If the meter indicates less than the real dispensed value (negative error) the new calibration factor must be higher
than the old one as shown in the example. The opposite applies if the meter shows more than the real dispensed
value (positive error).
OPERATION Display
Connfiguration
1
NONE
K900 in normal mode, not in counting mode
2
LONG CAL KEY KEYING
K900 enters calibration mode, shows “CAL” and displays the calibration factor
being used instead of the partial. The words “Fact” and “User” indicate which of
the two factors (factory or user) is currently being us
3
LONG RESET KEY KEYING
K900 shows “CAL” and the partial at zero.
K900 is ready to perform in-field calibration by dispensing
4
LONG RESET KEY KEYING
We now go on to Direct change of the calibration factor: the word “Direct” ap-
pears together with the Currently Used calibration factor. In the boom le part
of the display, an arrow appears (upwards or downwards) defining the direction
(increase or decrease) of change of the displayed value when subsequent opera-
tions 5 or 6 are performed
5
SHORT RESET KEY KEYING
Changes the direction of the arrow. The operation can be repeated to alternate
the direction of the arrow.
6
BSHORT/LONG CAL KEY KEYING
The indicated value changes in the direction indicated by the arrow
- one unit for every short CAL key keying
- continually if the CAL key is kept pressed. The speed increase rises by
keeping the key pressed.
If the desired value is exceeded, repeat the operations from point (5).

M0158B ITEN
46 /56
Installation, use and maintenance
7
LONG RESET KEY KEYING
K900 is informed that the calibration procedure is finished.
Before performing this operation, make sure the indicated value is that required
8
NO OPERATION
At the end of the calculation, the new USER K FACTOR is shown for a few sec-
onds, aer which the restart cycle is repeated to finally achieve standby condition.
IMPORTANT: From now on, the indicated factor will become the calibration factor
used by the meter and will continue to remain such even aer a baery change
9
NO OPERATION
K900 stores the new calibration factor and is ready
for dispensing, applying the newly defined USER K FACTOR.
9 CONFIGURATION
K900 has a menu with which the user can configure the machine in accordance with his/her requirements.
To enter the configuration menu, proceed as follows:
1wait until K900 is in Stand-by
2press the CAL and RESET buttons at the same time and hold them down until the
word “Unit” and the previously-set unit of measurement appear on the display (Litre/
Litre in this example)
CALCAL
CAL RESET
RESET
RESET

47/124
47 /56
EN
This manual is the property of PIUSI S.p.A. Any reproduction, even partial, is forbidden.
Translated from Italian
9.1 CONFIGURATION OF THE UNITS OF MEASUREMENT
The METER feature a menu with which the user can select the main measurement unit, Quarts (Qts), Pints (Pts),
Litres (Lit), Gallons (Gal); he combination of the unit of measurement of the Partial register and that of the
Totals is predefined according to the following table:
Combination no. Unit of Measurement
Partial Register Unit of Measurement
Totals Register
1Litres (L) Litres (L)
2Gallons (Gal) Gallons (Gal)
3Quarts (Qts) Gallons (Gal)
4Pints (Pts) Gallons (Gal)
To choose between the 4 available combinations:
1Wait for the METER to go to Standby
2
CAL
RESET
+
Then press the CAL and RESET keys together. Keep these pressed until the word “UNIT” ap-
pears on the screen together with the unit of measurement set at that time (in this example
Litres / Litres )
3
RESET Every short press of the RESET key, the various combinations of the units of measurements are
scrolled as shown below:
Gal
Qts
Pts
Gal
RESET
RESET
RESET
4
CALCAL
CAL
By pressing the CAL key at length, the new settings will be stored, the METER will pass
through the start cycle and will then be ready to dispense in the set units.
ATTENTION The Reset Total and Total registers will be automatically changed to the new
unit of measurement.
NO new calibration is required aer changing the Unit of Measurement.
Other manuals for K900
1
Table of contents
Other Piusi Measuring Instrument manuals
Popular Measuring Instrument manuals by other brands

Toledo Transducers
Toledo Transducers MoniTTor N269 Installation and operation manual

Extech Instruments
Extech Instruments CO40 user guide

Dorrough Loudness Monitor
Dorrough Loudness Monitor 40-A instruction manual

Inficon
Inficon Micro GC Fusion 2-Module operating manual

ROOTECH
ROOTECH ACCURA 2300S manual

Hanna Instruments
Hanna Instruments PCA 310 instruction manual