10
BACK TO INDEX For more informaon about our products and how to contact us, please visit thermopatch.com
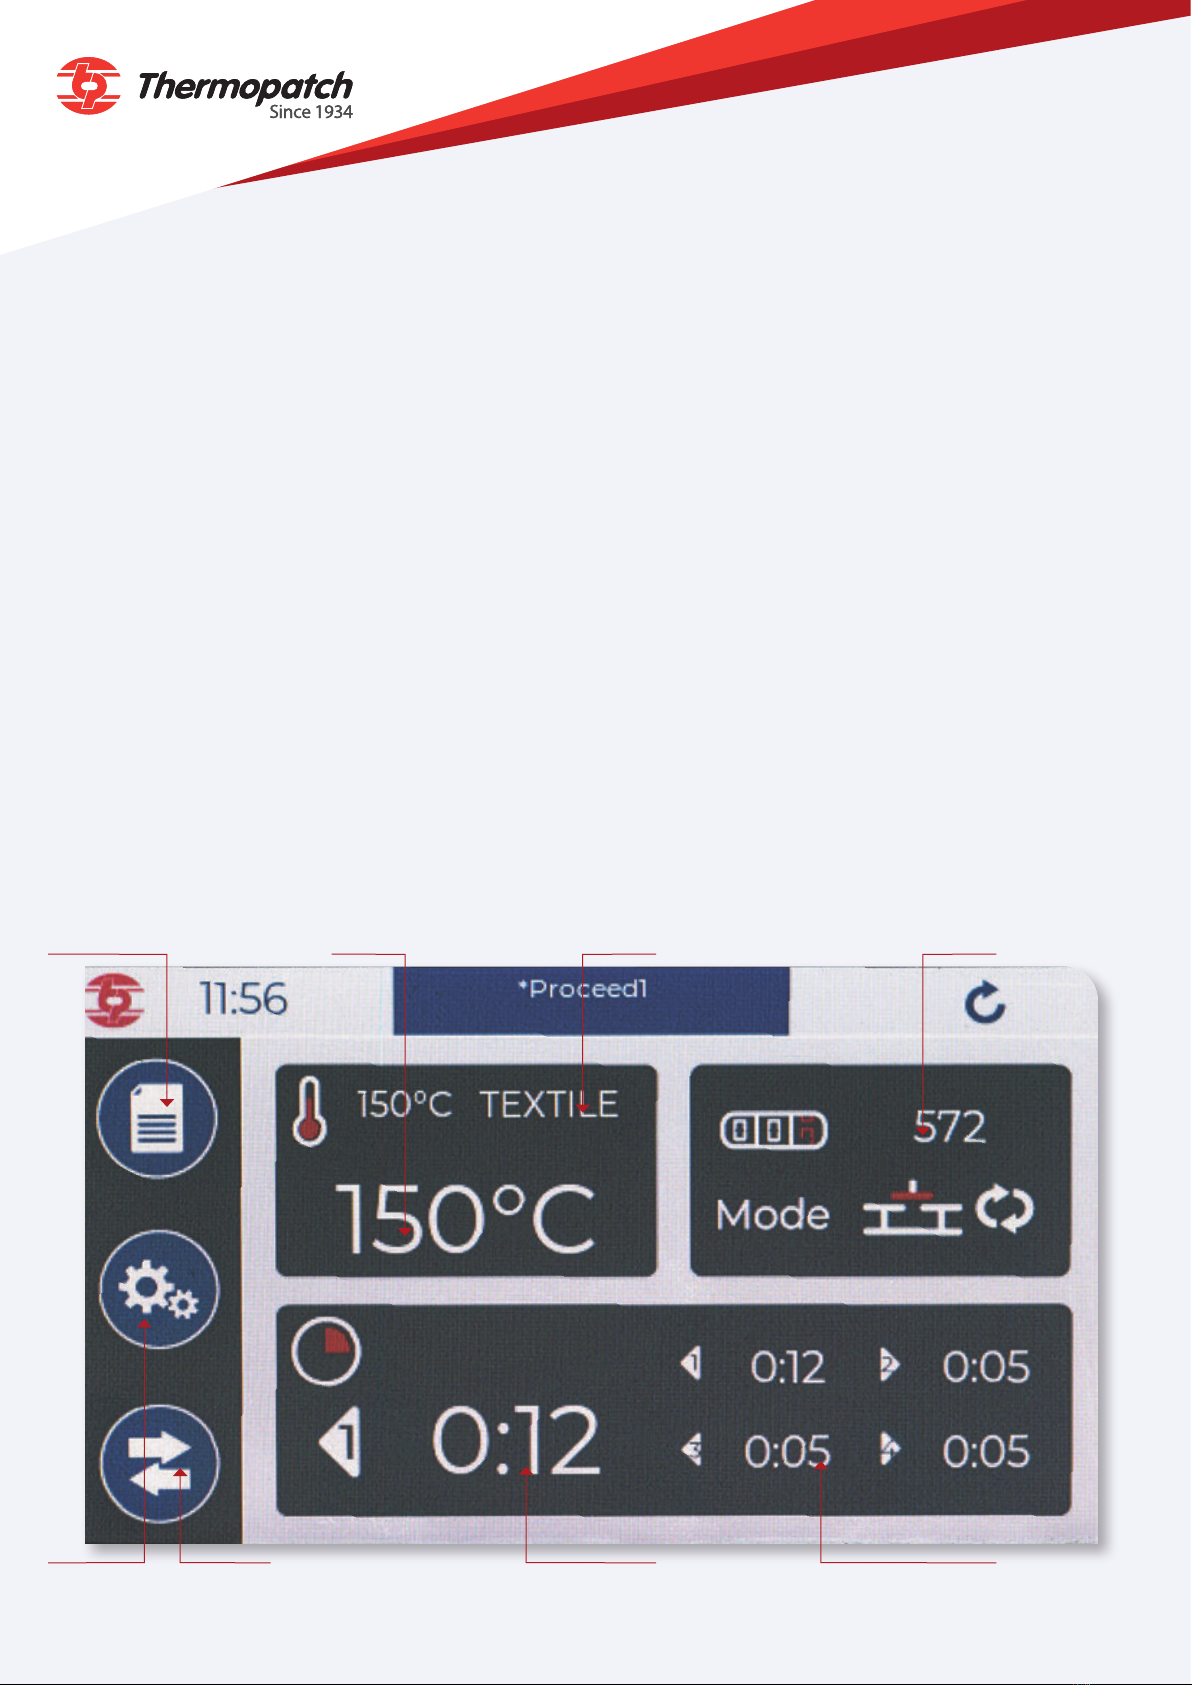
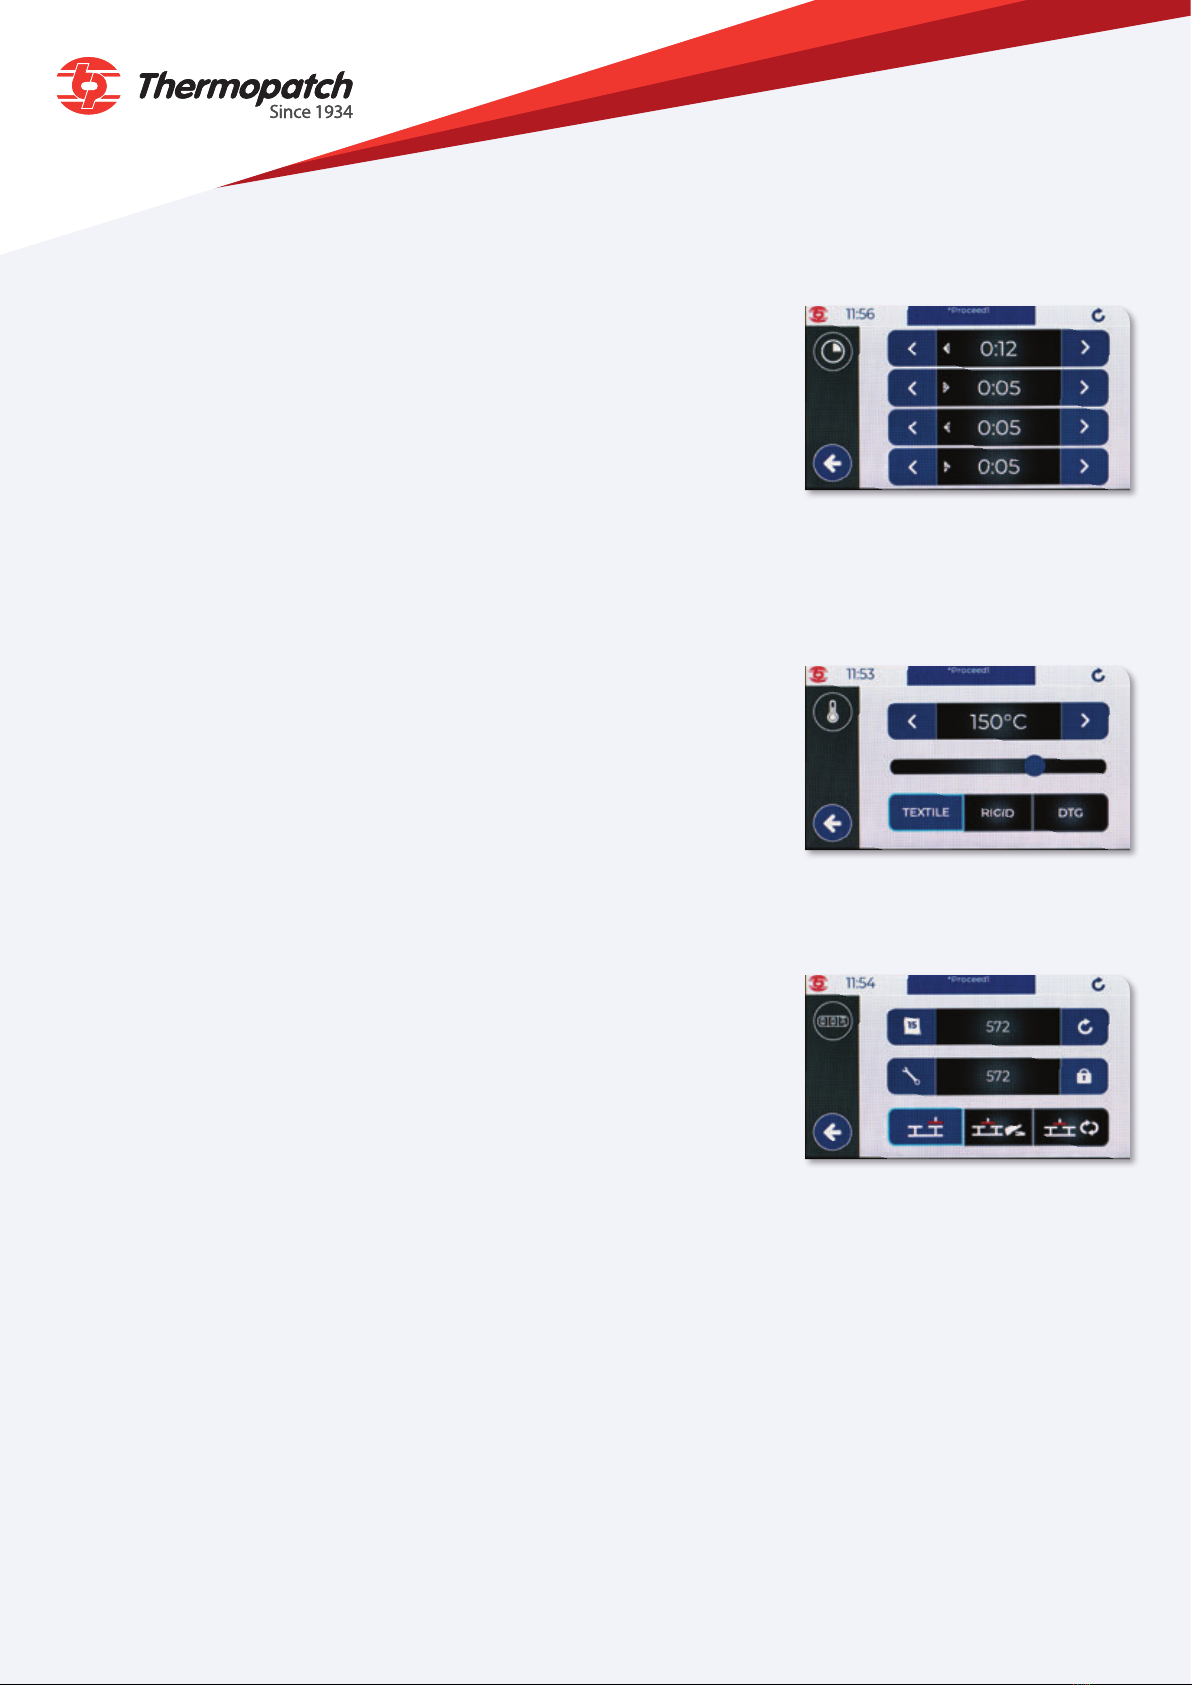
a) Pressing me
Press here to set the machine’s pressing me.
Use the le and right arrow keys to increase and decrease the seng.
You can also have 4 consecuve pressing mes (cf. “sengs (e)”) on
single-platen presses and up to 4 mes for dual-platen presses.
You can also change this seng by pressing the me display and
entering the required me from the touch pad (4 characters must be
entered).
Once you have entered the required me, press the “conrm” key in
the boom right corner of the screen.
b) Temperature seng
Press the “temperature” menu (b). You can select the temperature
you require in the same way as for the pressing me, using the arrow
keys on the le and right of the temperature display. You can also click
on the reading and manually select a temperature. When typing in a
temperature below 100°C, enter a “0” rst (e.g. 090°C).
You can also slide the blue cursor le and right with your nger to
lower and raise the temperature respecvely, and then adjust it using
the arrows. Select the prole you wish to press (Texle, Rigid or DTG).
c) Item counter/Operang mode
This menu shows how many items the machine has printed.
When you click on this icon, two counters are displayed.
See the table below.
You can also select the operang mode on Duplex models: single-
platen, dual-platen actuated by buon/pedal for each press stroke,
and dual-platen auto mode.
The rst counter shows the paral count and can be reset to zero by
pressing the arrow to its right.
The second counter shows the total number of items printed since the
machine was installed. This count is permanent and cannot be reset.