manuals.online logo
Brands
  1. Home
  2. •
  3. Brands
  4. •
  5. Thetford
  6. •
  7. Toilet
  8. •
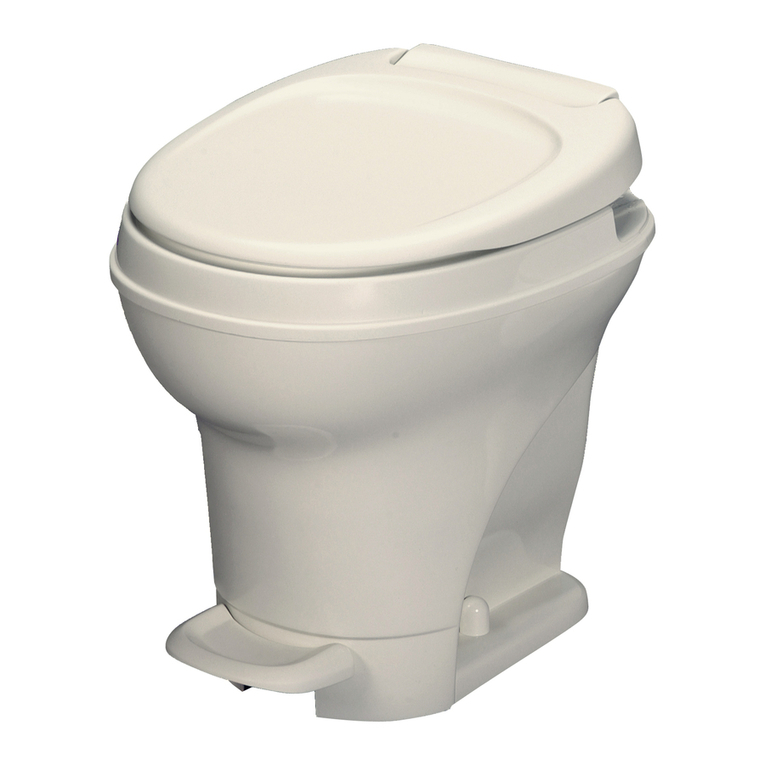
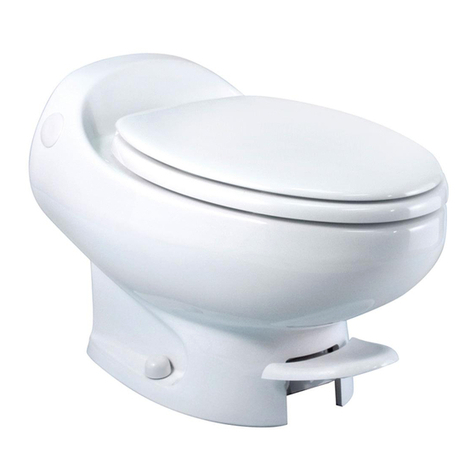
  9. Thetford Aria CLASSIC User manual

Thetford Aria CLASSIC User manual

RV Toilet
To add water
To raise bowl water level af-
ter flushing, press and hold
small button until desired level is
reached. Fill stops automatically
at 10 seconds. Wait 3 seconds
before pressing button again.
To open flush valve
… to access holding tank or add
deodorant, press both buttons
at the same time, TWICE. To
close valve, press large button
ONCE.
CAUTION: Keep fingers
away from motorized blade
Residential
Mode
Touch large
button once and
Walk-AwayTM.
In either mode
User Control
Mode
Hold down large
button for up to 10
seconds of flush
time.
Operation
To flush

Aria DELUXE II Operation
AriaCLASSIC To add Water To flush
Overfill Auto Shutoff
If the Add Water function is run long enough
to overfill the bowl, it will automatically shut
off. This will also occur if the toilet senses
a malfunction.
Once this happens, the toilet electronics
must be reset by cutting off and then re-
storing power to it, preferably at the RV’s
electrical panel. Alternatively, you can pull
apart and reconnect the yellow in-line Fuse
Holder at back of toilet (see Troubleshoot-
ing, Part 5). If problem recurs, your toilet
may need service (see page 5).
Flush Modes
There are two flush modes avail-
able, controlled by the Mode Selec-
tor Switch located at back of toilet.
A is Residential Mode; Bis User
Control/Water Saver Mode.
Winterization
This toilet must be winterized to avoid
freeze damage. Failure to do so will void
warranty.
1) Drain RV’s potable water supply.
2) Flush all of toilet’s plumbing with RV-type anti-
freeze (Propylene Glycol).
Refer to your vehicle manufacturer’s
winterization procedure for further informa-
tion.
Trouble Shooting
1) Leaks:
a) Backoftoilet:checkwatersupplylineconnec-
tion.
b) Between closet flange and toilet: check
Screwsfortightness.Ifleakcontinues,remove
toiletandcheckflangeheight.Adjust,ifneces-
sary, to 7/16” above floor. Replace flange seal
if damaged.
2) Bowl will not hold water: Check for and
remove foreign material in valve blade groove
in the flush drain. If necessary, replace blade
seal.
3) Poor flush: A good flush should be obtained
within 2 to 3 seconds. If problem persists,
remove the water supply line and check flow
rate. The flow rate should be at least eight
quarts (7.6 liters) per minute.
4) Flush or Add Water stops after 10 seconds
(Aria Deluxe II only): an automatic shutoff is
normal.
5) No electric operation (Aria Deluxe II only):
checkforblown/brokenfuse.Ifneeded,replace
witha4-ampSlow-Blow Fuse(Littlefuse4-amp
3AGSlow-BloworThetfordPart #19630). Fail-
ure to use the proper fuses and/or connections
may result in damage to the Toilet or the RV
and void the Warranty.
CAUTION: To avoid breaking glass fuse,
pull fuse holder STRAIGHT apart. Do not
bypass the in-line fuse supplied with
the toilet.
Manual override
In the event of a power outage, the
contents of the bowl can be released
to the holding tank by opening the
valve manually using the overrride
knob on the back of the toilet. Turn
clockwise to open, counter-clockwise
to close.
Back of Toilet
Deodorizing
This toilet was designed to be compat-
ible with Thetford brand holding tank
deodorants.
Cleaning
UseThetfordAqua-CleanTMnon-abrasive
cleaner with a soft-bristle, non-abrasive
bowlbrush,sponge or softcloth.DONOT
USE SCOURING POWDERS, ACIDS
OR CONCENTRATED CLEANERS,
WHICH CAN DAMAGE SURFACES,
PLASTICPARTSANDRUBBERSEALS.
FAILURE TO DO SO CAN VOID YOUR
WARRANTY.
Installation
Please read entire instructions before
attempting installation.
Items Needed for Installation:
• Drill with
3
/16-inch bit
•
1
/2” Carbide drill bit with Locking Ring
(if mounting on ceramic tile)
•
7
/16-inch Wrench (Socket or Ratchet)
• Adjustable Wrench
• Silicone Caulk (RTV)
• Tool to cut carpeting/padding (if needed)
Aria DeLuxe II only:
• Wire Crimper • Wire cutting pliers
Plumbing required:
For adequate flush, a 3/8” (min.) water
supply line with good flow is required.
Procedure (all models)
1.
Unpack new toilet. Check for shipping damage.
2. Make sure RV’s water supply is turned off.
3. Removeoldtoilet(includingClosetFlangeSeal
andClosetBolts).Takenecessaryprecautions
when handling and disposing of soiled toilet.
4. Install new Closet Flange Seal (found in Bolt
Pkg.) to bottom of new Toilet with lip oriented
down.
5. Make sure top of Closet Flange is
7
/16” above
floor surface. In some cases, the use of closet
flange spacer(s) (included) may be required to
achieve this mounting height (Fig. 1).
6. If necessary, the
3
/8” spacer goes under the
closet flange.
Fig. 1
Aria DeLuxe II only
1. A 12-volt power line with access to the Toilet
is required.
Warning: Thetford Corporation recom-
mends that a qualified RV Technician or
Electrician install this toilet according to all
applicable codes and regulations. Improper
installation can result in equipment damage,
personal injury or death.
Use a 10-amp breaker or fuse when
wiring from the primary 12-volt source.
Failure to use the appropriate 10-amp
breaker, or fuse holder and 10-amp fuse,
can result in damage to your Thetford toilet,
RV, or both.
IMPORTANT: A stable minimum of 10
volts DC is REQUIRED AT TOILET CON-
NECTION point for proper operation.
If voltage is below 10 volts, re-wiring to a
more stable source such as the main breaker
panel or main battery terminal is required.
2. Installer must provide required wire and con-
nectors.
3. If wiring toilet to the main breaker panel or
main battery terminal, use a 10-amp fuse or
breaker.
4. For distances up to 20 feet from the nearest
Breaker Panel or Battery to the Toilet, use
14-gauge or 12-gauge wire. For distances
20 feet or greater, use 12-gauge.
7/16”/po
7.
1
/8”spacers adhere to the top of closet
flange with silicone sealant.
8. Spacer orientation doesn’t matter with
either of Thetford’s spacers.
If Toilet Goes On…
Carpeted Floor:
• Set Toilet.
• TracearoundToiletbaseinstalledposition.
Remove Toilet.
• Cut away carpet/padding to expose
floor.
Ceramic Tile:
avoiddamage, donotdragtoiletacross
floor). (Do not install screws.) To ensure
toilet is centered over closet flange, look
down through bowl opening with flush
blademechanismopen. Suggestion:Apply
siliconecaulk(notincluded)toclosetflange
before setting toilet.
12.Withtoiletinlocation,usemountingbushing
as a drill guide. Drill pilot holes into floor
with
3
/16” bit. (See Fig. 4.)
13. After making sure floor is clean, mount
toilettofloorwith
1
/4”x3”hexheadScrews.
Tighten to approximately 20-23 inch/lbs.
torque. Do not overtighten.
14. Turn on water supply.
15. Flush test.
16.Aftertoilet passesflushtest,floodtest:Add
water until level reaches 1” below flush
nozzle. Leave for 10 minutes. Check for
leaks at seal and toilet base.
17. Attach Bolt Covers.
18. Fill in and mail Warranty Registration
Card.
(Aria DeLuxe II)
12V DC power
Back of Toilet
Fig. 3
To water supply
Fig. 4 Bolt cover
Seal to flange
Mounting bushing
Thrust washer
Screw
Fig. 2
Drill holes for hex
screws
Closet Flange
91
/8”/po
10”/po máx.
(Aria DeLuxe II)
Mechanism Override
Dimensions
A: 11”/po
B: 12-3/4”/po
C: 24-7/16”/po
D: 3”/po
E: 15”/po
F: 17-1/2”/po
G: 20-9/16”/po
H: 36”/po
High Profile Low Profile
A: 11”/po
B: 12-3/4”/po
C: 24-7/16”/po
D: 3-1/2”/po
E: 15”/po
F: 13-9/16”/po
G: 16-3/4”/po
H: 30-1/8”/po
• Check Closet Flange
height to floor surface.
• Drill
1
/2” holes through
tile only. Measure tile
thickness and set lock-
ing ring on drill bit to
assure that you drill
through tile only, not
wood sub-flooring (Fig.
2).
9. Using adjustable
wrenches, make
water
line connection to toilet (Fig. 3).
10. (Aria Deluxe II only) Make power con-
nection to Toilet (red to + and black to
-) (Fig. 3).
11. Properly locate toilet on closet flange (to
ID Label
Record Your Product
ID Information Here NOTE: Removal of Product ID
tags can void your warranty.
IMPORTANT: Be sure to record the Model number, Part Number and Code of your toilet.
Model
Part No.
Code
  Aria Deluxe II
  Aria Classic
7
12
14
13
11
10
9
6
5
4
3
2
1
8
15
19
16
18
17
20
21
22
23
24
Parts
(*) Specify color: Bone or White
1 Seat and Cover Assembly*
2 Vacuum Breaker Replace-
ment Package†
3 Key Pad Flush Switch*
4 Bolt Caps Package*
5 Water Solenoid Valve
6 Water Connection Fitting
7 Controller Assembly Package
8 Fuse Replacement (3)
9 Wiring Harness
10 Mechanism Plate Package
11 Blade Seal
12 Mechanism Assembly
13 Mounting Bolt Package
14 Spacer Kit (1 - 3/8” spacer,
2 - 1/8” spacers)
Aria Classic only:
15 Hole Plug
16 Pedal Package
17 Water Valve
18 Blade Seal
19 Mechanism Assembly
20 Water Valve Return Spring
21 Cable Package (Low)
22 Cable Package (High)
23 Vacuum Breaker
24 Hand Spray Kit
†In the event of Vacuum
Breaker failure the Vacuum
Breaker Assembly must be
replaced.
Discover other RV toilet accessories on our website.

This manual suits for next models

1

Other Thetford Toilet manuals

Thetford C502-X User manual

Thetford

Thetford C502-X User manual

Thetford Porta Potti 565 Series User manual

Thetford

Thetford Porta Potti 565 Series User manual

Thetford C220 Series User manual

Thetford

Thetford C220 Series User manual

Thetford C-250 Series User manual

Thetford

Thetford C-250 Series User manual

Thetford C200 CS/S User manual

Thetford

Thetford C200 CS/S User manual

Thetford Sani-Con Turbo 700 User manual

Thetford

Thetford Sani-Con Turbo 700 User manual

Thetford Wilcox Crittenden Headmate 1460 User manual

Thetford

Thetford Wilcox Crittenden Headmate 1460 User manual

Thetford C260 Series User manual

Thetford

Thetford C260 Series User manual

Thetford C224 User manual

Thetford

Thetford C224 User manual

Thetford Aqua-Magic V User manual

Thetford

Thetford Aqua-Magic V User manual

Thetford Porta Potti User manual

Thetford

Thetford Porta Potti User manual

Thetford Aqua-Magic IV User manual

Thetford

Thetford Aqua-Magic IV User manual

Thetford C223-CW User manual

Thetford

Thetford C223-CW User manual

Thetford C-250 Series User manual

Thetford

Thetford C-250 Series User manual

Thetford Aqua-Magic Starlite User manual

Thetford

Thetford Aqua-Magic Starlite User manual

Thetford Porta Potti 260P User manual

Thetford

Thetford Porta Potti 260P User manual

Thetford TECMA FLEXI LINE Manual

Thetford

Thetford TECMA FLEXI LINE Manual

Thetford Aqua-Magic IV Foot Pedal Flush User manual

Thetford

Thetford Aqua-Magic IV Foot Pedal Flush User manual

Thetford C260 Series User manual

Thetford

Thetford C260 Series User manual

Thetford C260 Cassette Toilet User manual

Thetford

Thetford C260 Cassette Toilet User manual

Thetford CASSETTE C-200 S User manual

Thetford

Thetford CASSETTE C-200 S User manual

Thetford TECMA EasyFit Premium Service manual

Thetford

Thetford TECMA EasyFit Premium Service manual

Thetford Aqua-Magic V User manual

Thetford

Thetford Aqua-Magic V User manual

Thetford C-250CS User manual

Thetford

Thetford C-250CS User manual

Popular Toilet manuals by other brands

clivus multrum CM14 installation manual

clivus multrum

clivus multrum CM14 installation manual

Dometic 4000 Series Operation manual

Dometic

Dometic 4000 Series Operation manual

FV Victoria E170 quick start guide

FV

FV Victoria E170 quick start guide

SFA Sanicompact comfort instructions

SFA

SFA Sanicompact comfort instructions

Globo RE003.BI Assembly instructions

Globo

Globo RE003.BI Assembly instructions

Kogan KAPWDBIDETA user guide

Kogan

Kogan KAPWDBIDETA user guide

Sanela SLWN 05 Mounting instructions

Sanela

Sanela SLWN 05 Mounting instructions

Kohler K-30215T-S installation instructions

Kohler

Kohler K-30215T-S installation instructions

Kohler K-3447 installation guide

Kohler

Kohler K-3447 installation guide

GREEN LOO KIWI-POD Owner's installation and operation manual

GREEN LOO

GREEN LOO KIWI-POD Owner's installation and operation manual

YitaHome BFTLPT-1007 user manual

YitaHome

YitaHome BFTLPT-1007 user manual

aquamano e operating instructions

aquamano

aquamano e operating instructions

Laufen KARTELL H8286610008811 manual

Laufen

Laufen KARTELL H8286610008811 manual

Mirabelle VILAMONTE MIRVL220WH installation instructions

Mirabelle

Mirabelle VILAMONTE MIRVL220WH installation instructions

La Playa 1510 operating instructions

La Playa

La Playa 1510 operating instructions

Kohler K-3493 Installation and care guide

Kohler

Kohler K-3493 Installation and care guide

IFO Spira Art 6240 Assembly, Operating and Maintenance Instruction

IFO

IFO Spira Art 6240 Assembly, Operating and Maintenance Instruction

FV Parma E157 installation instructions

FV

FV Parma E157 installation instructions

manuals.online logo
manuals.online logoBrands
  • About & Mission
  • Contact us
  • Privacy Policy
  • Terms and Conditions

Copyright 2025 Manuals.Online. All Rights Reserved.