manuals.online logo
Brands
  1. Home
  2. •
  3. Brands
  4. •
  5. Thetford
  6. •
  7. Toilet
  8. •
  9. Thetford Wilcox Crittenden Skipper II 1550 User manual

Thetford Wilcox Crittenden Skipper II 1550 User manual

Skipper II 1550 Marine Toilet
Toilette marine Skipper II 1550
Installation
The Skipper II 1550 may be installed either above or below the water-
line. The 1-1/2” ID Discharge Hose must be marine-grade, sanitation
hose. The 3/4” ID Hose must be installed without sharp bends.
Note: If Toilet is installed at or near the waterline, a vented loop must
be used with any connections to an overboard fitting. On the intake
side, the vented loop must be installed between Pump and Bowl.
P.O. Box 1285 • Ann Arbor, Michigan • Email: www.info@thetford. com
Installation
La toilette marine Skipper II 1550 peut être installée en haut ou en bas de la ligne de
flottaison. La conduite d’évacuation ID de 1 1/2 po est un tuyau d’hygiène de catégorie
marine. Le tuyau ID de 3/4 po doit être installé sans coudes courts.
Remarque : Si la toilette est installée au niveau ou près de la ligne de flottaison, une
boucle ventilée doit être utilisée avec connexion à un raccord de trop-plein. Sur le côté
de l’admission, la boucle ventilée doit être installée entre la Pompe et la Cuvette.
Un produit Thetford
CAUTION: The intake line for this toilet must NOT be connected
directly from the pump to the water tank as this could cause
serious illness or even death.
We recommend that ANY installation to the freshwater system
also include a backflow prevention device.
For any assistance with installing this toilet, please contact
Thetford Customer Service at (800) 543-1219.
Operation
An instruction label is supplied with toilet.
To add water to the bowl, pump Handle (Part #46) while pressing down
on the Foot Pedal (#39). To flush out waste, release the Foot Pedal and
Pump. After using the toilet, pump five or six extra strokes to clear
discharge line of waste material and leave the bowl without water.
The Pump may need to be primed after installation. Pour water into
Bowl Intake Hose (#6) with Foot Pedal down and Pump Handle verti-
cal, allowing water to enter Pump Cylinder (#53). Reconnect Hose
and begin pumping slowly. Toilet is now primed.
When running in rough seas or leaving boat unattended, pump bowl
dry to prevent splashing.
Normal Care & Maintenance
Pumping can be made easier by using Sea Lube to condition leather
and gaskets. Periodically pour a few ounces into the Intake Hose to
lubricate inside of the Pump Base.
The toilet should be serviced every two years, or more often with heavy
use. Use only Wilcox Crittenden-supplied parts. When servicing toilet,
apply waterproof grease to Pump Cylinder before reassembling.
Troubleshooting
If toilet is hard to prime, make sure Inlet Flap Valve (#14) has not ad-
hered to the inside surface of the Inlet Flap Valve Cover (#13). Remove
Inlet Elbow Coupling (#7 and 8), press down on Foot Pedal, and use a
screwdriver or pencil to push on brass washer of the Inlet Flap Valve.
Also make sure that the thru-hulls and seacocks are not blocked.
If a foreign object becomes lodged in toilet, or to check the Backwater
Check (“Joker”) Valve (#25) remove Flange Screws and Tailpiece (22).
Skipper II Maintenance Kit (#37070)
A marine toilet needs regular maintenance to ensure reliable service. A
Wilcox Crittenden Maintenance Kit should be kept on board at all times.
Fonctionnement
Une notice d’instructions est fournie avec la toilette.
Pour ajouter de l’eau à la cuvette, pompez la poignée (pièce nº 46) en appuyant sur le
levier de commande à pied (nº39). Pour chasser les déchets, lâchez le levier de com-
mande à pied et pompez. Après l’usage, pompez cinq à six coups additionnels pour
pousser les déchets hors de la conduite d’évacuation et vider la cuvette de toute eau.
La première fois que la toilette est mise en service après l’installation, il peut être nécessaire
d’amorcer la pompe. Versez de l’eau dans le tuyau de chasse (pièce nº 6) en mettant le
levier de chasse (nº 17) à la verticale pour permettre à l’eau de pénétrer dans le cylindre
de la pompe (nº 33). Rebranchez le tuyau et commencez à pomper lentement. La toilette
est maintenant amorcée.
Si vous sortez par mer agitée ou si le bateau est laissé sans surveillance, asséchez
la cuvette par pompage pour prévenir les éclaboussements.
Entretien régulier
Le pompage peut être facilité en utilisant Sea Lune pour conditionner le cuir et les
joints d’étanchéité. Mettez-en périodiquement sur le tuyau d’aspiration pour graisser
l’intérieur de la base de la pompe.
La toilette doit recevoir un service complet tous les deux ans, plus souvent avec un us-
age intensif. N’utilisez que les pièces fournies par Wilcox Crittenden. Lors du service de
la toilette, appliquez une couche de graisse étanche aux parois du cylindre de la pompe
avant de remettre la pompe en place.
Dépannage
Si la pompe de la toilette s’amorce difficilement, vérifiez que le clapet de retenue à battant
du tuyau d’alimentation (nº 14) n’est pas collé à la paroi interne du couvercle du clapet (nº
13). Retirez les raccords de coude (nº 7 et 8), appuyez sur le levier de commande à pied,
et à l’aide d’un tournevis ou d’un crayon, enfoncez la rondelle en laiton du clapet à battant.
Assurez-vous que le passe-coque et les poignées de robinet ne sont pas bloqués.
Si un objet étranger s’est logé dans la toilette, ou pour vérifier le enlevez le clapet anti-
retour « Joker » (nº 25), retirez les vis d’accouplement et la queue de tuyau (22).
Trousse d’entretien Skipper II (nº 37070)
Pour assurer un fonctionnement fiable, entretenez régulièrement votre toilette. Gardez
toujours à bord une trousse d’entretien Wilcox Crittenden qui contient toutes les
pièces nécessaires pour réparer la toilette.
MISE EN GARDE : la ligne d’admission de cette toilette NE doit PAS être connectée
directement au réservoir d’eau depuis la pompe, car cela risque d’entraîner une
maladie grave, voire la mort.
Nous recommandons que TOUTE installation au système d’eau douce comprenne
également un antirefouleur.
Pour obtenir de l’aide sur la manière d’installer cette toilette, veuillez contacter
le service à la clientèle de Thetford au 1 800 543-1219
Haul-Out and Launch
At haul-out, a solution of fresh water and vinegar should be
allowed to stand in the pump for several days to dissolve the
accumulation of salt in the Cylinder and hose lines. Pour a
few cupfuls into bowl and pump the Cylinder with a stroke
or two.
If antifreeze is used, it must be glycol base. Do not put oil,
kerosene, gasoline or alcohol in the toilet, as they will
ruin the valves.
Before launching, prime toilet by pouring in a half-bowl of
water and pump several times. Toilet is then ready for use.
Skipper II 1550 Marine Toilet Parts
Échouerie et mise à l’eau
À l’échouerie, irriguez la pompe avec une solution d’eau et de vinaigre
pendant plusieurs jours afin de dissoudre l’accumulation de sel dans
le cylindre et dans les tuyaux. Versez quelques tasses dans la cuvette
et actionnez le cylindre en un ou deux coups de pompe.
Si vous utilisez un antigel,le produit doit être à base de glycol. Ne versez
pas d’huile, de kérosène, d’essence ou d’alcool dans la toilette car
ces produits endommageront les robinets.
Avant la mise à l’eau, amorcez la toilette en remplissant la cuvette à
moitié avec de l’eau et actionnez plusieurs coups de pompe. La toilette
est maintenant prête à l’usage.
Pièces de la toilette marine
Skipper II 1550
Ref. Part In
# Kit Description
1 37347 Bowl Spud
2 37348 Bowl Spud Rubber Gasket
3 37349 Bowl Spud Friction Washer
4 37350 Bowl Spud Lock Nut
5 37351 Bowl Spud Elbow
6 37312 Inlet Flush Tubing (3/4”)
7 37432 Coupling Nut for Inlet Elbow
8 37430 90° Inlet Elbow for 3/4” Hose
9 37431 X Gasket for Inlet Elbow Coupling Nut
10 37428 Inlet Valve Cover Screws 1/4-20 x 1-3/4 (2)
12 37429 Washer, Fiber .25 x .50 x .06
13 37426 Inlet Valve Cover
14 37396 X Inlet Valve Assembly
15 37836 X Screw & Lock Washer for Inlet Control Lever
16 37407 Inlet Control Lever
17 37408 Flush Control Lever Spring
18 37439 Base Drain Plug
19 37434 Discharge Coupling Flange Bolt (2)
21 37437 Coupling Flange for Discharge Tailpiece
22 37436 90° x 1-1/2” Discharge Elbow
23 37427
Inlet Valve Cover Screw 1/4-20 .62 (3)
25 37435 X Backwater Check (Joker) Valve
26 37433 Main Riser
27 37434 Bolt for Main Riser (2)
28 37398 X Discharge Flap Valve Assembly
29 37394 Washer, Nylon .38 x .88 x .06
30 37425 Base Plate Screw 1/4-20 x 1 (7)
31 37423 Base Plate
32 37424 X Base Plate Gasket
33 37831 Lock Washer & Screw for Piston Lever
34 37391 Piston Lever
35 37390 Piston Pin
36 37395 Cotter Pin, SS .08 x .75 (2)
37 37389 Piston
38 37385 X Leather Cup for Piston Head
39 37412 Foot Pedal
40 37413 X Foot Pedal Set Screw
41 37411 Inlet Control Shaft Packing Nut
42 37404 Stainless Inlet Control Shaft
43 37406 Inlet Control Shaft Packing Gland
44 37405 X Inlet Control Shaft Packing
45 37422 Pump Handle Knob
46 37420 Bronze Pump Handle
47 37421 Set Screw
48 37419 Pump Shaft Packing Cap
49 37417 Pump Shaft
50 37418 Pump Shaft Key (2)
51 37416 Pump Shaft Packing Gland
52 37415 X Pump Shaft Packing
53 37403 Bronze Pump Cylinder/Base Casting
54 37372 Pin for Bowl/Waste Flap Valve Spring
55 37371 X Bowl/Waste Flap Valve Spring
56 37373 X Bowl/Waste Flap Valve Assembly
57 37376 Bowl Gasket
58 37300 Standard Bowl - Porcelain
37509 Household Bowl - Porcelain
59 37438 Bowl Fastener Package
37380 4 Studs
37302 4 SS Washers
37381 4 Rubber Washers
37303 4 Nuts
60 37361 Bolt Cap
61 37388 Piston Head
NS 37307 Wooden Seat & Cover - Standard Bowl
NS 37816 Wooden Seat & Cover - Household Bowl
In Kit = Part included in Maintenance Kit #37070
NS = Not Shown
Réf. Pièce Avec la
nº trousse
Description
1 37347 Tubulure de raccordement de la cuvette
2 37348 Joint en caoutchouc de la tubulure de raccordement de la cuvette
3 37349 Rondelle de friction de la tubulure de raccordement de la cuvette
4 37350 Contre-écrou de la tubulure de raccordement de la cuvette
5 37351 Coude de la tubulure de raccordement de la cuvette
6 37312 Tuyau d’admission de la chasse (3/4 po)
7 37432 Écrou d’accouplement pour coude d’admission
8 37430 Coude d’admission de 90° pour tuyau de 3/4 po
9 37431 X Joint d’étanchéité pour écrou d’accouplement
10 37428 Vis du couvercle du clapet d’admission 1/4-20 x 1-3/4 (2)
12 37429 Rondelle, fibre 0,25 x 0,50 x 0,06
13 37426 Couvercle du clapet d’admission
14 37396 X Assemblage de clapet d’admission
15 37836 X Vis et rondelle pour levier de commande d’aspiration
16 37407 Levier de commande d’aspiration
17 37408 Ressort du levier de commande de la chasse d’eau
18 37439 Bouchon de drain
19 37434 Boulon d’accouplement à bride de vidange (2)
21 37437 Bride d’accouplement pour raccord droit de vidange
22 37436 Coude de vidange de 90° x 1-1/2 po
23 37427 Vis pour couvercle du clapet d’admission 1/4-20 0,62 (3)
25 37435 X Clapet de non retour (Joker)
26 37433 Colonne montante
27 37434 Boulon pour colonne montante (2)
28 37398 X Assemblage de raccord à bride de vidange
29 37394 Rondelle en nylon 0,38 x 0,88 x 0,06
30 37425 Vis pour plaque de la base 1/4-20 x 1 (7)
31 37423 Plaque de la base
32 37424 X Joint d’étanchéité de la plaque de base
33 37831 Rondelle et vis pour levier de piston
34 37391 Levier de piston
35 37390 Axe de piston
36 37395 Goupille fendue SS 0,08 x 0,75 (2)
37 37389 Piston
38 37385 X Coupelle en cuir pour tête de piston
39 37412 Levier de commande à pied
40 37413 X Vis d’assemblage pour levier de commande à pied
41 37411 Écrou de presse-garniture pour arbre de commande d’admission
42 37404 Arbre de commande d’admission en inox.
43 37406 Fouloir de presse-garniture pour arbre de commande d’admission
44 37405 X Presse-garniture pour arbre de commande d’admission
45 37422 Bouton de poignée de la pompe
46 37420 Poignée de pompe en bronze
47 37421 Ensemble de vis
48 37419 Capuchon de l’axe de la pompe
49 37417 Axe de la pompe
50 37418 Clé pour axe de la pompe (2)
51 37416 Écrou de presse-garniture de la pompe
52 37415 X Presse-garniture de la pompe
53 37403 Cylindre de pompe e bronze /Base moulée
54 37372 Fiche de cuvette/ Ressort du clapet de non retour des déchets
55 37371 X Ressort pour la cuvette/ clapet de non retour des déchets
56 37373 X Assemblage de la cuvette/ clapet de non retour des déchets
57 37376 Joint d’étanchéité de la cuvette
58 37300 Cuvette en porcelaine - standard
37509 Cuvette en porcelaine - domestique
59 37438 Trousse d’attache / de fixation pour cuvette
37380 4 tiges
37302 4 rondelles SS
37381 4 rondelle en caoutchouc
37303 4 écrous
60 37361 Chapeaux de boulon
61 37388 Tête de piston
NI 37307 Siège et couvercle en bois – cuvette standard
NI 37816 Siège et couvercle en bois – cuvette domestique
Avec la trousse = Pièces comprises dans la trousse d’entretien nº 37070
Two-Year Limited Warranty
Warranty
Thetford Corporation warrants permanent toilets that are used
for personal, family or household purposes to be free from
defects in material and workmanship for a period of two years
from the date of purchase. Thetford Corporation warrants to the
original purchaser permanent toilets placed in commercial or
business use to be free of defects in material and workmanship
for a period of ninety (90) days from the date of purchase.
Limitation of Warranty
1. This warranty does not apply to products which have been
subjected to misuse, negligence, accident, fire, improper
repair, improper installation or any other unreasonable
use.
2. This warranty will be void if the identification number or
date of manufacture stamp has been effaced, altered, or
removed, or if the product has been repaired or altered by
persons other than Thetford Corporation.
3. In order to obtain the remedy of repair or replacement, the
permanent toilet must be transported to a Thetford Service
Center for warranty service.
Limitation of Remedy
1. THE RESPONSIBILITY OF THETFORD CORPORATION
UNDER THIS WARRANTY IS LIMITED TO THE REPAIR
OR REPLACEMENT, AT THETFORD’S OPTION, OF THE
DEFECTIVE PART OR ASSEMBLY.
2. IN NO EVENT SHALL THETFORD CORPORATION BE
RESPONSIBLE FOR CONSEQUENTIAL OR INCIDENTAL
DAMAGES OF ANY KIND ARISING FROM THE USE OF ITS
PRODUCTS, INCLUDING BUT NOT LIMITED TO SPILLS
FROM HOLDING TANK DEODORANTS OR ADDITIVES, OR
DAMAGE RESULTING FROM TOILET FLOODING. RESPON-
SIBILITY OF THETFORD CORPORATION IS LIMITED TO THE
REPAIR OR REPLACEMENT OF THE DEFECTIVE PART.
3. SOME STATES DO NOT ALLOW LIMITATIONS ON HOW
LONG AN IMPLIED WARRANTY LASTS, OR DO NOT AL-
LOW ANY EXCLUSION OR LIMITATION OF INCIDENTAL
OR CONSEQUENTIAL DAMAGES SO THAT ABOVE LIMITA-
TIONS MAY NOT APPLY TO YOU.
Disclaimer of Other Warranties
THIS WARRANTY IS EXPRESSLY IN LIEU OF ALL OTHER
WARRANTIES EITHER EXPRESSED OR IMPLIED. ALL
OTHER WARRANTIES, EXPRESSED OR IMPLIED, INCLUD-
ING ANY WARRANTY OF MERCHANTABILITY OR FITNESS
FOR A SPECIFIC PURPOSE, ARE HEREBY DISCLAIMED AND
EXCLUDED.
Legal Rights
This warranty gives you specific legal rights, and you may also
have other rights which vary from state to state.
Garantie limitée de deux ans
Garantie
Thetford Corporation garantit que les cabinets d’aisance utilisés à des
fins personnelles, familiales ou domestiques seront exempts de tout
défaut de matériaux ou de fabrication pendant une période de deux
(2) ans à partir de la date d’achat. Thetford Corporation garantit aux
premiers acheteurs que tous ses cabinets d’aisance placés à des en-
droits commerciaux ou professionnels seront exempts de tout défaut
de matériaux ou de fabrication pendant une période de quatre-vingt-dix
(90) jours à partir de la date d’achat.
Restrictions de la garantie
1. Cette garantie ne s’applique pas aux défauts qui résultent d’un
mauvais emploi, d’une négligence, d’un accident, d’un incendie,
d’une réparation ou d’une installation imparfaite, ainsi que de tout
autre emploi excessif.
2. La présente garantie deviendra nulle si le numéro d’identification
et la date de fabrication sont effacés, modifiés ou détruits, ou si le
produit a été réparé ou modifié par des personnes autres que les
employés de Thetford Corporation.
3. Afin d’obtenir le recours d’une réparation ou d’un remplacement
en vertu de la garantie, le cabinet d’aisance doit être transporté à
un Centre de services Thetford.
Restriction des recours
1. LA RESPONSABILITÉ DE THETFORD CORPORATION EN VERTU
DE LA PRÉSENTE GARANTIE EST LIMITÉE À LA RÉPARATION
OU AU REMPLACEMENT, AU CHOIX DE THETFORD, DE LA PIÈCE
DÉFECTUEUSE OU DE L’ASSEMBLAGE DÉFECTUEUX.
2. THETFORD CORPORATION NE PEUT EN AUCUN CAS ÊTRE TENU
RESPONSABLE D’AUCUN DOMMAGE INDIRECT OU ACCESSOIRE
RÉSULTANT DE L’EMPLOI DE SES PRODUITS, Y COMPRIS, ENTRE
AUTRES, LES DÉGÂTS CAUSÉS PAR LES DÉODORISANTS OU
ADDITIFS POUR RÉSERVOIR, OU LES DOMMAGES ENTRAÎNÉS
PAR LE DÉBORDEMENT DU CABINET. LA RESPONSABILITÉ DE
THETFORD CORPORATION EST LIMITEE À LA REPARATION OU
AU REMPLACEMENT DES PIECES DEFECTUEUSES.
3. CERTAINS ÉTATS NE PERMETTENT PAS DE LIMITES DE DURÉE DE
GARANTIE TACITE, OU D’EXCLUSIONS OU DE RESTRICTIONS SUR
LES DOMMAGES INDIRECTS OU CONSÉCUTIFS; LES RESTRIC-
TIONS CI-DESSUS PEUVENT NE PAS S’APPLIQUER À VOUS.
Exclusions d’autres garanties
LA PRÉSENTE GARANTIE TIENT EXPRESSÉMENT LIEU DE TOUTE
AUTRE GARANTIE EXPLICITE OU IMPLICITES. TOUTES LES AUTRES
GARANTIES, Y COMPRIS LA GARANTIE DE VALEUR MARCHANDE
ET D’APTITUDE À UN USAGE PRÉCIS, SONT PAR LES PRÉSENTES
DÉSAVOUÉES ET EXCLUES.
Droits légaux
Cette garantie vous confère des droits légaux précis; vous pouvez
également en avoir d’autres qui varient d’un État à l’autre.
Vous avez des questions?
N’appelez pas et ne retournez pas la toilette au magasin où vous
l’avez achetéE.
Pour des questions concernant l’installation ou la garantie, veuillez
appeler notre service de soutien technique au numéro sans frais 1 888
536-0009 du lundi au vendredi de 8 h 00 à 17 h 00 (HNE) p.m. EST.
Questions?
Do not call or return toilet to place of purchase
.
For installation or warranty questions, please call Technical
Support toll free at 888-536-0009 from 8 a.m.-5 p.m. EST.,
Monday-Friday.
Form No./Formulaire no37821 • Rev. 4.20.05/Rév. 20.4.05
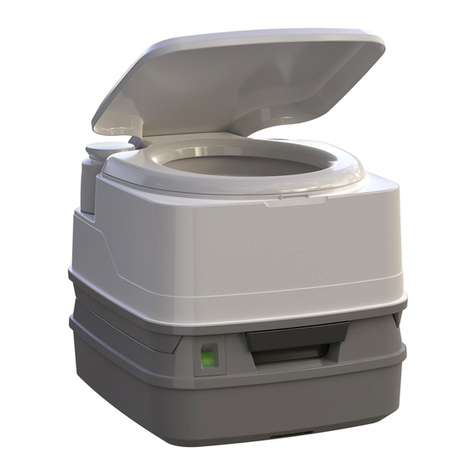
Other Thetford Toilet manuals

Thetford Aqua-Magic V User manual

Thetford

Thetford Aqua-Magic V User manual

Thetford Aqua-Magic Starlite User manual

Thetford

Thetford Aqua-Magic Starlite User manual

Thetford 345346A User manual

Thetford

Thetford 345346A User manual

Thetford TECMA Design Series User manual

Thetford

Thetford TECMA Design Series User manual

Thetford CASSETTE C-200 S User manual

Thetford

Thetford CASSETTE C-200 S User manual

Thetford C-250 Series User manual

Thetford

Thetford C-250 Series User manual

Thetford C2 Assembly instructions

Thetford

Thetford C2 Assembly instructions

Thetford C260 Series User manual

Thetford

Thetford C260 Series User manual

Thetford C224 User manual

Thetford

Thetford C224 User manual

Thetford Tecma Compass High ECO User manual

Thetford

Thetford Tecma Compass High ECO User manual

Thetford Sani-Con Turbo 700 User manual

Thetford

Thetford Sani-Con Turbo 700 User manual

Thetford C502-X User manual

Thetford

Thetford C502-X User manual

Thetford Porta Potti 260P User manual

Thetford

Thetford Porta Potti 260P User manual

Thetford C-250 Series User manual

Thetford

Thetford C-250 Series User manual

Thetford Porta Potti Excellence User manual

Thetford

Thetford Porta Potti Excellence User manual

Thetford Porta Potti 565e User manual

Thetford

Thetford Porta Potti 565e User manual

Thetford C260 Series User manual

Thetford

Thetford C260 Series User manual

Thetford Wilcox Crittenden Headmate 1460 User manual

Thetford

Thetford Wilcox Crittenden Headmate 1460 User manual

Thetford 23709 Setup guide

Thetford

Thetford 23709 Setup guide

Thetford Aqua-Magic IV Foot Pedal Flush User manual

Thetford

Thetford Aqua-Magic IV Foot Pedal Flush User manual

Thetford C220 Series User manual

Thetford

Thetford C220 Series User manual

Thetford CASSETTE Series User manual

Thetford

Thetford CASSETTE Series User manual

Thetford Porta Potti Excellence User manual

Thetford

Thetford Porta Potti Excellence User manual

Thetford TECMA EasyFit Premium Service manual

Thetford

Thetford TECMA EasyFit Premium Service manual

Popular Toilet manuals by other brands

Toto USWN900 Series Instruction Manual with Warranty

Toto

Toto USWN900 Series Instruction Manual with Warranty

Grone SENSIA CBS manual

Grone

Grone SENSIA CBS manual

noken Urban 100099732 manual

noken

noken Urban 100099732 manual

SFA SANICOMPACT Eco LUXE installation instructions

SFA

SFA SANICOMPACT Eco LUXE installation instructions

DXV Modulus Right Height D22020A Series installation instructions

DXV

DXV Modulus Right Height D22020A Series installation instructions

Villeroy & Boch ViClean-IR installation instructions

Villeroy & Boch

Villeroy & Boch ViClean-IR installation instructions

BidetMate 700 Series user manual

BidetMate

BidetMate 700 Series user manual

Toto MS636CDR Series installation manual

Toto

Toto MS636CDR Series installation manual

Kohler FAMILY CARE K-23188T-NS installation instructions

Kohler

Kohler FAMILY CARE K-23188T-NS installation instructions

Bano 5970S2-EL installation instructions

Bano

Bano 5970S2-EL installation instructions

closomat Asana operating instructions

closomat

closomat Asana operating instructions

Woodbridge LT610 Installation and care guide

Woodbridge

Woodbridge LT610 Installation and care guide

ProFlo Gilpin B8204 owner's manual

ProFlo

ProFlo Gilpin B8204 owner's manual

ALLIED MEDICAL MP20504 Assembly instructions

ALLIED MEDICAL

ALLIED MEDICAL MP20504 Assembly instructions

DURAVIT 45700900A1 Mounting instructions

DURAVIT

DURAVIT 45700900A1 Mounting instructions

Medline Microban BEDSIDE TOILET User instructions and warranty

Medline

Medline Microban BEDSIDE TOILET User instructions and warranty

Grohe SENSIA IGS operating instructions

Grohe

Grohe SENSIA IGS operating instructions

BEMIS bioBidet PRODIGY P500 Service manual

BEMIS

BEMIS bioBidet PRODIGY P500 Service manual

manuals.online logo
manuals.online logoBrands
  • About & Mission
  • Contact us
  • Privacy Policy
  • Terms and Conditions

Copyright 2025 Manuals.Online. All Rights Reserved.