manuals.online logo
Brands
  1. Home
  2. •
  3. Brands
  4. •
  5. Thetford
  6. •
  7. Toilet
  8. •
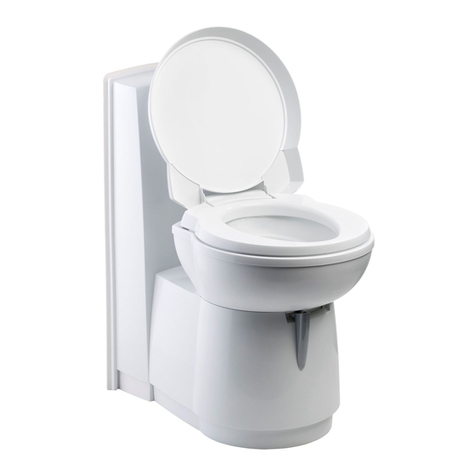
  9. Thetford C260 Cassette Toilet User manual

Thetford C260 Cassette Toilet User manual

© 2011 Thetford
C260
User Manual
Thetford B.V.
Nijverheidsweg 29
Postbus 169
4870 AD Etten-Leur
Nederland
T +31 (0)76 5042200
F +31 (0)76 5042300
E [email protected]
Thetford Ltd.
Unit 19
Parkwood Industrial
Estate
Oakham Drive
Sheffield, S3 9QX
England
T +44 (0)114 273 8157
F +44 (0)114 275 3094
E [email protected]
Thetford GmbH
Schallbruch 14
42781 Haan
Deutschland
T +49 (0)2129 94250
F +49 (0)2129 942525
E [email protected]
Thetford S.A.R.L.
Bâtiment le Californie
11, Rue Rosa Luxembourg
BP 40204 Eragny sur Oise
95614 Cergy Pontoise
Cedex
France
T +33 (0)1 30 37 58 23
F +33 (0)1 30 37 97 67
E [email protected]
Thetford Italy c/o
Tecma s.r.l.
Via Flaminia
Loc. Castel delle Formiche
05030 Otricoli (TR)
Italia
T +39 0744 709071
F +39 0744 719833
E [email protected]
Mercé Grau Solà
Agente para España y
Portugal
C/Libertat
103-105 Baixos
08800 Vilanova i la Geltrú
Barcelona
España
T +34 (9)3815 4389
F +34 (9)3815 6106
E [email protected]
Thetford B.V.
Representative Office
Scandinavia
Hönekullavägen 13
43544 Mölnlycke
Sverige
T +46 (0)31 336 35 80
F +46 (0)31 448 570
E [email protected]
93052/0611-V01
QUICK GUIDE
Preparing flush-water tank (only for C262-models)
Preparing Electric Ventilator (if applicable)
Preparing waste-holding tank
THE ORIGINAL
AQUA
KEM
GREEN
K
I
0
0
3
5
6
2
THE ORIGINAL
AQUA
RINSE
K
I
0
0
3
5
6
2
1 2 3 4
5 6 7 8
9 10 11 12
13 14 15
15
16
16
17 18
Which Thetford Toilet Care products do I need?
Thetford is the only brand in Europe with products that have conquered
the Dutch eco-label Milieukeur (Aqua Rinse, Aqua Kem Green) and
the German eco-label Der Blaue Engel (Aqua Rinse, Aqua Kem Green,
Aqua Kem Natural).
K
I
0
0
3
5
6
2
The range of available Toilet Care products may vary for each country
Plastic surfaces
Toilet bowl
Blade
seal
Waste-holding tank
Flush-
water tank
2
79
3
QUICK GUIDE
Emptying flush-water tank (only for C262-models)
21 22 23 24
25 26 27 28
29 30 31 32
33 34 35 36
37 38
Emptying waste-holding tank
54
1 Introduction
This Thetford Cassette Toilet is a high quality
product. It is user-friendly, meets high quality
standards and gives you all the convenience of
home.
Before operating and using this toilet we advise
you to read the manual completely. Keep this
manual in a safe place for future reference.
For the latest version of the manual please visit
www.thetford.eu
Symbols used
OK
Tip
Special attention required
Caution (possible risk of injury or
product damage)
2 Possible toilet options
Some toilets are fitted with
extra options. To check
which options are available,
press the flush button on
the control panel.
The following symbols can light up:
Waste Pump-Out system; transfers waste
from the waste-holding tank into the
vehicle’s central waste tank
Electric Blade; electrically opens or closes
the blade
Electric Ventilator; draws unpleasant odours
away from the waste tank to the outside of
the vehicle
You will find additional instructions to these
options in the blue text boxes. Thoroughly read the
applicable instructions.
3 Preparing for use
This Cassette Toilet has a waste-holding tank of
17.5L. A C262-model also has its own 8L flush-
water tank . Before using your toilet, it is vital that
you add toilet additives to these tanks. Check the
correct dosage on the additive package. Then add
±3L of water to the waste-holding tank. Fill the
flush-water tank of a C262-model to the top.
Electric Ventilator (if applicable)
Open the service door and remove the
waste-holding tank. Then remove the filter
housing cover and place the new filter into the
filter housing. Replace the cover and return the
waste-holding tank back to original position.
Never add toilet additives directly via the
blade as this could damage the lip seal of the
waste-holding tank. Only fill the waste-holding
tank via the pour out spout.
Never use force if you cannot get the waste-
holding tank back into place easily. If
blockage occurs, always check if the blade handle
is in the closed position.
See ‘Quick Guide’ diagrams 1-20 for visual
reference. To depressurise the waste-holding
tank, press the vent button before placing the
tank back in its position.
Thetford offers a pleasantly scented toilet fluid
for the flush-water tank (Aqua Rinse) and a variety
of waste-holding tank products (Aqua Kem Blue,
Aqua Kem Green, Aqua Kem Natural, Aqua Kem
Sachets).
Aqua Rinse keeps the flush water fresh, ensures
a smooth flush and leaves a protective layer. All
products for the waste-holding tank suppress
unpleasant smells, stimulate the breakdown
of waste, reduce the formation of gas, protect
moving parts and help to keep the waste-holding
tank fresh and clean. For the differences between
the distinguishing qualities of each waste-holding
tank product please visit www.thetford.eu.
GB • INSTRUCTIONS FOR USE
Main parts
Standard
1 Cover • 2 Seat • 3 Swiveling toilet bowl • 4 Blade handle to open/close blade • 5Control panel (position is
different on C263-models) • 5a Flush button • 5b Waste-holding tank level indication (1 level or 3 levels;
dependent on model) • 6 Pull handle • 7 Pour out spout • 8 Cap with measuring cup • 9Automatic pressure
release vent • 10 Vent button • 11 Sliding cover • 12 Blade opener • 13 Waste-holding tank mechanism
• 14 Wheel • 15 Service door 3
Options
16 Waterfill door (only for C262-models) • 17 Console with flush-water tank (only for C262-models)
• 18 Filter for Electric Ventilator • 19 Location Waste Pump-Out system
GBGB
76
The range of available Toilet Care products may
vary for each country.
4 Use of your toilet
Turning the bowl You can turn this bowl to a
desired position
(max. ±90 º). Close the
cover and use both hands
to rotate the bowl as
illustrated.
Opening the blade
The toilet can be used with
the blade open or closed.
To open the blade, slide the
blade handle sideways as
illustrated. Make sure you
always close the blade
completely after use.
Electric Blade (if applicable)
Press the flush button to activate the
control panel. Then push the Electric Blade
button. The blade will open or close electrically.
Flushing the toilet
Press the flush button once
to activate the control
panel. Then press the flush
button for several seconds
to flush the toilet.
Electric Ventilator (if applicable)
By activating the control panel, the
Electric Ventilator starts automatically. The
button will flash to indicate that this function is
active. To stop the Electric Ventilator, press the
button. Press the button again to re-start the
ventilator. To optimise its function, activate the
Electric Ventilator before use of your toilet.
Even without an own flush-water
tank you can still use Aqua Rinse
for a smooth and fresh lavender
scented flush. Simply spray Aqua
Rinse with a spray can evenly into
the toilet bowl before use.
Ordinary toilet paper can
cause clogging. Use Aqua
Soft toilet paper instead.
This toilet paper is super-soft,
dissolves quickly, prevents
clogging and makes it easier to
empty the waste-holding tank.
Level indication
You can check wether your waste-holding tank has
a 1-level or a 3-level indication. Make sure the tank
is empty and place it back properly. Then activate
the control panel. If no level indication light lights
up, your toilet has a 1-level indication. It will only
indicate a full tank. If a green level indication light
immediately lights up, your toilet has a 3-level
indication. It will indicate empty, half full and full.
5 Emptying the tank
Waste-holding tank
When the red light of the level indicator on the
control panel lights up, you need to empty the
waste-holding tank. Remove the tank via the
service door. Then take it to an authorised waste
disposal point. Empty the waste-holding tank via
the pour out spout.
To empty the tank without splashing, press
and hold the vent button with your thumb
while the pour out spout is pointing downwards.
Waste Pump-Out system (if applicable)
By activating the control panel, this
button automatically lights up. Press the
button to empty the waste-holding tank into the
vehicle’s central waste tank. The button flashes
while the waste is being pumped and stops
flashing when all waste has been transferred.
(±1.5L of waste is left). If the central waste tank
is too full (only measured when this tank has a
level indicator), the button flashes rapidly and
no pump-out is possible until you have emptied
the central waste tank.
See ‘Quick Guide’ diagrams 21-32 for visual
reference. If you want to continue using your
toilet after emptying, prepare the waste-holding
tank again.
Our ‘green’ products Aqua Kem Green, Aqua
Kem Natural and Aqua Rinse (test ISO 11734)
are absolutely safe to empty into a septic tank
or small biological systems on camping sites.
Please avoid to travel with a waste-holding
tank that is more than ¾ full. This may
cause leakage through the venting system.
Flush-water tank (only for C262-models)
The flush-water tank has a capacity of 8L. Only
empty the flush-water tank completely if you don’t
expect to use your toilet for a long (winter) period.
Place a sufficiently large bowl under the drain tube
and catch the remaining water. Empty this bowl at
an authorised waste disposal point.
See ‘Quick Guide’ diagrams 33-38 for visual
reference.
To prevent water damage to your caravan or
motor home, ensure that you don’t travel
with a full flush-water tank or with water in the
bowl.
6 Cleaning
Just like your toilet at home, it is also important
to clean this Cassette Toilet
regularly. You will prevent
limescale and ensure optimal
hygiene. Clean the inside
of the bowl with Toilet Bowl
Cleaner and a soft brush and
use Bathroom Cleaner for the
outside of the toilet.
Never use household cleaners to clean your
toilet. These may cause permanent damage
to the seals and other toilet components.
Waste Pump-Out system (if applicable)
Fill the emptied waste-holding tank with
water and place the tank back. Then activate
the control panel. Press the Waste Pump-Out
system button to pump the water through the
system. Do this once every 3 weeks.
Remove seat & cover
To clean your toilet
thoroughly, remove the
seat and cover. First push
the seat and cover together
to the right, then lift them
up.
7 Winter use
You can use your toilet as normal in cold weather
as long as the toilet is situated in a heated
location. If this is not the case, and there is a risk
of frost, we advise not to use your toilet. Make
sure you completely empty the waste-holding
tank. For a C262-model also empty the flush-
water tank.
Aqua Kem Sachets are particularly
suitable for winter camping as the
sachets are filled with powder.
They completely dissolve in water, are
easy to dose and economical in use.
8 Maintenance
To prolong the life span of your toilet,
maintain your toilet regularly.
Use Cassette Tank Cleaner 2 to 3
times a year on the waste-holding
tank. It safely
removes
stubborn
limescale on
the inside of the tank. When
seals become dry, use Seal
Lubricant to keep the seals
soft and pliable. It has been
specially developed for mobile toilets and is
absolutely safe to use.
Never use Vaseline or vegetable oil to
lubricate the seals as these may cause
leakage to your waste-holding tank.
Waste Pump-Out system (if applicable)
To ensure optimal functionality, maintain
the waste-holding tank regularly. Fill the waste-
holding tank with water and wash it. Then use
Cassette Tank Cleaner. Do this every 6 weeks
when on holiday.
GBGB
Other manuals for C260 Cassette Toilet

4

Other Thetford Toilet manuals

Thetford Cassette C-402C User manual

Thetford

Thetford Cassette C-402C User manual

Thetford C262CWE User manual

Thetford

Thetford C262CWE User manual

Thetford Aqua-Magic Starlite User manual

Thetford

Thetford Aqua-Magic Starlite User manual

Thetford C260 Cassette Toilet User manual

Thetford

Thetford C260 Cassette Toilet User manual

Thetford C400 Series User manual

Thetford

Thetford C400 Series User manual

Thetford Tecma Compass High PREMIUM PLUS User manual

Thetford

Thetford Tecma Compass High PREMIUM PLUS User manual

Thetford C260 Series User manual

Thetford

Thetford C260 Series User manual

Thetford C-250 Series User manual

Thetford

Thetford C-250 Series User manual

Thetford Aria Classic User manual

Thetford

Thetford Aria Classic User manual

Thetford Porta Potti 165 User manual

Thetford

Thetford Porta Potti 165 User manual

Thetford Porta Potti Excellence User manual

Thetford

Thetford Porta Potti Excellence User manual

Thetford Porta Potti Excellence User manual

Thetford

Thetford Porta Potti Excellence User manual

Thetford TECMA Design Series User manual

Thetford

Thetford TECMA Design Series User manual

Thetford Wilcox Crittenden Headmate 1460 User manual

Thetford

Thetford Wilcox Crittenden Headmate 1460 User manual

Thetford Aqua-Magic V User manual

Thetford

Thetford Aqua-Magic V User manual

Thetford Cassette C-402C User manual

Thetford

Thetford Cassette C-402C User manual

Thetford Porta Potti 565 Series User manual

Thetford

Thetford Porta Potti 565 Series User manual

Thetford TECMA EasyFit Premium Service manual

Thetford

Thetford TECMA EasyFit Premium Service manual

Thetford C220 Series User manual

Thetford

Thetford C220 Series User manual

Thetford C224 User manual

Thetford

Thetford C224 User manual

Thetford Aqua-Magic V User manual

Thetford

Thetford Aqua-Magic V User manual

Thetford Porta Potti User manual

Thetford

Thetford Porta Potti User manual

Thetford C220 Series User manual

Thetford

Thetford C220 Series User manual

Thetford TECMA FLEXI LINE Manual

Thetford

Thetford TECMA FLEXI LINE Manual

Popular Toilet manuals by other brands

rba RBA8847-100 Installation, operation and maintenance instructions

rba

rba RBA8847-100 Installation, operation and maintenance instructions

DURAVIT DuraStyle Basic 21820900001 Mounting instructions

DURAVIT

DURAVIT DuraStyle Basic 21820900001 Mounting instructions

Toto NEOREST LS instruction manual

Toto

Toto NEOREST LS instruction manual

Toto NEOREST installation guide

Toto

Toto NEOREST installation guide

Raritan Crown Head CW912 Installation, operation and maintenance instructions

Raritan

Raritan Crown Head CW912 Installation, operation and maintenance instructions

Signature Hardware SITKA 948420 Install

Signature Hardware

Signature Hardware SITKA 948420 Install

Toto Washlet TCF4914E Series instruction manual

Toto

Toto Washlet TCF4914E Series instruction manual

Kohler K-30215T-S installation instructions

Kohler

Kohler K-30215T-S installation instructions

AXA GLOMP manual

AXA

AXA GLOMP manual

STUDIOLUX SLi5200 manual

STUDIOLUX

STUDIOLUX SLi5200 manual

enware Ifo Sign Junior Toilet-S Trap Installation and maintenance instructions

enware

enware Ifo Sign Junior Toilet-S Trap Installation and maintenance instructions

LUXE BIDET Neo 70 installation manual

LUXE BIDET

LUXE BIDET Neo 70 installation manual

Inax AC-959VAN installation manual

Inax

Inax AC-959VAN installation manual

MOBB Health Care MHRTSA2 instructions

MOBB Health Care

MOBB Health Care MHRTSA2 instructions

agape 750 Assembly instructions

agape

agape 750 Assembly instructions

Lippert Flow Max RV installation guide

Lippert

Lippert Flow Max RV installation guide

Swiss Madison SM-WT470 installation instructions

Swiss Madison

Swiss Madison SM-WT470 installation instructions

Foremost TT-2000E-WL-PB instructions

Foremost

Foremost TT-2000E-WL-PB instructions

manuals.online logo
manuals.online logoBrands
  • About & Mission
  • Contact us
  • Privacy Policy
  • Terms and Conditions

Copyright 2025 Manuals.Online. All Rights Reserved.