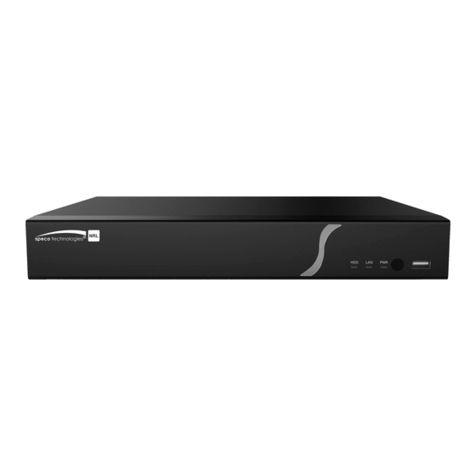
Timespace X300 Series User manual

X300
(X300 Mark 2
and X300-16M)
INSTRUCTION MANUAL
DESIGNED AND MANUFACTURED
IN THE UK
X300 OPERATING SOFTWARE
V1.5.2
THE X300 MANUAL IS AVAILABLE
ONLINE: w ww .t sp a ce .c o .u k
© TT0912 ISSUE 1
FEBRUARY 2019

i
Contents
1. About This Manual..................................................................................................... 1
1.1 X300 models –identification and distinction ....................................................... 1
1.2 Applicability of this manual ................................................................................. 2
1.3 X300 naming terminology ................................................................................... 3
1.4 Structure of this manual...................................................................................... 3
2. Quick Start Guide....................................................................................................... 4
2.1 System Overview ................................................................................................ 4
2.1.1 X300 Digital Video/Audio Recording System ....................................................... 5
2.1.2 Programming –X301 Reviewer............................................................................ 5
2.1.3 Help Screens......................................................................................................... 6
3. User Guide –X300 Menu System................................................................................ 7
3.1 Main Menu ......................................................................................................... 9
3.1.1 Normal Recording .............................................................................................. 10
3.1.2 Timer Recording ................................................................................................. 12
3.1.3 Alarm Recording................................................................................................. 14
3.1.4 SD Recording ...................................................................................................... 27
3.1.5 Shot Recording ................................................................................................... 39
3.1.6 Motion Detection ............................................................................................... 40
3.1.7 Mask View/Edit .................................................................................................. 43
3.1.8 Audio Recording ................................................................................................. 46
3.1.9 Recorded Files .................................................................................................... 49
3.1.10 Video Output ...................................................................................................... 51
3.1.11 Main Video Switcher .......................................................................................... 52
3.1.12 Multi Camera Options ........................................................................................ 53
3.1.13 Auxiliary Video Switcher (X300-16M only) ........................................................ 55

ii
3.2 Settings Menu................................................................................................... 56
3.2.1 System Settings .................................................................................................. 56
3.2.2 Time and Date .................................................................................................... 57
3.2.3 Alarm Inputs/Outputs menu .............................................................................. 59
3.2.4 Camera Settings ................................................................................................. 60
3.2.5 File System.......................................................................................................... 63
3.2.6 File Security Settings .......................................................................................... 65
3.2.7 File System Check ............................................................................................... 67
3.2.8 System Info......................................................................................................... 68
3.2.9 System Security .................................................................................................. 69
3.2.10 Power Options.................................................................................................... 73
3.2.11 Voltage Menu ..................................................................................................... 75
3.2.12 GSensor .............................................................................................................. 76
3.2.13 Vehicle ID............................................................................................................ 80
3.2.14 Reset................................................................................................................... 81
3.3 External Equipment........................................................................................... 85
3.3.1 LAN ..................................................................................................................... 86
3.3.2 GPS ..................................................................................................................... 88
3.3.3 GSensor .............................................................................................................. 90
3.3.4 GSM/Remote...................................................................................................... 91
3.3.5 PTZ Cameras ....................................................................................................... 97
3.3.6 SMTP Email....................................................................................................... 100
3.3.7 CANLink ............................................................................................................ 103
3.4 Advanced Menu...............................................................................................104
3.4.1 Health Page Display.......................................................................................... 106
3.4.2 Service Log........................................................................................................ 107
3.4.3 Load Software/Settings .................................................................................... 109

iii
3.4.4 Save Software/Settings .................................................................................... 110
4. System Information And Security ............................................................................111
4.1 Language Selection...........................................................................................111
4.2 Video Standard - PAL and NTSC ........................................................................111
4.3 File System.......................................................................................................111
4.4 Video Compression ..........................................................................................112
4.5 Audio...............................................................................................................113
4.6 PC Access Precautions ......................................................................................114
4.7 PC Network Access...........................................................................................115
4.8 Watermark and Sequencing .............................................................................116
4.8.1 Watermark ....................................................................................................... 116
4.8.2 Sequencing ....................................................................................................... 116
4.8.3 Watermark / Sequencing Report ..................................................................... 117
5. System Interfaces ...................................................................................................118
5.1 GPS ..................................................................................................................118
5.2 Remote Operation ( LAN / Wifi / 3G) –Telnet / FTP ..........................................119
5.3 RS232 / TELNET External Control ......................................................................120
5.4 USB Interface Kit ..............................................................................................120
6. Installation Guide ...................................................................................................122
6.1 Safety ..............................................................................................................122
6.2 Environmental .................................................................................................122
6.2.1 Shock And Vibration ......................................................................................... 122
6.2.2 EMC .................................................................................................................. 122
6.2.3 Conformity........................................................................................................ 122
6.2.4 Recycling........................................................................................................... 122
6.3 Warnings .........................................................................................................123

iv
6.4 X300 Connections.............................................................................................124
6.4.1 X300 Front Panel .............................................................................................. 124
6.4.2 Reviewer Connector......................................................................................... 125
6.4.3 X300 Rear panel, common connections .......................................................... 126
6.4.4 X300 Mark 2 Rear Panel (January 2016 onwards) ........................................... 128
6.4.5 X300-16M Rear Panel (August 2018 onwards) ................................................ 129
6.5 Installation Instructions....................................................................................130
6.5.1 Installation Checklist (Example) ....................................................................... 131
6.5.2 Mechanical Data............................................................................................... 132
6.5.3 Mounting Kits ................................................................................................... 134
6.5.4 Installation Spare Parts List .............................................................................. 145
7. Service And Maintenance........................................................................................146
7.1 Maintenance....................................................................................................146
7.2 Service And Fail LED .........................................................................................146
7.3 Service Codes...................................................................................................147
8. Software.................................................................................................................149
8.1 X300 Software and Updates .............................................................................149
8.1.1 Software Upload............................................................................................... 149
8.1.2 Software Download.......................................................................................... 149
8.1.3 Loading software from PCLink ......................................................................... 150
8.2 PCLink Suite .....................................................................................................151
9. Appendices .............................................................................................................153
APPENDIX 1 –X300 specification and technical data ...................................................153
APPENDIX 2 –Certificates of conformity and type approval ........................................156
APPENDIX 3 –Splash Screen ......................................................................................163
APPENDIX 4 –Tokens / Protocol .................................................................................164

vi
List of Figures
Figure 1 - X300 models/dates of manufacture .......................................................................... 1
Figure 2 –X300 Front panel - all models.................................................................................... 1
Figure 3 –X300 Identification / distinction................................................................................ 2
Figure 4 - X300 Models - features and differences.................................................................... 2
Figure 5 X300 Digital Video/Audio Recorder ............................................................................. 4
Figure 6 X300 connected to X301 Reviewer .............................................................................. 5
Figure 7 X300 Mark 2 Microphones....................................................................................... 113
Figure 8 X300-16M Microphone ............................................................................................ 113
Figure 9 - Network Ports ........................................................................................................ 115
Figure 10 - X300 Front Panel .................................................................................................. 124
Figure 11 - X300 with Reviewer ............................................................................................. 125
Figure 12 - X300 Mark 2 Rear Panel ....................................................................................... 128
Figure 13 - X300 Mark 2 Audio Connector............................................................................. 128
Figure 14 - X300-16M Rear Panel........................................................................................... 129
Figure 15 - X300-16M Rear Connections ............................................................................... 129
Figure 16 - X300 Mark 2 Mechanical Data ............................................................................. 132
Figure 17 - X300-16M Mechanical Data................................................................................. 133
Figure 18 - Vehicle Mounting System - Mounting Hole Preparation..................................... 134
Figure 19 - Wire Rope Mounts ............................................................................................... 135
Figure 20 –Timespace Vehicle Mounting Plates System Parts.............................................. 137

vii
Figure 21 - Vehicle Mounting Plates Mechanical Data .......................................................... 138
Figure 22 - X300 Vehicle Mounting Plate System - unscrewed ............................................. 139
Figure 23 - X300 Vehicle Mounting Plate System - screwed down ....................................... 140
Figure 24 - Attaching the latching plate to the X300-16M .................................................... 141
Figure 25 - X300-16M mounting plate - Inserting the peg into the base plate ..................... 142
Figure 26 - X300-16M mounting plate screwed down .......................................................... 142
Figure 27 - Final Mounted Clearance Required ..................................................................... 143
Figure 28 - Cable Installation Example................................................................................... 144
Figure 29 - Mounting Orientation Example ........................................................................... 144

viii
List of Abbreviations
Abbreviation
Meaning
AUX
Auxiliary
bps
Bits per second
CAN
Controller Area Network
CD
Compact Disk
CE
European Conformity
COM
Communication (port)
COMMS
Communications
DVR
Digital video recorder
EEC
European Economic Community
EMC
Electro-magnetic compatibility
EMG
Emergency (EMG Splash Screen)
FAT
File Allocation Table
FMS
Fleet Management System
FTP
File Transfer Protocol
FPS
Frames Per Second
GB
Gigabytes
GMT
Greenwich Mean Time
GND
Ground
GPS
Global positioning System
GSM
Global system (or standard) for mobile
HDD
Hard Disk Drive
HR
Hour
IP
Internet Protocol
IPS
Images per second
kHz
Kilohertz
KPH
Kilometres Per Hour
LAN
Local Area Network
LED
Light-Emitting Diode

ix
MAC
Media Access Control
MB
Megabytes
MBR
Master Boot Record
MED
Medium
mics
Microphones
MIN
Minute
MPH
Miles Per Hour
NTSC
The television broadcasting system used in North America and Japan
OSD
On-screen display
PAL
Phase Alternating Line
PC
Personal Computer
PCB
Printed Circuit Board
PoE
Power over Ethernet
PTZ
Pan Tilt Zoom (camera)
QUAL
Quality
RES
Resolution
RH
Relative Humidity
RMS
Root Mean Square
RTSP
Real Time Streaming Protocol
s
Second
SD
Secure Digital (card)
SDHC
Secure Digital High Capacity
SEC
Second
SMART
Self-Monitoring, Analysis and Reporting Technology
SMS
Short Message System
TB
Terabyte
TCP
Transmission Control Protocol
TFL
Transport for London
UK
United Kingdom
URL
Uniform Resource Locator (address of specific website or file on the
internet)
USA
United States of America

x
USB
Universal Series Bus (cable system)
UTC
Co-ordinated Universal Time
V
Volts
VOR
Voice Operated Recording
Vrms
Root-mean-square Voltage
W
Watts
WiFi
Wireless local area network

X300 Instruction Manual Chapter 1 - About This Manual
1
1. About This Manual
This manual contains the information required for the installation and operation of the Timespace
Technology X300 Digital Video Recorder (DVR).
1.1 X300 models –identification and distinction
The original X300 DVR (Mark 1) was the X300 Mark 1. The X300 Mark 2 was introduced from January
2016. At the date of issue of this manual, Timespace is manufacturing two versions of the X300 DVR
–the X300 Mark 2 (4-channel) and the X300-16M (16 channels). See Figure 1 - X300 models/dates
of manufacture below for a summary of the model numbers and dates:
Model number
Dates of manufacture
X300 (Mark 1)
2010 –January 2016
X300 Mark 2
January 2016 –present
X300-16M
August 2018 –present
Figure 1 - X300 models/dates of manufacture
All 3 versions of the X300 have identical front panels:
Figure 2 –X300 Front panel - all models

X300 Instruction Manual Chapter 1 - About This Manual
2
The various models of the X300 can be distinguished by their rear panels and labelling –see below:
X300 Identification/distinction
X300 Mark 1 rear
X300 Mark 2 rear (4 channels)
X300-16M rear (16 channels)
(2010 –January 2016)
(January 2016 –present)
(August 2018 –present)
Figure 3 –X300 Identification / distinction
1.2 Applicability of this manual
This manual contains details for the X300 Mark 2 and the X300-16M.
Users with X300 Mark 1 DVR should contact Timespace for a previous version of this Technical
Many features are common to the X300 Mark 2 and the X300-16M. In some sections of this manual,
additional/different details are relevant to the X300-16M, and this will be highlighted in relevant
sections, particularly in the Menu System section.
Mechanical diagrams and installation details for the X300 Mark 2 and the X300-16M are given in the
Installation chapter.
A summary of the main feature differences between the X300 and the X300-16M is below:
Feature
X300 Mark 2
X300-16M
Analogue (SD) video inputs
4
16
Video outputs
1
2
Audio inputs
2
1
Alarms in
5
10
Built in camera
power/connector
No
Yes (Molex)
Built-in GSensor
No
Yes
Supports Bridge Alert
No
No
Supports CANLink
Yes
Yes
Figure 4 - X300 Models - features and differences

X300 Instruction Manual Chapter 1 - About This Manual
3
1.3 X300 naming terminology
Where the generic term “X300” is used in this manual, this refers to all versions of the X300 DVR. If a
feature is specific to only one of the models, then this will be made clear by naming eg either the
“X300 Mark 2”or the “X300-16M”.
1.4 Structure of this manual
This manual is divided into the following sections:
Quick Start Guide
User Guide –X300 Menu System
System Information and Security
System Interfaces
Installation Guide
Service and Maintenance
Software
Appendices
Where text in the body of the manual is shown in CAPITALS, this relates to one of the menu choices
in the X300 menu system.
Within the X300 User Guide section of the Manual, links from menus to other menus or sub-menus
are given as hyperlinks.
Detailed technical information can be found in the Appendices, along with certificates of conformity
and type approval.
Recorded files can be viewed using PCLink200, Timespace’s proprietary reading and archiving
software package. Detailed information on viewing the recorded files is found in the manual for
PCLink200.

X300 Instruction Manual Chapter 2 - Quick Start Guide
4
2. Quick Start Guide
2.1 System Overview
X300 DIGITAL VIDEO / AUDIO RECORDER
REMOVABLE, SHOCK MOUNTED
HARD DISK CARTRIDGE
REMOVABLE SD CARD FOR DUAL
RECORDING & DOWNLOAD (OPTIONAL)
X300 with X301 REVIEWER / PROGRAMMER
Figure 5 X300 Digital Video/Audio Recorder
X300 DIGITAL VIDEO/AUDIO RECORDING SYSTEM

X300 Instruction Manual Chapter 2 - Quick Start Guide
5
2.1.1 X300 Digital Video/Audio Recording System
The X300 is a digital video/audio surveillance recorder for use in covert, portable and mobile
applications.
Recordings are made on a removable hard disk cartridge inserted in the X300. Optionally, recordings
can be simultaneously written to a removable SD card.
The recordings can be accessed by connecting the cartridge to a PC using Timespace USB interface kit
or cartridge station. Timespace PCLink application is a proprietary reading and archiving software
package used to review the recordings.
The X301 Reviewer is used to program the menu settings on the X300, check camera views, review
footage and list the recorded files on the installed Hard Disk Cartridge. Recording can continue
during this reviewing process.
2.1.2 Programming –X301 Reviewer
The X300 is configured using a tiered menu system. The menu system is accessed using the
Timespace X301 Reviewer (pictured below).
Figure 6 X300 connected to X301 Reviewer
To enter Menu System press any of the four MENU arrow buttons.
To exit the Menu System or to move back up a level press the MENU EXIT button.
See the separate X301 Reviewer manual at http://www.tspace.co.uk/pdf/timespace-reviewer-
manual.pdf for detailed information on the Reviewer’s functions / controls. A separate manual for
the previous model of Reviewer, the X201, is available by contacting Timespace.

X300 Instruction Manual Chapter 2 - Quick Start Guide
6
2.1.3 Help Screens
Each page on the menu system has an associated Help screen which describes the features on that
page.
Pressing the HELP key on the Reviewer front panel will display the Help page. Use the UP/DOWN
arrow keys to scroll through each help page.
The help pages included on the X300 are intended as a quick reference with more detailed
descriptions contained in this X300 Manual.

X300 Instruction Manual Chapter 3 - User Guide –X300 Menu System
7
3. User Guide –X300 Menu System
The X300 is configured using a tiered menu system. The menu system is accessed using the Reviewer.
There are two top level menus through which all features and settings are configured.
The MAIN MENU relates to the recording functions, files and video output:
The SETTINGS MENU is where the X300 and any connected equipment are configured:
NB: Each menu, feature and setting is detailed in the following pages. Refer to the Table of
Contents for reference to specific features, functions and settings.

X300 Instruction Manual Chapter 3 - User Guide –X300 Menu System
8
A help system is included and can be displayed for each menu by pressing the HELP key on the
Reviewer.
Navigation of the menu system is by using the arrow keys on the Reviewer.
All menu configuration items are changed instantly with the exception of the following which require
a reboot:
VIDEO STANDARD –switching between PAL/NTSC.
BAUD RATE –changing the baud rate for GPS, GSensor and RS232.
LANGUAGE FILE –when loading a language file from the hard disk cartridge.

X300 Instruction Manual Chapter 3 - User Guide –X300 Menu System
9
3.1 Main Menu
Recording modes in order of priority are:
1) SHOT RECORDING
2) ALARM RECORDING
3) TIMER RECORDING
4) NORMAL RECORDING
SD RECORDING can be running in parallel to any of the above recording modes.
MOTION DETECTION is used as a trigger to start one of the recording modes - it is not a recording
mode on its own.
Only one mode is active at any one time. For example if ALARM recording occurs during NORMAL
recording, ALARM takes control but reverts back to NORMAL once ALARM recording has finished.
Audio recording can be turned on or off for all recording modes. This selection is found on the AUDIO
RECORDING menu where other specific audio settings can be configured.
HINT: A MANUAL OVERRIDE feature exists. If the DVR is recording from a configured recording
setting, eg TIMER RECORDING or ALARM RECORDING, and a user attempts to stop recording (by
pressing the REC button on the Reviewer or on the X300 front panel), a warning message will be
displayed. “MANUAL OVERRIDE ENABLED”. To disable MANUAL OVERRIDE, press the record key
again. To cancel the action, press the MENU EXIT key.
NB: Across the different recording modes, the X300 has some common settings, e.g. Images per
Second (IPS). The IPS can be configured from 1 to 25 per camera. To save duplication, these
options will only be documented in the first instance and subsequent features should be assumed
to be the same unless explicitly stated.
Other manuals for X300 Series
1
This manual suits for next models
2
Table of contents
Other Timespace DVR manuals

Timespace
Timespace X200 User manual
Timespace
Timespace X100 User manual
Timespace
Timespace K200 User manual
Timespace
Timespace X500 User manual

Timespace
Timespace X200 User manual

Timespace
Timespace X200 User manual
Timespace
Timespace K210 User manual
Timespace
Timespace OmniBase 8 User manual

Timespace
Timespace X300 Series User manual

