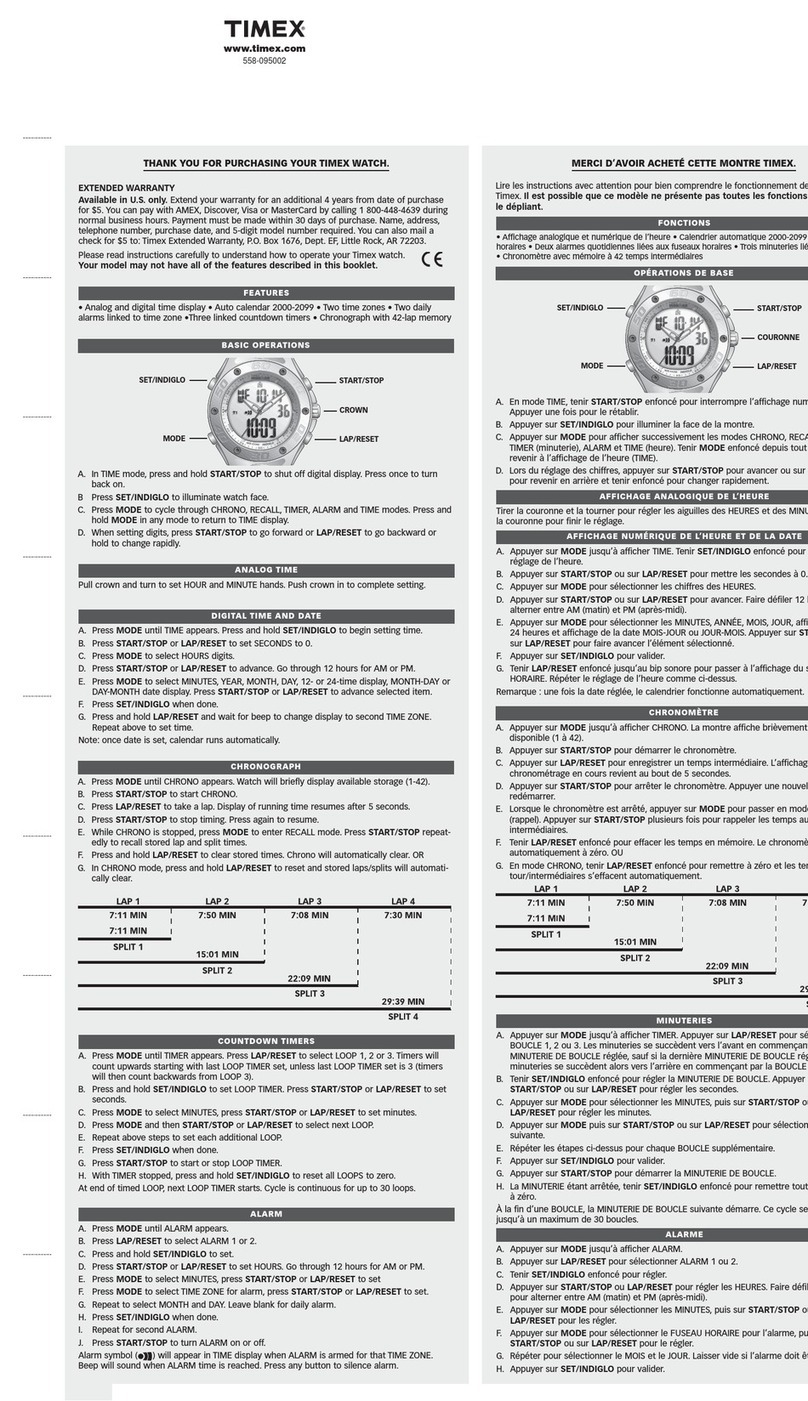
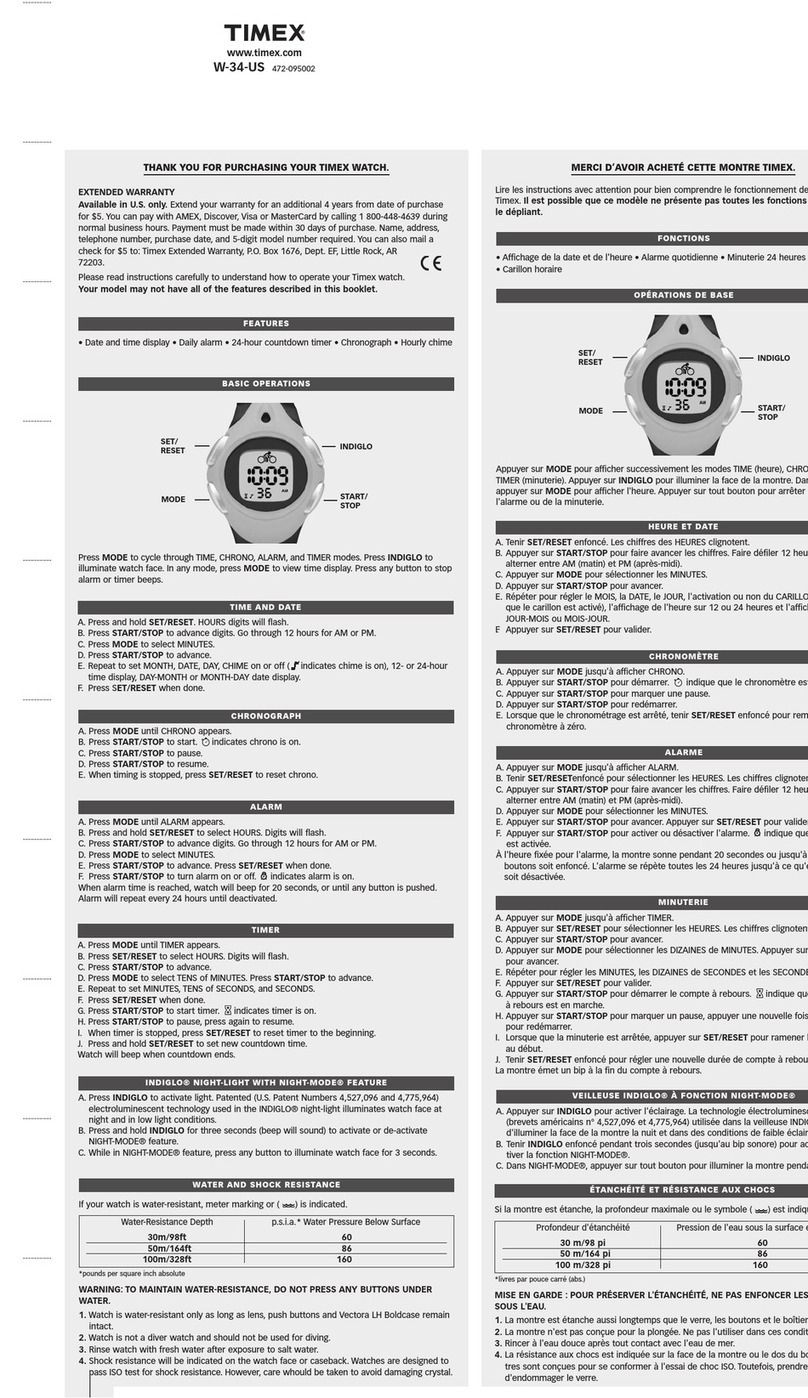
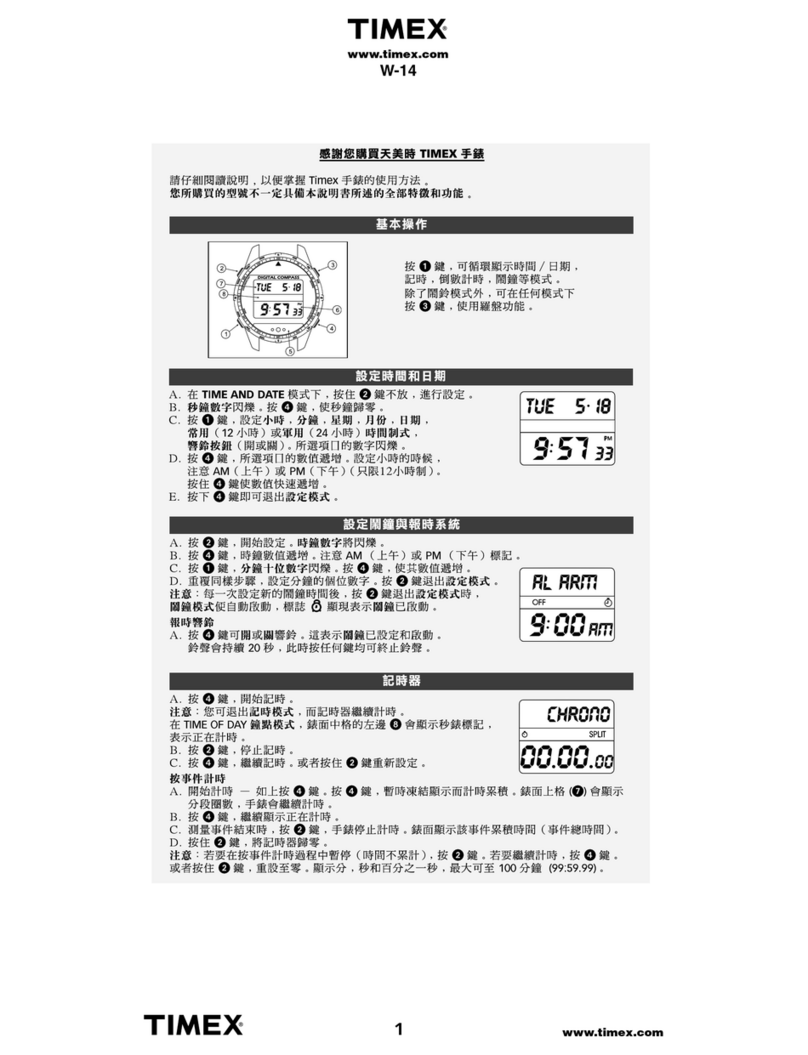
Timex Ironman Run User manual

NA/EU W276 878-095003-02

1
Table of Contents
Introduction...........................................................................................................2
Features Overview................................................................................................2
Operational Buttons..............................................................................................3
Status Bar Icons ....................................................................................................4
Charge Your Run Trainer™Watch .........................................................................5
Get the Latest Firmware.......................................................................................5
Configure the Watch ............................................................................................. 6
Set the Time and Date ..........................................................................................6
Set up Personal Information .................................................................................6
Acquire GPS Signal and Connect to Heart Rate Sensor ....................................... 7
Start a Workout.....................................................................................................7
Take a Split/Lap.....................................................................................................8
Stop and Save a Workout...................................................................................... 8
Review Workout Summary ...................................................................................8
Review Workout Online......................................................................................... 9
Warranty & Service ............................................................................................. 10
Declaration of Conformity................................................................................... 13
English page 1
Français page 17
Español página 35
Português página 53
Deutsch Seite 71
Nederlands pagina 89
Italiano pagina 107

2 3
OPERATIONAL BUTTONS
INDIGLO® NIGHT-LIGHT
Press the INDIGLO®button at any time to activate the INDIGLO®night-light for a
few seconds. Hold it to turn on Night-Mode® feature or constant-on lighting.
RADIO/BACK
Press RADIO to begin searching for a GPS signal. In a menu, press BACK to go
back to the previous item. When setting parameters such as time, press this
button to move from right to left through the fields.
In any workout mode or Time of Day mode, hold RADIO to open the SENSOR
menu.
MODE/EXIT/DONE
When in time of day mode, press MODE to cycle through the operational modes.
When done with selecting an option in a menu or submenu, press DONE to go
back to the menu containing the option.
START/SPLIT/DOWN
In a menu, press DOWN to select the item below the current one.
In Chrono, Interval Timer, or Timer modes, press START to start the workout.
Press SPLIT to take a split while a Chrono workout is running.
INTRODUCTION
Congratulations on your purchase of the Timex®Ironman®Run Trainer™GPS
watch. For first use, please follow this abbreviated guide to learn to:
1. Charge the watch
2. Load the latest firmware
3. Configure the settings
4. Acquire the GPS signal
5. Record your workout
6. Review your performance
For more detail, consult the full-length instructions posted at:
http://www.timex.com/manuals
Instructional videos are posted at:
http://www.YouTube.com/TimexUSA
FEATURES OVERVIEW
• GPS–SiRFstarIV™technology tracks pace, speed, distance, and altitude.
• WirelessANT+™Radio–WirelesscapabilityenablestheRunTrainer™watch
to connect to a Heart Rate and/or Foot Pod sensor.
• HeartRate(HR)Sensor–Whenconnectedtoaheartratesensor,
monitor your heart rate to maintain a level of activity that matches your
personalized workout requirements.
• FootPodSensor–WhenconnectedtoaFootPodsensor,trackmultiple
values in your workout including pace, speed, distance, and cadence.
• TheINDIGLO®night-light–Illuminatesthedisplaywiththepressofthe
INDIGLO®button. The Night-Mode®feature illuminates the display with any
button press. When Constant On is active, the display remains illuminated
until the INDIGLO®button is pressed again.
Indiglo® Button Stop/Reset/Up ()
Mode/Exit/Done Start/Split/Down ()
( U) Radio/Back Set/Menu/Select/Next ( u)

4 5
CHARGE YOUR RUN TRAINER™WATCH
Before you use the watch for the first time, charge the battery for at least
4 hours to insure complete charging.
In order to maximize the rechargeable battery life:
• Depletethebatteryuntilthelastbatteryindicatorsegmentdisappearsand
the empty indicator begins to flash. If the watch display goes blank, you
can still proceed as long as it has been in that state for no more than
1-2 days.
• Fullychargethewatchbatteryforatleast4hoursuntilallfoursegments
in the battery level indicator are no longer blinking.
• Repeatthisdischarge/rechargeproceduretwomoretimes.
NOTE: You should repeat this procedure every two months if the watch is not
used or recharged regularly.
Chargewithinatemperaturerangeof32°F-113°F(0°C-45°C).
The charging cable has a clip on one end and a standard USB connector on the
other end.
1. Attach the clip to the watch so the four pins on
the clip align with the four metal contacts on the
back of the watch. The clip has two black pins
that align the clip into the watch case back.
2. Insert the other end of the cable into a
powered USB port on your computer. The
blinking battery level icon confirms that the
watch is charging.
GET THE LATEST FIRMWARE
Use the Device Agent to connect the Run Trainer watch to your computer and
get the latest updates.
STOP/RESET/UP
In a menu, press UP to select the item above the currently selected one.
When the chronograph running, press STOP to stop or pause the chronograph.
Ifthechronographisstopped(orpaused),holdRESETtoresetthechronograph.
SET/MENU/SELECT/NEXT
In a menu, press SET to select the current option. This may open a submenu
or select the item with a check mark.
Press NEXT to select the next set of options or move to the next data field.
STATUS BAR ICONS
Battery icon Shows the approximate charge of the battery. More dark
segments indicate a higher charge. Battery segments
blink during charging until the watch is fully charged.
dAlarm icon Displays in Time of Day and Alarm modes when alarm
is set.
NAlert icon Displays in Time of Day mode when the watch is set to
beep each hour.
gHeart icon Solid: Heart rate sensor is communicating properly.
Blinking: Watch is searching for heart rate sensor.
None: Heart rate sensor is not selected or Radio is off.
Shoe icon Solid: Foot Pod sensor is communicating properly.
Blinking: Watch is searching for Foot Pod sensor.
None: Foot Pod sensor is not selected or Radio is off.
Satellite icon
Solid: GPS has a satellite fix and is communicating
properly.
Blinking: GPS is seeking a satellite fix.
None: GPS cannot acquire a satellite fix, is not selected,
or Radio is off.

6 7
1. Download the Timex Device Agent at:
http://timexironman.com/deviceagent
2. Connect the watch to your computer using the USB cable, and then
double-click the Device Agent icon on your computer desktop.
3. If prompted by the Device Agent, follow the onscreen instructions to
download the latest watch firmware.
CONFIGURE THE WATCH
SET THE TIME AND DATE
You can set up to 3 time zones.
1. From the Time of Day display, press SET. The SET menu displays.
2. Press DOWN to select TIME 1, TIME 2, or TIME 3, and then press SELECT.
3. Press SELECT to open the TIME/DATE setting screen.
4. Press UP or DOWN to change the blinking value. Press NEXT to move to the
next value.
SET UP PERSONAL INFORMATION
ENTER YOUR PERSONAL INFORMATION TO ENSURE ACCURATE CALCULATIONS
DURING WORKOUTS.
1. Press MODE until CONFIGURE displays.
2. Press DOWN to select USER, and then press SELECT. The USER menu opens.
3. Press UP or DOWN to select the setting to change, and then press SELECT.
The SETTING menu opens.
4. Change the values to match your personal data.
• PressUPorDOWNtochangeanumericalvalue,andpressNEXTtomove
to the next value. Press DONE to go back to the USER menu.
• PressUPorDOWNtoselectanon-numericalvalue,andthenpressSELECT
to apply the check mark. Press BACK to go back to the USER menu.
5. Repeat for Birthday, Gender, Weight, Height, and Activity.
BIRTHDAY Set the month, day, and year of your birth.
GENDER Select MALE or FEMALE.
WEIGHT Enteryourweight(inLBorKG,dependingonyourUNITSsettings)
HEIGHT Enteryourheight(inINorCM,dependingonyourUNITSsettings)
ACTIVITY Select a level and type for the activity you will participate in the most.
NOTE: You can also make changes to your watch through the Timex Device
Agent “Settings” tab. See the full-length guide for more details.
ACQUIRE GPS SIGNAL AND CONNECT TO HEART RATE SENSOR
Connections need to be made in order to collect workout data.
1. Go outside with a clear view of the sky, away from buildings or obstructions.
2. Press RADIO to search for GPS. Keep the watch still and avoid walking
around.
NOTE: Initial GPS signal lock can take a few minutes, but subsequent acquisition
in the same area should be accomplished in under 30 seconds.
3. The watch display will confirm GPS signal lock, and the satellite icon will
stop flashing.
4. If wearing a heart rate sensor, its signal should have been acquired during
GPS start-up, as confirmed by the solid heart icon. If no connection is made,
check that the sensor pads are wet and it fits snug against the chest. Press
RADIO to connect the heart rate sensor.
START A WORKOUT
Start the chronograph to begin timing your workout and tracking workout data.
1. Press MODE until CHRONO displays.
2. Press START to start the first split of your workout.
8 9
2. If the Odometer is displayed, press UP or DOWN.
3. Press MENU. The WORKOUTS menu displays with a list of dates that had
workouts saved.
4. Press UP or DOWN to select the date, and then press SELECT. A list of
workouts for the selected date displays, along with the time the workout
was saved.
5. Press UP or DOWN to select the workout, and then press SELECT.
6. Press UP to select SUMMARY, and then press SELECT.
All data tracked during the workout displays.
7. Press UP or DOWN to scroll through the workout data.
The best lap display toggles every 2 seconds between the best lap time and
the corresponding best lap number.
NOTE: You cannot delete individual workouts manually. Workouts are only
removed when overwritten by a newer one.
If the watch is connected to any of the sensors, the sensor icons will be
displayed in the status bar.
TAKE A SPLIT/LAP
While a workout is in progress, take a split to begin timing another segment of
your workout.
1. Press SPLIT to start a new split of your workout. In the graphic below,
the LAP # is shown on the top line, the lap time is on the second line,
and the split time is on the third. The data displayed varies depending
on the display setup.
STOP AND SAVE A WORKOUT
You have the option to save a workout when the chronograph is reset.
1. Press STOP to stop the workout.
2. PressandholdRESETuntilSAVEWORKOUTdisplays.
3. Press UP or DOWN to select YES, and then press SELECT. Up to 15 workouts
can be saved.
REVIEW WORKOUT SUMMARY
You can review saved workouts by date and time.
1. PressMODEuntilREVIEWdisplays.
The watch displays the number of stored workouts available for review.
LAP NUMBER
LAP TIME
SPLIT TIME

10 11
WARRANTY & SERVICE
Timex International Warranty (U.S. Limited Warranty)
Your Timex®GPS watch is warranted against manufacturing defects by Timex
for a period of ONE YEAR from the original purchase date. Timex Group USA,
Inc. and its worldwide affiliates will honor this International Warranty.
Please note that Timex may, at its option, repair your Timex®product by
installing new or thoroughly reconditioned and inspected components or
replace it with an identical or similar model.
IMPORTANT:PLEASENOTETHATTHISWARRANTYDOESNOTCOVERDEFECTS
OR DAMAGES TO YOUR PRODUCT:
1. after the warranty period expires;
2. if the product was not originally purchased from an authorized Timex
retailer;
3. from repair services not performed by Timex;
4. from accidents, tampering or abuse; and
5. lens or crystal, strap or band, sensor case, attachments or battery. Timex
may charge you for replacing any of these parts.
THISWARRANTYANDTHEREMEDIESCONTAINEDHEREINAREEXCLUSIVEANDIN
LIEU OF ALL OTHER WARRANTIES, EXPRESS OR IMPLIED, INCLUDING ANY IMPLIED
WARRANTY OF MERCHANTABILITY OR FITNESS FOR PARTICULAR PURPOSE.
TIMEX IS NOT LIABLE FOR ANY SPECIAL, INCIDENTAL OR CONSEQUENTIAL
DAMAGES. Some countries and states do not allow limitations on implied
warranties and do not allow exclusions or limitations on damages, so these
limitations may not apply to you. This warranty gives you specific legal rights
and you may also have other rights which vary from country to country and
state to state.
REVIEW WORKOUT ONLINE
Use the free online log powered by TrainingPeaks™for enhanced workout
review.
1. If you do not have a TrainingPeaks account, create one at:
http://timexironman.com/deviceagent
2. Connect the watch to your computer using the USB cable, and then double-
click the Device Agent icon on your computer desktop. The watch display
confirms “PC SYNC IN PROGRESS”.
3. Make sure that your account is selected in the Username field, and Timex
Run Trainer is selected in the Device field.
NOTE: Add your new account to the Device Agent by clicking on File [Edit
Login Accounts. Click on the “+” in the Manage User Accounts
window to add your new account information.
4. Click Download to display the workouts in the watch memory.
5. Leave the boxes checked for those workouts you want sent to your online
account and click Save.
6. Click Login to enter the Timex online log powered by TrainingPeaks™.

12 13
TIMEX INTERNATIONAL WARRANTY REPAIR COUPON
Original Purchase Date:________________________________________________
(attach a copy of sales receipt, if available)
Purchased by: ______________________________________________________
(name, address, telephone number)
Place of Purchase: ___________________________________________________
(name and address)
Reason for Return: ___________________________________________________
__________________________________________________________________
To obtain warranty service, please return your GPS watch to Timex, one of its
affiliates or the Timex retailer where the GPS watch was purchased, together
with a completed original Repair Coupon or, in the U.S. and Canada only, the
completed original Repair Coupon or a written statement identifying your
name, address, telephone number and date and place of purchase. Please
include the following with your GPS watch to cover postage and handling
(thisisnotarepaircharge):aUS$8.00checkormoneyorderintheU.S.;
aCAN$7.00chequeormoneyorderinCanada;andaUK£2.50chequeor
money order in the U.K. In other countries, Timex will charge you for postage
andhandling.NEVERINCLUDEANYARTICLEOFPERSONALVALUEIN
YOUR SHIPMENT.
For the U.S., please call 1-800-328-2677 for additional warranty information.
ForCanada,call1-800-263-0981.ForBrazil,call+55(11)55729733.For
Mexico, call 01-800-01-060-00. For Central America, the Caribbean, Bermuda
andtheBahamas,call(501)370-5775(U.S.).ForAsia,call852-2815-0091.For
the U.K., call 44 208 687 9620. For Portugal, call 351 212 946 017. For France,
call33381634200.Germany/Austria:+436628892130.FortheMiddleEast
and Africa, call 971-4-310850. For other areas, please contact your local Timex
retailer or Timex distributor for warranty information. In Canada, the U.S. and
in certain other locations, participating Timex retailers can provide you with a
postage-paid, Repair Mailer for your convenience in obtaining factory service.

14
Immunity- Reference EN 55024
Standards: CENELEC EN 55024
LVD: 2006/95/EC
Standards: CENELECEN60950-1/A11:2009(M503)
CENELECEN60950-1:2006ED:2(M878)
Supplemental Information: The product herewith complies with the
requirements of the Radio & Telecommunications Terminal Equipment
Directive1999/05/EC,theLowVoltageDirective2006/95/EC,andcarriesthe
CE marking accordingly.
Agent:
David Wimer
Quality Engineer
Date: 9 September, 2011, Middlebury, Connecticut, U.S.A
©2012 Timex Group USA, Inc. TIMEX, TRIATHLON, RUN TRAINER, NIGHT-MODE and INDIGLO
aretrademarksofTimexGroupB.V.anditssubsidiaries.IRONMANandMDOTareregistered
trademarks of World Triathlon Corporation. Used here by permission. SiRF and the SiRF logo are
registeredtrademarksofCSR.SiRFstarIVisatrademarkofCSR.ANT+andtheANT+Logoare
trademarks of Dynastream Innovations, Inc.
DECLARATION OF CONFORMITY
Manufacturers Name: Timex Group USA, Inc.
Manufacturers Address: 555 Christian Road
Middlebury, CT 06762
United States of America
declares that the product:
Product Name: Timex®Run Trainer™GPS®System
Model Numbers: M878, M503
conforms to the following specifications:
R&TTE: 1999/05/EC
Standards:
EETSIEN300440-1-V1.4.1:2008(M503)
ETSIEN300440-2-V1.2.1:2008(M503)
ETSIEN300400-1-V1.5.1:2008(M878)
ETSIEN300440-2-V1.3.1:2008(M878)
ETSIEN301489-1V1.8.1:2008(M503)
ETSIEN301489-3V1.4.1:2002(M503)
UL60950-1(878)
CSAC22.2#60950-1(878)
IEC60950-1(878)
Digital Device Emissions
Standards:
FCCPart15SubpartB/EN55022/AZ/NZSCispr22(878)
FCC47CFR15BclB(878)
CENELECEN55022(878)
SAIAS/NZSCISPR22(878)
15

Sommaire
Introduction.........................................................................................................18
Vued’ensembledesfonctions ...........................................................................18
Boutons opérationnels........................................................................................ 19
Icônesdebarred’état......................................................................................... 21
Charge de la montre Run Trainer™....................................................................22
Obtention du tout dernier micrologiciel .............................................................23
Configuration de la montre................................................................................. 23
Réglagedel’heureetdeladate.........................................................................23
Configuration de vos informations personnelles................................................23
Obtention du signal GPS et connexion au cardiofréquencemètre..................... 25
Démarraged’uneséanced’exercice.................................................................. 25
Temps intermédiaires/temps au tour................................................................. 26
Arrêtetsauvegarded’uneséanced’exercice....................................................26
Revuedurécapitulatifdesséancesd’exercice..................................................27
Revuedeséancesd’exerciceenligne................................................................28
Garantie et réparation......................................................................................... 29
Déclaration de conformité..................................................................................32
1716

18 19
• VeilleuseINDIGLO®–Illuminel’afchageàl’appuiduboutonINDIGLO®. La
fonction Night-Mode®illuminel’afchagesousl’actionden’importequel
bouton.Lorsquel’éclairagecontinuestactivé,l’afchageresteallumé
jusqu’àcequeleboutonINDIGLO®soitappuyéànouveau.
BOUTONS OPÉRATIONNELS
VEILLEUSE INDIGLO®
AppuyezàtoutmomentsurleboutonINDIGLO®pour activer la veilleuse
INDIGLO®pendant quelques secondes. Tenez-le enfoncé pour activer la
fonction Night-Mode®oul’éclairageencontinu.
RADIO/BACK
AppuyezsurRADIOpourcommenceràchercherunsignalGPS.Dansunmenu,
appuyezsurBACKpourreveniràl’élémentprécédent.Lorsduréglagedes
paramètrestelsquel’heure,appuyezsurceboutonpourallerdedroiteà
gauche dans les champs.
DanstoutmodeSéanced’exerciceoumodeHeuredujour,maintenezenfoncé
RADIO pour ouvrir le menu SENSOR.
INTRODUCTION
Félicitationspourvotreachatd’unemontreGPSTimex®Ironman®Run Trainer™.
Pour la première utilisation, veuillez suivre ce guide abrégé pour apprendre
àfairecequisuit:
1. Charger la montre
2. Télécharger le tout dernier micrologiciel
3. Configurer les paramètres
4. Acquérir le signal GPS
5. Enregistrervotreséanced’exercice
6. Revoir votre performance
Pourdeplusamplesinformations,consultezlesinstructionscomplètesà:
http://www.timex.com/manuals
Desvidéospédagogiquessetrouventà:
http://www.YouTube.com/TimexUSA
VUE D’ENSEMBLE DES FONCTIONS
• GPS–LatechnologieSiRFstarIV™effectuelesuividel’allure,delavitesse,
deladistanceetdel’altitude.
• TechnologiesanslWirelessANT+™Radio–Lacapacitésanslpermetà
lamontreRunTrainer™deseconnecteràuncardiofréquencemètreet/ou
àuncapteuràboîtierpédestre.
• Capteurdefréquencecardiaque–Lorsquelamontreestconnectéeàun
capteur de fréquence cardiaque, surveillez votre fréquence cardiaque pour
maintenirunniveaud’activitécorrespondantàvosexigencesdeséance
d’exercicepersonnalisée.
• Capteuràboîtierpédestre–Lorsquelamontreestconnectéeàuncapteur
àboîtierpédestre,effectuezlesuivideplusieursvaleursdansvotreséance
d’exercice,notammentl’allure,lavitesse,ladistanceetlacadence.
Bouton Indiglo®
Stop/Reset/Up
(Arrêt/Remise à zéro/
Haut) ()
Mode/Exit/Done
(Mode/Quitter/Valider)
Start/Split/Down
(Démarrer/Temps
intermédiaire/Bas) ()
( U) Radio/Back
(Radio/Retour)
Set/Menu/Select/Next
(Régler/Menu/Sélectionner/
Suivant) ( u)

20 21
ICÔNES DE BARRE D’ÉTAT
Icône de batterie
Indique la charge approximative de la batterie. Plus il
y a de segments foncés, plus la batterie est chargée.
Les segments de batterie clignotent pendant la charge
jusqu’àcequelamontresoitcomplètementchargée.
dIcôned’alarme S’afcheenmodesHeuredujouretAlarmelorsque
l’alarmeestactivée.
NIcôned’alerte S’afcheenmodeHeuredujourlorsquelamontreest
régléepourémettreunbipàtouteslesheures.
gIcône de cœur
Continue : Le cardiofréquencemètre communique
correctement.
Clignotante : La montre cherche le
cardiofréquencemètre.
Rien :Lecardiofréquencemètren’estpassélectionné
ou la Radio est désactivée.
Icône de
chaussure
Continue :Lecapteuràboîtierpédestrecommunique
correctement.
Clignotante :Lamontrecherchelecapteuràboîtier
pédestre.
Rien :Lecapteuràboîtierpédestren’estpassélectionné
ou la Radio est désactivée.
Icône de satellite
Continue : GPS est calé sur un satellite et communique
correctement.
Clignotante : Le point GPS est en cours.
Rien :LeGPSnepeutpasobtenirdesatellite,n’estpas
sélectionné ou la Radio est désactivée.
MODE/EXIT/DONE
En mode Heure du jour, appuyez sur MODE pour afficher successivement les
modes opérationnels.
Unefoislasélectiond’uneoptiondansunmenuouunsous-menuterminée,
appuyezsurDONEpourreveniraumenucontenantl’option.
START/SPLIT/DOWN
Dansunmenu,appuyezsurDOWNpoursélectionnerl’élémentsousl’élément
en cours.
En modes Chrono, Minuterie par intervalles ou Minuterie, appuyez sur START
pourcommencerlaséanced’exercice.AppuyezsurSPLITpourmarquerun
tempsintermédiairependantqu’uneséanced’exerciceChronofonctionne.
STOP/RESET/UP
Dansunmenu,appuyezsurUPpoursélectionnerl’élémentau-dessusdecelui
actuellement sélectionné.
Lorsquelechronographefonctionne,appuyezsurSTOPpourl’arrêteroufaire
une pause.
Silechronographeestarrêté(ouenpause),maintenezRESETenfoncépour
réinitialiser le chronographe.
SET/MENU/SELECT/NEXT
Dansunmenu,appuyezsurSETpoursélectionnerl’optionencours.Cecipeut
ouvrirunsous-menuousélectionnerl’élémentavecunecoche.
AppuyezsurNEXTpoursélectionnerl’ensembled’optionssuivantoupasserau
champ de données suivant.

22 23
CHARGE DE LA MONTRE RUN TRAINER™
Avantd’utiliserlamontrepourlapremièrefois,chargerlapilependantau
moins4heurespours’assurerquelachargesoitcomplète.
Pour maximiser la durée de vie de la batterie rechargeable :
• Déchargezcomplètementlabatteriejusqu’àdisparitionduderniersegment
indicateurdebatterieetquelevoyantvidecommenceàclignoter.Si
l’afchagedelamontredisparaîtcomplètement,vouspouveztoujours
continuertantqu’ilestdanscetétatpendantmoinsde1ou2jours.
• Chargezcomplètementlabatteriedelamontrependantaumoins
4heuresjusqu’àcequelesquatresegmentsdel’indicateurdeniveau
de batterie ne clignotent plus.
• Recommencezlaprocédurededécharge/rechargedeuxfoisdeplus.
REMARQUE : Vousdevriezrecommencercetteprocéduretouslesdeuxmois
silamontren’estpasutiliséeourechargéerégulièrement.
Chargezàunetempératureentre0°Cà45°C(32°Fà113°F).
Le câble de charge a un clip sur une extrémité et un connecteur USB standard
surl’autre.
1. Attachezleclipàlamontredesortequelesquatre
brochessurleclips’alignentaveclesquatre
contacts en métal sur le dos de la montre. Le
clip a deux broches noires qui alignent le clip
dansledosduboîtierdelamontre.
2. Insérezl’autreextrémitéducâbledansun
portUSBsoustensionsurl’ordinateur.L’icône
de niveau de batterie clignotante confirme que
la montre est en cours de charge.
OBTENTION DU TOUT DERNIER MICROLOGICIEL
UtilisezleDeviceAgentpourconnecterlamontreRunTraineràvotre
ordinateuretobtenirlestoutesdernièresmisesàjour.
1. TéléchargezleTimexDeviceAgentà:
http://timexironman.com/deviceagent
2. Connectezlamontreàvotreordinateuràl’aideducâbleUSB,puisdouble-
cliquezsurl’icôneDeviceAgentsurlebureaudevotreordinateur.
3. AprèslemessageduDeviceAgent,suivezlesinstructionsàl’écranpour
télécharger le tout dernier micrologiciel de la montre.
CONFIGURATION DE LA MONTRE
RÉGLAGE DE L’HEURE ET DE LA DATE
Vouspouvezréglerunmaximumde3fuseauxhoraires.
1. DepuislemodeHeuredujour,appuyezsurSET(RÉGLER).Lemenu
SETs’afche.
2. Appuyez sur DOWN [BAS] pour sélectionner TIME 1, TIME 2 ou TIME 3, puis
appuyez sur SELECT.
3. AppuyezsurSELECTpourouvrirl’écranderéglageTIME/DATE
(HEURE/DATE).
4. Appuyez sur UP [HAUT] et DOWN [BAS] pour changer la valeur clignotante.
AppuyezsurNEXT(SUIVANT)pourpasseràlavaleursuivante.
CONFIGURATION DE VOS INFORMATIONS PERSONNELLES
Saisissez vos informations personnelles pour vous assurer de calculs exacts
lorsdesséancesd’excercice.
1. AppuyezsurMODEjusqu’àafchagedeCONFIGURE(CONFIGURER).
2. Appuyez sur DOWN pour sélectionner USER [UTILISATEUR] puis appuyez sur
SELECT.LemenuUSERs’ouvre.

24 25
OBTENTION DU SIGNAL GPS ET CONNEXION AU
CARDIOFRÉQUENCEMÈTRE
Des connexions doivent être faites pour recueillir les données de séances
d’exercice.
1. Allez dehors avec une bonne vue du ciel, loin des immeubles ou des
obstructions.
2. Appuyez sur RADIO pour chercher le GPS. Maintenez la montre immobile et
évitez de vous déplacer.
REMARQUE : L’acquisitioninitialedusignalGPSpeutprendrequelquesminutes,
toutefois, toute acquisition suivante dans la même zone peut se
faire en moins de 30 secondes.
3. L’afchagedelamontreconrmeral’acquisitiondusignalGPSetl’icônede
satellites’arrêteradeclignoter.
4. Si vous portez un cardiofréquencemètre, son signal doit avoir été obtenu
durantlamiseenmarcheduGPS,commeleconrmel’icônedecœuren
continu.Siaucuneconnexionn’esteffectuée,vériezquelescoussinetsdu
capteur du cardiofréquencemètre sont mouillés et bien ajustés contre la
poitrine. Appuyez sur RADIO pour connecter au cardiofréquencemètre.
DÉMARRAGE D’UNE SÉANCE D’EXERCICE
Mettrelechronomètreenmarchepourcommenceràchronométrervotre
séanced’exerciceetàsuivrelesdonnéesdeséanced’exercice.
1. AppuyersurMODEjusqu’àafchagedeCHRONO.
2. Appuyez sur START pour lancer le premier temps Intermédiaire de votre
séanced’exercice.
Silamontreestconnectéeàl’undescapteurs,lesicônesdecapteurs
s’afcherontdanslabarred’état.
3. AppuyezsurUPouDOWNpoursélectionnerleparamètreàchangerpuis
appuyezsurSELECT.LemenuSETTINGs’ouvre.
4. Changezlesvaleurspourlesadapteràvosdonnéespersonnelles.
• AppuyezsurUPouDOWNpourchangerunevaleurnumérique,puis
appuyezsurNEXTpourpasseràlavaleursuivante.AppuyezsurDONE
[TERMINÉ]pourreveniraumenuUSER.
• AppuyezsurUPouDOWNpoursélectionnerunevaleurnonnumérique,
puis appuyez sur SELECT pour appliquer la coche. Appuyez sur BACK
[RETOUR] pour revenir au menu USER.
5. RecommencezpourBirthday(anniversaire),Gender(sexe),Weight(poids),
Height(taille)etActivityl’activité.
ANNIVERSAIRE Réglezlemois,lejouretl’annéedevotrenaissance.
SEXE SélectionnezMALE(MASCULIN)ouFEMALE(FÉMININ).
POIDS Saisissezvotrepoids(enLBouKG,selonvosréglagesd’UNITÉS[UNITS])
TAILLE Saisissezvotretaille(IN[PO]ouCM,selonvosréglagesd’UNITÉS[UNITS])
ACTIVITÉ Sélectionnezunniveauetuntypepourl’activitéàlaquellevous
participez le plus.
REMARQUE : Vouspouvezégalementeffectuerdeschangementssurvotre
montreparlebiaisdel’onglet«Settings»[Paramètres]du
TimexDeviceAgent.Voirleguidecompletpourdeplusamples
informations.

26 27
REVUE DU RÉCAPITULATIF DES SÉANCES D’EXERCICE
Vouspouvezrevoirlesséancesd’exercicesauvegardéespardateetheure.
1. AppuyezsurMODEjusqu’àafchagedeREVIEW.
Lamontreafchelenombredeséancesd’exercicesauvegardées
disponibles pour revue.
2. Sil’odomètres’afche,appuyezsurUPouDOWN.
3. AppuyezsurMENU.LemenuWORKOUTS[SÉANCESD’EXERCICE]afchela
listedesdatesdesséancesd’exercicepréalablementsauvegardées.
4. Appuyez sur UP ou DOWN pour sélectionner la date puis appuyez sur
SELECT.Unelistedesséancesd’exercicepourladatesélectionnées’afche
ainsiquel’heureàlaquellelaséanced’exerciceaétésauvegardée.
5. AppuyezsurUPouDOWNpoursélectionnerlaséanced’exercicepuis
appuyez sur SELECT.
6. AppuyezsurUPpoursélectionnerSUMMARY[RÉCAPITULATIF]puisappuyez
sur SELECT.
Touteslesdonnéesenregistréesdurantlaséanced’exercices’afchent.
7. Appuyez sur UP ou DOWN pour faire défiler les données de séance
d’exercice.
L’afchagedumeilleurtourbasculetoutesles2secondesentrelemeilleur
temps au tour et le numéro du meilleur tour correspondant.
TEMPS INTERMÉDIAIRES/TEMPS AU TOUR
Lorsd’uneséanced’exercice,prenezuntempsintermédiairepourcommencer
àchronométrerunautresegmentdevotreséanced’exercice.
1. Appuyez sur SPLIT pour commencer un nouveau temps intermédiaire de
votreséanced’exercice.Danslegraphiqueci-dessous,lenuméroduLAP
[TOUR] est Indiqué sur la ligne supérieure, le temps au tour sur la deuxième
ligne et le temps intermédiaire sur la troisième. Les données affichées
varientenfonctiondelacongurationdel’afchage
ARRÊT ET SAUVEGARDE D’UNE SÉANCE D’EXERCICE
Vousavezl’optiondesauvegarderuneséanced’exercicelorsquele
chronomètre est réinitialisé.
1. AppuyezsurSTOPpourarrêterlaséanced’exercice.
2. AppuyezsurRESETetmaintenez-leenfoncéjusqu’àafchagedeSAVE
WORKOUT[SAUVEGARDEDESÉANCED’EXERCICE].
3. Appuyez sur UP ou DOWN pour sélectionner YES [OUI] puis appuyez sur
SELECT.Jusqu’à15séancesd’exercicepeuventêtresauvegardées.
NUMÉRO DU TOUR
AU TOUR
TEMPS INT

28 29
GARANTIE ET RÉPARATION
GARANTIE INTERNATIONALE TIMEX (États-Unis – GARANTIE LIMITÉE)
VotremontreGPSTIMEX®est garantie contre les défauts de fabrication par
TimexpendantuneduréedeUNANàcompterdeladated’achatoriginale.
Timex Group USA, Inc. et ses filiales du monde entier honoreront cette garantie
internationale.
VeuilleznoterqueTimexseréserveledroitderéparervotreproduitTimex®en
y installant des composants neufs ou reconditionnés avec soin, ou bien de le
remplacer par un modèle identique ou similaire.
IMPORTANT :VEUILLEZNOTERQUECETTEGARANTIENECOUVREPASLES
DÉFAUTSOUDOMMAGESDEVOTREPRODUIT:
1. aprèsl’expirationdelapériodedegarantie;
2.sileproduitn’apasétéachetéinitialementchezunrevendeuragrééTimex;
3.suiteàdesréparationsnoneffectuéesparTimex;
4. suiteàunaccident,unealtérationouunemploiabusif;
5. s’ils’agitduverreoucristal,dubraceletoubrassard,duboîtierdecapteur,
d’accessoiresoudelapile.Leremplacementdecespiècespeutvousêtre
facturé par Timex.
CETTEGARANTIEAINSIQUELESRECOURSPRÉVUSDANSLESPRÉSENTES
SONT EXCLUSIFS ET REMPLACENT TOUTE AUTRE GARANTIE EXPRESSE OU
IMPLICITE,YCOMPRISTOUTEGARANTIEIMPLICITEDEQUALITÉMARCHANDEET
D’ADAPTATIONÀUNUSAGEPARTICULIER.
TIMEXN’ESTRESPONSABLED’AUCUNDOMMAGEPARTICULIER,ACCESSOIRE
OUINDIRECT.CertainspaysouÉtatsn’autorisentpasleslimitationsde
garantiesimplicitesetn’autorisentpaslesexclusionsoulimitationspourdes
dommages, auquel cas lesdites limitations pourraient ne pas vous concerner.
Les modalités de la présente garantie vous donnent des droits légaux
particuliersetvouspouvezégalementvousprévaloird’autresdroitsquivarient
d’unpaysoud’unÉtatàunautre.
REMARQUE :Vousnepouvezpassupprimerdesséancesd’exercice
individuellesmanuellement.Lesséancesd’exercicenesont
suppriméesquelorsqu’ellessontremplacéesparuneséance
plus récente.
REVUE DE SÉANCES D’EXERCICE EN LIGNE
Utilisez le journal gratuit en ligne réalisé par TrainingPeaks™pour une revue
amélioréedesséancesd’exercice.
1. Sivousn’avezpasdecompteTrainingPeaks,créez-enunà:
http://timexironman.com/deviceagent
2. Connectezlamontreàvotreordinateuràl’aideducâbleUSB,puis
double-cliquezsurl’icôneDeviceAgentsurlebureaudevotreordinateur.
L’afchagedelamontreconrme«PCSYNCINPROGRESS»
[SYNC PC EN COURS].
3. Assurez-vous que votre compte est sélectionné dans le champ
Username[Nomd’utilisateur]etqueTimexRunTrainerestsélectionné
dans le champ Device.
REMARQUE : Ajoutez votre nouveau compte au Device Agent en cliquant
sur File [Edit Login Accounts. Cliquezsurle«+»dans
la fenêtre Manage User Accounts pour ajouter les
informations de votre nouveau compte.
4. Cliquez sur Download[Télécharger]pourafcherlesséancesd’exercice
dans la mémoire de la montre.
5. Laissezlesboîtescochéespourlesséancesd’exercicequevoussouhaitez
envoyer sur votre compte en ligne et cliquez sur Save.
6. Cliquez sur Login pour ouvrir le journal en ligne Timex réalisé par
TrainingPeaks™.

30
Pourobtenirleservicedegarantie,retournezvotremontreGPSàTimex,à
une de ses filiales ou au détaillant Timex où la montre GPS a été achetée
avecuncouponderéparationoriginaldûmentrempliou,auxÉ.-U.etau
Canada, le coupon original ou une déclaration écrite comprenant votre nom,
adresse,numérodetéléphoneainsiqueladateetlelieud’achat.Veuillez
inclure la somme suivante avec votre montre GPS pour couvrir les frais de
portetdemanutention(cenesontpasdesfraisderéparation):unchèqueou
mandatde8,00$USauxÉtats-Unis,de7,00$CANauCanadaetde2,50£au
Royaume-Uni.Danslesautrespays,Timexvousfactureralesfraisd’envoietde
manutention.N’INCLUEZJAMAISD’ARTICLESDEVALEURPERSONNELLEDANS
VOTREENVOI.
AuxÉtats-Unis,veuillezcomposerle1-800-328-2677pourplusde
renseignements sur la garantie. Au Canada, composez le 1-800-263-0981.
AuBrésil,composezle+55(11)55729733.AuMexique,composezle
01-800-01-060-00.Pourl’Amériquecentrale,lesCaraïbes,lesBermudes
etlesBahamas,composezle(501)370-5775(É.-U.).EnAsie,composezle
852-2815-0091. Au Royaume-Uni, composez le 44 208 687 9620. Au Portugal,
composez le 351 212 946 017. En France, composez le 33 3 81 63 42 00. En
Allemagne/Autriche:+436628892130.PourleMoyen-Orientetl’Afrique,
composez le 971-4-310850. Pour les autres régions, veuillez contacter votre
détaillant ou distributeur Timex local pour toute information sur la garantie.
AuCanada,auxÉtats-Unisetdanscertainsautresendroits,lesdétaillants
Timex participants peuvent vous faire parvenir un emballage pré-adressé et
préaffranchipourvousfaciliterl’envoidelamontreàl’atelierderéparation.
GARANTIE INTERNATIONALE TIMEX – COUPON DE RÉPARATION
Date d’achat initiale : _________________________________________________
(si possible, joindre une copie du reçu)
Acheté par : ________________________________________________________
(nom, adresse et numéro de téléphone)
Lieu d’achat : _______________________________________________________
(nom et adresse)
Motif du renvoi : _____________________________________________________
__________________________________________________________________
31

32 33
Immunité- Référence EN 55024
Normes : CENELEC EN 55024
LVD : 2006/95/EC
Normes : CENELECEN60950-1/A11:2009(M503)
CENELECEN60950-1:2006ED:2(M878)
Information supplémentaire : Le produit ci-dessus est conforme aux exigences
delaDirectivedel’équipementRadioetTélécommunications1999/05/CEetde
la Directive basse tension 2006/95/CE, et porte en conséquence le marquage
CE.
Agent :
David Wimer
Ingénieur Qualité
Date:le9septembre2011,Middlebury,Connecticut,États-Unisd’Amérique
©2012 Timex Group USA, Inc. TIMEX, TRIATHLON, RUN TRAINER, NIGHT-MODE et INDIGLO sont
desmarquesdéposéesdeTimexGroupB.V.etdesesliales.IRONMANetMDOTsontdes
marques déposées de World Triathlon Corporation. Utilisées avec une permission. SiRF et le
logoSiRFsontdesmarquesdéposéesdeCSR.SiRFstarIVestunemarquedeCSR.ANT+etle
LogoANT+sontdesmarquesdéposéesparDynastreamInnovations,Inc.
DÉCLARATION DE CONFORMITÉ
Nom du fabricant : Timex Group USA, Inc.
Adresse du fabricant : 555 Christian Road
Middlebury, CT 06762
États-Unisd’Amérique
déclare que le produit suivant :
Nom du produit : Système Timex®Run Trainer™GPS®
Numéros de modèle : M878, M503
est conforme aux spécifications suivantes :
R&TTE : 1999/05/EC
Normes :
EETSIEN300440-1-V1.4.1:2008(M503)
ETSIEN300440-2-V1.2.1:2008(M503)
ETSIEN300400-1-V1.5.1:2008(M878)
ETSIEN300440-2-V1.3.1:2008(M878)
ETSIEN301489-1V1.8.1:2008(M503)
ETSIEN301489-3V1.4.1:2002(M503)
UL60950-1(878)
CSAC22.2#60950-1(878)
IEC60950-1(878)
Normes d’émissions d’appareils numériques :
FCCPartie15Sous-partieB/EN55022/AZ/NZSCispr22(878)
FCC47CFR15BclB(878)
CENELECEN55022(878)
SAIAS/NZSCISPR22(878)

Índice
Introducción ........................................................................................................36
Reseña de funciones........................................................................................... 36
Botones de operación......................................................................................... 37
SÍmbolos de la Barra de estado..........................................................................39
Cargue su reloj Run Trainer™.............................................................................40
Obtenga el firmware más reciente..................................................................... 41
Programe el reloj................................................................................................. 41
Para programar hora y fecha.............................................................................. 41
Programar la información personal .................................................................... 41
Adquiera la señal GPS y conéctese al sensor de ritmo cardiaco....................... 43
Inicio de un Ejercicio...........................................................................................43
Tome una fracción o vuelta ................................................................................44
Detener y guardar un Ejercicio ...........................................................................44
Revise el resumen del Ejercicio .......................................................................... 44
Revisión del Ejercicio en internet ....................................................................... 45
Garantía y servicio...............................................................................................47
Declaración de cumplimiento............................................................................. 50
34 35

36 37
• LaluznocturnaINDIGLO®ilumina la esfera al oprimirse el botón INDIGLO®.
La función Night-Mode®ilumina la pantalla al oprimirse cualquier botón.
CuandoConstantOn(encendidocontinuo)estáactivo,lapantallasigue
iluminada hasta que se oprima de nuevo el botón INDIGLO®.
BOTONES DE OPERACIÓN
LUZ NOCTURNA INDIGLO®
Oprima el botón INDIGLO®en cualquier momento para activar la luz nocturna
INDIGLO®durante varios segundos. Sosténgalo para encender la función
Night-Mode® o poner iluminación constante.
RADIO/BACK
Oprima RADIO para empezar a buscar una señal GPS. En un menú, oprima
BACK para regresar al elemento anterior. Cuando se programan parámetros
como la hora, pulse este botón para moverse de izquierda a derecha por
los campos.
En cualquier modo de ejercicio o en el modo horario, sostenga RADIO para
abrir el menú del SENSOR.
INTRODUCCIÓN
Felicitaciones por la compra del reloj Timex®Ironman®Run Trainer™GPS. Al
usarlo la primera vez, sírvase seguir esta guía resumida para aprender cómo:
1. Cargar el reloj
2. Incorporar el firmware más reciente
3. Programar las funciones
4. Adquirir la señal GPS
5. Grabar su sesión de ejercicios
6. Revisar su rendimiento
Para más detalles, consulte las instrucciones completas puestas en:
http://www.timex.com/manuals
Vídeosdeguíaestánpuestosen:
http://www.YouTube.com/TimexUSA
RESEÑA DE FUNCIONES
• LatecnologíaGPS–SiRFstarIV™registra ritmo, velocidad, distancia
y altitud.
• LascapacidadesderecepcióninalámbricaANT+™y de radio habilitan
al reloj Run Trainer™para conectarse a un dispositivo sensor de ritmo
cardíaco y/o del pie.
• SensorderitmocardíacoHeartRate(HR)–Cuandoseconectaaunsensor
de ritmo cardíaco, monitoree su pulso para mantener un nivel de actividad
que corresponda a sus exigencias personalizadas de ejercicio.
• Dispositivosensordelpie–Cuandoseconectaaundispositivosensor
del pié, registre distintos valores en su ejercicio incluidos ritmo, velocidad,
distancia y cadencia.
Botón Indiglo®
Stop/Reset/Up
(Parar/Reiniciar/Arriba) ()
Mode/Exit/Done
(Modo/Salir/Fin)
Start/Split/Down
(Inicio/Fracción/Abajo) ()
( U) Radio/Back
(Radio/Regresar)
Set/Menu/Select/Next
(Programar/Seleccionar/
Menú/Siguiente) ( u)
Table of contents
Languages:
Other Timex Watch manuals

Timex
Timex M-286 Marathon Installation and operation manual

Timex
Timex iConnect Square M03Z User manual

Timex
Timex W223-EU2 User manual

Timex
Timex 155-095000 User manual

Timex
Timex W-105 User manual

Timex
Timex Ironman Transit+ User manual

Timex
Timex Watches User manual

Timex
Timex W-3 User manual

Timex
Timex W-162 User manual

Timex
Timex W-162 User manual