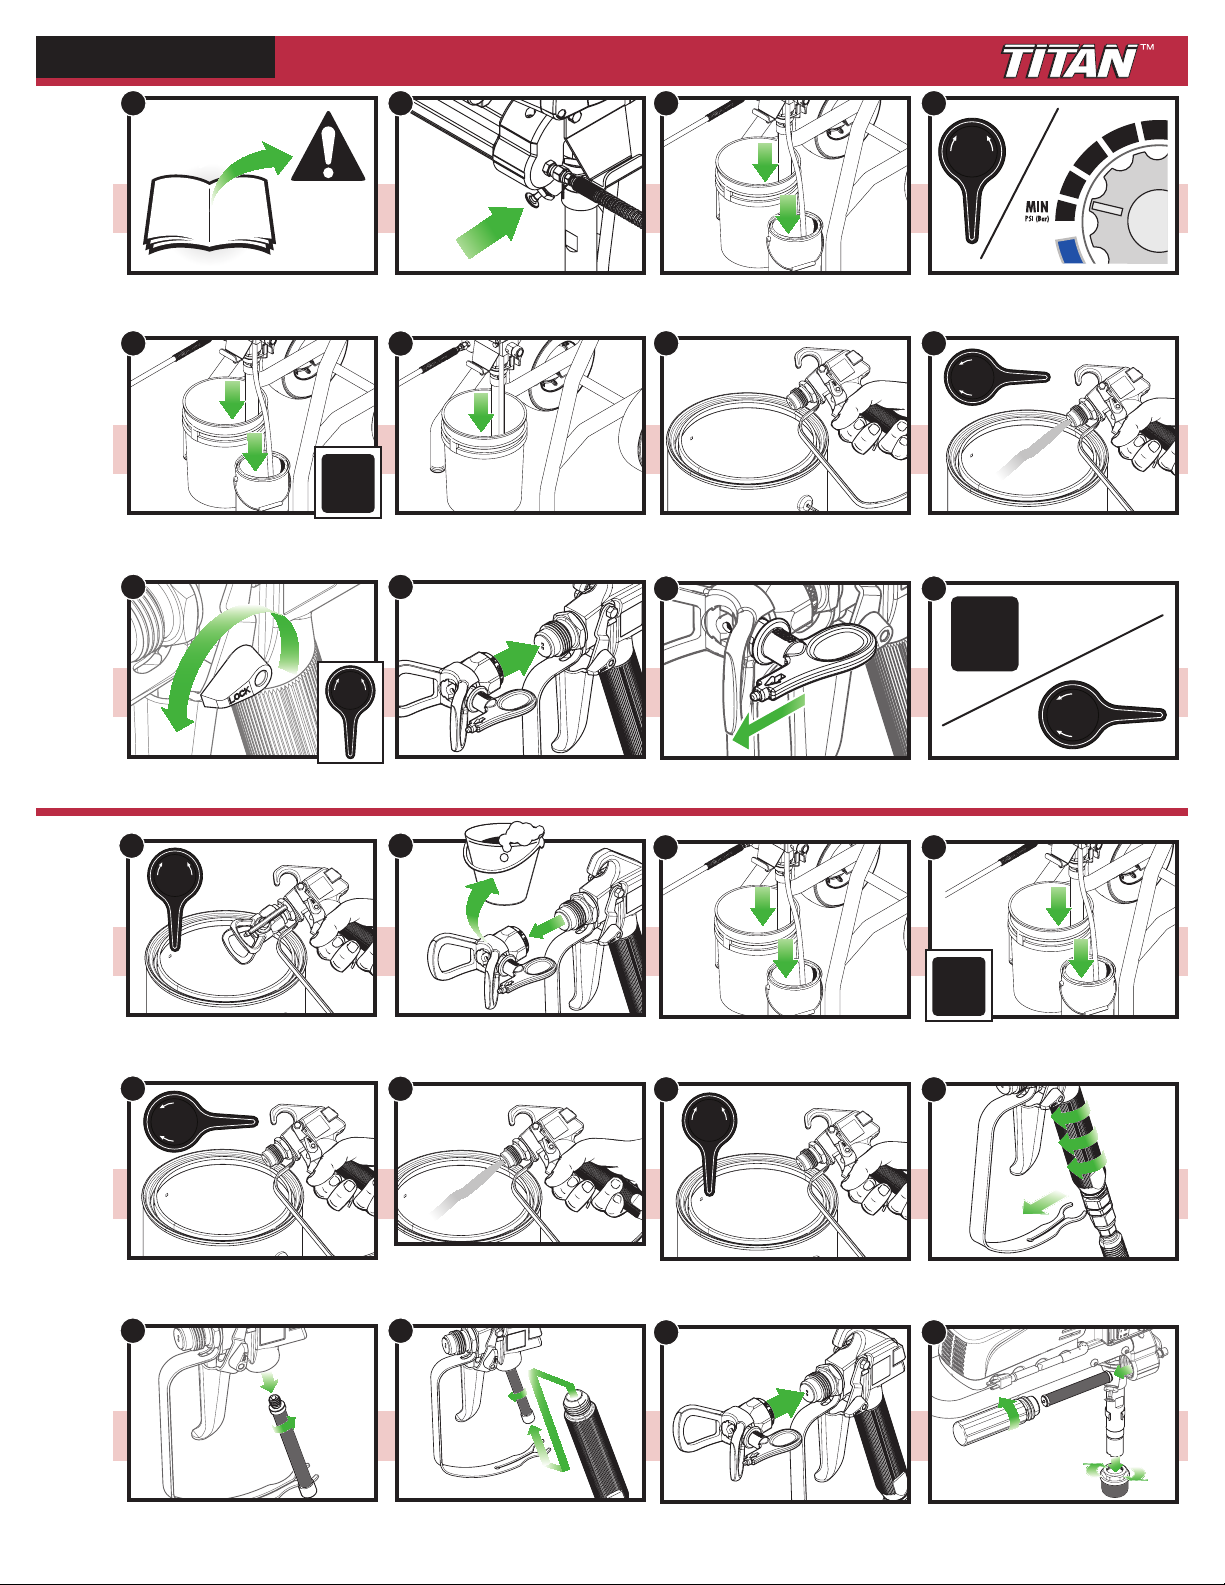
Quick Start Guide IMPACT Series
Read all warnings in pump manual or nd
the electronic manual (www.titantool.com)
Release pressure.
Unclip siphon / return tubes. Place
siphon tube into material container.
Place return tube into waste container.
Unclip siphon / return tubes. Place siphon
tube into appropriate cleaning solution.
Place return tube into waste container.
Turn power ON. Steady ow through
the return tube for 5 seconds
Point the spray gun to the side of a
waste container, squeeze the trigger and
turn the PRIME/SPRAY knob to SPRAY.
Point spray gun at separate waste
container. Squeeze and hold trigger for
steps 7-8. Turn power ON
Turn power OFF and release pressure.
Turn the power OFF. Release trigger
and lock spray gun. Turn PRIME/SPRAY
knob to PRIME.
Remove lter by turning counter-
clockwise. Clean lter with soft bristled
brush.
Make sure spray tip is rotated forward
in SPRAY position.
Install spray tip and guard assembly.
Press pusher stem.
Lock spray gun. Remove spray tip and
clean with soft bristled brush.
Plug in power cord. Turn PRIME/
SPRAY knob to PRIME position. Set
pressure to minimum.
Turn power ON. Allow a minimum of one
(1) gallon of the appropriate cleaning
solution to ow through the return tube.
Turn power OFF. Move return tube into
material container. Clip siphon tube and
return tube together.
Pull the trigger, running a minimum of 2
gallons through the gun. Then add one 4-oz.
bottle of LS-10 to 1 gallon of water and run
the mixture through the pump, hose and gun.
Turn PRIME/SPRAY knob to SPRAY.
Continue to squeeze trigger until material
is owing freely through spray gun.
Pull trigger guard and unscrew lter
housing.
Thread the spray tip guard assembly onto
the gun. Tighten by hand.
Reassemble the lter and gun assembly.
Turn power ON. Turn PRIME/SPRAY knob
to SPRAY. Adjust to desired pressure.
Remove and clean the manifold lter and
inlet screen. Replace and hand-tighten.
Start Up Clean Up
P
R
I
M
E
S
P
R
A
Y
1
1
3
3
57
7
9
9
11
11
2
2
4
4
6
6
8
8
10
10
12
12
lON
lON
P
R
I
M
E
S
P
R
A
Y
P
R
I
M
E
S
P
R
A
Y
P
R
I
M
E
S
P
R
A
Y
P
R
I
M
E
S
P
R
A
Y
P
R
I
M
E
S
P
R
A
Y
P
R
I
M
E
S
P
R
A
Y
lON
5
SL40301 JB70444A SL40301 JB70444A


