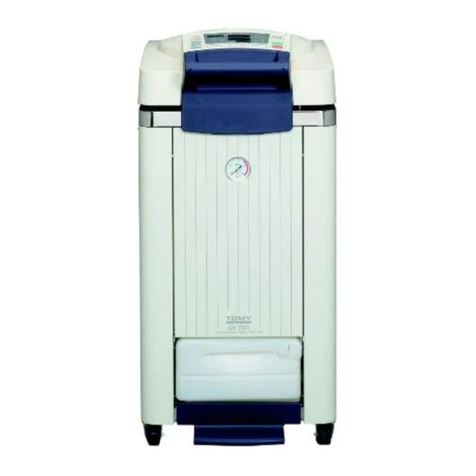
Tomy SX-300 User manual

DME11D327-06
Maintenance mode manual
Autoclave
SX-300/500/700, SX-300E/500E/700E
TOMYSEIKO CO.,LTD.
TOMY DIGITAL BIOLOGY CO.,LTD.
3-14-17 Tagara,Nerima-ku,Tokyo 179-0073,Japan
e-mail:info@digital-biology.co.jp
URL:http://www.digital-biology.co.jp
phone:+81-3-5971-8160
fax:+81-3-3970-6036

DME11D327-06
- 1 -
1. How to start maintenance mode
1) Turn on the power switch while pressing the FUNCTION , STERILIZE/LIQUID and
STERILIZE/NORMAL keys at the same time.
2) Selecting maintenance code
*When the maintenance mode is started, the control panel as shown below displays.
The Temperature display blinks and the maintenance code can be selected by using the
Temperature
▲ or ▼ keys.
Press the START key to activate the function of the maintenance code selected.
When you press the STOP key or CHECK key, return to the normal mode.
2. System Initialization [c.00 ]
1) Press the START key
2) Press the HR-TIMER/℃-WARM setting ▲ or ▼ keys to select the SX-Model code
1 = SX-300/300E, 2 = SX-500/500E, 3 = SX-700/700E
(e.g., this is case of SX-700)
3) Press the START key keep pressing over 3 seconds.
Temperature display
Time display
Warming/Timer display
FUNCTION key
STERILIZE/LIQUID key
STERILIZE/NORMAL key
TEMPERATURE setting ▲ ▼
keys
START key
CHECK key
TIME setting
▲ ▼keys
STOP key
HR-TIMER / ℃-
WARM setting
▲ ▼keys
C. 0 0
--- --
C. 0 0
0
al
C. 0 0
0
3

DME11D327-06
- 2 -
4) The beep sounds, the Warming/Timer display is changes from [3] to [AL].
5) Turn off the power supply switch.
6) Turn on the power supply switch. It is displayed as shown below during 5 sec.
3. Temperature display adjustment [ c.01 ]
1) Selecting Maintenance code [ C 01 ]
2) Press the START key
(e.g., 23.42 degree C )
3) Press the START key while more than 2 seconds. It is displayed as shown below [r-1].
4) Connect dummy resistor (123.24 ohm) to CN13 on Main Control PCB
5) Press the START key while more than 2 seconds. It is displayed as shown below [r-2].
6) Connect dummy resistor (151.71 ohm) to CN13 on Main Control PCB
7) Press the START key while more than 2 seconds.
It is displayed as shown first of the display.
8) Press the STOP key or the CHECK key, return to the normal mode.
Temperature display adjustment is updated.
r
-
1
0
C. 0 0
0
al
a. 3 U
1.1 0
1: SX-300/300E
2:SX-500/500E
3:SX
-
700/700E
Program Ver, number
C. 0 1
--- --
l
2
4
4
23.
42
Digital data (0-1023)
Temp erature
0.01 degree C /unit
Temperature 1 degree C / unit
60.
r
-
2
0
135.

DME11D327-06
- 3 -
4. Pressure display and adjustment [ c.02 ]
As you make an adjustment of pressure, the lid opens before the maintenance mode.
1) Selecting Maintenance code [ C 02 ]
2) Press the START key
(e.g., adjusted value –0.1 , Pressure 0.1 Kpa)
3) Press the START key while more than 2 seconds. When the buzzer sounded,
Offset is updated. (No pressure in the chamber)
4) Press the STOP key or the CHECK key, return to the normal mode.
Offset is updated.
5. Exhaust valve [ c.03 ]
1) Selecting Maintenance code [ C 03 ]
2) Press the START key
Exhaust valve can be rotated by manually and display about Pulse position and sensor condition.
a.) Temperature ▲ ▼ keys : Exhaust valve can be rotated during press the key
b.) START key : rotate to original point
c.) Time ▼ keys : rotate to close position
d.) Time ▲ keys : rotate to full open position
e.) Exhaust ▲ ▼ keys : Close position > level 1 > level 2 > level 3 > level 4 > level 5 >
> Full open
C. 0 2
--- --
l
-
.
0. 1
0
.
.
Offset (adjusted value)
Pressure 0.1 Kpa /unit
Pressure 1 Kpa /unit
C. 0 3
--- --
l
3
.
03.
300
0
Actual pulse position
Sensor condition (original point)
Target pulse position

DME11D327-06
- 4 -
6. Error History [ c.04 ]
1) Selecting Maintenance code [ C 04 ]
2) Press the START key
3)Temperature ▲ ▼ keys : Indicate last 10 Error Code
7. number of Operation [ c.05 ]
1) Selecting Maintenance code [ C 05 ]
2) Press the START key
3)Temperature ▲ ▼ keys : Indicate number of operation for each mode
n.00 : number of total operation
n.01 : number of “ sterilize liquid “ operation
n.02 : number of “ sterilize normal “ operation
n.03 : number of “ sterilize – warming “ operation
n.04 : number of “ Heat – warming “ operation
7. Door lock monitoring [ c.08 ]
1) Selecting Maintenance code [ C 08 ]
2) Press the START key
C. 0 4
--- --
l
Er. 0
E01
--
l
C. 0 5
--- --
l
N.0 0
000
01
C. 0 8
--- --
l
Lon
00
---
l
Lon : Lock the door
Lof : unlock the door
Left : Door open /close microswitch [o] =on [-]=off
Center : Hook microswitch [o] =on [-]=off
Right : interlock microswitch [o] =on [-]=off

DME11D327-06
- 5 -
8. SYSTEM PARAMETER [ c10 ]
1) Selecting Maintenance code [ C 10 ]
2) Press the START key
■[P 0 0 ] External temperature sensor for articles to be sterilized setting
a) Press the time setting ▲ ▼ keys to set the 1 or 2 as equipped external sensor for
articles to be sterilized.
b) Press the STOP key to return to the control panel display as shown below.
Press the STOP key again to end the procedures.
■[P 3 5 ] Standard Temperature sensor calibration
a) Press the temperature setting ▲ ▼ keys to select the system parameter [ P 3 5 ].
b) Press the START key
c) Press the time setting ▲ ▼ keys to set the calibration value for the temperature
sensor inside the chamber.
C. 1 0
--- --
l
P. 0 0
0
--
l
0: not equipped
1: equipped > Monitor timer count down
2: equipped > Monitor timer count down
Temperature to unlock door interlock,
and temperature to complete sterilization.
P. 3 5
0
--
l
P. 3 5
0
--
l
The display differs with the type of the product.
P. 0 0
1
--
l
C. 1 0
--- --
l

DME11D327-06
- 6 -
(e.g., If the temperature measured inside the chamber is 0.8℃ lower than
the temperature displayed on the control panel ( or the set temperature ),
Enter [ -8 ] by pressing the time setting ▲ ▼ keys.)
(e.g., If the temperature measured inside the chamber is 1.1℃ higher than
the temperature displayed on the control panel ( or the set temperature ),
Enter [ +11 ] by pressing the time setting ▲ ▼ keys.)
d) Press the START key to determine the calibration value and store it.
e) Press the STOP key to return to the control panel display as shown below.
Press the STOP key again to end the procedures.
P. 3 5
-
8
--
l
Calibration values for the temperature sensor inside the
chamber: -30~+30 (Calibration value 1 = 0.1℃)
P. 3 5
11
--
l
Calibration values for the temperature sensor inside the
chamber: -30~+30 (Calibration value 1 = 0.1℃)
P. 3 5
-
8
--
l
P. 3 5
11
--
l
C. 1 0
--- --
l

DME11D327-06
- 7 -
■[P 3 6 ] External sensor for the articles to be sterilized calibration
a) Press the temperature setting ▲ ▼ keys to select the system parameter [ P 3 6 ]
b) Press the START key
c) Press the time setting ▲ ▼ keys to set the calibration value for the temperature
sensor inside the chamber.
(e.g., If the temperature measured inside the chamber is 0.8℃ lower than
the temperature displayed on the control panel ( or the set temperature ),
Enter [ -8 ] by pressing the time setting ▲ ▼ keys.)
(e.g., If the temperature measured inside the chamber is 1.1℃ higher than
the temperature displayed on the control panel ( or the set temperature ),
Enter [ +11 ] by pressing the time setting ▲ ▼ keys.)
d) Press the START key to determine the calibration value and store it.
P.
36
0
--
l
P. 3 6
0
--
l
The display differs with the type of the product.
P. 3 6
-
8
--
l
Calibration values for the temperature sensor inside the
chamber: -30~+30 (Calibration value 1 = 0.1℃)
P. 3 6
11
--
l
Calibration values for the temperature sensor inside the
chamber: -30~+30 (Calibration value 1 = 0.1℃)
P. 3 6
-
8
--
l
P. 3 6
11
--
l

DME11D327-06
- 8 -
e) Press the STOP key to return to the control panel display as shown below.
Press the STOP key again to end the procedures.
■[P 6 9 ] High altitude setting
a) Press the temperature setting ▲ ▼ keys to select the system parameter [ P 6 9 ].
b) Press the START key
c) Press the time setting ▲ ▼ keys to set the altitude segment.
d) Press the STOP key to return to the control panel display as shown below.
Press the STOP key again to end the procedures.
C. 1 0
--- --
l
P. 6 9
0
--
l
P. 6 9
0
--
l
Altitude segment
0 : ( 0 – 1,000m )
1 : (1,000-2,000m)
2: (2,000-3,000m)/(89.9-79.5kPa(abs))
P. 6 9
1
--
l
C. 1 0
--- --
l

DME11D327-06
- 9 -
■[P 9 4 ] Model Select
a) Press the temperature setting ▲ ▼ keys to select the system parameter [ P 9 4 ].
b) Press the START key
c) Press the time setting ▲ ▼ keys to set the model code.
d) Press the STOP key to return to the control panel display as shown below.
Press the STOP key again to end the procedures.
9. External Temperature sensor display adjustment [ c.12 ]
1) Selecting Maintenance code [ C 12 ]
2) Press the START key
(e.g., 23.42 degree C )
3) Press the START key while more than 2 seconds. It is displayed as shown below [r-1].
r
-
1
0
C. 1 2
--- --
l
2
4
4
23.
42
Digital data (0-1023)
Temp erature
0.01 degree C /unit
Temperature 1 degree C / unit
60.
P. 9 4
0
--
l
P. 9 4
1
--
l
Model Code
1 : SX-300/300E
2 : SX-500/500E
3: SX-700/700E
C. 1 0
--- --
l
P. 9 4
3
--
l
Model Code
3: SX-700/700E

DME11D327-06
- 10 -
4) Connect dummy resistor (123.24 ohm) to CN12 on Main Control PCB
5) Press the START key while more than 2 seconds. It is displayed as shown below [r-2].
6) Connect dummy resistor (151.71 ohm) to CN12 on Main Control PCB
7) Press the START key while more than 2 seconds.
It is displayed as shown first of the display.
8) Press the STOP key or the CHECK key, return to the normal mode.
Temperature display adjustment is updated.
10. number of lid open/close operation [ c.22 ]
1) Selecting Maintenance code [ C 22 ]
2) Press the START key
(e.g., 1,234 times open to close) Lid open to close : 1 time
a.) TIME ▲ ▼ keys : Times of open/close can be changed
b.) Press the START key while more than 2 seconds. When the buzzer sounded,
Number of times updated.
c.) STOP key : back to maintenance mode
C. 2 2
--- --
l
001
234
DC
r
-
2
0
135.
Other manuals for SX-300
1
This manual suits for next models
5
Table of contents
Other Tomy Laboratory Equipment manuals
Popular Laboratory Equipment manuals by other brands

Belden
Belden HIRSCHMANN RPI-P1-4PoE installation manual

Koehler
Koehler K1223 Series Operation and instruction manual

Globe Scientific
Globe Scientific GCM-12 quick start guide

Getinge
Getinge 86 SERIES Technical manual

CORNING
CORNING Everon 6000 user manual

Biocomp
Biocomp GRADIENT MASTER 108 operating manual