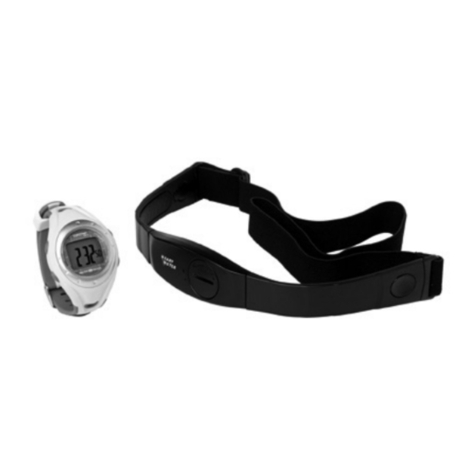
Topcom OUTDOOR SPORTSWATCH 2000 User manual

OUTDOOR SPORTSWATCH 2000
USER GUIDE
HANDLEIDING
MANUEL D’UTILISATEUR
BEDIENUNGSANLEITUNG
MANUAL DE USUARIO
MANUAL DO UTILIZADOR
1.1

UK The features described in this manual are published with reservation
to modifications.
NL De in deze handleiding beschreven mogelijkheden worden
gepubliceerd onder voorbehoud van wijzigingen.
FR Les possibilités décrites dans ce manuel sont publiées sous réserve
de modifications.
DE Die in dieser Bedienungsanleitung umschriebenen Möglichkeiten,
werden vorbehaltlich Änderungen publiziert.
ES Las características descritas en este manual pueden ser objeto de
futuras modificaciones.
PT As características descritas neste manual são publicadas sob reserva
de modificação.
UK The CE symbol indicates that the unit complies with the essential
requirements of the R&TTE directive.
NL Het toestel voldoet aan de basiseisen van de R&TTE-richtlijn. Dit wordt
bevestigd door de CE-markering.
FR La conformité de l’appareil avec les exigences fondamentales de la
directive européenne R&TTE relative aux terminaux, est confirmée par
le label CE.
DE Die Übereinstimmung des Gerätes mit den grundlegenden
Anforderungen der R&TTE-Directive ist durch das CE-Kennzeichen
bestätigt.
ES El sello CE corrobora la conformidad del equipo con los
requerimientos básicos de la directiva R&TTE.
PT O símbolo CE indica que esta unidade cumpre com os requisitos
essenciais da directiva R&TTE.

3
ENGLISH
TOPCOM Outdoor Sportswatch 2000
1 INTRODUCTION
Thank you for purchasing of Outdoor Sports Watch 2000. This Watch
features electronic sensors which measures and shows the outdoor
conditions: weather forecast, temperature, pressure, altitude and compass
directions. Your Watch provides the essential information at the time during
hiking, wild camping or other outdoor activities especially for a prolonged
period.
2 SAFETY NOTES
Read the instruction before using the Watch.
Avoid exposing your Watch to extreme conditions for an unreasonable time.
Avoid rough usages or severe impacts to your Watch.
Do not open the Watch's case unless a certified service agency because it
contains precise electronic sensors and components.
3 CARE AND MAINTENANCE
Clean your Watch with a soft cloth occasionally that working for a longer use
life of your watch.
Keep your Watch away from magnets or the appliances which contains
magnetic objects such as mobile phones, speakers and motors.
Store your Watch in a dry place when it is not in use.

4
TOPCOM Outdoor Sportswatch 2000
4 BUTTONS
A. START/STOP BUTTON [S/S]
• To 'start' or 'stop' the
chronograph function during
chronograph mode.
• To select between the
functional displays under the
same mode.
• To toggle Yes/No.
• To increase the digits during
setting display.
B. LAP/RESET BUTTON [L/R]
• To activate the 'lap' or 'reset'
the chronograph function
during chronograph mode.
• To move the cursor to left by one during history recalling.
• To decrease the digits under setting display.
• To toggle Yes/No.
C. SENSOR BUTTON [SR]
• To select among the Time, Altimeter, Barometer or Compass Mode.
D. MODE BUTTON [M]
• To select among the Current Time, Daily Alarm, Chronograph, Timer,
Pacer or Dual Time Mode.
• To select among the setting items during setting display.
E. LIGHT BUTTON [EL]
• To turn on the back light.
A
B
E
D
C

5
ENGLISH
TOPCOM Outdoor Sportswatch 2000
5 CURRENT TIME MODE
5.1 FUNCTIONAL DISPLAY
The Current Mode includes 4 kinds of functional
display:
• Day of Week Display
• Temperature Display
• Altitude Tendency Display
• Sea Level Pressure Tendency
Press button [S/S] following the adjacent
diagram.
5.2 DISPLAY INFORMATION
(See diagram)
a. Day of the week
b. Weather forecast
c. Current Time
d. Date
e. Temperature
f. Altitude tendency
g. Sea level pressure tendency
6 WEATHER FORECAST
A special feature of the Watch is the coming weather forecast function. It
works by analyzing the changes of the past air pressure.
The Watch provides 4 different symbols to indicate the weather forecast.
Sunny
Cloudy with Sun
Cloudy
Raining
b
c
d
e
f
g
[S/S]
[S/S]
[S/S]
[S/S]
a

6
TOPCOM Outdoor Sportswatch 2000
IMPORTANT
The symbols will be shown only in Current Time and Dual Time Mode
Since the weatherprediction is based on the changes in the air pres-
sure, it is highly recommended to stay at the same altitude for at least
24 hours for a higher accuracy predication.
The Watch predicts the weather by adopting general weather predic-
tion principles, it is NOT capable to reflect the dramatic changing of
weather within a very short period of time.
6.1 HOW TO SET CURRENT TIME
• Press and hold the [M] button for about 2 seconds in
the Current Time Mode. In setting display, the
flashing "SET" icon will appear.
• Press the [M] button to change the selection
following the adjacent Current Time Setting
Sequence.
• When the second digits are flashing (selected), press the [S/S] or
[L/R] button to reset the digits to "00".
• When the digits are flashing (selected), press the [S/S] or [L/R]
button to increase / decrease the number.(Hold down the button to
change the number at a higher speed).
• When month-day order setting is selected, press the [S/S] or [L/R]
button to select between month-day and day-month format.
• When 12/24 hour format setting is being selected, press the [S/S]
button to select between 12 and 24 hour format.
• When LCD contrast is selected, press the [S/S] or [L/R] button to
increase / decrease the contrast level (1 to 10).
• When key beep setting is selected, press the [S/S] or [L/R] button to
select between ON and OFF the beep.
• Press and hold the [M] button to exit the setting display.
1. Seconds
2. Minute
3. Hour
4. Year
5. Month
6. Day
7. Month/Day
8. 12/24h Format
9. LCD display contrast
10. Key Beep
SET
SET
7
ENGLISH
TOPCOM Outdoor Sportswatch 2000
7 DAILY ALARM
7.1 DAILY ALARM 1 & 2
• The Watch includes two independent daily
alarms.
• In current time mode, press [M] briefly to
enter alarm mode.
• Press the [S/S] button to switch among the
Daily Alarm 1, Daily Alarm 2 and Chime. (See
adjacent diagram)
7.1.1 HOW TO TURN ON/OFF THE DAILY
ALARM
• In Daily Alarm ‘AL1’ or ‘AL2’ mode, press the
[L/R] button.
• When the Daily Alarm is ON, the alarm
indicator ' ' will appear.
• The Watch will sound every day at the preset
alarm time .
• When the alarm sounds, press any button to
stop the beep.
7.1.2 HOW TO SET THE ALARM 1 AND ALARM 2
• In Daily Alarm ‘AL1’ or ‘AL2’ mode, press and hold the [M] button for
about 2 seconds. The flashing "SET" icon will appear.
• In setting display, press the [M] button to switch between minutes and
hour.
• When the digits are flashing (selected), press the [S/S] or [L/R]
button to increase / decrease the number. (Hold down the button to
change the number at a higher speed).
• When the set is completed, press and hold the [M] button to exit the
setting display.
7.1.3 HOW TO TURN ON/OFF THE HOURLY CHIME
• In Chime mode, press the [L/R] button in Chime to turn ON/OFF the
Hourly Chime.
• When the chime is ON, the chime indicator ' ' will appear. If the
Chime indicator is displayed, the Watch will beep every hour.
[S/S]
[S/S]
[S/S]

8
TOPCOM Outdoor Sportswatch 2000
8 CHRONOGRAPH MODE
The Watch includes a function to measure elapsed times, accumulative
elapsed time and lap times.
8.1 CHRONOGRAPH MODE
• In current time mode, press [M] twice to enter
Chronograph mode.
•Tostart the chronograph, press the [S/S] button
once.
•Tostop the chronograph, press the [S/S] button once
again
• Repeat the above mentioned steps to get the
accumulative elapsed time of which the chronograph
is running.
•Toreset the chronograph, hold the [L/R] button for 2 seconds.
8.2 LAP TIMES
The chronograph can measure elapsed time without stopping the counting
- lap time. (up to 100 laps)
• When the chronograph is counting, press the [L/R]
button once to record a lap time (this key operation
will not affect the counting).The lap number and lap
time will appear on the display for 10 seconds, and it
returns to the counting display automatically.
• Repeat the steps mentioned above to get another lap
time.
•Tostop press the [S/S] button once again.
•Torecall lap times, hold down the [M] button in the
Chronograph Stop Mode.
• When the Total Time (TTL) is displayed, press the
[S/S] or [L/R] button to check the next / previous lap
time.
• Hold down the [M] button any time to go back to the
Chronograph Display.
•Toreset the lap times, hold the [L/R] button for 2 seconds in the
Chronograph Stop Display.
1e
Lap

9
ENGLISH
TOPCOM Outdoor Sportswatch 2000
9 COUNTDOWN TIMER
The Timer counts down from the preset value to zero.
9.1 SETTING THE TIMER
There are 6 Quick-Preset-Values: 1, 3, 5, 10, 15 and 45 minutes and one
user defined time. The setting range is up to 99 hours 59 minutes 99
seconds.Once the User Preset Value has been set, such as 30 minutes,
that value is stored into the Watch for the user to recall next time.
• In current time mode, press [M] until TMR is
displayed.
• Press the [L/R] button to select a preset time or the
user defined time.
To set the user defined time.
• Hold the [M] button for 2 seconds. The flashing "SET"
icon will be displayed.
• Press the [M] button to switch between hour, minutes
and seconds.
• When the digits are flashing (selected), press the
[S/S] or [L/R] button to increase / decrease the
number (Hold down the button change the number at
a higher speed).
• When the setting is completed, hold the [M] button to
exit the setting display.
9.2 HOW TO USE THE TIMER.
• To start the timer, press the [S/S] button.
- In last 10 minutes, it will beep for every minute.
- In the last minute it will beep for every 10 seconds.
- in the last 5 seconds it will beep every second .
- As countdown time is reached, a beep sound which will last for 30
seconds.
• To stop the timer, press the [S/S] button once again .
• To reload the timer (existing preset counting time) for a new counting,
press the [L/R] button when the timer was stopped.
SET
SET

10
TOPCOM Outdoor Sportswatch 2000
10 PACER MODE
The pacer will generate beeps at a pre-defined beeping
rate.The beeping rate can be set from 30 to 180 beats per
minute (BPM) in step of 5.
10.1 USING THE PACER
• In current time mode, press [M] until PACER is
displayed.
• Press the [S/S] button to start the pacer.
• The step counter “St” will run in the middle of the
display (max 99999 steps)
• Press the [S/S] button to stop the pacer.
• To reset the step counter, press and hold the [L/R]
button when the pacer was stopped.
10.2 HOW TO SET THE BEEPING RATE
• Press and hold the [M] button for 2 seconds in Pacer Mode.
• When the beeping rate digits start to flash, press the [S/S] or [L/R]
button to increase / decrease the number. (Hold down the button to
change the number at a higher speed).
• When the setting is completed, press and hold the [M] button to exit
the setting display.
11 DUAL TIME MODE
The Watch includes a function to show the time for a second time zone.
The second digit of the dual time synchronizes with the Current Time.
• In current time mode, press [M] until T2 is displayed.
• Hold the [M] button for 2 seconds. The flashing "SET"
icon will be displayed.
• Press the [M] button to switch between hour and
minutes.
• When the digits are flashing (selected), press the
[S/S] or [L/R] button to increase / decrease the
number (Hold down the button change the number at a higher speed).
• When the setting is completed, hold the [M] button to exit the setting
display.
[S/S]
beep-beep

11
ENGLISH
TOPCOM Outdoor Sportswatch 2000
12 ALTIMETER MODE
12.1 DISPLAY
The Watch includes two Altimeter functional displays:
The current (history) altitude is displayed on the middle row.
The current (history) time is displayed on the bottom row
If you want to have an accurate reading of air temperature, you must
remove the watch from the wrist that allows no body temperature
effect on your watch.
12.2 ALTUDE AND TEMPERATURE UNIT
The Watch can display altitude in meter (m) or feet (ft) and can display the
temperature in degree Celsius (C) or degree Fahrenheit (F).
• To switch among different unit, hold down the [S/S] button to change
the units following the adjacent units select sequence.
12.3 ALTITUDE HISTORY
The Watch records the altitude reading automatically every hour at the
hour, i.e 1:00, 2:00, 3:00 and etc. These records will be plotted into a
altitude record graph. In History Display, the altitude record graph shows on
the top row of the display. To review the altitude records of the last 23
hours, press the [L/R] button to move cursor left cyclically, then the
respective altitude record and its recording time (flashing) will appear on the
display.
1. Temperature 2. Altitude History
ALTI
ALTI
ALTI

12
TOPCOM Outdoor Sportswatch 2000
12.4 ALTIMETER CALIBRATION
To have an accurate reading, you have to calibrate your altimeter as much
as possible.
There are 4 kinds of calibration methods.
NOTE: The altitude is calibrated independently on each mode. For ex-
ample, if absolute altitude is selected, effect of the sea level pressure
previous setting will be ignored
12.4.1 ZERO ALTITUDE ADJUSTMENT
The Watch can measure the relative altitude, for example, it can measure
the ascending or the descending altitude between the starting point and the
finish point of a trail.To measure this, the current altitude must be set to
'zero' at a reference point such as the starting point of a trail. An ‘r’ indicator
will be appeared on the display.
• In current time mode, press the [SR] button
until the altitude “ALTI” is displayed.
• Hold the [M] button for 2 seconds. The
flashing "SET"icon and “ZERO” will be
displayed.
• Press the [S/S] button in Display, "NO" is
displayed.
• Press the [S/S] button to select “YES”
• Hold the [M] button for 2 seconds to
confirm the setting and to exit Adjustment
Display.
•"DONE" will be displayed and the watch
will be back in Altitude Mode. The altitude is
0 meter.
ALTI
ALTI
ALTI
ALTI
SET
ALTI
ALTI

13
ENGLISH
TOPCOM Outdoor Sportswatch 2000
12.4.2 ABSOLUTE ALTITUDE CALIBRATION.
Instead of starting from zero altitude, you can set the absolute altitude
whenever you have reliable reference, such as a peak or a topographic
map, available.
• In current time mode, press [SR] until the
altitude is displayed.
• Hold the [M] button for 2 seconds. The
flashing "SET" icon and ‘ZERO’ will be
displayed.
• Press the [M] button until ‘ALTI’ is
displayed
• Press the [S/S] button. The absolute
altitude is flashing on the display.
• Press the [S/S] or [L/R] button to increase /
decrease the number (Hold down the
button to change the number at a higher
speed).
• Hold the [M] button to confirm the setting.
• To exit Adjustment Display, hold the [M]
button for 2 seconds. "DONE" will be displayed and the watch will be
back in Altitude Mode.
12.4.3 SEA LEVEL PRESSURE CALIBRATION
The altitude can be calculated by the difference
between current and sea level air pressure.
• In current time mode, press [SR] until the
altitude is displayed.
• Hold the [M] button for 2 seconds. The
flashing "SET"icon and ‘ZERO’ will be
displayed.
• Press the [M] button until ‘SEAP’ is
displayed.
• Press the [S/S] button. The actual Sea
Level Pressure is flashing on the display.
• Press the [S/S] or [L/R] button to increase /
decrease the number (Hold down the
button change the number at a higher
speed).
• Hold the [M] button to confirm the setting.
ALTI
ALTI
A
AL
TI
ALTI
ALTI
ALTI
AL
ALTI
ALTI

14
TOPCOM Outdoor Sportswatch 2000
Important:
This calibration method is less accurate, since the air pressure can
change because of atmosperic changes when moving further away
from the sea .
When calibrating the altimeter, the barometer is calibrated simultane-
ously.
12.4.4 FACTORY DEFAULT CALIBRATION
The normal sea level pressure is 1013,2mb.
This calibration method is only intresting when you are at higher alti-
tude. Since the sea level pressure varies continously, the altitude is
inaccurate and gives only a rough indication.
To set the sea level pressure back to this standard level.
• In current time mode, press [SR] until the
altitude is displayed.
• Hold the [M] button for 2 seconds. The
flashing "SET"icon and “ZERO” will be
displayed.
• Press the [M] button until ‘F.DEF’ is
displayed.
• Press the [S/S] button in Display, "NO" is
displayed.
• Press the [S/S] button to select “YES”
• Hold the [M] button for 2 seconds to
confirm the setting and to exit Adjustment
Display.
•"DONE" will be displayed and sea level air
pressure will be set to 1013,2mb.
• The altitude will be calculated by the
difference between current measured air
pressure and the normal sea level air
pressure.
ALTI
SET
AL
TIAL
TI
ALTIALTI
AL
TIAL
TI
BARO
AL
TIAL
TI

15
ENGLISH
TOPCOM Outdoor Sportswatch 2000
13 BAROMETER MODE
13.1 FUNCTIONAL DISPLAY
The Watch includes three Barometer functional displays.
1. Temperature Display
2. Sea Level Pressure Display
3. History Display
One of the three functional displays will be appeared on the top row of the
display.
• In current time mode, press [SR] until the barometer ’BARO’ is
displayed.
• Press the [S/S] button to switch between the diffent functional
displays.
The current (history) pressure and the current (history)
time shows on the middle row and bottom row of the display respectively.
If you want to have an accurate reading of the air temperature, you
must remove the Watch from the wrist for more than 20 minutes to
avoid that your body temperature as an effect on your watch.
BARO
BARO
BARO
[S/S] [S/S]
123

16
TOPCOM Outdoor Sportswatch 2000
13.2 PRESSURE AND TEMPERATURE UNIT
The Watch can display pressure in mb/hPa or inHg and can display
temperature in degree Celsius (°C) or degree Fahrenheit (°F).
To switch among different unit, hold down the [S/S] button to change the
units following the adjacent units selection sequence.
13.3 TEMPERATURE DISPLAY
In Temperature Display, the current temperature in degree Celsius (°C) or
degree Fahrenheit ( °F) shows on the top row of the display.
If you want to have an accurate reading of air temperature, you must
remove the Watch from the wrist (for 20 to 30 minutes) that allows no
body temperature effect on your watch.
13.4 PRESSURE HISTORY DISPLAY
The Watch records the level pressure reading automatically every hour.
These records will be plotted into a pressure record graph.
In Sea Level History Display, the pressure record graph shows on the top
row of the display.
To review the pressure records of the last 23 hours, press the [L/R] button
to move cursor left cyclically, then the respective pressure record and its
recording time (flashing) will appear on the display following the adjacent
diagram.
C (Celsius)
inHgC (Celsius)
mb/hPa
F(Fahrenheit)
mb/hPa
F (Fahrenheit)
inHg
hold
[S/S]hold
[S/S]
hold
[S/S]
hold
[S/S]
hold
[S/S]

17
ENGLISH
TOPCOM Outdoor Sportswatch 2000
13.5 SEA LEVEL PRESSURE DISPLAY
In Sea Level Pressure Display, the current sea level pressure shows on the
top row of the display.
The Watch records the sea level pressure reading automatically every hour
at the hour, i.e 1:00, 2:00, 3:00 and etc. These records will be plotted
into a pressure record graph.
13.6 SEA LEVEL PRESSURE HISTORY DISPLAY
In Sea Level History Display, the pressure record graph
shows on the top row of the display.
To review the pressure records of the last 23 hours, press
the [L/R] button to move cursor left cyclically, then the
respective pressure record and its recording time (flashing)
will appear on the display.
14 BAROMETER CALIBRATION
14.1 WHY THE BAROMETER NEED TO BE CALIBRATED
The Watch was calibrated for you in the factory. For normal use, you need
not to calibrate the Barometer. But for vigorous users, the Watch includes
a adjustment procedure.
BARO

18
TOPCOM Outdoor Sportswatch 2000
14.2 BAROMETER ADJUSTMENT
There are 2 kinds of Barometer adjustment method:
1. Absolute Pressure: Input the known atmospheric pressure into the
Watch directly (AIRP)
2. Factory Default: Restore the Watch to factory default setting.For in-
depth information for each of the adjustment methods, it will be given
in the coming sections (FDEF)
To select the Adjustment Display;
• In current time mode, press the [SR] button until the altitude “BARO”
is displayed.
• Hold the [M] button in Barometer Mode.
• Press the [M] button to select between the Absolute Pressure
Calibration and Factory Default Calibration.
BARO
[S/S]
[M]
2 sec
"DONE" Display
Barometer Mode
hold
M] hold
[M]
hold
[M]
[S/S] / [L/R]
BARO
SET
BARO
SET
BARO
BARO
BARO
BARO
[S/S]
12
[

19
ENGLISH
TOPCOM Outdoor Sportswatch 2000
14.3 ABSOLUTE PRESSURE CALIBRATION
The Watch can adjust the current pressure reading to an absolute pressure
value.
Before calibrating the Barometer, consult the nearest observatory sta-
tion to get the ambient barometric pressure of your current position.
• Press the [S/S] button in Absolute Pressure Display. The pressure
reading will appear.
• Press the [S/S] or [L/R] button to increase / decrease the number.(
Hold down the button changes the number at a higher speed).
• Hold the [M] button to confirm setting and exit the adjustment display.
14.4 FACTORY DEFAULT CALIBRATION
The Watch can adjust the pressure reading calculation back to using factory
default value.
• Press the [S/S] button in Factory Default Display, and the indicator
"NO" will appear.
• Press the [S/S] or [L/R] button to select between "YES" (reset the
Watch to factory default) or "NO" (abort the resetting).
• To exit Adjustment Display, hold the [M] button for 2 seconds, and
then the Watch will go back to Altimeter Mode.
If "YES" is selected, "DONE" Display will appear for 2 seconds prior to
normal operation.

20
TOPCOM Outdoor Sportswatch 2000
15 COMPASS MODE
15.1 IMPORTANT
• Keep your Watch away from magnets or the appliances which may
contain magnetic objects such as mobile phones, speakers, motors
and etc.
• The Watch, like most magnetic compass, points to the magnetic north
which is slightly different from the true north.
• Perform the compass calibration from time to time, because the
calibration reinforces the precision of the compass.
• To achieve a accurate result, you should avoid measuring direction on
the following conditions:
- The watch is placed close to a magnetic object
- The watch is placed close to a metal objects
- The watch is placed close to an electrica appliances
- The watch is placed inside a moving object or a ferroconcrete build-
ing.
15.2 COMPASS DIRECTIONS AND BEARING DIRECTIONS
15.2.1 THE DIRECTION OF AN OBJECT
• The direction of an object from a point can be specified in either
compass directions or bearing directions.
• The Watch includes both compass directions and bearing directions.
15.2.2 THE COMPASS DIRECTIONS
• The compass directions are shown on
the adjacent table.
• For example, in the figure on the right,
the compass direction of object B from
point A is East. The compass direction
of object C from point A is Southeast.
The compass direction of object D
from point A is Northwest.
object B
object C
object D
angular
difference
90
135
315
point
A
0
0
Table of contents
Languages:
Other Topcom Watch manuals

Topcom
Topcom HB 2F00 User manual

Topcom
Topcom HB 4F00 User manual

Topcom
Topcom HBM Sensor Watch 2002 User manual

Topcom
Topcom HB 6M00 User manual

Topcom
Topcom Butler 1000 User manual

Topcom
Topcom HBM Sensor Watch 2002 User manual

Topcom
Topcom HB 4F00 User manual

Topcom
Topcom HBM DUO WATCH 2500 User manual

Topcom
Topcom HBM Watch 1000 User manual

Topcom
Topcom Speedopulse 1000W User manual