9
*For all questions regarding connecting your battery to your vehicle or
camper, call your local RV service center.
Slide the non-buckle end of the Nylon Strap down through the slotted hole
in the Battery Tray (see figure 7.1). Using the Nylon Strap, secure the lid to
the battery box.
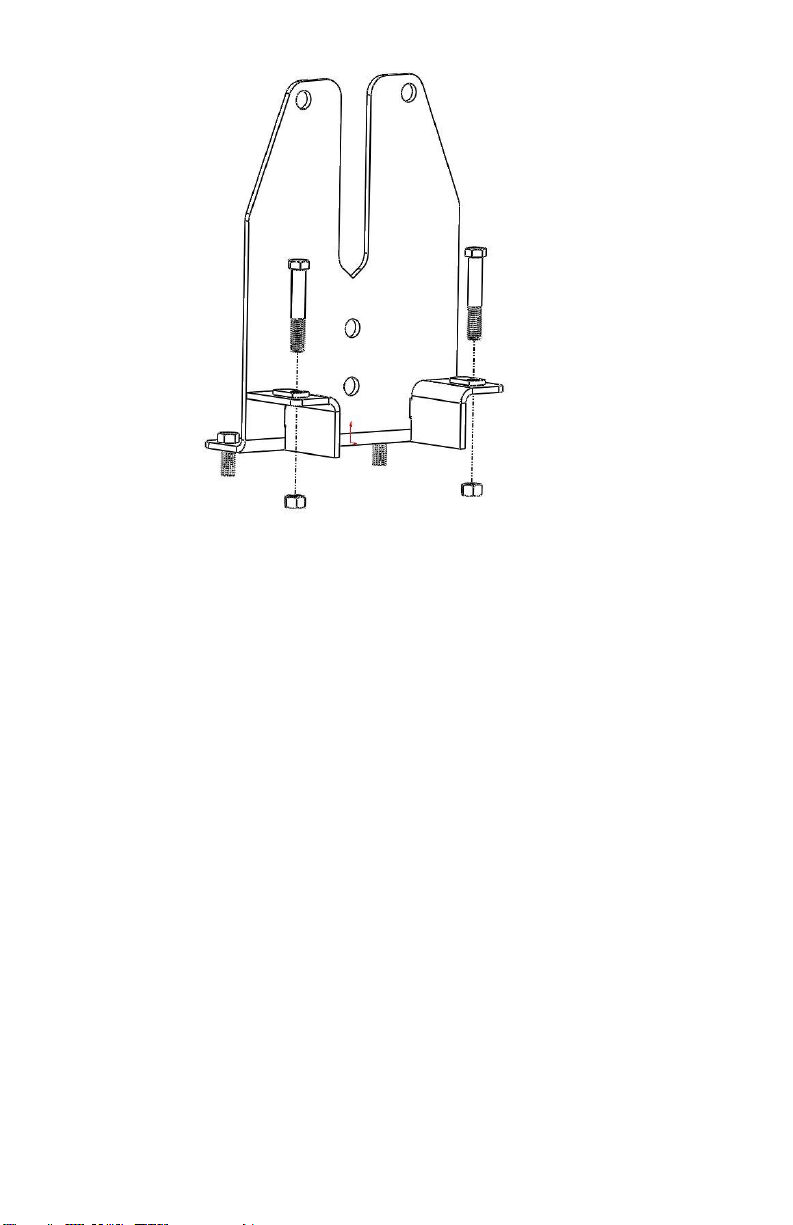
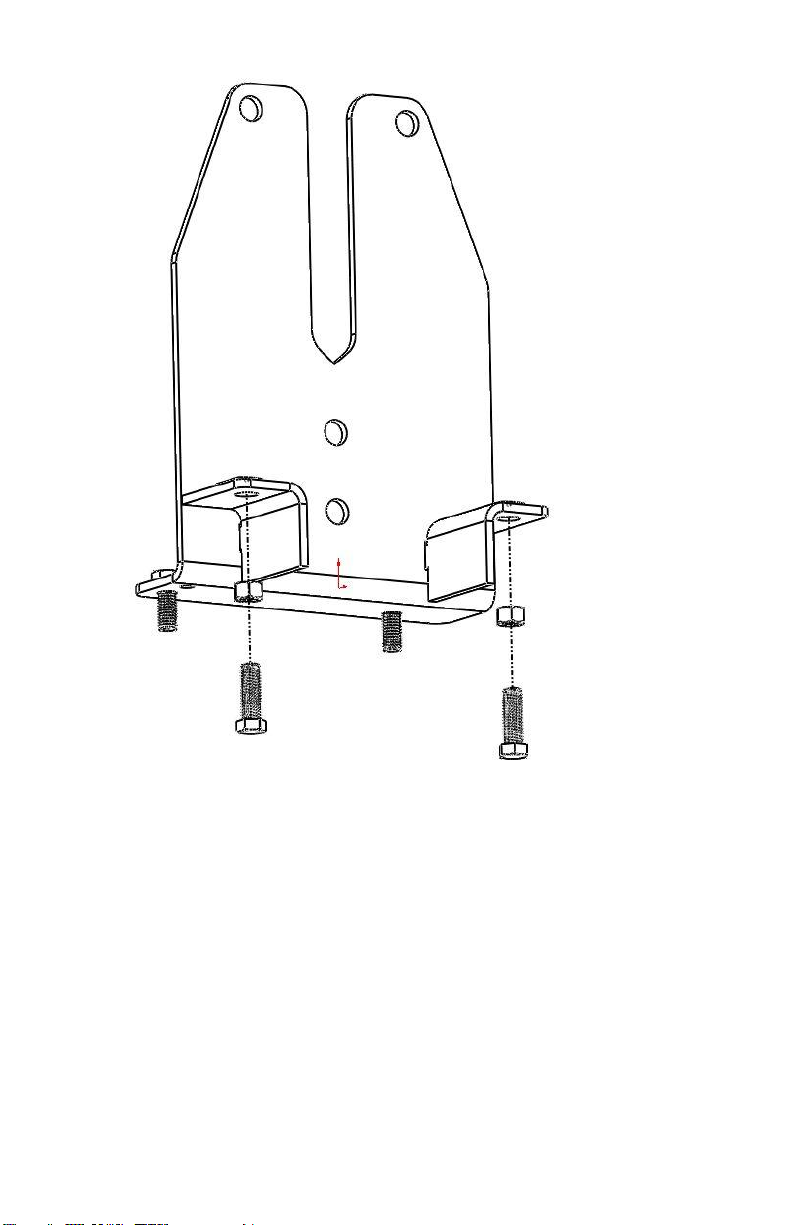
Step 9:
Reinstall the battery tray onto the A7729 Frame Plate as described in Step
6. Torque the 3/8”-16 Flanged Nylock Nuts on the bottom of the frame
plate studs to 25 ft-lbs. Make sure the 1/4" x 1-3/8” Bail Pin is installed
before proceeding.
On E250 vans, back the 3/8”-16 x 2-1/2” Grade 5 Hex Boltsout of the 3/8”
weld nuts until the heads of the bolts are touching the bottom of the E250
frame. Back them out an additional 1/2 turn, and secure their position by
tightening the 3/8” -16 Grade 5 Nuts against the bottom of the A7729
Frame Plate.
On E350 vans, screw the 3/8”-16 x 1-1/4” Grade 5 Hex Bolts into the 3/8”
Weld Nuts until they contact the E350 frame. Screw them in an additional
1/2 turn. Secure their position by tightening the 3/8” -16 Grade 5 Nuts
against the bottom of the A7729 Frame Plate.
Battery Charging Wire Diagrams
To test if you have a factory battery separator, use a voltmeter or
a 12V test light to test for key on/ key off positive power at the RV
Plug. See RV Plug Diagram below.