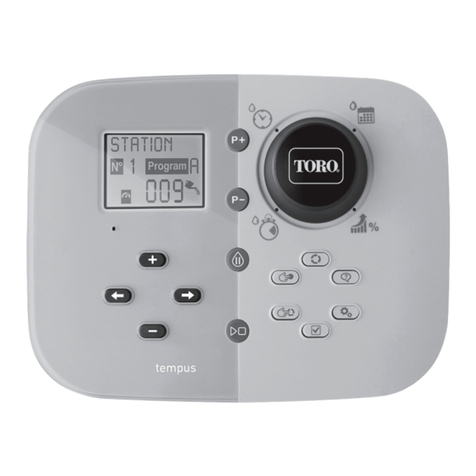
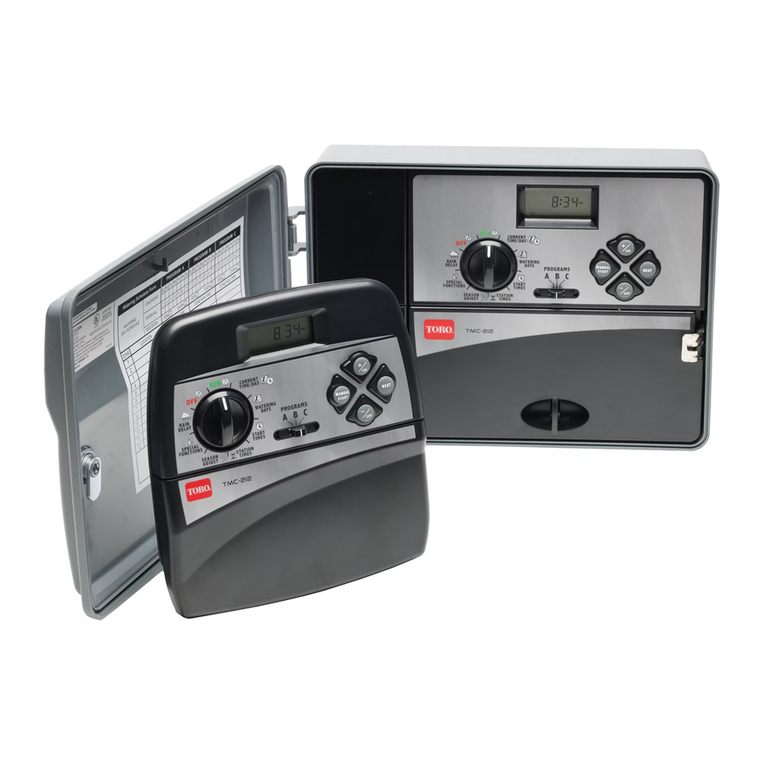
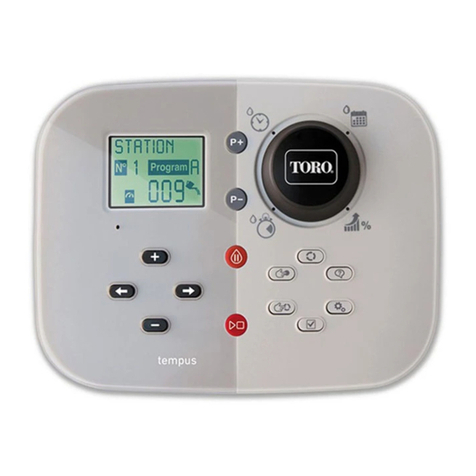
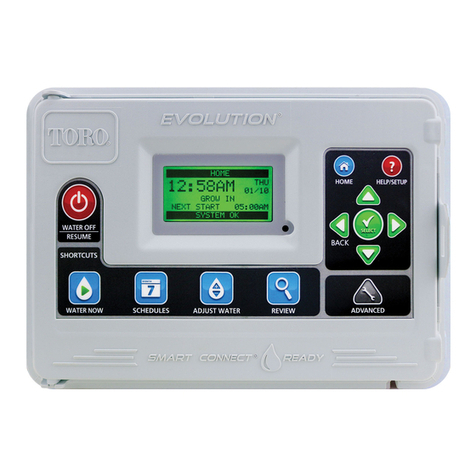
Toro VISION II Series User manual

VISIONII
SERIES CONTROLLER
OWNER
’
S MANUAL

Introduction
Congratulations on your purchase of the Toro Vision II controller. You have
chosen one of the most sophisticated and technologically advanced irrigation
system controllers available for residential and light commercial applications.
Your new controller has some very unique features and operating
characteristics. So please, ta e just a few minutes to read through this
manual and familiarize yourself with the Vision II's various components,
programming steps, and control features. We are confident that you will find
the controller easy to program and easy to operate once you have ta en this
initial step.
The information in this manual applies to all Vision II 6, 9 and 12 station
models and is divided into four main sections. The first section provides a brief
description of the controller's components and program memory. The second
section ta es you step-by-step through the programming procedure for
automatic operation. The third section explains the various ways to operate
the controller manually, as well as detailed information on specific control
features. The fourth and final section provides technical information covering
controller specifications, troubleshooting and fuse replacement. A Watering
Program Record form, located in the bac of the manual, provides a
convienent place to record the location of each watering station area and
specific details of your automatic watering program.

1
Table of Contents
Controller Component Description........................................................... 2-3
About the Controller's Memory.............................................................. 4
Programming for Automatic Operation................................................... 5-15
Prepare Controller for Programming ...................................................... 5
Set Cloc to Current Time and Day ....................................................... 5
Set Station Run Time......................................................................... 6-7
Assign Stations to Programs ............................................................ 8-10
Set Daily Watering Schedule .......................................................... 11-14
Set Program Start Times ..................................................................... 15
Manual Operations and Controls ......................................................... 16-19
Manual Operation – Full Program....................................................... 16
Manual Operation – Partial Program................................................... 17
Manual Operation – Selected Stations ................................................ 17
Watering Delay™Control .................................................................... 18
Water Conservation Control™.............................................................. 18
Selecting Control Options.................................................................... 19
Technical Information.......................................................................... 20-22
Troubleshooting .................................................................................. 20
Servicing Fuse .................................................................................... 21
Specifications...................................................................................... 22
FCC Regulations ................................................................................. 22
Watering Program Record ......................................................................... 23

Controller Components
2
COM
12345678910 11 12
WARNING
HIGH
VOLTAGE
CURRENT
TIME WATERING DELAY
1-4 DAYS
CURRENT
DAY MANUAL
OPERATION SEASONAL ADJUST
ACTIVE WATERING DAYS
Su Mo Tu We Th Fr Sa
1:1 1:2 1:3 1:4 1:5 1:6 1:7
am
DELETE WEEK 1 2
INTERVAL
14 DAY CALENDAR
DAILY START TIMES
OFF
3 6 9 12pm 3 6 9 12
5
15 30
90
60
MANUAL
OFF
1
5
15 30
90
60
MANUAL
OFF
2
5
15 30
90
60
MANUAL
OFF
3
5
15 30
90
60
MANUAL
OFF
4
5
15 30
90
60
MANUAL
OFF
5
5
15 30
90
60
MANUAL
OFF
6
5
15 30
90
60
MANUAL
OFF
7
5
15 30
90
60
MANUAL
OFF
8
5
15 30
90
60
MANUAL
OFF
9
5
15 30
90
60
MANUAL
OFF
10
5
15 30
90
60
MANUAL
OFF
11
5
15 30
90
60
MANUAL
OFF
12
ENTER
PUMP
A
B
PROGRAM A
PROGRAM B
+
–
34
ON /OFF
13
15
14
16
17
18
19 5
11
6
7
8
9
10
12
2
1

3
1Display - Shows current time and
day of wee , station run time (set and
remaining), program start time(s),
water conservation % and Off.
2
3
4
5
6
PROGRAM A
PROGRAM B
Program Select Key & Indicators -
Press ey to select program “A” or
“B”. Indicator shows program
selected.
7
am
Program “B” Start Time Controls -
Position sliding controls to select
watering cycle start times for
program “B”.
8
am
Program “A” Start Time Controls -
Position sliding controls to select
watering cycle start times for
program “A”.
9
-+
%
SEASONAL ADJUST
Seasonal Ad ust Control - Position
sliding control to decrease or increase
run time of all stations from 25% to
200%. See pg. 18 for details.
™
10
WATERING DELAY
1-4 DAYS
Watering Delay Key & Indicator -
Press ey to suspend automatic operation
from one to four days. Indicator shows
number of suspended days remaining.
™
11
ON / OFF
Controller On/Off Key - Press ey to
activate or deactivate controller.
When deactivated, “OFF” is displayed.
Cloc continues to update time.
12
WEEK 12
Week Select Key & Indicators - Press
ey to select wee 1 or 2 of Calendar
watering schedule. Indicator shows
wee selected.
14
Fr
1:6
Sa
1:7
14 DAY
INTERV
DAYS
Su
1:1
Watering Day Schedule Switch &
Indicators - Switch UP - 14 Day Calendar.
Switch DOWN - Interval. Indicators show
watering days or interval selected.
13
5
15 30
60
90
1
MANUAL
OFF
Station Run Time Dials & Indicator -
Rotate dial to select station run time.
Indicator shows station is
programmed or operating.
15
RUN PROGRA
Run/Program Switch - Position switch to
“Program” only when assigning stations
to programs. Switch must remain in
“Run” position at all other times.
17
Removable Jumper Plugs - Two
removable jumper plugs are provided
to select control options. See pg. 19
for details.
16
Fuse - 1-1/2 Amp fuse protects 24
VAC output to field. See pg. 21 for
details.
18
Fuse - 3/4 Amp fuse protects
controller timing circuitry. See pg. 21
for details.
19
Note: 12 station model shown. Although
location of items 11-14 on 6 and 9 station
models is slightly different, function is
identical.
CURRENT
DAY
Set Day Key - Press ey to set
current day of wee .
CURRENT
TIME
Set Time Key - Press ey to set
current time of day or change run
time mode.
MANUAL
OPERATION
Manual Operation Key & Indicator -
Press ey to select manual
operations. Indicator shows manual
operation is active.
ENTER
Enter Key - Press ey to enter days
or stations into a watering program.
DELETE
Delete Key - Press ey to delete days
or stations from a watering program.
About the Controller's Memory
The Vision II controller utilizes a special device which permanently stores the
automatic watering program information as it is entered. This protects the
program information in the event of a power outage without the use of battery
bac -up. If controller power has been lost for an extended length of time, the
display will begin flashing, signifying that current time and possibly current
day will need to be reset. All other watering program information will remain
unaffected by the loss of power.
When assembled at the Toro factory, a watering program is entered into the
controller's memory to enable operation immediately upon installation. The
program consists of the following information:
• All stations are assigned to programs “A” and “B”.
• Watering will occur every Monday, Wednesday, and Friday or every other
day (determined by Watering Day Schedule Switch position).
If you wish to use this program for automatic watering, all that remains to be
set is Current Time and Day (pg. 5), Station Run Time (pg. 6-7), and Program
Start Time (pg. 15).
To fully program the controller for your specific watering needs, follow the
step-by-step procedure in the next section, “Programming For Automatic
Operation”.
4

5
Programming For Automatic Operation
STEP 1 - Prepare Controller For Programming
STEP 2 - Set Clock To Current Time and Day
❑Remove lower cabinet cover.
❑Assure Run/Program Switch is
positioned to “RUN”
❑Observe display:
–If it is flashing, continue to STEP 2.
–If it reads OFF, press On/Off Key;
continue to STEP 2.
– If it shows incorrect time and/or
day, continue to STEP 2.
O
O
■To Set Time:
❑Press and hold Set Time Key until
display advances to current time.
Note: Digits will advance rapidly
after 10 consecutive seconds.
■To Set Day:
❑Press Set Day Key repeatedly until
current day (abbreviation) is
displayed.
CURRENT
TIME
CURRENT
DAY
RUN PROGRAM
STEP 2
STEP 2
STEP 2

6
STEP 3 - Set Station Run Time
The length of time a station operates during a watering cycle is called Run
Time. Each station can have its run time set in one of two modes: Minutes or
Hours. Minutes mode provides a station run time from 1 to 90 minutes (in 1
minute increments). Generally, a run time under 90 minutes is more than
adequate for most lawn and shrub sprin ler applications. However, drip
irrigation emitters often require a run time of several hours in order to supply
the proper amount of water. Selecting Hours mode enables run time to be set
from 10 minutes to 9 hours (in 10 minute increments) for any drip watering
requirements. Use the following procedure to set a run time for each station.
❑Turn desired Station Dial slowly
until display shows run time.
Note: un time will be displayed
for 5 seconds after dial is turned.
❑Turn Station Dial in either direction
to display exact run time. (Example
shown: 15 minutes).
❑Repeat procedure with each station
dial to set a run time for each station.
Note: Turning Station Dial past 90
minute mark will manually
activate station. If this occurs,
simply turn dial counterclockwise
to 0 (OFF) and reset to desired run
time.
❑Set all unused stations to 0 (OFF).
(continued)
5
15 30
60
90
1
MANUAL
OFF
5
15 30
60
90
MANUAL
OFF
1
1
5
15 30
60
90
MANUAL
OFF
5
15 30
60
90
1
MANUAL
OFF
6
5
15 30
60
90
MANUAL
OFF

7
(Set Station Run Time Continued)
■To Change Run Time Mode From
Minutes To Hours, Or Hours To
Minutes:
❑Turn Station Dial slowly until
display shows Run Time.
Immediately press Set Time Key to
change mode. (Example shown:
Changing Minutes to Hours Mode.)
Note: Hours Mode displays un
Time in three digits. (Example
shown: 2 hours and 20 minutes.)
❑Turn Station Dial to display exact
Run Time. (Example shown: 3 hours
and 30 minutes.)
Note: To change back to Minutes
Mode, repeat procedure.
❑Apply Hours Decal (supplied) to
stations set in Hours Mode.
Note: As each station operates during a watering cycle, its indicator will be
On and its set run time will count down on display.
12
5
15 30
60
90
MANUAL
OFF
CURRENT
TIME
12
5
15 30
60
90
MANUAL
OFF
1369
5
15 30
60
90 1369

8
❑Position Run/Program switch to
“PROGRAM”.
❑Press Program Select Key to select
Program A.
Note: Station Indicators will show
which stations are currently
assigned to program selected.
❑Press Enter Key. Station 1 indicator
will begin flashing.
(continued)
STEP 4 - Assign Stations to Programs
In order for a station to operate automatically, it must be assigned to a
watering program. Each station can be assigned to Program “A” and/or
Program “B”. For example, lawn stations are typically assigned to Program A
and shrub stations to Program B. This enables the stations to operate on
different schedules. Additionally, stations can be assigned to both programs if
they are required to operate more frequently. Please note, that initially, all
stations are pre-assigned to both programs before the controller is shipped
from the factory. Therefore, it is important to use the following procedure for
Programs A and B.
RUN PROGRAM
PROGRAM A
PROGRAM B
ENTER
1
5
15 30
60
90
MANUAL
OFF

9
(Assign Stations to Program Continued)
❑Choose to assign or delete indicated
station.
– To assign station to program,
press Enter Key. Indicator stays on;
next station indicator begins
flashing.
– To delete station from program,
press Delete Key. Indicator turns off;
next station indicator begins flashing.
❑Continue to assign or delete all
remaining stations for Program A.
❑Press Program Select Key to select
Program B.
❑Repeat procedure to assign or delete
stations for Program B.
❑Position Run/Program switch to
“RUN.”
(continued)
OR
2
5
15 30
60
90
MANUAL
OFF
1
5
15 30
60
90
MANUAL
OFF
ENTER
2
5
15 30
60
90
MANUAL
OFF
1
5
15 30
60
90
MANUAL
OFF
DELETE
RUN PROGRAM
PROGRAM A
PROGRAM B

10
(Assign Stations to Program Continued)
■To Review Current Station
Assignment For Either Program:
❑Press Program Select Key to select
desired program.
❑Press and hold ey again. Station
Indicators will show which stations
are currently assigned. A flashing
indicator signifies Station un Time
is set in Hours Mode.
(Example shown: Stations 1 and 3
are assigned to Program B. Station 3
has run time set in Hours Mode.)
PROGRAM A
PROGRAM B
OFF OFF
5
15 30
60
90
1
5
15 30
60
90
2
5
15 30
3
PROGRAM A
PROGRAM B OFF

11
STEP 5 - Set Daily Watering Schedule
So far you have set a Run Time for each station and assigned it to one or both
programs. This step will determine the daily watering schedule that each
program will follow.
Two types of watering schedules are available: Calendar and Interval. The
Calendar schedule enables you to select watering days in a two wee (14 day)
cycle. The Interval schedule allows you to select watering days by how often
watering is required (or permitted in some areas). The Intervals are: every day
(1:1), every other day (1:2), every third day (1:3) and so on, up to every seventh
day (1:7).
Each program can have a Calendar schedule and an Interval schedule.
However, only one type of schedule can be operational at a given time. This is
determined by the position of the Watering Day Schedule Switch. UP for
Calendar; DOWN for Interval. Use the following procedure to set a daily
watering schedule for each program.
■To Set A Calendar Schedule:
❑Press Program Select Key to
select Program A.
❑Position Watering Day Schedule
Switch UP.
Note: Indicators will show
watering schedule currently set.
(Example shown: Monday,
Wednesday and Friday.)
❑Press Wee Select Key to select
wee 1.
(continued)
PROGRAM A
PROGRAM B
Fr
1:6
Sa
We Th
1:7
1:4 1:5
Tu
1:3
Su Mo
1:1 1:2
ACTIVE WATERING DAYS 14 DAY CALENDAR
INTERVAL
WEEK 12

12
(Select Daily Watering Schedule
Continued)
❑Press Enter Key - Sunday Indicator
will begin flashing.
❑Choose to Enter or Delete indicated
day.
– To enter day into program, press
Enter Key. Indicator stays on; next
day indicator begins flashing.
– To delete day from program, press
Delete Key. Indicator turns off; next
day indicator begins flashing.
❑Continue this procedure to enter or
delete all days of wee 1.
❑Press Wee Select Key to select
wee 2.
❑Repeat procedure for all days of
wee 2.
(continued)
OR
ENTER Fr
1:6
Sa
We Th
1:7
1:4 1:5
Tu
1:3
Su Mo
1:1 1:2
ACTIVE WATERING DAYS 14 DAY CALENDAR
INTERVAL
ENTER Fr
1:6
Sa
We Th
1:7
1:4 1:5
Tu
1:3
Su Mo
1:1 1:2
ACTIVE WATERING DAYS 14 DAY CALENDAR
INTERVAL
Fr
1:6
Sa
We Th
1:7
1:4 1:5
Tu
1:3
Su Mo
1:1 1:2
ACTIVE WATERING DAYS 14 DAY CALENDAR
INTERVAL
DELETE
WEEK 12

13
(Select Daily Watering Schedule
Continued)
❑Press Program Select Key to select
Program B.
❑Repeat procedure to set Calendar
schedule for all days of wee 1 and 2
in Program B.
■To Set An Interval Schedule:
❑Press Program Select Key to select
Program A.
❑Position Watering Day Schedule
Switch down.
Note: Indicator will show watering
interval currently set. (Example
shown: 1:2 - every other day.)
❑Press Delete Key repeatedly until
indicator flashes at desired interval.
(Example shown: 1:3 - every third
day.)
(continued)
PROGRAM A
PROGRAM B
PROGRAM A
PROGRAM B
Fr
1:6
Sa
We Th
1:7
1:4 1:5
Tu
1:3
Su Mo
1:1 1:2
ACTIVE WATERING DAYS 14 DAY CALENDAR
INTERVAL
Fr
1:6
Sa
We Th
1:7
1:4 1:5
Tu
1:3
Su Mo
1:1 1:2
ACTIVE WATERING DAYS 14 DAY CALENDAR
INTERVAL
DELETE

14
(Select Daily Watering Schedule
Continued)
❑Press Enter Key to select desired
interval.
❑Press Program Select Key to select
Program B. Repeat procedure to set
Interval schedule for Program B.
Note: First active day of Interval
schedule is the day when Interval
was selected. (Example shown: An
Interval schedule of 1:3 has just
been selected and the current day
is Monday. All watering days for
this example are shown at right in
bold type.)
Note: If an automatic start time is
already past for today, watering
will not occur until the next
Interval day (Thursday in the
example shown).
ENTER Fr
1:6
Sa
We Th
1:7
1:4 1:5
Tu
1:3
Su Mo
1:1 1:2
ACTIVE WATERING DAYS 14 DAY CALENDAR
INTERVAL
PROGRAM A
PROGRAM B
SU MO TU WE TH FR SA
MO TH
SU WE SA
TU FR
ENTER Fr
1:6
Sa
We Th
1:7
1:4 1:5
Tu
1:3
Su Mo
1:1 1:2
ACTIVE WATERING DAYS 14 DAY CALENDAR
INTERVAL

15
STEP 6 - Set Program Start Times
The sixth and final step is to determine the time of day you want to start a
watering program. Each program can be started up to 3 times per scheduled

watering day. Start times are set by the position of the program start time
controls. The upper controls set Program “A” start times and the lower controls
set Program “B” start times.
When selecting start times, please eep in mind the following operational
characteristics:
– A start time initiates a complete program cycle, not an individual station.
– A start time can only be set to occur on the hour or in ten minute increments
past the hour, such as 3:00, 3:10, 3:20 etc.
– If the same start time is selected in both programs, the “A” program will run
first. Upon its completion, the “B” program will start. Both programs cannot
operate at the same time.
– A start time which occurs during a watering program already in progress will
be delayed until the program in progress is finished.
– The earliest start time will always occur first regardless if set for Program A
or Program B.
Use the following procedure to select program start times.
❑Position all start time controls to left
(OFF). Slide first control slowly to
right until display shows start time.
Note: Display shows Start Time for
5 seconds after control is moved.
❑Slide control in either direction to
display exact start time (Example
shown: 8:00 p.m.).
❑Repeat this procedure for all
additional start times in both
programs.
36912
369
am
12
pm
36912
369
am
12
pm
Note: The controller is now fully programmed for automatic operation.

16
Manual Operations and Controls
Manual Operation
Manual Operation allows you to start the Automatic Watering Program or
Individual Stations whenever needed. Three types of Manual Operations are
available: Full Program, Partial Program and Selected Station(s).
Full Program enables all active stations assigned to Programs A and B to
operate in sequence.
Partial Program allows all active stations following a selected station to operate
in sequence.
Selected Station(s) enables manual operation of a single station or a group of
stations (six maximum) selected to operate in any chosen order.
Upon completion of any manual operation, controller will return to automatic
mode.
To cancel Manual Operation, turn controller off by pressing On/Off Key. Press
ey again, returning controller to Automatic Mode.
■Full Program:
❑Press Manual Operation Key one
time. Program A will operate followed
immediately by Program B.
(continued)
■Partial Program:
❑Press Manual Operation Key repeatedly
until indicator of first desired station in
sequence is on. Station selected will
operate followed in sequence by all
remaining active stations.
Note: If first selected station is assigned to Program A, all remaining
stations assigned to Programs A and B will operate in sequence. If first
selected station is only assigned to Program B (signified by Program B
indicator On) only remaining stations assigned to Program B will operate.
MANUAL
OPERATION
MANUAL
OPERATION

17
■Selected Stations:
❑Turn Station Dial of selected station
(cloc wise) until display shows two
dashes.
❑Turn dial (countercloc wise) to set
run time. Station will start and
operate for set run time. Display will
count down run time remaining.
❑Repeat this procedure to select up to
5 additional stations. Stations will
operate in sequence selected.
Note: Station run time will remain (as set for Manual Operation) after
controller returns to Automatic Mode. eset run time for each station as
necessary after Manual Operation is finished.
(Manual Operation Continued)
1
5
15 30
60
90
MANUAL
OFF
1
5
15 30
60
90
MANUAL
OFF

18
Watering Delay ™
Controller operation can be suspended from 1 to 4 days by pressing the
Watering Delay Key. Each time the ey is pressed, operation is
suspended for one day. The Watering Delay Indicator will flash one,
two, three, or four times (repeatedly) signifying the number of days remaining
until controller operation resumes. Example: If you wish to suspend watering for
the rest of today and tomorrow, press ey twice.
Note: The controller recognizes the end of a day at 12:00 a.m. (midnight).
To cancel Watering Delay at any time, simply press and hold the Watering
Delay Key for 5 seconds. Controller will resume operation.
Seasonal Ad ust Control™
Changes in weather often require a change in sprin ler run time to prevent
under or over watering. A unique feature of the Vision II, called Seasonal
Adjust Control, enables station run times to be increased or decreased
simultaneously by the movement of a single control.
Sliding the control from center position (100%) toward minus (–) reduces run
time in 5% increments down to 25% of setting. Sliding the control toward
plus (+) increases run time in 5% increments up to 200%. To reduce the
possibility of water run off, any setting above 100% automatically increases
the set run time, calculates half of the increased value, and operates the
watering cycle twice.
Example: A station has a set run time of 20 minutes. The Seasonal Adjust
Control is set at 150% which increases the run time value to 30 minutes. The
actual run time of the station will be 15 minutes per each of two concurrent
watering cycles.
Note: Station run time will be displayed at 100% value regardless of
Seasonal Adjust Control setting. Actual run time will appear on display
and count down while station is operating.
■To Change Setting From 100%:
❑Slide Seasonal Adjust Control
toward (+) or (–). Percentage of
increase or decrease appears on
display for 5 seconds after control
is moved. (Example shown: 65%.)
-+
%
SEASONAL ADJUST
WATERING DELAY
1-4 DAYS
Table of contents
Other Toro Controllers manuals

Toro
Toro TIS-240 User manual

Toro
Toro SRL-IR User manual

Toro
Toro TEMPUS Series User manual

Toro
Toro TEMPUS-AG-MV User manual

Toro
Toro LoRa Tempus Air MV User manual

Toro
Toro Network LTC Plus User manual

Toro
Toro TEMPUS DC LCD User manual

Toro
Toro Wireless RainSensor 53770 User manual

Toro
Toro DDCWP Series User manual

Toro
Toro TDC+ User guide

Toro
Toro Micro-Master Series User manual

Toro
Toro TEMPUS DC LCD User manual

Toro
Toro ECXTRA Operating instructions

Toro
Toro EVOLUTION Series User manual

Toro
Toro EVOLUTION Series User manual

Toro
Toro 24 User manual

Toro
Toro TBC WP Instruction Manual

Toro
Toro TMC-424 Series User manual

Toro
Toro NO FOUND TMC-424E User manual

Toro
Toro TMC-212 User manual