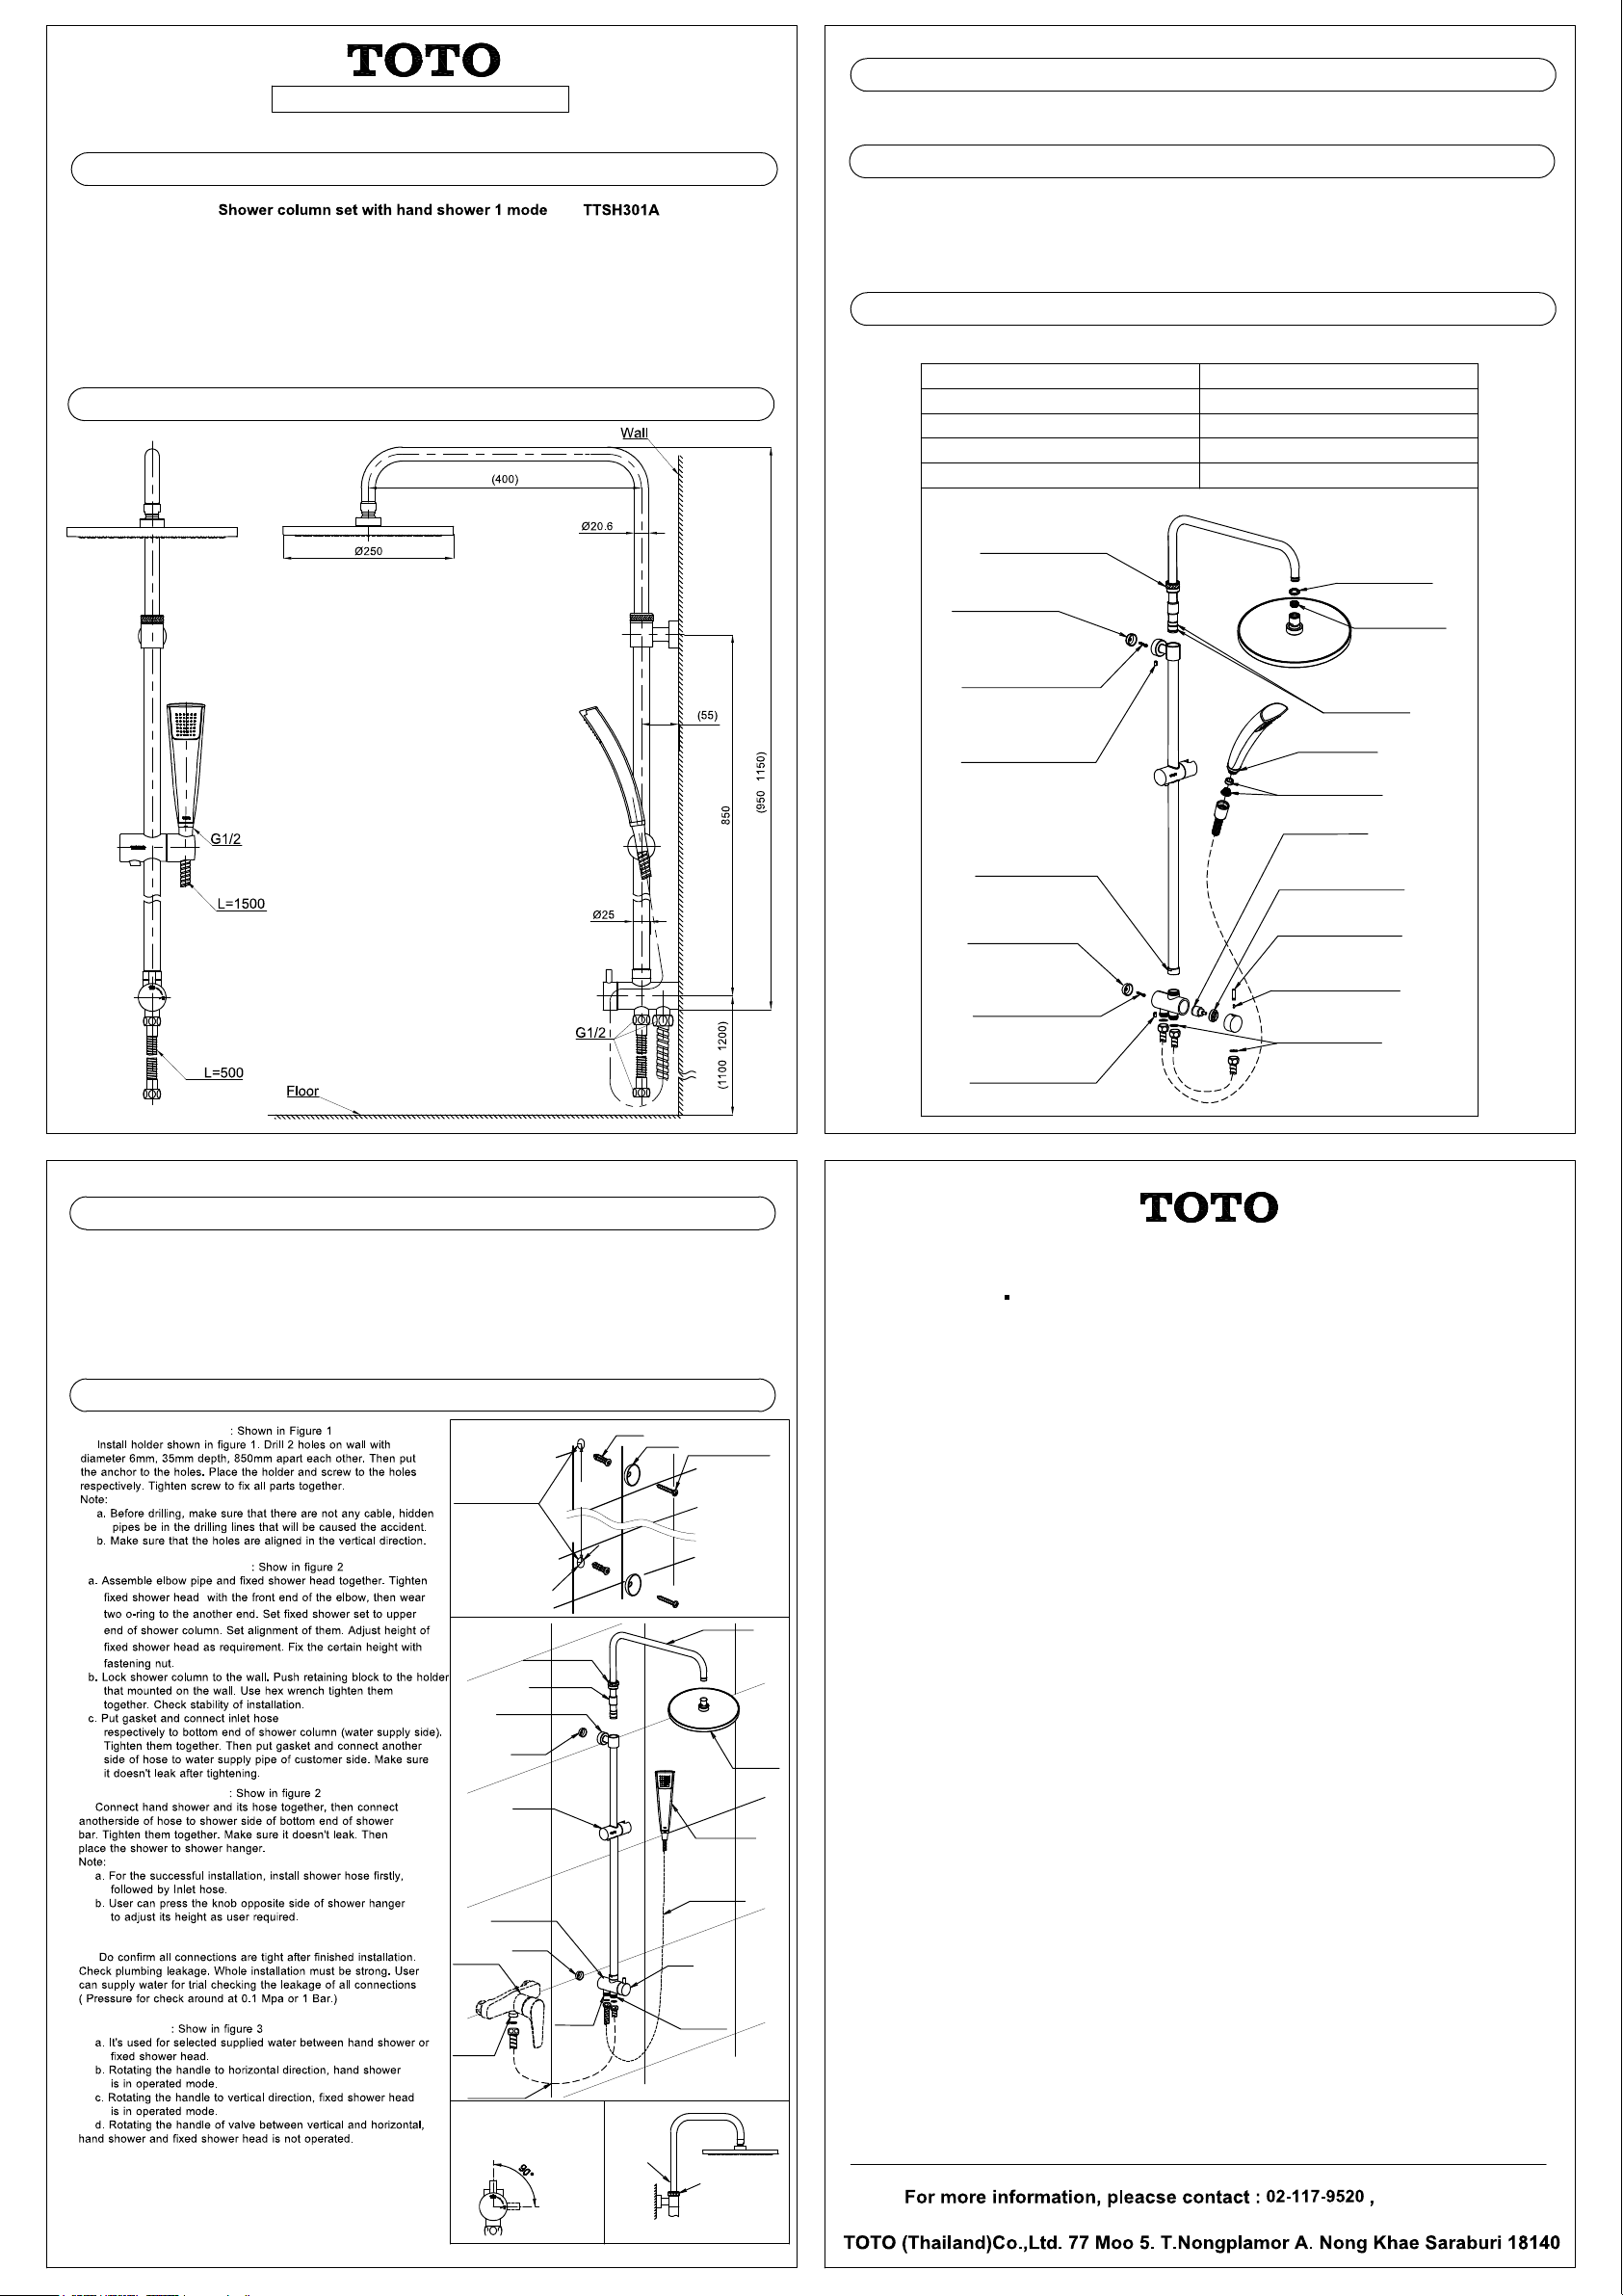
Component parts
Shower column uni 1 se
Elbow pipe 1 pc
Fixed shower head (round) 1 pc
Wall holder + fixing screws 1 se
Inle hose (L= 500 ) 1 pc
Shower hose (L= 1500) 1 pc
Hand shower 1 pc
Diver er valve 1 se
Product Drawing
Installation and owner manual
To use he produc effec ively. Should follow he ins ruc ions of his manual.
Cuations be ore installation
1. Ho and cold wa er pressure during use.
Minimum pressure...................................0.05 MPa (flow pressure)
Maximum pressure..................................0.75 MPa (S a ic pressure)
2. The ho wa er empera ure should no exceed 65°C. I 's recommended in he range of 60±5°C, ho wa er do no use s ream
3. The ambien empera ure should above 0°C, if no higher han 0°C, produc will be deformed, cracked and o her damaged.
4. To preven in ernal damage of shower, he wa er empera ure of discharge side should no exceed 60°C. I 's recommended
below 45°C.
5. Incase haven' used for long ime. I may be lead o in ernal and ex ernal corrosion.
Installation Procedure
Figure 1
Figure 2
Ø6
Hole Dep h 35 mm
Anchor
Holder Self- apping screw
(850)
Holder
Fas ening nu
Taper washer
Re aining wall blocks
Elbow Pipe
Fixed
shower
head
Hand shower
Shower hose
Shower hanger
Diver er valve
Holder
Fauce
Wa er ou
connec or
Wa er in
connec ion
Lever
Wa er ou
fi ings
Inle hose
(L=500mm)
Warning!
To preven being scalded due o malfunc ion, make sure ha he diver er valve is swi ched o he hand shower posi ion in order o
es he wa er empera ure before using. Canno allow he diver er valve swi ched undernea h over head shower.
Care and Cleaning
Troubleshooting
Check Item
Af er ins alla ion, if here is malfunc ions occuring, please see below.
10, 13, 18
9, 11, 12, 14, 18
1, 2, 3, 4, 5, 6, 7, 8
15, 16, 17
Uns able selec ion valve
Vibra ion
Wa er leak
Problem
Less flow ra e
Fas ening nu
(1. Have enough igh )
(3. Have enough igh )
(4. Have enough igh )
(7. Have enough igh )
Holder
(2. Have enough igh )
Screw
Hex screw
(5. Have enough igh )
Fas ening nu
(6. Have enough igh )
Holder
Screw
(8. Have enough igh )
Hex screw
Flow Regula or
(10. Dir )
O-Rings
(11. Scra ched)
Gaske rubber
(14. Scra ched)
(15. Have enough igh )
Pressure spool
(16. Have enough igh )
(17. Have enough igh )
Lever
Fas ening screw
Packing
(18. Scra ched, dir )
Your new produc is designed for years of rouble-free performance.
1. Keep i looking new by cleaning i periodically wi h mild soap, rinsing horoughly wi h warm wa er and drying wi h a clean, sof clo h.
2. Do no use abrasive cleaners, s eel wool or harsh chemicals, as hese will damage he produc .
3. Do no use liquid cleaners wi h acid-base con en . Incase of acciden ally happening, rinse wi h pure wa er immedia ely in order o
preven any damage of produc surface.
Failure o follow hese ins ruc ions may void your warran y.
Warranty
Please find de ail in warran y card as a ached
Adjus ing nu
200mm lif
Hand shower posi ion
Fixed shower posi ion
Figure 3 Figure 4
Packing
(9. Scra ched, dir )
Flow regula or+S ainner
(13. Scra ched, dir )
~
~
O-rings
(12. Scra ched)
1. Installation wall mouting
2. Installation ixed shower head
3. Installation hand shower
4. Trial or tightening con irmatiom
5. Diverter Valve
Require adjus he heigh of he fixed shower
by adjus ing he nu .


