manuals.online logo
Brands
  1. Home
  2. •
  3. Brands
  4. •
  5. Toto
  6. •
  7. Plumbing Product
  8. •
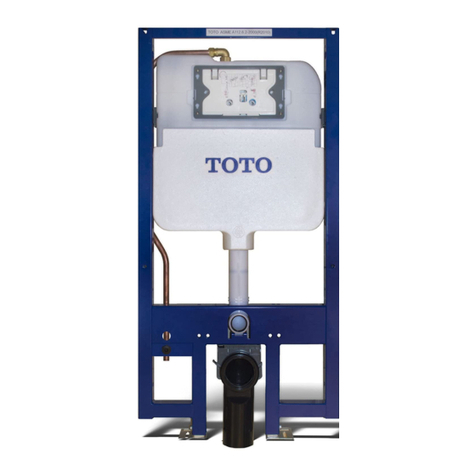
  9. Toto WH053 Instruction Manual

Toto WH053 Instruction Manual

563288 13-1.1
NO.
1
2
3
4
5
6
7.1
7.2
8.1
8.2
8.3
9
10
NAME QTY FUNCTION
THE INSTALLING INSTRUCTION FOR CONCEALED TANK
FFL
Note:
1.Please install the frame before paving the tiles. The dimensional unit
is millimeter.
2.Please subject to the object as right if it is not in conformity with the
components in picture.
FFL of finish face, all dimension is millimeter
Important remind:
Please read through this Instructions carefully prior to installation,
and our company shall not be responsible for any loss caused by
not installating accrding with this Instructions. There are lubricants
in production for toilet bowl installation.
Please confirm the FFL according to the overall indoor fitment
method. Line out the FFL on the wall and always regard FFL as
datum line of 0 height.
Accessories List:
1.
2.
3. Please confirm the wall is the main wall ,the thickness exceed
80mm and it can bear more than 300kgf strength when the
strength act on the front of toilet bowl.
8
9
7
8.2
8.3
300kgf
FFL
0
main wall
Straight flush pipe of some products are
offered with two kinds of seal gaskets A.B
which can be selected according to toilet
bowl type during installation.
B
A
7.2
7.1
8.1
隱壁水箱安裝說明書
重要提示:
1.安裝前請仔細閱讀說明書,本公司不承擔因安裝人員未按說
明書要求施工所造成的損失,產品中包含潤滑劑,安裝馬桶
時選用。
2.在安裝支架前,應先確認安裝位置,並根據室內裝修的總體
策劃,確定裝修完成後的地面FFL,在安裝牆上畫出FFL線,
並始終以此作為高度0的基準線。
3.在安裝支架前,請確認所安裝牆壁是承重牆,牆壁厚度在
80mm以上,且當300kgf以上的力施加於完工後的馬桶前
端時,牆壁應能承受這股拉力。
1.請在貼磁磚前安裝本產品;
所有的尺寸單位為mm。
2.圖示零件若與實物不符,請以實物為準。
=完成地面
配件一覽表
在某些型號產品沖水直管密封套提供兩種
規格A.B,安裝時根據馬桶型號選配。
名稱 數量 用途
4
1
1
1
1
1
1
1
2
2
2
1
1
膨脹螺栓組Expansion bolt components
保護框Protection frame
保護蓋Protection cover
管夾Clamp
排汚彎管Drainage pipe
沖水彎管Flush pipe
排汚直管件Drainage straight pipe components
沖水直管件Flush straight pipe components
長螺桿Long bolt
透明桿套Transparent long bolt shield
固定馬桶零件組Long bolt components
塞頭Plug
止水栓Angle valve
機架固定用To fix frame 
砌牆時為按鈕面板預留空間用
For space reservation of push button plate when building the wall
防止裝修時雜物進入水箱
To prevent sundries falling into the tank when fitment
固定排汚彎管用To fix drainage pipe 
馬桶排汚管道To drain 
馬桶排水管道To supply water to flush 
用於馬桶的連接及與牆面距離
To connect the bended pipes to toilet bowl 
固定馬桶用To fix toilet bowl 
保護長螺桿用To shield long bolt 
固定馬桶用To fix toilet bowl 
砌牆時為沖水直管和排水直管預留空間用
To reserve space for straight pipes when laying bricks 
進水閥開關
On-off For Filling Water
安裝牆
型號:WH053/WH063
Please make sure W is between 70 to 130.
1. Dimensions and Supply Pipe-laying
Top inlet
Back inlet
安裝牆
Main wall
Main wall
130
安裝牆
Main wall
500
FFL
0
1000
230
180
1185
35
320
100
40(40~240)
G1/2
400-10
0
135(135~220)
110(110~195)
0~200
340
360
FFL
0
1000
1170
G1/2
400-10
0
135(135~220)
110(110~195)
0~200
1048.5
Main wall
130
Please make sure W is between 70 to 130.
一、基本尺寸及供水管道鋪設:
水箱頂孔進水
安裝牆
要求排水管中心到安裝牆面的
距離(W)在70~130之間
安裝牆
水箱壁面進水
要求排水管中心到安裝牆面的
距離(W)在70~130之間
80/100
W
1
2
1
2
When excretory tube lean 45°
it can only be fixed in Position 2(W=80/100).
2.Drainage Pipe Installation
If necessary, adjust the clamp and drainage pipe location
according to the bowl dimension.
(Keep this clamp tightened to professionals!)
Remind: The function of drainage would be worse when the installation
angle of drainage pipe exceed 45°
Install drainage pipe clamp.
二、排汚管安裝:
提示:排汚管側向安裝角度一般不超過45º,
否則很可能會影響排汚效果。
排汚管裝上管夾
位置1Position1:W=60(第1溝槽)/80(第2溝槽)
位置2Position2:W=80(第1溝槽)/100(第2溝槽)
排汚管傾度45度時,只能裝在位置2(W=80/100)。
必要時,根據馬桶尺寸調整管夾及排汚管位置。
(非專業人員請勿鬆開此管夾)
3.
1.
4.
2.
5. 6.
10mm
50mm
3.Drill on the main wall and floor 4.Install Expansion Bolts
As shown on picture:
1.Drill 10*50
2. Insert expansion bolt
3. Tighten nut to strain bolt;
4. Unscrew nut;
5.Hold screw and washer for
later use.
“a” should be adjusted
according to real location
of drainage pipe.
1000
FFL
0
360
340
B
a
1170
A
100
99
8101 102
1m
5. Install Wall-fixing bracket and adjust floor-fixing bracket
Wall-fixing bracket
Floor-fixing bracket
三、在安裝牆及地面鑽孔:(Ø10深50) 四、膨脹螺絲的使用方法
“a”可根據排水管實際
位置確定
步驟說明:
1.鑽孔Ø10深50
2.裝入膨脹螺栓
3.栓緊螺帽,以拉緊螺栓
4.旋開螺帽
5.取走螺帽、墊片,待用
五、牆腳組裝、地腳調節
牆面固定架
地面固定架
6. Adjust horizontally and vertically, and tighten bolt:
Please pre-tighten bolt,
and tighten after bracket
adjustment.
A
B
2
1
1
A
B
C
D
E
“Click” “Click”
F
1
3
19
2
Install angle valve,
connect it to inlet valve with hose.
Angle valve
Supply pipe
Flexible hose
connecting inlet valve
六、調整支架的水平和垂直,並鎖緊螺栓:
進水管
止水栓
連接進水閥軟管
螺栓請先預鎖緊,
待支架調整確定後再鎖緊。 將進水止水栓裝上並與
軟管和進水管連接。
7.Install Plug:
Sketch of installed frame
8.The thickness of fixed wall is 20~60mm
(measured from the front of frame to the finished tile surface)
20~60
“Click”
Important remind: When the concealed tank fixed completely, it is important to test
leaking with water upon 12 hours before fixing wall.
180
230
For the fixing of the long screw, there
are two groups of screw holes on the
bracket which are of different
distance. Please choose the right
position according to the size of the
toilet bowl.
七、裝入裝修嵌件安裝:
注:
對於長螺栓的固定支撐上提供兩組
不同距離螺栓孔,裝配時,
請根據馬桶的尺寸進行選擇安裝。
重要提示:在支架安裝後砌牆前,務必通水並放置12小時以上,檢查是否有滲漏
現象。
八、裝修牆厚度範圍20~60mm
(從固定支架外面算起,到貼磚後完成面)
完成示意圖
9.Install toilet bowl:
d
L2
L1
L1+6mm
L2+3mm
Set Straight Pipes into Flush Bend and Drain Bend
properly, and marks lines.
Add lubricant onto the Rubber Gaskets of two Straight
Pipes and set them into Bowl. Flush Pipe seal
Gasket assembly see 3.1, 3.2 and 3.3 .
Mark lines as shows.
L1 is the distance of two marks on Flush Straight Pipe, and
L2 is that of two marks on Drainpipe Straight Pipe.
Cut Straight Pipe just as shows.
Chamfer and trim the cutting edges on the
shortened Straight pipes (as shows). Adjusting length for Bolt is d+25mm as shows.
First install Drain Straight Pipe into Drain Bend, and
second install Flush Straight Pipe into Hole on Bowl. Install Bowl. Station Bowl properly.
.3.2.1
.6.5.4
.9.8.7
.21.11.01
Take out the sponge with silicon oil and smear it on
connecting edges of Straight Pipe and Bends.
九、安裝馬桶
將直管分別插入沖水管和排水管到位,並畫線標示
分別在兩根直管橡膠墊上抹上潤滑油,再插入馬桶。
(沖水直管密封套安裝方式見3.1、3.2、3.3)
如圖畫線標示
沖水直管所畫線標示之間L1;
排水直管所畫線標示之間L2。
如圖切割直管
將鋸短的兩管管口端面打磨倒角(如圖),
並去除毛邊。
取出帶有潤滑油海綿在直管與彎管的結合
處抹上潤滑油。 螺桿調整長度為d+25mm(如圖)。
鎖定。
插入馬桶。
排水直管插入排水管,再將沖水直管
插入馬桶孔。
All data contained is based upon the last product information available at the time of publication. We reserves
the right to implement changes of product characteristics, packaging and availability at any time without further notice.
TAIWANTOTOCO.,LTD
AfterServiceFreeTel:0800-890-250
10.Installation of tank fittings:
The tank fittings have been installed before leaving factory.
The above sketches are only for reference.
A
B
1
2
3
4
A
1
2B
5
1
2
2
1
3.1 3.2 3.3
沖水直管密封套。
密封套A
密封套B
沖水直管密封套A安裝示意。
密封套安裝時連同沖水直管一起插入
馬桶孔內。
沖水直管密封套B安裝示意。
密封套B安裝: 首先需將密封套裝入馬桶孔;
然後將沖水直管塞進密封套B。
十、水箱配件安裝圖:
水箱配件出廠時已裝好;
以上圖示僅供參考。
所有的資料是按出版時的最新產品資料編寫的,本公司保留在任何時候不需通知便可更改產品的特徵、包裝
或供應產品的權利。
台灣東陶股份有限公司
TOTO免付費專線:0800-890-250

This manual suits for next models

1

Other Toto Plumbing Product manuals

Toto DONNA TX109LD User manual

Toto

Toto DONNA TX109LD User manual

Toto GLORIA TX301BG User manual

Toto

Toto GLORIA TX301BG User manual

Toto CST654MF Installation instructions

Toto

Toto CST654MF Installation instructions

Toto SOIREE TL960dDLQ Installation instructions

Toto

Toto SOIREE TL960dDLQ Installation instructions

Toto Connelly TS221E Installation instructions

Toto

Toto Connelly TS221E Installation instructions

Toto TBV01801U Installation instructions

Toto

Toto TBV01801U Installation instructions

Toto TLP02301 User manual

Toto

Toto TLP02301 User manual

Toto Oberon-D TL363SDA05 Installation instructions

Toto

Toto Oberon-D TL363SDA05 Installation instructions

Toto NEOREST SE User manual

Toto

Toto NEOREST SE User manual

Toto MONO TX119LMBR User manual

Toto

Toto MONO TX119LMBR User manual

Toto TBW02005A User manual

Toto

Toto TBW02005A User manual

Toto GLORIA TX411SGC User manual

Toto

Toto GLORIA TX411SGC User manual

Toto Vivian TS220T Installation instructions

Toto

Toto Vivian TS220T Installation instructions

Toto TTSH301M Installation instructions

Toto

Toto TTSH301M Installation instructions

Toto ETHOS Series Installation instructions

Toto

Toto ETHOS Series Installation instructions

Toto EGO TX443SEN User manual

Toto

Toto EGO TX443SEN User manual

Toto Aquia TS416T Installation instructions

Toto

Toto Aquia TS416T Installation instructions

Toto SOIREE TS960J Installation instructions

Toto

Toto SOIREE TS960J Installation instructions

Toto TBW02004U4 Installation instructions

Toto

Toto TBW02004U4 Installation instructions

Toto GLORIA TX471SPN User manual

Toto

Toto GLORIA TX471SPN User manual

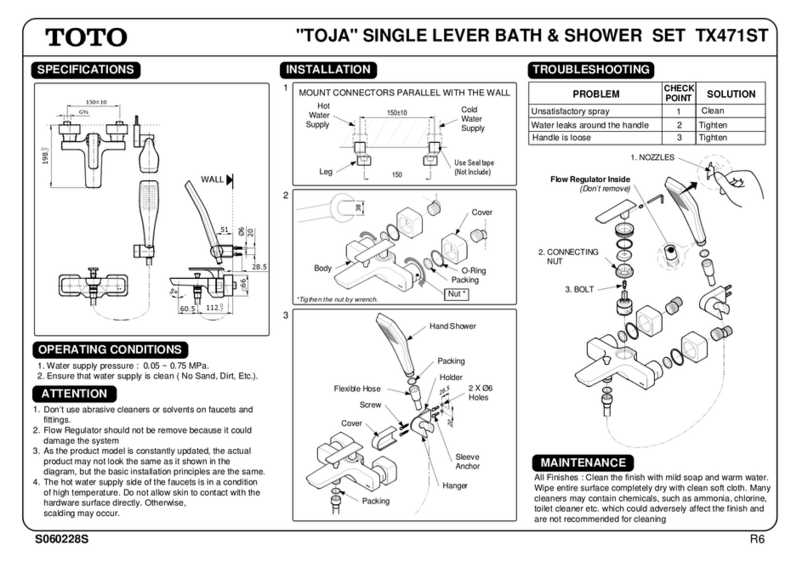
Toto TOJA TX471ST User manual

Toto

Toto TOJA TX471ST User manual

Toto ZL Series Installation instructions

Toto

Toto ZL Series Installation instructions

Toto UMI TX496SUN User manual

Toto

Toto UMI TX496SUN User manual

Toto SS234 User manual

Toto

Toto SS234 User manual

Popular Plumbing Product manuals by other brands

Jeans Machine mose 8801/B installation instructions

Jeans Machine

Jeans Machine mose 8801/B installation instructions

Sanela SLU 14B Mounting instructions

Sanela

Sanela SLU 14B Mounting instructions

Hans Grohe Crometta Vario 26330 Series Assembly instructions

Hans Grohe

Hans Grohe Crometta Vario 26330 Series Assembly instructions

Teuco 155 Assembly instructions

Teuco

Teuco 155 Assembly instructions

Hans Grohe Focus M43 120 1jet 71816 Series Instructions for use/assembly instructions

Hans Grohe

Hans Grohe Focus M43 120 1jet 71816 Series Instructions for use/assembly instructions

Kraus KCV-120 installation manual

Kraus

Kraus KCV-120 installation manual

ulsonix UNICLEAN 7 user manual

ulsonix

ulsonix UNICLEAN 7 user manual

Moen ELECTRONIC FAUCET 8301 user manual

Moen

Moen ELECTRONIC FAUCET 8301 user manual

American Standard Colony Soft 4275.550 Specification sheet

American Standard

American Standard Colony Soft 4275.550 Specification sheet

Grohe Aquatower 27 200 manual

Grohe

Grohe Aquatower 27 200 manual

Aqua Free Baclyser neo S user manual

Aqua Free

Aqua Free Baclyser neo S user manual

Blanco Single Bowl Undermount 513-616 Specifications

Blanco

Blanco Single Bowl Undermount 513-616 Specifications

Watermark Blue 37-2 instructions

Watermark

Watermark Blue 37-2 instructions

Carron Phoenix SAVONA Fitting Instructions & Contents List

Carron Phoenix

Carron Phoenix SAVONA Fitting Instructions & Contents List

McAlpine Mountain FRANCIS ANTHONY LITTLE GOURMET... Installation sheet

McAlpine

McAlpine Mountain FRANCIS ANTHONY LITTLE GOURMET... Installation sheet

Moen 84438 Series Specifications

Moen

Moen 84438 Series Specifications

American Standard Colony Right Height Elongated 14" Rough-In Toilet... Specification sheet

American Standard

American Standard Colony Right Height Elongated 14" Rough-In Toilet... Specification sheet

Vortex Linear owner's manual

Vortex

Vortex Linear owner's manual

manuals.online logo
manuals.online logoBrands
  • About & Mission
  • Contact us
  • Privacy Policy
  • Terms and Conditions

Copyright 2025 Manuals.Online. All Rights Reserved.