touch bionics i-limb ultra User manual

Part number: MA01069: Issue No. 2, March 2013
i-limbTM ultra
User Manual

2
This symbol signies important information and is used throughout the manual.
This document provides information for i-limb ultra users and should be used in conjunction with advice
from your clinical team.
A seperate USB datadrive is included with your kit that contains all relevant product manual.
Refer to www.touchbionics.com to ensure you have the latest copy of this document.

3 of 35
Part number: MA01069: Issue No. 2, March 2013
2
Table of Contents
1 i-limb ultra 1.1 Product Description
1.2 Know Your Prosthesis
2 Socket Interface 2.1 Socket Interface and Control
2.2 Battery Charging
3 biosim 3.1 biosim Overview
3.2 biosim Connecting
3.3 Navigating biosim
3.3.1 Features
3.3.2 Training
3.3.3 Hand Health Check
3.3.4 Exit
4 i-limb ultra Coverings 4.1 Cover Options
4.2 Donning an i-limb skin active cover
4.3 Dong an i-limb skin active cover
4.4 Donning the i-limb skin natural cover
4.5 Dong the i-limb skin natural cover
4.6 Wear and Care Guidelines for i-limb natural and custom covers
5 Support Information 5.1 Troubleshooting
5.2 Frequently Asked Questions
5.3 Warnings and Precautions
6 User Information 6.1 User Details
7 Appendix 7.1 Technical Information
7.2 Component Compatibility
7.3 Warranty

4 of 35
Part number: MA01069: Issue No. 2, March 2013
1.1 Product Description
We are pleased that you and your clinical team have decided that
the i-limb ultra is the most appropriate prosthetic hand for your
needs. You may have discussed your functional goals with your
clinical team. This manual along with the training and support
of your clinical team should help you understand how the i-limb
ultra will help you accomplish these goals.
Each digit of the hand has its own motor. This allows the digits to
run until they meet the object being grasped, so the hand takes
the shape of that object (compliant grip). Fig. 1 is an example of a
hand holding a ball with compliant grip. The power for the hand
comes from a battery which has been built into the prosthesis
that your prosthetist has made especially for you. Initially you
and your clinical team will develop control of opening and closing
your hand. At this stage, you should be able to carry out a wide
range of functional daily activities using your i-limb ultra hand.
As you become more condent and adept you may begin to
expand the number of features that you use and therefore get
more from your i-limb ultra. It takes time and practice to gain
control and master the best way to do tasks with your prosthetic
hand. The pace at which individuals gain this control varies, but
we encourage you to be patient and seek training.
Your i-limb ultra is covered under the Touch Care program. The
duration of the program varies, please contact your clinician
regarding this program.
1.0 i-limb ultra
Figure 1.

4 of 35 5 of 35
Part number: MA01069: Issue No. 2, March 2013
1.2 Know Your Prosthesis
Each i-limb ultra has a unique identifying number called the serial
number as depicted on the image to the right (g. 2). This is an
important piece of information and we recommend that you
make a note of it on page 25 of this manual.
The i-limb ultra will not provide you with sensation and so
you will not be able to feel things such as heat and moisture.
The i-limb ultra cannot absorb any shock as your own body is able
to do.
If high degrees of force are applied, you may cause damage to
your i-limb ultra. If this does happen, then please contact your
clinical team who will contact Touch Bionics customer care team
to resolve the matter as quickly as possible.
To best protect the hand when carrying objects, the weight
should be distributed evenly across the digits as close to the base
of the digits as much as possible rather than out on the tips of
the digits. The image to the right (g. 3) is an example of how to
correctly carry objects.
The i-limb ultra is like any other electrical device so do not
immerse in water and do not pour water over the device. When
you have to clean the covering then use a damp cloth to remove
any dirt.
If you have any specic questions about your hand then please
contact your clincial team or visit the Touch Bionics web site
www.touchbionics.com for the latest information and news.
Serial Number
Figure 2.
Figure 3.

6 of 35
Part number: MA01069: Issue No. 2, March 2013
Motorized Digit
Knuckle
Palmar Fairing
Manual Thumb Rotator
On / O Switch

6 of 35 7 of 35
Part number: MA01069: Issue No. 2, March 2013
To t the i-limb ultra you have had a socket especially made for
you by your clinical team. They will have made this to ensure it
is comfortable and ts directly onto your remaining limb. You
may experience some redness but this should not last for very
long after you remove the socket. If the socket is causing you
discomfort or aecting you using your i-limb ultra then we
recommend that you contact your clinician.
As part of the tting process, your prosthetist selected the best
method for you to provide control of your device. This tells the
processor (the brains of the hand) whether you want the hand
to open or close. The most common control option is called an
electrode (g. 4). To the right you will see two examples of the
type of electrode that may have been used to build your prothesis.
Electrodes pick up on the electrical activity that your body gives
o when you contract a muscle. While gaining good control may
take time and practice, your method of input should not cause
pain. Talk with your prosthetist if you do not understand how
your input control is working or if it is causing discomfort. There
are also other potential control options that your prosthetist may
have determined to be the best option for you. If so, they will
describe to you how that option works.
2.0 Socket Interface
2.1 Socket Interface and Control
Figure 4. Electrode Options.

8 of 35
Part number: MA01069: Issue No. 2, March 2013
2.2 Battery Charging
As the i-limb ultra is powerd by a battery, you will need to charge
it. How often you need to charge it will depend on how much you
use the i-limb ultra each day. You do not have to worry about over
charging your battery.
First, remove the the socket from your arm and turn the hand o. The
on/o switch is pictured on the image to the right. Hand is o when
switch is in left position.
Only use the charger that was supplied with the your i-limb ultra.
If you intend to travel outside of your home country please ensure
you have a Touch Bionics charger that will work in the country to
which you are traveling. Additional chargers are available from Touch
Bionics. Please contact your clinician for details on how to obtain
them.
For customers residing in parts of Europe and the United States, the
charger pictured to the right (g. 5) is used. The light display is either:
Red – rapid charge
Green – fully charged
Charging time is approximately:
1,300 mAh battery- 90 minutes
2,000 mAh battery- 180 minutes
For customers residing in the UK, Australia and South Africa the
charger illustrated to the right (g. 6) is used. The light display is as
follows:
Solid Amber – on standby
Slow ashing amber – pre-charge mode
Rapid ashing amber – Error
Slow ashing green – maintenance charge
Rapid ashing green – rapid charge
Solid green – fully charged
Charging time from full discharge is approximately:
1,300 mAh battery 180 minutes
2,000 mAh battery 180 minutes
Note: If the green light is on when you rst plug in your device, ensure
that the hand is o.
To charge, insert the charger lead connector into the charge port. A
“click” should be heard on connection.
Insert the charger into the power outlet.
To remove the charger lead connector from the i-limb ultra, grip the
connector and pull directly away from the port. Consult Warnings
and Precautions for additional information.
On/O Switch
Figure 5.
Figure 6.

8 of 35 9 of 35
Part number: MA01069: Issue No. 2, March 2013
As an alternative to charging directly from domestic power, a car
charger is also available. Please contact your clinician to inquire
about car charger options.
To ensure the i-limb ultra is continually functional,
charge at the end of each day.
Switch the hand OFF to preserve battery power
when not in use.
Replace the battery annually for optimal performance.
Contact your clinical team to order new batteries.
DO NOT PULL THE CABLE TO REMOVE THE LEAD.

10 of 35
Part number: MA01069: Issue No. 2, March 2013
3.0 biosim
3.1 biosim Overview
3.2 biosim Connecting
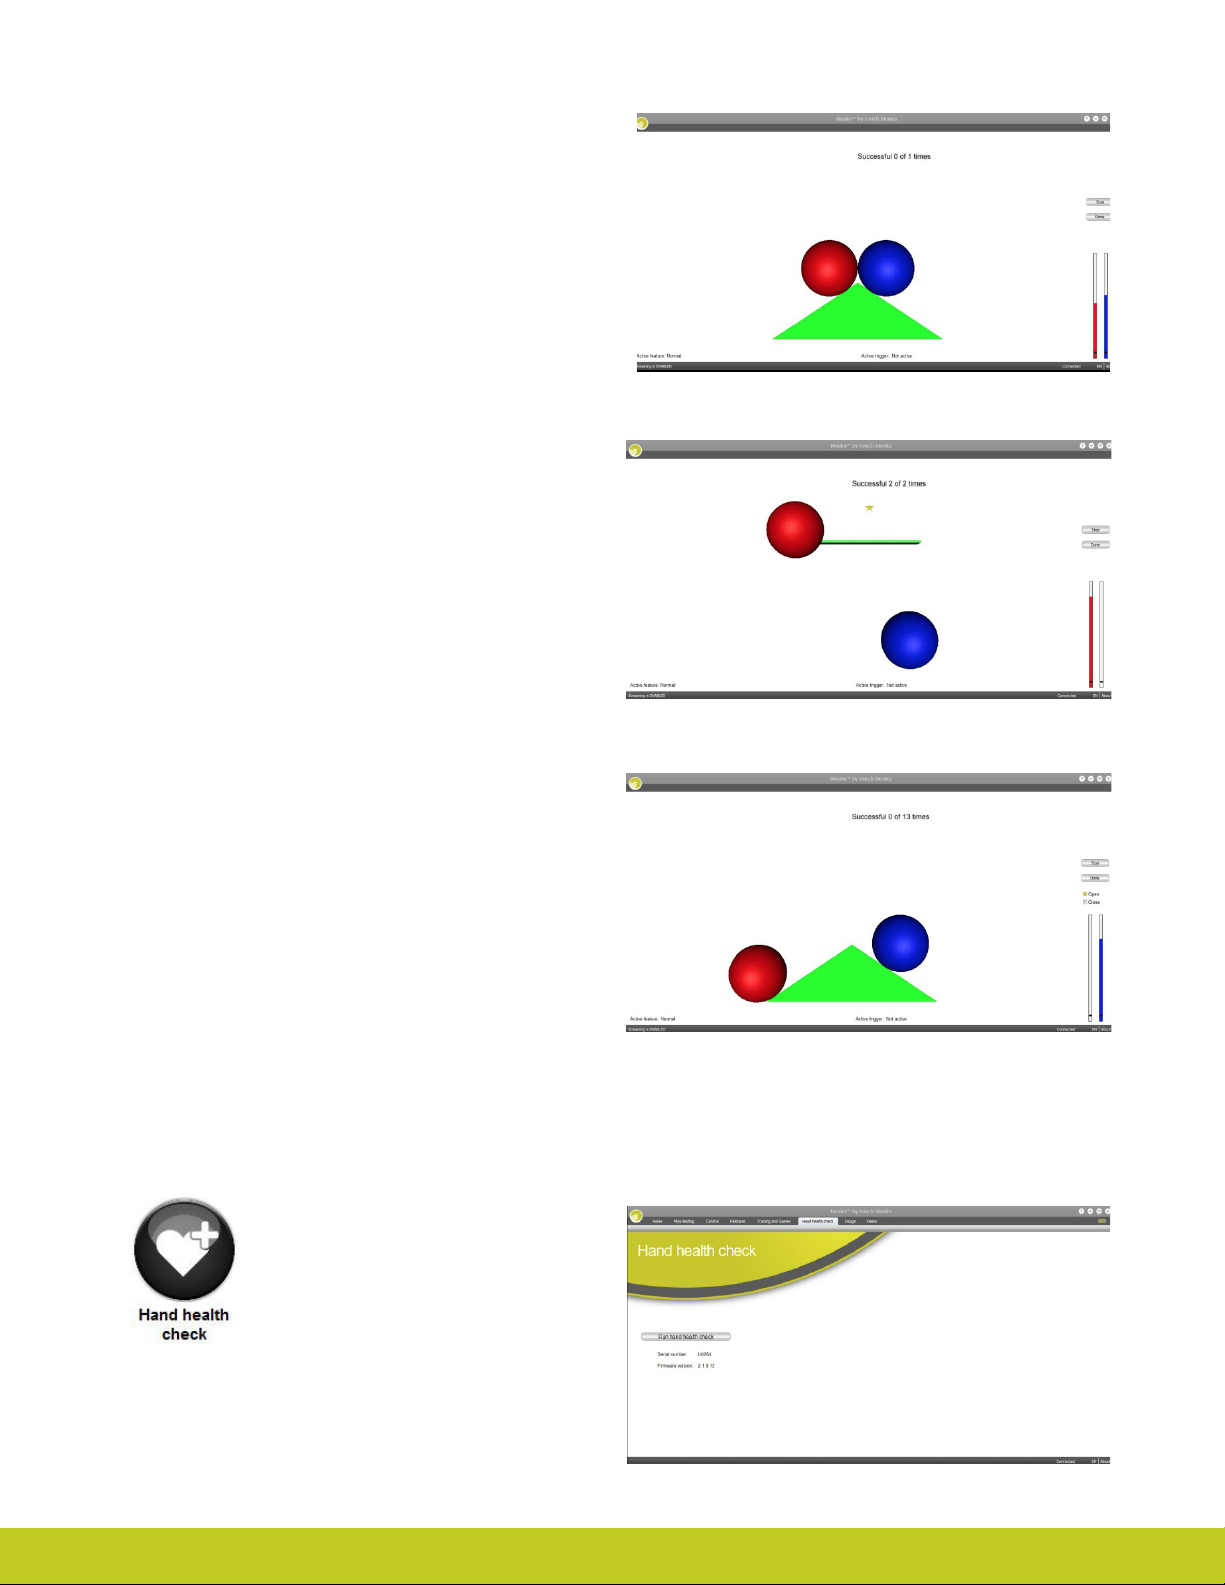
biosim is a software program that wirelessly connects to i-limb
ultra using a Bluetooth® connection.
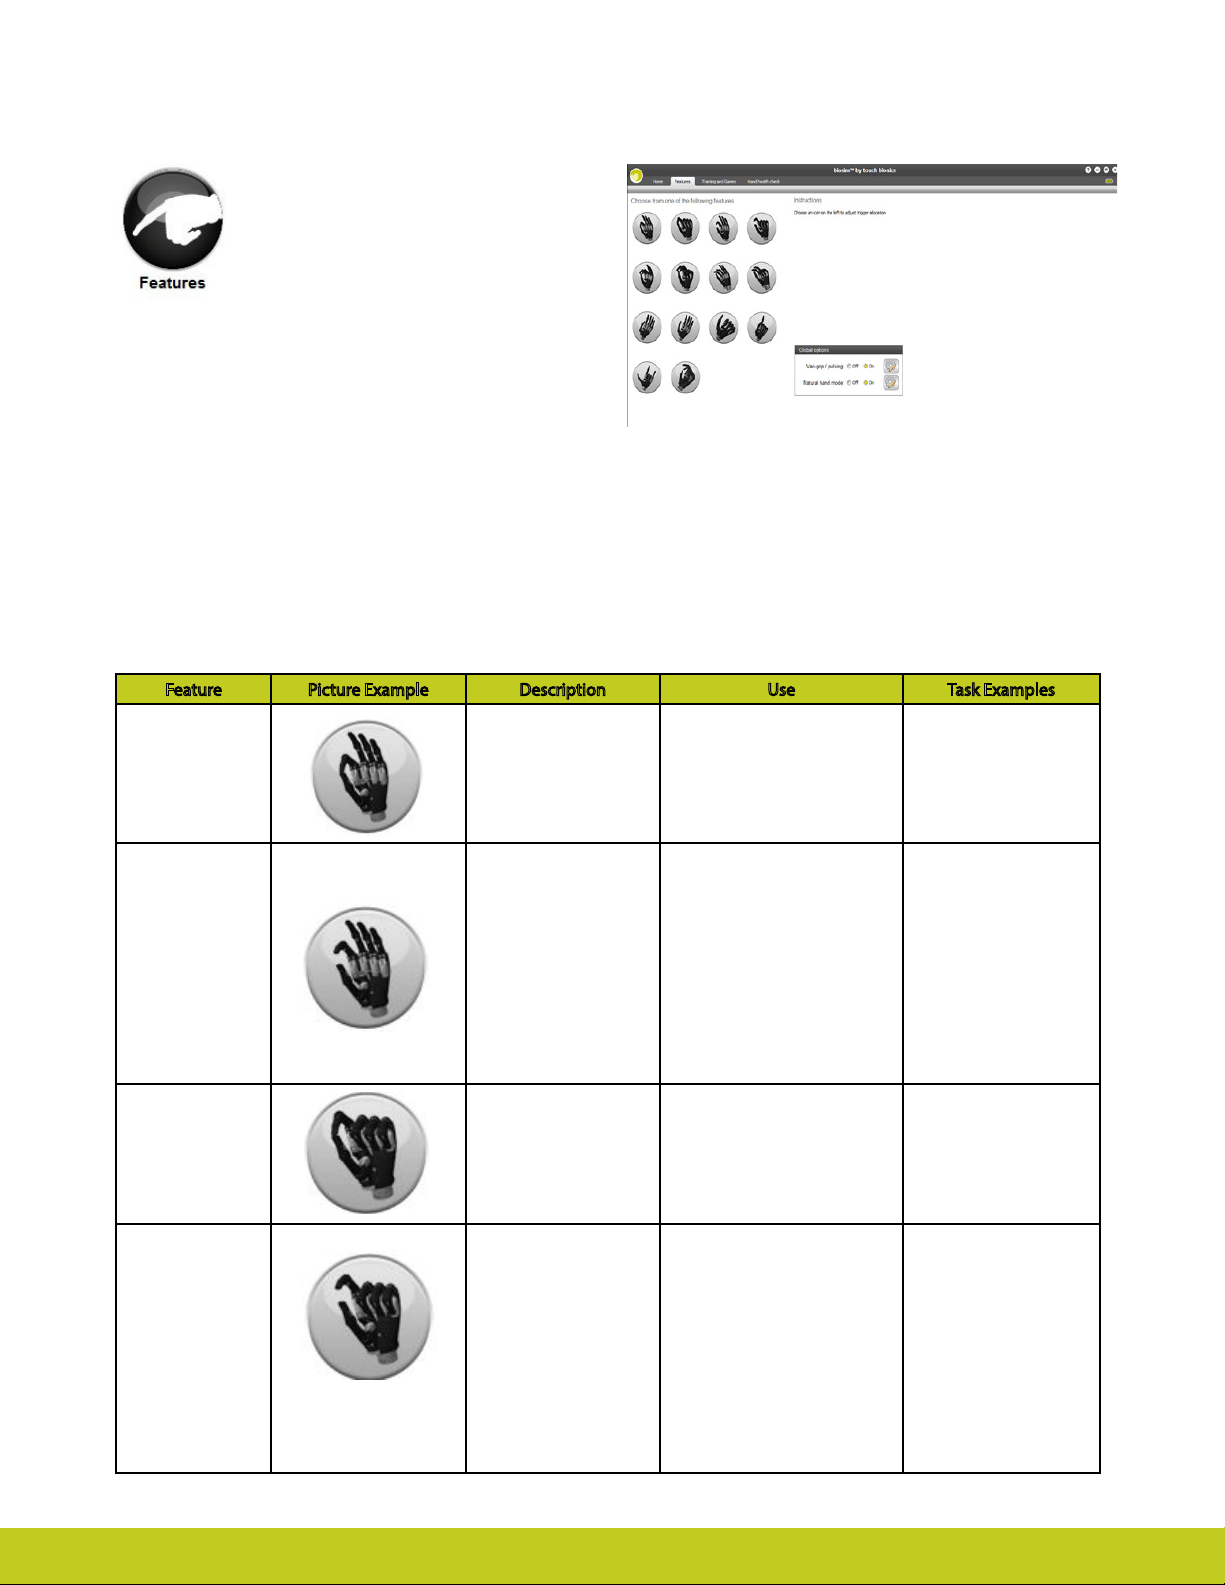
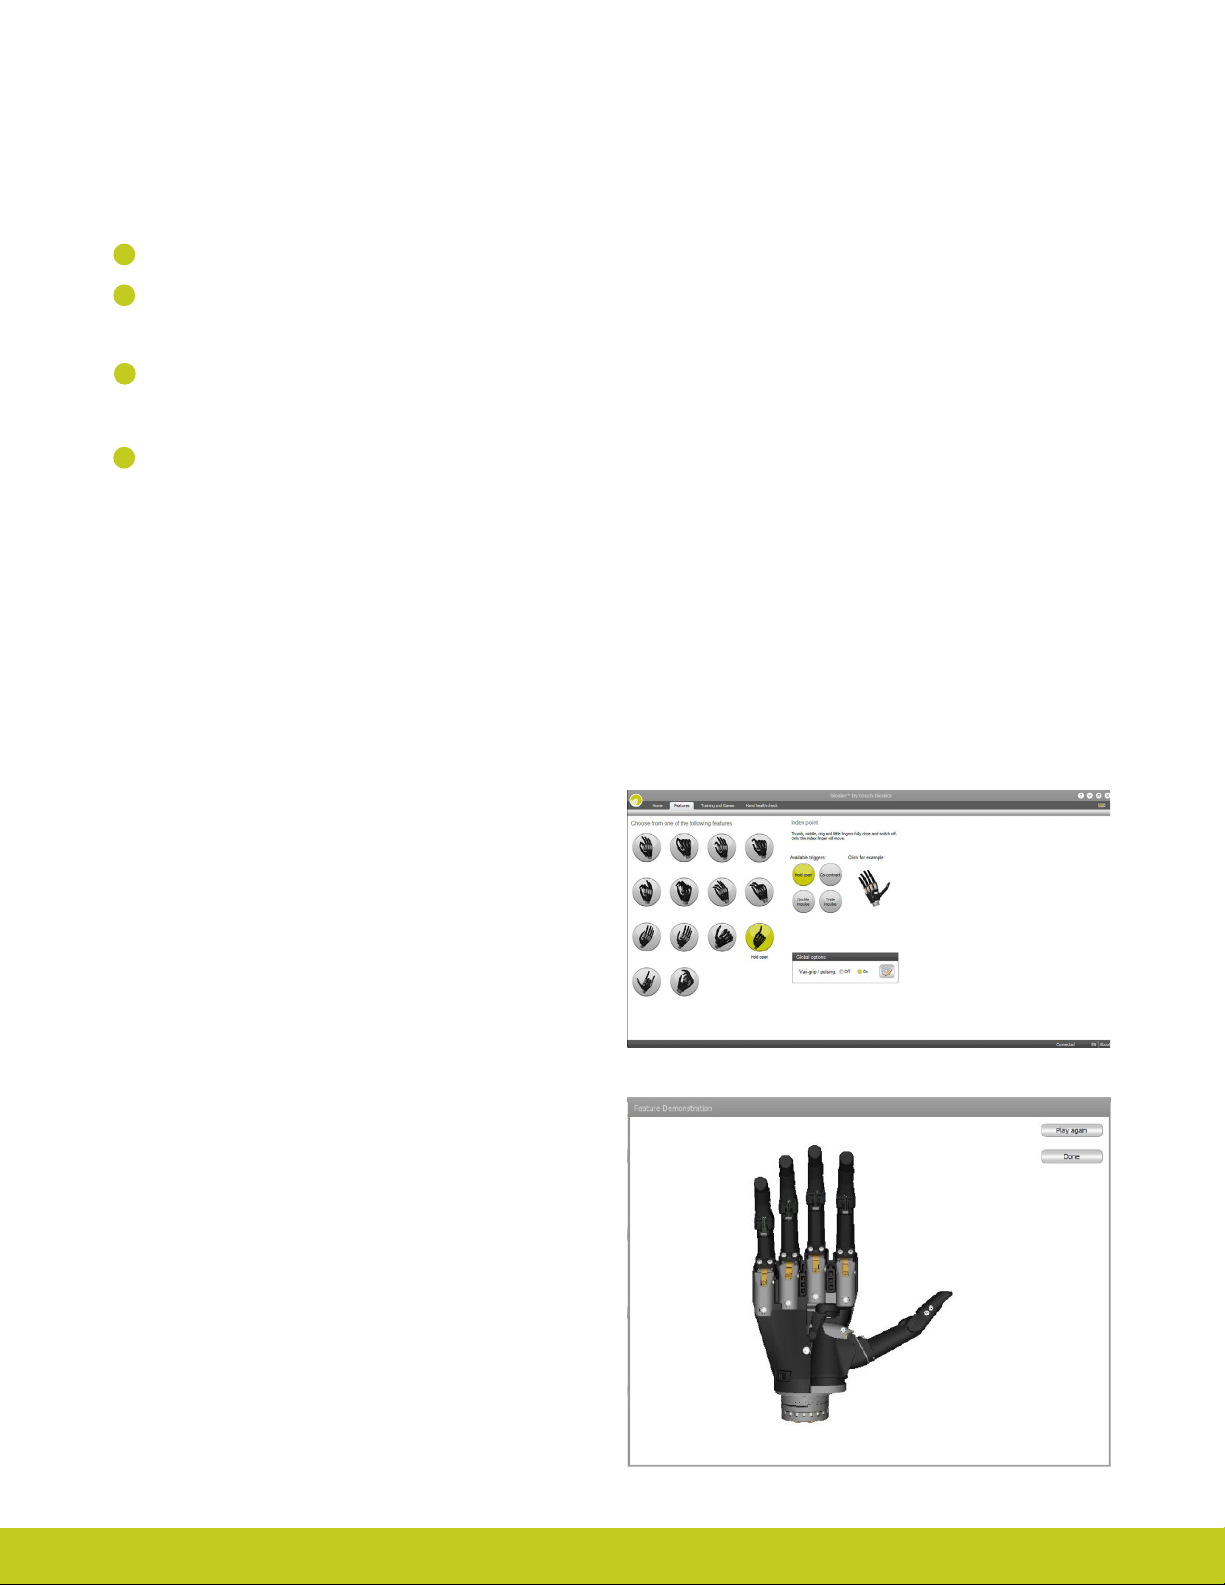
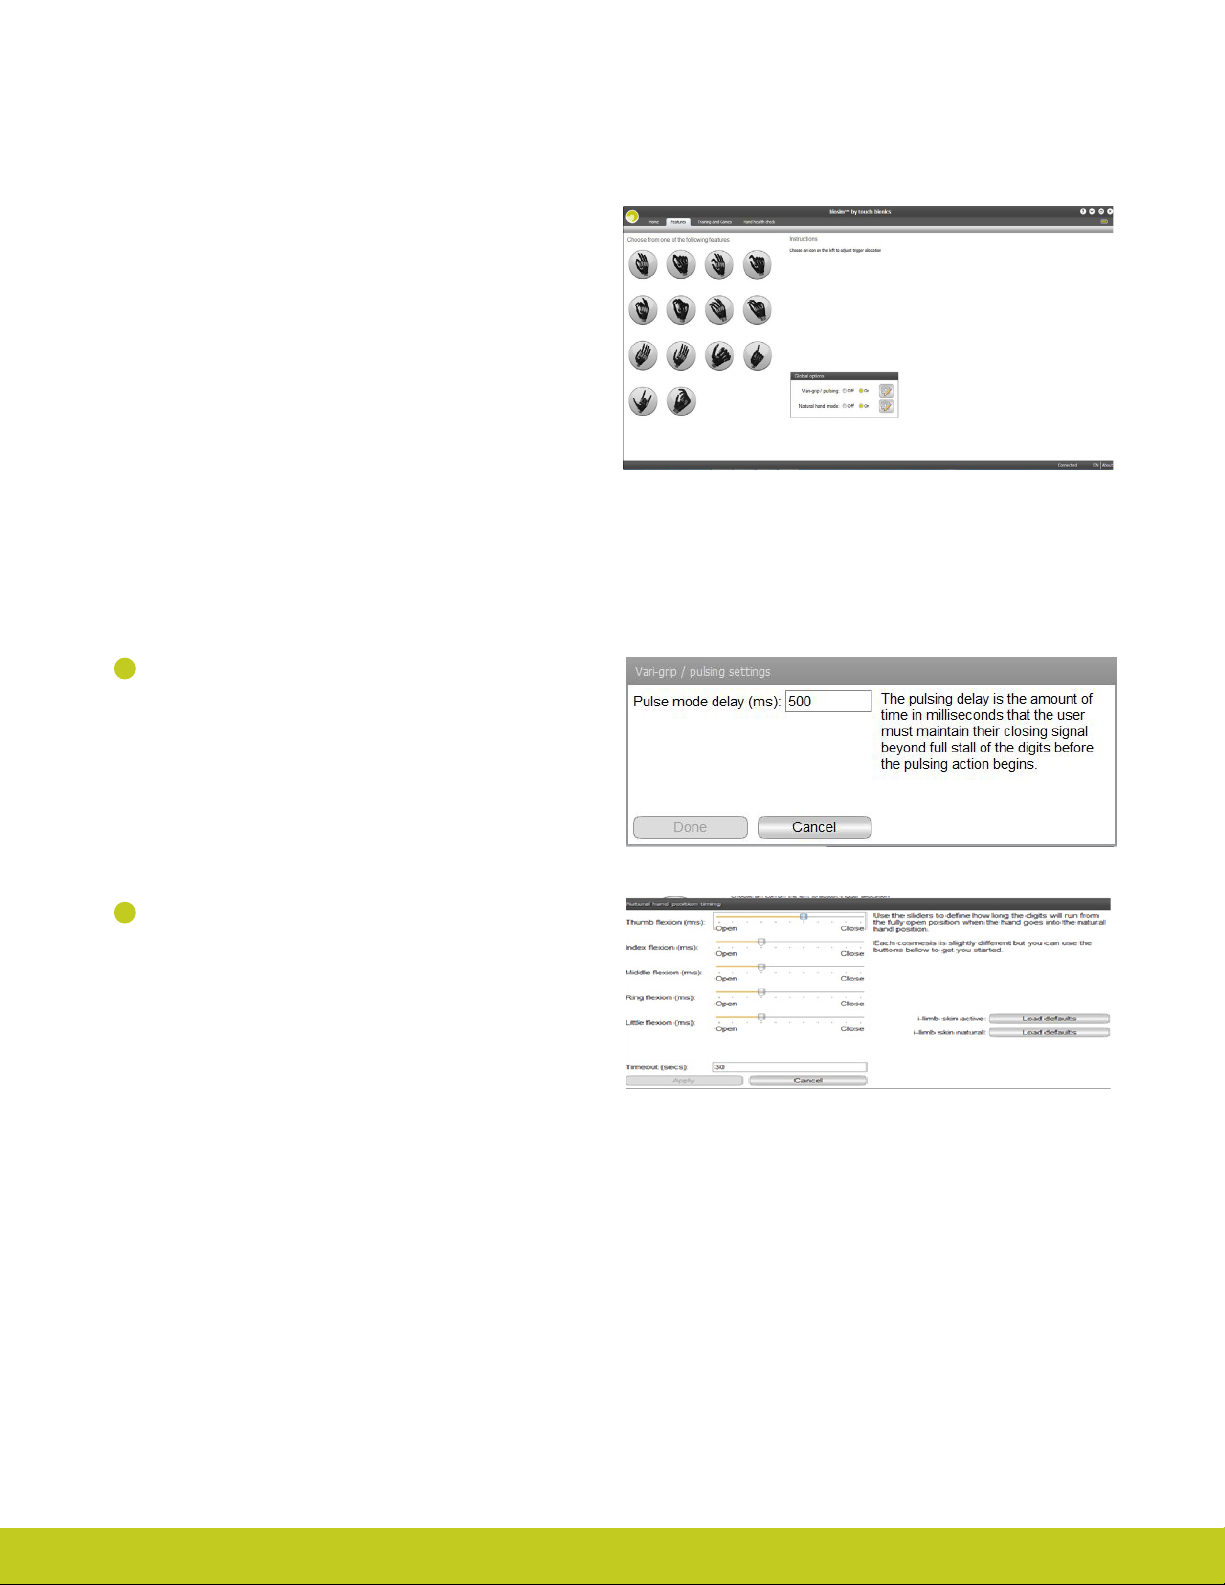
You can use biosim to select the grip patterns and hand features
that you want to use, including the option to create your own
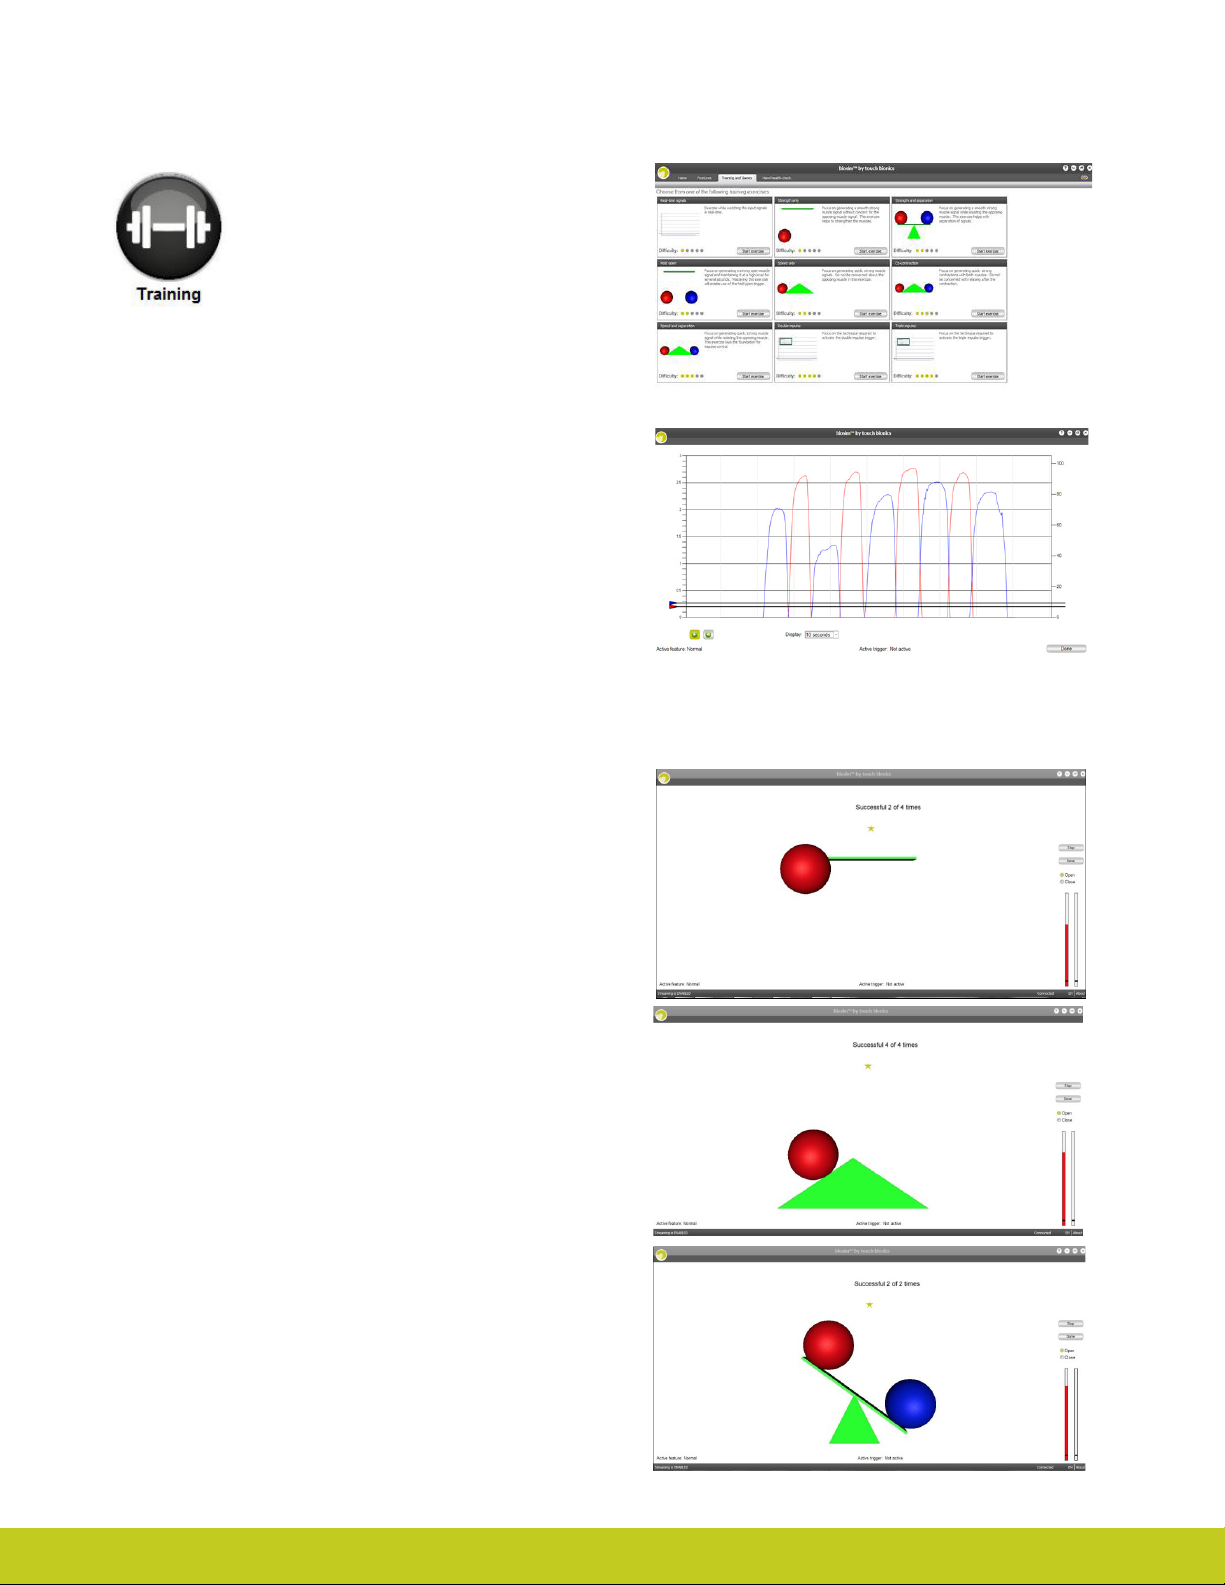
custom gestures. Built-in training modes are included to help
you achieve better results with your prosthesis. It also allows
you to view the signals that are being used to control the hand,
which can be useful if you are struggling with your control.
Your prosthetist will also have a version of biosim to make
changes to how your i-limb ultra functions.
To use the biosim software with the i-limb ultra device you will
need either an iPod® Touch supplied by Touch Bionics (pre-
loaded with the biosim App), or a PC loaded with the biosim
software and used with the biosim Bluetooth handshake
receiver.
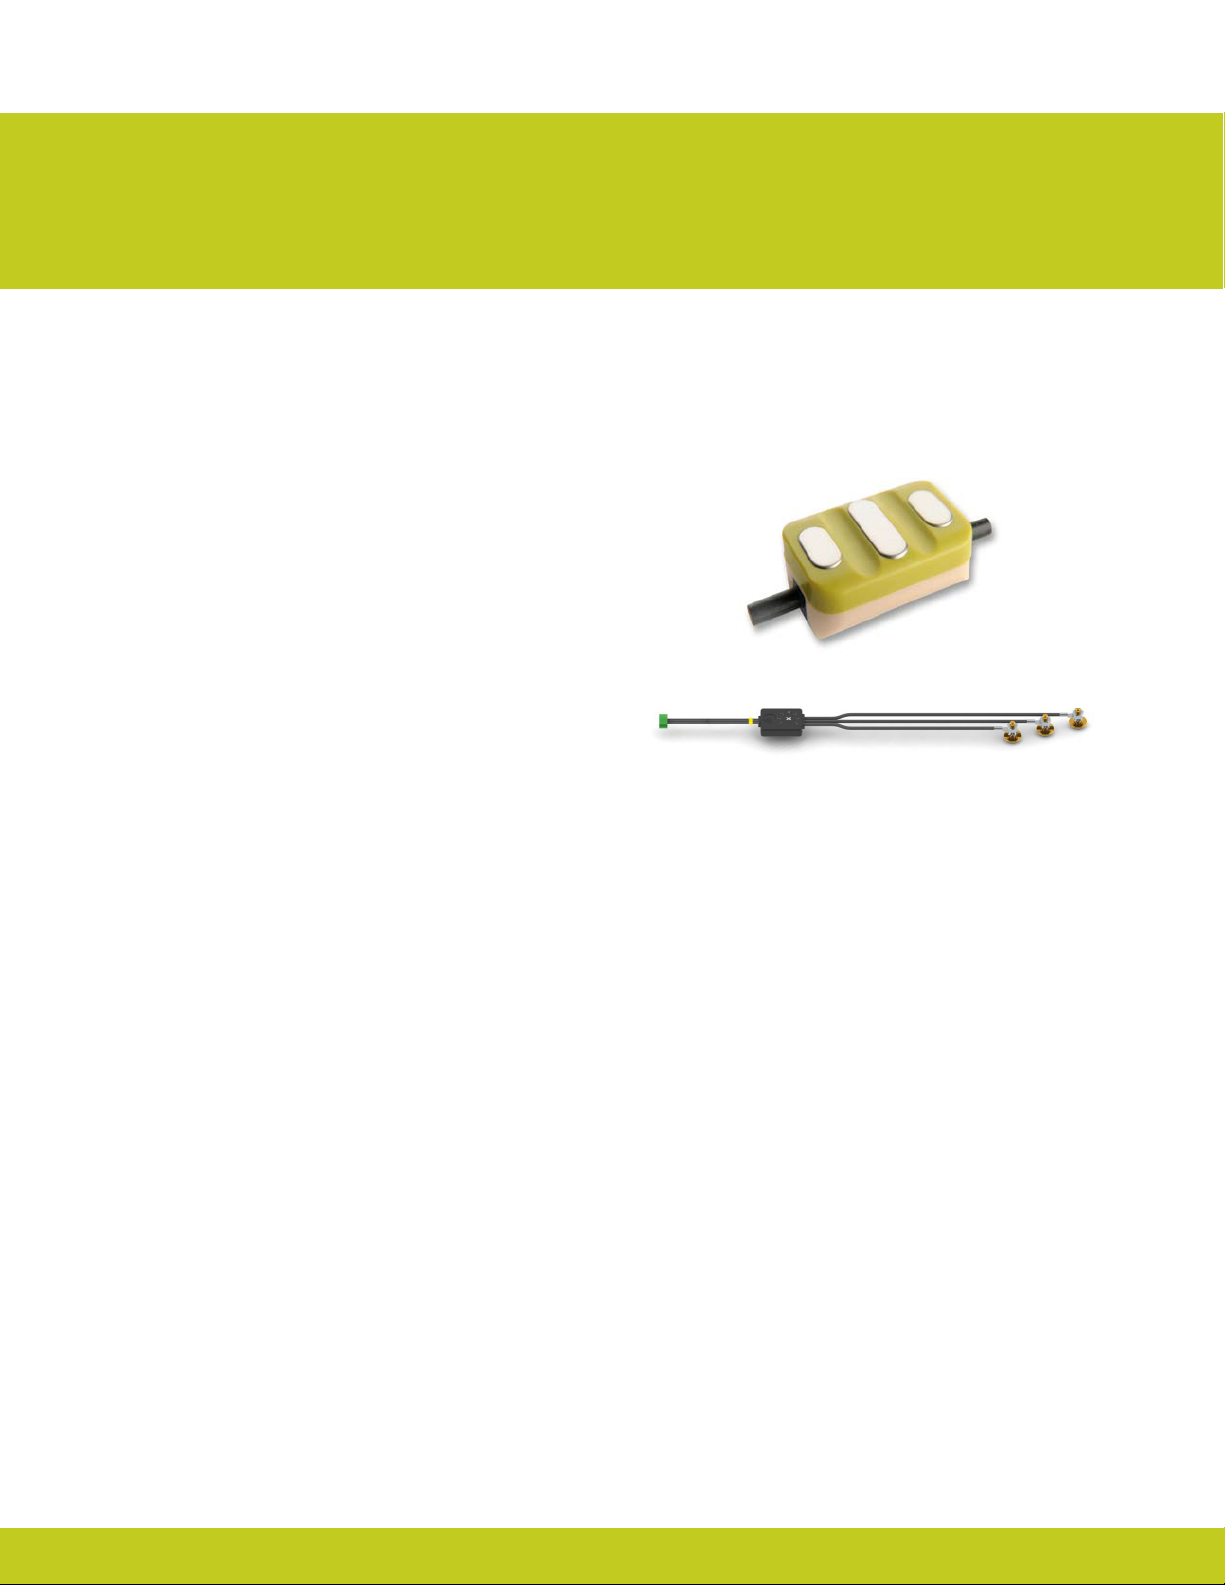
biosim can be downloaded at http://www.touchbionics.com/
biosimdownload. Load biosim by clicking on the biosim icon
(g. 7) which should be clearly visible on your computer’s desk-
top. The biosim handshake USB (g. 8) must also be inserted
into a USB port to allow the Bluetooth® signal to be received by
the i-limb ultra prosthesis. The Handshake Bluetooth® receiver
will pick up signals within a 10 meter range (32 feet).
The opening welcome screen will load and the rst numerical
icon “insert handshake”request will ash. On insertion of the
Bluetooth receiver (biosim USB handshake) the icon will be
constantly lit, the“handshake installed and ready” box will then
self-tick and the second icon“Turn device o, then back on” will
begin to ash. At this point the i-limb ultra device should be
turned o and then on. The third icon “Connecting to device”
will be constantly lit. The tab marked “connect” must now be
selected for the connection to be made, this may take up to 24
seconds.
Figure 7.
PC requirements are as follows: Window XP, Windows Vista,
Windows 7, or Windows 8; Microsoft.NET framework v3.5; USB
port for Bluetooth® connector.
For users of biosim via iPod Touch, please consult the Quick
Start Guide provided (also downloadable from www.touchbion-
ics.com).
Occasionally updates to the biosim software will be provided.
An automated notication will advise you when this is needed.
Follow the steps as advised in the notication.
Figure 8.

10 of 35 11 of 35
Part number: MA01069: Issue No. 2, March 2013
If there is more than one i-limb device within range of the
Bluetooth® receiver then a box will appear listing all devices
by serial number. The correct i-limb ultra device can then be
selected from the list.

12 of 35
Part number: MA01069: Issue No. 2, March 2013
3.3 Navigating biosim
Once you are connected the home screen will now be displayed,
with four options as illustrated. This is the homepage and can be
accessed at any time from subsequent pages.
Features are where you will nd the dierent grip patterns and
gestures the hand can perform. You can also change what grip
patterns are programmed from this page.
Training provides access to the training suite and a selection of
games to improve overall control.
Hand health check icon provides a quick and easy diagnostic
check of the hand to ensure it is working properly.
Exit icon draws the session to a close, exiting the program.

12 of 35 13 of 35
Part number: MA01069: Issue No. 2, March 2013
3.3.1 Features
Click on the features icon to enter the features.
The features are the actual movements of the
hand and triggers are the signals you give in
order to enter the feature.
Precision pinch grip options are best for picking up small items between and the thumb and index nger. There are 4 options
available depending on how you want the other digits to perform while doing the pinch. The most popular is Thumb Precision
Pinch Closed. Many individuals choose the one that works best for them, but some will have more than one precision pinch
programmed depending on the activities they perform most often.
Feature Picture Example Description Use Task Examples
Standard Precision
Pinch Opened
Middle, ring and little
ngers remain fully
opened and switch o.
Both index nger and
thumb will move to
provide grip.
Allows for a wider open-
ing than thumb precision.
Aids with visualization or for
pinching objects where the
non-active digits may get in
the way.
1. Returning cards or
money to wallet
2. Picking up napkins
3. Folding laundry
Thumb Precision
Pinch Opened
Middle, ring and little
ngers remain fully
opened and switch o.
Thumb automatically
moves to a partially
closed position. Only
index nger will move
to provide grip against
the xed thumb.
Accuracy is improved when
picking up an object by allow-
ing you to place the thumb
against the object to be
pinched. Only the index nger
moves to grasp the object.
Ideal for repetitive tasks.
1. Pick up pencil or slim,
long objects
2. Thread needle
3. Sort/Pick up medica-
tions
Standard Preci-
sion Pinch Closed
Middle, ring and little
ngers automatically
close and switch o.
Both index nger and
thumb will move to
provide grip
Will allow for better visualiza-
tion in some tasks, especially
when the working surface is
not at eye level.
1. Slide small object
from shelf over head
2. Pick up small object
from oor
Thumb Precision
Pinch Closed
Middle, ring and little
ngers automatically
close and switch o.
Thumb automatically
moves to a partially
closed position. Only
index nger will move
to provide grip against
the xed thumb.
Can improve accuracy for
picking an object by allow-
ing you to place the thumb
against the object to be
pinched and only the index
nger moves to grasp the ob-
ject. Ideal for repetitive tasks.
1. Pick up and open
sugar packet from a
coee stand
2. Pick up coins
3. Can be used to pull
single trigger such as
with a drill
4. Alternative way to tie
shoes (also see “lateral
grip”)
Precision Pinch Grip Options

14 of 35
Part number: MA01069: Issue No. 2, March 2013
Feature Picture Example Description Use Task Examples
Standard 3 Jaw
Chuck (Tripod)
Opened
Ring and little ngers
remain fully opened
and switch o. Thumb,
index and middle
ngers will move to
provide grip
Allows for larger objects to
be grasped using the tripod
pinch. Can also improve po-
sitioning. May also decrease
compensation at shoulder for
tasks where closed digits get
in the way of the pinch.
1. Preparing food with
the ngers ring and
little nger clear, such
as slicing cucumber or
carrot
2. Holding cell phone
(would manually rotate
thumb laterally based
on size of phone or
setup custom grip)
Standard 3 Jaw
Chuck (Tripod)
Closed
Ring and little ngers
automatically close and
switch o. Thumb, in-
dex and middle ngers
will move to provide
grip.
Allows for the wider opening
when using this feature with
larger objects. Tripod grip al-
lows greater stability for larger
or round objects in compari-
sion to precission pinch.
1. Open bag of chips
2. Pull up socks
Thumb 3 Jaw
Chuck (Tripod)
Opened
Ring and little ngers
remain fully opened
and switch o. Thumb
automatically moves
to a partially closed
position. Only index
and middle ngers
will move to provide
grip against the xed
thumb.
For smaller motion, but
increased accuracy. Tripod
grip allows greater stability
for larger or round objects
in comparision to precission
pinch. Can also decrease
elbow compensation when
seated.
1. Grab spices from
cupboard
Thumb 3 Jaw
Chuck (Tripod)
Closed
Ring and little ngers
automatically close
and switch o. Thumb
automatically moves
to a partially closed
position. Only index
and middle ngers
will move to provide
grip against the xed
thumb.
Can improve stability and
control grasping larger ob-
jects. With thumb in a static
position, your ability to align
an object can improve par-
ticularly on small objects. Can
also decrease elbow compen-
sation when seated.
1. Repetitive fac-
tory type work moving
pieces
2. Grasp pen for writing
3. Laundry
4. Pack bag
Tripod Grip Options
Tripod Grip Options provide a grip where the thumb is meeting up with the index and middle digits. Typically the thumb is rotated
between the index and middle to provide more stability when gripping slightly larger objects than those with the precision pinch grips.
As a result of having a motor in each digit and the hand conforming to the shape of the object being held, the hand will automatically
form a tripod grip when the object is small enough to only be gripped between the thumb, index, and middle digits. The advantage
of using the tripod grip options is if you want the ring and small digits to stay either fully open or fully closed when gripping.

14 of 35 15 of 35
Part number: MA01069: Issue No. 2, March 2013
Feature Picture Example Description Use Task Examples
Thumb Park
Continuous
All four ngers remain
fully open and switch
o. Only the thumb
will move.
For longer dressing period
that will require more than
the 1.5 seconds of thumb park
quick or grasping light weight
at objects. Can also use stall-
ing out digits to complete,
putting pressure against
index to little and closing
thumb in to hand.
1. Put on jacket
2. Grasp at objects,
such as a book or a
tablet computer or
clipboard
3. Allows readjustment
of the object open-
ing letters or sorting
paperwork.
Thumb Park Quick
All four ngers fully
open and switch o.
For 1.5 seconds only
thumb will move,
after which the hand
automatically returns
to normal function.
Dressing or putting on a coat.
Can achieve this position by
using stall out capability of
digits against a table if do not
want to program.
1. Put on jacket or shirt
Lateral Grip
All four ngers fully
close and switch o.
Only thumb will move.
Holding onto plate, papers,
CD or other at objects.
Improved stability with use of
the side of the index nger.
1. Hold plate while
serving food
2. Hold clipboard
3. Get card from ATM
5. Open ziplock bag
6. Tie Shoe Laces
Index Point
Thumb, middle, ring
and little ngers fully
close and switch o.
Only the index nger
will move.
Used for pushing buttons,
typing on computer, or simply
pointing. Can be achieved
with stall out.
1. Keyboarding (hitting
shift key, CTRL, ALT,
DEL, general typing)
2. Push Button for
elevator
Customer Gesture
All digits automatically
move to a user dened
position with each
digit option as open or
closed.
Allows user to fully custom-
ize the hand. Many positions
can be obtained using stall
out if the user does not have
enough available triggers to
use this feature.
1. Boy scout salute
2. Peace sign
Custom Grip
Digits move to user
dened position with
options for degree of
open or closed and
option to keep selected
digits “active”.
Can be used to fully custom-
ize for use of specic tool or
work or hobby. Multiple can
be set up as “favorites” on
iPod.
1. Click mouse
2. Hold trigger acti-
vated work type tool
Additional Grip and Gesture Options
With these additional grip patterns and gestures, consider how often you perform dierent tasks and if having a program for that
activity would make it easier/faster for you to perform. Since each digit has its own motor, you can put pressure against any digit to
stop it from moving (called stalling the digit). Many of these additional grips can be performed by stalling one or more digits. If it is a
task that is not performed often (maybe using index point to press the “Shift” key on a keyboard) then you may prefer to just stall the
digit. However, if you frequently perform the task or want to go into the position without needing to put the hand against the table
or your other hand, then programming the grip may be the better option.

16 of 35
Part number: MA01069: Issue No. 2, March 2013
By clicking on any of the features on the features page the available
triggers and example sections will also appear. In order to preview
a feature simply highlight the feature and click on example to the
right of the screen. The section will then enlarge and provide a
demonstration of the feature. The hand image can be rotated to
improve visualization by holding the right mouse key and moving
the curser in the direction of the intended rotation. The left mouse
key will zoom in and out while the right mouse key will allow you
to drag the hand around on the screen to a dierent view point.
In order to link a trigger with a feature simply click on to the
desired feature (the feature will now be highlighted). Select
and click the desired trigger that you would like to link with the
highlighted feature. Both feature and trigger should now be
highlighted and the descriptive label will now appear under the
feature icon. The example illustration on the right indicates the
Index Point Feature linked to the Hold Open Trigger.
Linking Triggers with Features
1Hold open: a prolonged open signal for the programmed amount of time, normally 2-3 seconds.
Your muscles create signals that you will use to control the i-limb ultra revolution. These signals are called triggers Four potential
triggers are available to activate features: Hold open, Co-contraction, Double impulse and Triple impulse.
Triggers
2Co-contraction: Both the open and closed signals must be activated at the same time. Your clinical team may have a
recommendation on how to do this based on your control, such as imagining making a tight st, icking your ngers, or forcefully
straightening your arm.
3Double impulse: two rapid open signals, separated by relaxation below the threshold. Impulses are very quick open signals. They
do not need to be strong, just fast like blinking your eyes. Your prosthetist will have pre-set this at the time of tting. To activate a
double impulse the device needs to be fully opened prior to attempting activation.
4Triple impulse: three rapid open signals, separated by relaxation below the threshold. Impulses are very quick open signals. They
do not need to be strong, just fast like blinking your eyes. Your prosthetist will have pre-set this at the time of tting. To activate a
triple impulse the device needs to be fully opened prior to attempting activation.
Any of the above four potential triggers can be linked with any of the above features. Some users are able to perform activities of daily
life (ADL’s) without the use of any triggers. In many cases users initially set one or two triggers while familiarity and control is gained
when learning how the i-limb ultra works. If you have several features set up with dierent triggers and notice that you accidently jump
into a particular feature often, you may want to stop using that trigger until you can follow up with your prosthetist to determine why it
is happening inadvertently. Your clinical team may be able to make adjustments or training recommendations to improve your control.

16 of 35 17 of 35
Part number: MA01069: Issue No. 2, March 2013
1Vari-grip/pulsating: this mode provides additional grip
force when the closed signal is sustained for the amount of
time selected (default 0.5 seconds). This can also be customized
between 250ms (0.25 seconds) to 3,000ms (3 seconds). Vari-grip
is excellent for tasks such as tying shoes, opening bags (ziplock,
chips, etc.), tearing paper or opening packages.
Natural Hand Mode: this mode allows you to select what
position you would like the hand to move to when it is not in
use. Once the hand is fully opened and you relax your signals
for the selected amount of time, the hand will move to a more
relaxed position. The timing for this position can be adjusted as
well as how far opened of closed each digit moves.
2
Toward the bottom right of the screen the additional Global
Options box can be used to give access to Vari-grip / pulsating
and natural hand mode.
Additional Functioning

18 of 35
Part number: MA01069: Issue No. 2, March 2013
3.3.2 Training
The training suite contains a variety of short
exercises aimed at developing control of
the i-limb ultra device. The opening screen
highlights a series of exercises which can be
selected individually and in any order. Both
open and closed signals can be practiced by
selecting the appropriate box to the right. An
indication of diculty is provided by the 5
point scale on each module.
Real time signals: This is graph that allows you to view the
signals you are providing to the hand. The red signals are your
open signals and the blue are closed signals. Press the play
button to start the graph and stop when nished. The dark lines
with arrows to the left show how strong your signals must be
before the hand starts to pay attention to them. To make the
hand run at full speed, the signals should be about half way up
the graph. Your signals may be too strong if they peak out at
the very top of the graph. Signals should also stay isolated be-
tween red or blue, if your signals cross over one another when
you do not intend them to you may lose control of the direc-
tion your hand is moving. If your signals are either too low or
too high or you are having diculty controlling your hand and
should contact your prosthetist. The “done”button allows you
to return to the training page.
Strength: This is to help you focus on generating a strong
muscle signal from one muscle at a time. At the right of the
screen select either the open or close icon to work on that
signal. Press the start button and then give the signal you have
selected to try to get the ball above the line. See how many
times you can successfully get the ball to rise. You can view the
strength of your signals on the right by watching the red and
blue rise. Red is open and blue is closed. Press“stop” and “done”
when nished.
Speed Only: This is to help you generate quick muscle signals.
Quick signals help with giving quick impulses. Typically the
open signal is the one that needs to be quick. Work to make the
ball rise to the top of the hill as quick as possible.
Strength and Separation: This game is to help you give strong
signals that will not confuse the hand about the direction you
want to move in by staying isolated. Choose to work on either
open or close then press “start”. Only let the teeter-totter move
in the direction you have selected.

18 of 35 19 of 35
Part number: MA01069: Issue No. 2, March 2013
Speed and Separation: Focuses on generating quick, strong
muscle signals while isolating the opposing muscle. This exercise
lays the foundation for impulse control. Remember, impulses
are the very quick signals that can be used to change from one
grip pattern feature to another using a double or tripple impulse
trigger. The open signal should be focused on for this purpose.
3.3.3 Hand Health Check
The Hand Health Check screen provides a
quick and easy check of the hand. Click on
the “Run Hand Health Check” icon and the
health check will begin. There must be an
internet connection to run the Hand Health
Check.
Hold Open: Focuses on generating a strong open muscle signal
and maintaining it at a high level for several seconds. Mastering
this exercise will enable use of the hold open trigger. After
pressing “start” remember to hold the open signal above the bar
for 2-3 seconds to be successful.
Co-contraction: Focuses on generating quick strong
simultaneous contractions with both muscles. Do not be
concerned with relaxing after the contraction. Press Start then
try to get both balls to reach the top of the hill at the same time
indicating both signals being activated. Mastering this will allow
you to be successful with the co-contraction trigger.

20 of 35
Part number: MA01069: Issue No. 2, March 2013
The i-limb ultra device will then go through a series of move-
ments as each digit is checked, the process will run for approxi-
mately 8 seconds and provide basic feedback on each step. If
there is a problem with your hand, please contact your clinician.
3.3.4 Exit
Use the Exit icon to fully exit biosim.
Table of contents
Other touch bionics Medical Equipment manuals

touch bionics
touch bionics i-limb digits User manual

touch bionics
touch bionics i-limb ultra revolution User manual

touch bionics
touch bionics i-limb select User manual

touch bionics
touch bionics i-digits quantum User manual

touch bionics
touch bionics i-limb digits User manual

touch bionics
touch bionics i-Limb Wrist User manual

touch bionics
touch bionics i-limb User manual